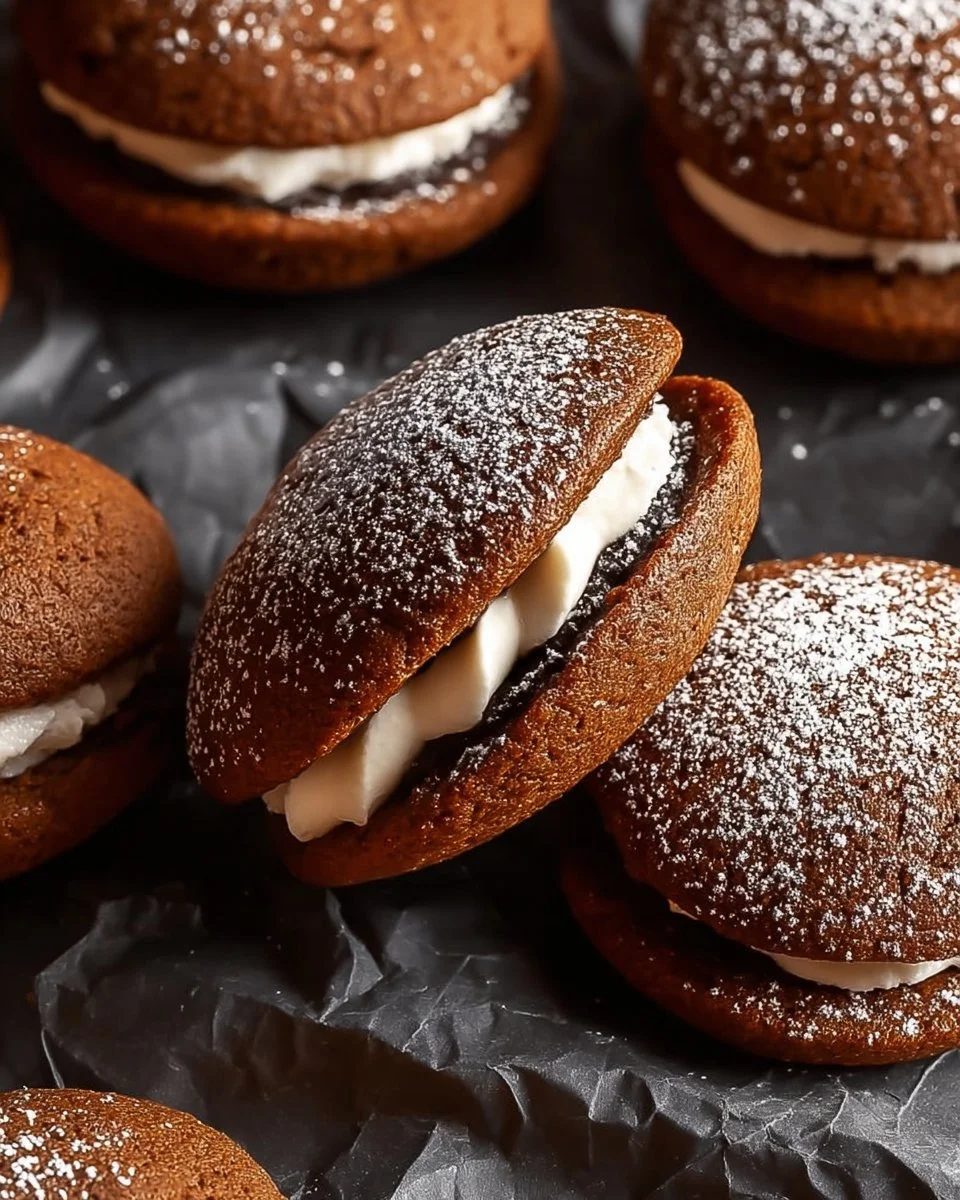
Irresistible Gingerbread Whoopie Pies: A Holiday Treat Like No Other
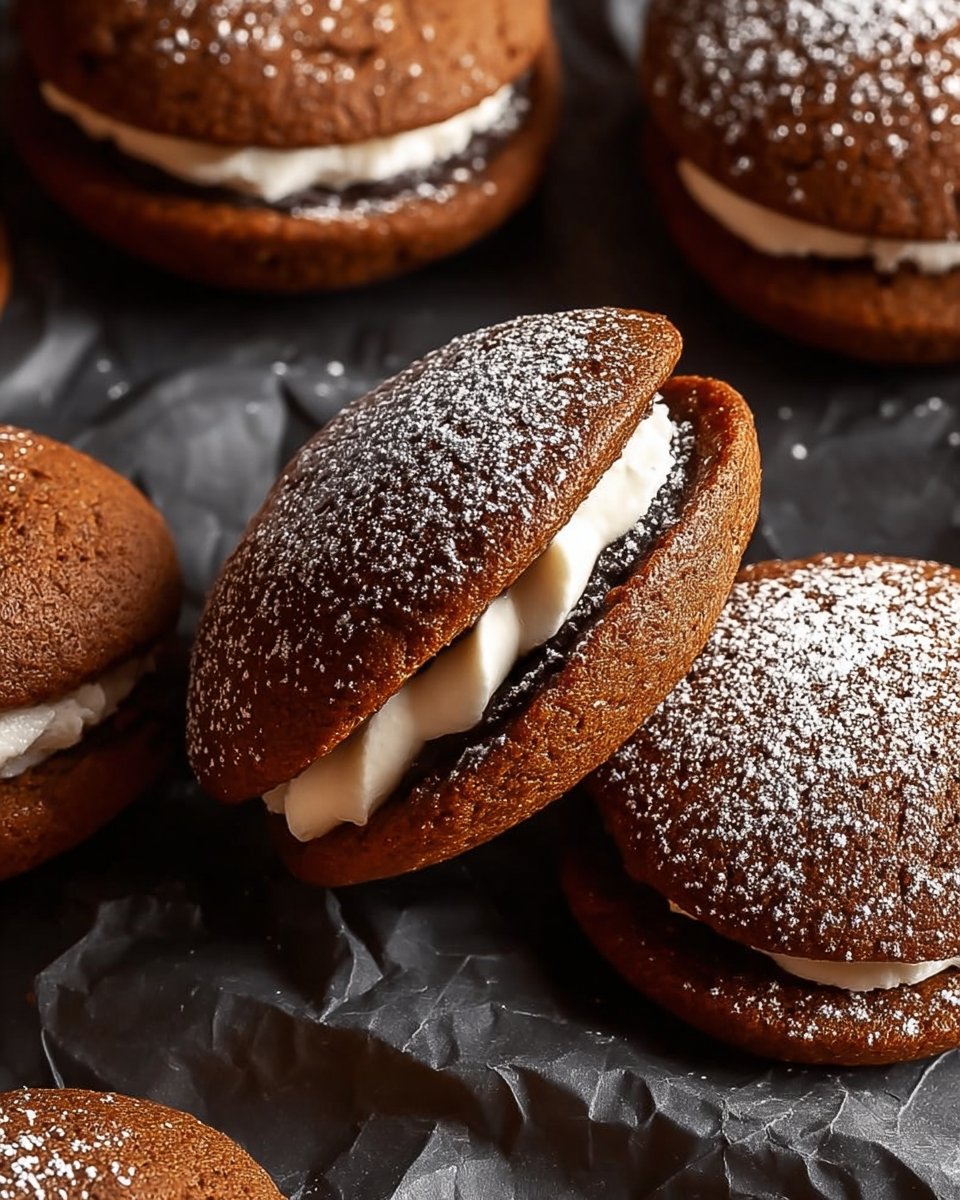
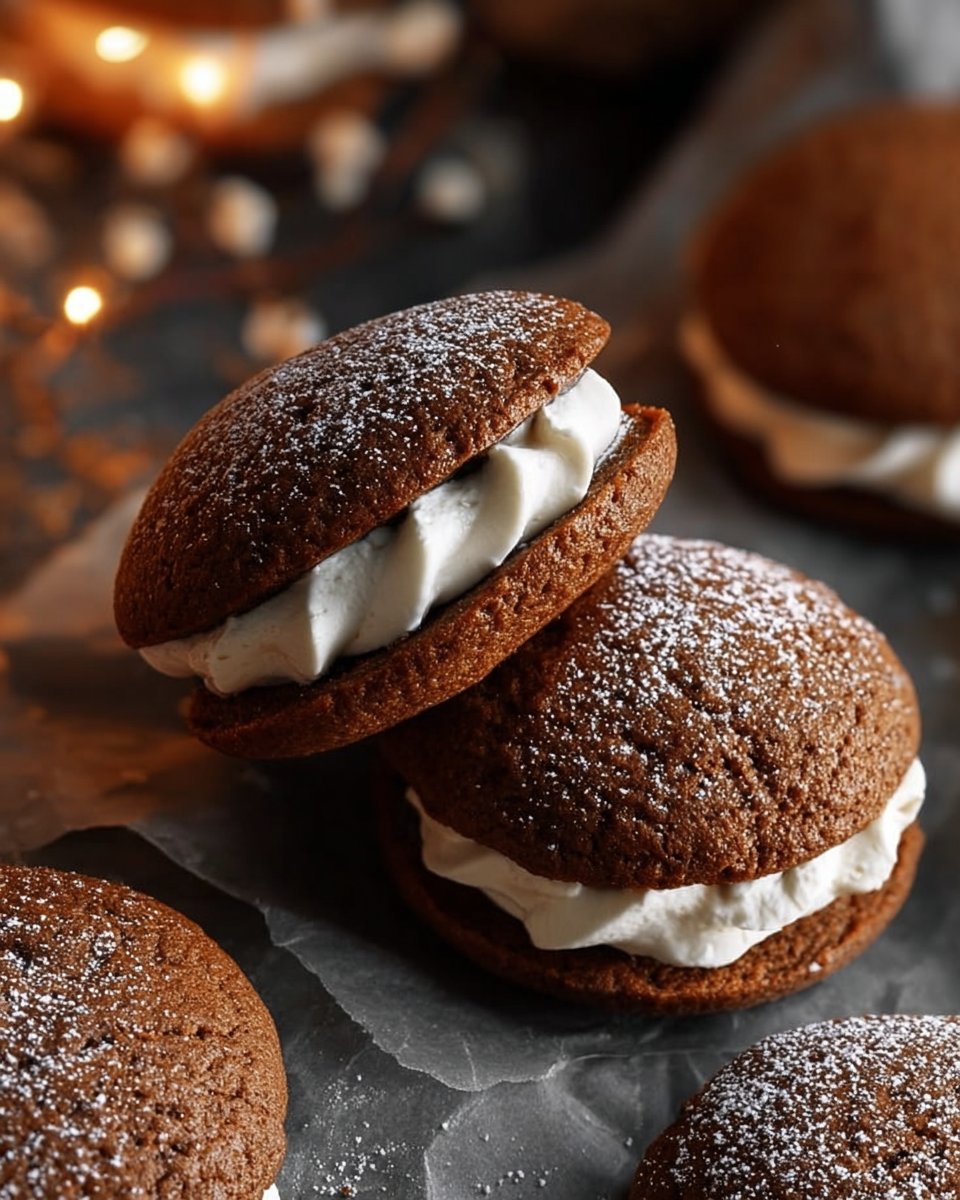
As the first hints of winter chill grace the air, my thoughts inevitably drift to the cozy kitchen aromas that enveloped my childhood home. Each year, my family and I would gather in the kitchen, flour dusting our clothes and laughter filling the air, as we created delightful treats for the holidays. Among these, one standout has always been the Gingerbread Whoopie Pies. Imagine soft, spiced gingerbread cookies, perfectly nestled around a luscious, fluffy filling. It’s a comforting dessert that not only satisfies the sweet tooth but also brings back a rush of memories with every bite!
What makes these Gingerbread Whoopie Pies especially tantalizing is their delightful balance of flavors and textures—the soft cake-like cookies paired with a rich, chocolaty filling that makes each bite an emotional journey. Unlike store-bought treats that often fall flat, these homemade gems burst with warmth and love, making them the ideal holiday comfort food.
In this post, I’ll share my best-kept secrets for creating the perfect Gingerbread Whoopie Pies that your family will rave about. Get ready to whip up some memories that will last a lifetime!
What Are Gingerbread Whoopie Pies?
Originating in the early 20th century in the northeastern United States, whoopie pies have been a beloved treat for generations. They’re made from two soft, cake-like cookies that sandwich a delicious filling in between. Traditionally, these cookies are flavored with spices that call to mind cozy winter evenings—think molasses, cinnamon, and ginger. The best part? The texture is sumptuous and moist, making for a delightful bite with every mouthful.
Gingerbread Whoopie Pies are unique because they bring a festive twist to the classic whoopie pie formula. They’re perfect for holiday gatherings or winter get-togethers, delivering all the flavors of gingerbread cookies in a brand new format. Whether you’re looking for a sweet treat to accompany your coffee or a memorable dessert to share with loved ones, these whoopie pies are a fantastic choice.
Why You’ll Love This Recipe
Flavor Explosion: With warm spices like ginger and cinnamon blended into a perfectly sweet cookie, every bite will transport you to a winter wonderland. Each whoopie pie is not just dessert; it’s an experience that evokes memories of nostalgic holiday baking.
From Scratch is Better: Unlike store-bought whoopie pies, which can often be overly sweet and packed with preservatives, this recipe utilizes natural ingredients that enhance flavor and texture. You’ll be amazed at the difference homemade makes in taste.
Budget-Friendly: Making your own Gingerbread Whoopie Pies is kinder to your wallet than buying those expensive, artisanal desserts. With the basics found in your pantry, these treats are both delicious and cost-effective.
Customizable: Want to switch things up? You can easily adapt the filling to your liking; think peppermint frosting for a holiday twist or cream cheese icing for a richer flavor.
Easy to Make: With straightforward steps and ingredients, this recipe is approachable even for beginner bakers. Plus, it doesn’t take ages to whip up—perfect for those last-minute holiday surprises!
Ingredients
For the delightful Gingerbread Whoopie Pies, you’ll need the following ingredients:
For the Cookies:
- 2 cups all-purpose flour
- 1 teaspoon baking soda
- 1 teaspoon baking powder
- 1 tablespoon ground ginger
- 1 tablespoon ground cinnamon
- 1/2 teaspoon ground nutmeg
- 1/2 teaspoon salt
- 3/4 cup unsalted butter, softened (let it sit at room temp for about 30 minutes)
- 1 cup brown sugar, packed (I love using light brown for its subtle molasses flavor)
- 1/2 cup molasses (look for unsulfured if you want a milder taste)
- 1 large egg (preferably at room temperature)
- 1 teaspoon vanilla extract (pure extract enhances the flavor profoundly)
For the Filling:
- 1 cup powdered sugar
- 1/2 cup unsweetened cocoa powder (I always opt for Dutch-process for richness)
- 1/2 cup unsalted butter, softened (again, let it sit out to reach room temperature)
- 1 teaspoon vanilla extract (this adds an extra layer of flavor)
- 2 tablespoons milk (you can substitute with almond or oat milk if desired)
Prep Notes: Make sure to bring your butter and egg to room temperature beforehand as this will help with the creaming process and yield a fluffier final product. I recommend using high-quality ingredients for the best flavor, and brands like King Arthur Flour and Domino Sugar never steer me wrong!
Step-By-Step Instructions
Preheat Your Oven: Start by preheating your oven to 350°F (175°C). Line a baking sheet with parchment paper. This keeps your cookies from sticking and makes cleanup a breeze!
Mix Dry Ingredients: In a medium bowl, whisk together the flour, baking soda, baking powder, ginger, cinnamon, nutmeg, and salt. This not only combines the ingredients but also aerates the flour for a lighter texture.
Cream Butter and Sugar: In a large mixing bowl, beat the softened butter and brown sugar together using a hand mixer until light and fluffy. This usually takes about 3-5 minutes. Don’t rush this step; it’s key for a soft cookie!
Incorporate Wet Ingredients: Add the molasses, egg, and vanilla extract to the butter-sugar mixture. Beat until everything is smooth and well combined—about 2 minutes will do.
Combine Mixtures: Gradually add the dry ingredients to the wet mixture, mixing gently until just combined. Be careful not to over-mix; you want your cookies to stay tender!
Scoop the Dough: Using a tablespoon or cookie scoop, drop spoonfuls of dough onto the prepared baking sheet, spacing them about 2 inches apart (they will spread a bit).
Bake: Bake in the preheated oven for 8-10 minutes or until the edges are firm but the centers are still slightly soft. Trust me, that gooeyness makes all the difference! Let cool on the tray for a few minutes before transferring to a wire rack.
Prepare the Filling: While the cookies cool, whip up the filling by beating together powdered sugar, cocoa powder, softened butter, vanilla extract, and milk in a bowl until smooth and creamy. Adjust the milk for your desired consistency.
Assembly: Once the cookies are completely cooled, spread a generous spoonful of the filling on the flat side of one cookie and top it with another cookie, sandwiching it together.
Enjoy: Now comes the best part—indulge in your delightful Gingerbread Whoopie Pies! Share with friends or, better yet, keep them all for yourself!
Expert Tips & Tricks
Storage Recommendations: Store these delicious pies in an airtight container at room temperature for about 3 days. To prolong freshness, keep them in the fridge for up to a week.
Make-Ahead Instructions: These whoopie pies can be made in advance! Prepare the cookies and freeze them for up to three months. Just thaw and fill before serving.
Common Problems: If your filling is too runny, add a bit more powdered sugar. For a thicker consistency, you can incorporate more cocoa powder or butter.
Timing: Don’t skip the cooling period for the cookies! This helps prevent the filling from melting and keeps your whoopie pies intact.
Chef’s Tip: If you want to add a festive touch, dust with powdered sugar before serving!
Serving Suggestions
Gingerbread Whoopie Pies are tasty enough on their own, but why not elevate the experience? Pair them with a dollop of whipped cream, a swirl of peppermint bark, or serve them alongside a warm mug of spiced apple cider or hot cocoa for an unforgettable treat. They’re the perfect addition to any winter gathering or holiday dessert table!
Variations & Substitutions
Feeling adventurous? Try these creative twists on the classic Gingerbread Whoopie Pies:
Flavor Combinations: Swap out the chocolate filling for a cream cheese frosting spiced with orange zest for a bright twist.
Dietary Restrictions: For a gluten-free version, substitute the all-purpose flour with a gluten-free baking mix. You can also use vegan butter and a flaxseed egg for a vegan-friendly option!
Seasonal Variations: Add a touch of peppermint extract to your filling for a holiday-themed taste or sprinkle in some chopped nuts for added texture.
Nutrition & Storage Info
- Prep Time: 20 minutes
- Cook Time: 10 minutes
- Total Time: Approximately 30 minutes (plus cooling time)
- Yield: Makes about 12-15 whoopie pies, depending on the size!
- Estimated Calories: Approximately 180 calories per whoopie pie
- Storage Instructions: Best enjoyed fresh but can be stored at room temperature for up to 3 days or in the fridge for up to a week. They can also be frozen for up to 3 months.
FAQ Section
Can I use whole wheat flour instead of all-purpose flour?
Yes, but your whoopie pies may turn out denser. For the best results, consider using half whole wheat and half all-purpose.Are these whoopie pies suitable for children?
Absolutely! They’re perfect for kids—with delicious flavors and a fun sandwich style they’ll love.Can I make these without eggs?
Yes, you can substitute the egg with a flaxseed meal egg or unsweetened applesauce for an egg-free version.How can I adjust the spice level for my Gingerbread Whoopie Pies?
Feel free to increase or decrease the spices according to your preference. More ginger will add a lovely kick!Is there a way to make the filling healthier?
You can swap powdered sugar for natural sweeteners like honey or maple syrup, but it may alter the texture slightly.What can I do if my cookies spread too much?
Ensure your butter is not too soft; slightly chill the dough before scooping can help too.Can these be made gluten-free?
Yes, you can use a gluten-free flour blend as a substitute for all-purpose flour.How can I store leftovers?
Keep them in an airtight container at room temperature for up to 3 days, or refrigerate for a longer shelf life.Are these suitable for freezing?
Yes! You can freeze the cookies unfilled, and then fill them once thawed to preserve freshness.Can I add other flavors to the cookies?
Definitely! Consider mixing in chocolate chips or dried fruits for a fun twist.
Conclusion
There you have it! My cherished recipe for Gingerbread Whoopie Pies that holds so many sweet memories. They’re not just a delicious treat; they’re a reminder of all the joy and love that comes with baking. So, gather your loved ones, try this recipe, and create new memories together. I can’t wait to hear your thoughts, feedback, or any little twists you might add! Don’t forget to check out my other holiday recipes on the blog—the fun is just beginning!
Happy baking, friends!

Irresistible Gingerbread Whoopie Pies
- Total Time: 30
- Yield: 12-15 whoopie pies 1x
- Diet: Vegetarian
Description
Delightful, soft gingerbread cookies sandwiched with a rich chocolaty filling—the perfect holiday treat to evoke memories and warmth.
Ingredients
- 2 cups all-purpose flour
- 1 teaspoon baking soda
- 1 teaspoon baking powder
- 1 tablespoon ground ginger
- 1 tablespoon ground cinnamon
- 1/2 teaspoon ground nutmeg
- 1/2 teaspoon salt
- 3/4 cup unsalted butter, softened
- 1 cup brown sugar, packed
- 1/2 cup molasses
- 1 large egg
- 1 teaspoon vanilla extract
- 1 cup powdered sugar
- 1/2 cup unsweetened cocoa powder
- 1/2 cup unsalted butter, softened
- 1 teaspoon vanilla extract
- 2 tablespoons milk
Instructions
- Preheat your oven to 350°F (175°C) and line a baking sheet with parchment paper.
- In a medium bowl, whisk together the flour, baking soda, baking powder, ginger, cinnamon, nutmeg, and salt.
- In a large mixing bowl, beat the softened butter and brown sugar together with a hand mixer until light and fluffy.
- Add the molasses, egg, and vanilla extract to the butter-sugar mixture, beating until smooth.
- Gradually add the dry ingredients to the wet mixture, mixing gently until just combined.
- Drop spoonfuls of dough onto the prepared baking sheet, spacing them about 2 inches apart.
- Bake for 8-10 minutes or until the edges are firm but the centers are slightly soft.
- Allow the cookies to cool on the tray for a few minutes before transferring to a wire rack.
- Prepare the filling by beating together powdered sugar, cocoa powder, butter, vanilla extract, and milk until smooth.
- Once cooled, spread filling on the flat side of one cookie and top with another cookie.
- Enjoy your delicious Gingerbread Whoopie Pies!
Notes
Store in an airtight container at room temperature for up to 3 days or in the fridge for up to a week. Can also be frozen for up to 3 months.
- Prep Time: 20
- Cook Time: 10
- Category: Dessert
- Method: Baking
- Cuisine: American
Nutrition
- Serving Size: 1 whoopie pie
- Calories: 180
- Sugar: 12g
- Sodium: 100mg
- Fat: 8g
- Saturated Fat: 4g
- Unsaturated Fat: 4g
- Trans Fat: 0g
- Carbohydrates: 26g
- Fiber: 1g
- Protein: 2g
- Cholesterol: 30mg
🥗 Free Custom Keto Meal Plan?
Do you want to lose weight while still enjoying delicious Asian & Thai Fusion meals? Take this quick quiz to get your personalized Keto plan based on your favorite foods!
- ✅ No more guessing what to eat
- ✅ Delicious & easy-to-make recipes
- ✅ Tailored to your body type
Get My Custom Plan Now! →
*Over 100,000+ people have transformed their lives with this quiz.