Tempting Chocolate Covered Oreos: A Sweet Indulgence Made for Sharing
I still remember the first time I tried Chocolate Covered Oreos. It was one crisp winter evening—snowflakes danced outside as we gathered around the kitchen table, laughter echoing the warmth of our hearts. My mom, a self-proclaimed cookie aficionado, transformed simple Oreo cookies into little bites of heaven, encased in silky chocolate. That sweet crunch followed by the creamy filling was pure bliss, and I was instantly hooked!
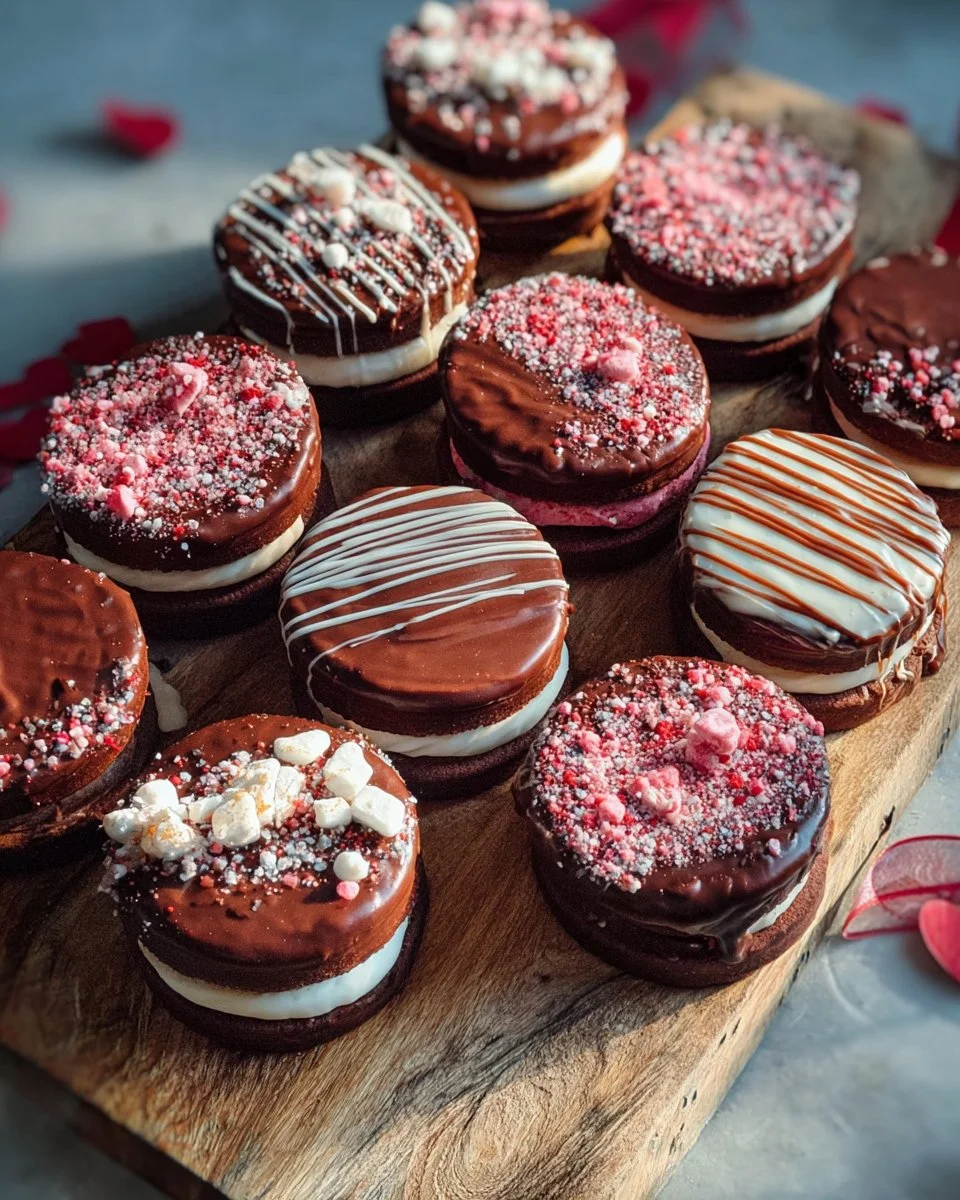
What makes these Chocolate Covered Oreos truly special, though, is the creative spin you can put on them. Unlike store-bought treats that often feel mass produced, this recipe invites you to bring your flair into the mix—whether it’s a sprinkle of colored sugar for festive occasions or a swirl of peanut butter for that extra kick. The beauty is that every batch is stamped with a little bit of “you,” whether you’re making them for a cozy night in or to impress guests at a gathering.
In this post, I’ll share my tried-and-true recipe, complete with tips, tricks, and heartfelt stories that make this treat a staple in my home. Get ready to elicit smiles and perhaps even nostalgic memories as we dive into making these scrumptiously satisfying Chocolate Covered Oreos together!
What Are Chocolate Covered Oreos?
Chocolate Covered Oreos are a delectable twist on the classic Oreo cookie. The story goes back to the early 20th century when the Oreo was first developed—can you believe it’s been a family favorite ever since? The delightful combination of the crispy chocolate wafer and creamy filling makes Oreos the ultimate canvas for dessert creativity.
When coated in smooth chocolate, these cookies transform into a luxurious treat with contrasting textures; the crunch of the Oreo plays beautifully against the velvety chocolate coating. Typically enjoyed with a glass of milk, they’re perfect for birthdays, holidays, or even as a comforting snack after a long day. Make these treats when you want something easy and impressive to serve, or just to indulge your sweet tooth!
Why You’ll Love This Recipe
You might be wondering, why make Chocolate Covered Oreos at home when you could easily grab a box from the store? Let me lay it out for you:
Customization Galore: Unlike the pre-packaged ones, making these at home allows you to play with flavors and decorations! You can choose milk or dark chocolate, sprinkle on colorful toppings, or even drizzle caramel for a gourmet touch.
Cost-Effective: Let’s talk cost. A pack of store-bought Chocolate Covered Oreos can run you around $4-5, and that’s for a small quantity! This homemade version delivers double the oreo goodness for half the price.
Easier Than You Think: If you’re intimidated by baking, fear not! This recipe is incredibly straightforward—perfect for bakers of all levels. With less than a half hour of active work, you could whip up a delightful batch that will have your friends asking for seconds.
Unique and Memorable: Trust me; nothing says “I put thought into this” like homemade treats. These beauties will become the star of any gathering, and you can relish the joy of watching your loved ones devour them (and asking for the recipe, of course).
Tied to Special Moments: As I make these for every family gathering, they’ve become a cherished tradition in my household. Associating these sweet treats with personal memories adds a layer of meaning that store-bought cookies just can’t compete with.
Ingredients
Here’s what you’ll need to create your indulgent Chocolate Covered Oreos. Remember, using high-quality ingredients makes a significant difference!
Oreo Cookies: Classic dark chocolate Oreos are a must! You can use any flavor, but traditional ones make for the best experience.
Chocolate Chips: Choose between milk chocolate for a sweet, creamy finish or dark chocolate for a sophisticated touch. I personally love Ghirardelli chocolate chips for their rich flavor.
Sprinkles (Optional): Funfetti sprinkles elevate your Chocolate Covered Oreos and are perfect for birthdays or celebrations. Choose colors that suit the occasion!
Prep Notes: It’s essential to have everything measured and your chocolate chips at room temperature. If you prefer a smoother coating, pick up some paraffin wax or coconut oil to mix with the chocolate.
Step-by-Step Instructions
Let’s get rolling on making our Chocolate Covered Oreos! Here are the detailed, easy-to-follow instructions:
Melt the Chocolate: In a microwave-safe bowl, combine your chocolate chips. Microwave in 30-second increments, stirring in between, until the chocolate is smooth and melted—approximately 1-2 minutes total. Avoid overheating!
Chef’s Tip: If the chocolate appears too thick, add a teaspoon of coconut oil to lighten it up!
Dip the Oreos: Take an Oreo cookie and use a fork to dip it into the melted chocolate. Roll it with the fork to ensure a complete coating, then lift it out and let the excess chocolate drip back into the bowl.
Common Mistake to Avoid: Don’t let the cookies sit in the chocolate too long, or they’ll lose their crispy texture!
Set on Parchment: Place each chocolate-covered Oreo onto a baking sheet lined with parchment paper. Repeat until all cookies are coated.
Add Sprinkles: If you’re feeling festive, now is the time to sprinkle on those adorable toppings before the chocolate sets.
Let it Harden: Allow the cookies to harden at room temperature for about 20-30 minutes. If you’re in a hurry, you can pop them in the fridge for around 10-15 minutes.
Serve and Enjoy: Once the chocolate has set, your delicious Chocolate Covered Oreos are ready to be devoured! Perfect for sharing or celebrating special moments, these sweets are bound to please.

Expert Tips & Tricks
- Quality Matters: Invest in good-quality chocolate for coating; this makes a huge difference in the flavor.
- Storage: Store your Chocolate Covered Oreos in an airtight container at room temperature, where they’ll stay fresh for about a week. Up to two weeks in the fridge!
- For Best Results: If you want to drizzle contrasting chocolate over the top for that professional touch, use a piping bag or a plastic zip bag with a small corner snipped off.
- Make-Ahead: Feel free to make these treats in advance! Just remember to store them carefully so they don’t stick together.
- Troubleshooting: If your chocolate hardens too quickly while dipping, warm it back up gently in the microwave—chocolate should always have a smooth, fluid consistency while working with it.
Serving Suggestions
Chocolate Covered Oreos make an impressive standalone treat, but you can take it up a notch with some thoughtful accompaniments. Serve them alongside a tall glass of cold milk or a rich hot cocoa for ultimate indulgence.
For presentation, arrange a tower of these beauties on a decorative platter, and garnish with fresh mint leaves. They’re perfect for birthdays, anniversaries, or casual movie nights with friends—any occasion that calls for a little sweetness!
Variations & Substitutions
Now, let’s talk about how you can mix it up:
Different Flavors: Swap out the standard Oreos for seasonal flavors, like pumpkin spice or golden Oreos. You can even use mint chocolate or peanut butter Oreos for a delicious twist!
Dietary Adaptations: For a vegan option, use dairy-free chocolate chips and gluten-free Oreos. The flavor will still shine through!
Seasonal Variations: Change up the color of your sprinkles or add seasonal embellishments, like holiday-themed decorations for Christmas or pastel colors for Easter.
Nutrition & Storage Info
- Prep Time: 15 minutes
- Cook Time: 5 minutes (for melting chocolate)
- Total Time: Approximately 30 minutes
- Yield: About 20 Chocolate Covered Oreos
- Estimated Calories: Roughly 90 calories per piece
- Storage Instructions: Keep at room temperature in an airtight container for up to 1 week, or in the refrigerator for up to 2 weeks. You can freeze them as well!
FAQ Section
Can I use white chocolate?
Yes! White chocolate works beautifully if you’re looking for a sweeter option.What if my chocolate seized?
If your chocolate becomes grainy, you can try adding a little vegetable oil to rescue it.Can I make these without a microwave?
Absolutely! Use a double boiler or heat some water in a saucepan and place a glass bowl on top to melt your chocolate.How do I keep the Oreos from getting soggy?
Make sure the chocolate is at the right temperature—too hot can melt the cream inside the Oreo.Can I use flavored chocolate?
Definitely! Flavored chocolate can add an exciting element—think caramel, raspberry, or orange.What is the best way to store leftovers?
Store them in an airtight container with parchment paper between layers to prevent sticking.How long do they take to set?
Allow them to set at room temperature for about 30 minutes, or you can speed it up by placing them in the fridge for 10-15 minutes.What should I do if the chocolate isn’t melting properly?
Ensure your bowl is completely dry and that your chocolate isn’t overheated; 30-second intervals work wonders for that smooth melt!Can I make them ahead of time?
Yes! You can prepare these days in advance—just store them properly.What other cookies can I use for this recipe?
Any sandwich cookie can work—try using Thins for a lighter bite, or even homemade cookies for a fun twist!
Conclusion
There you have it—Chocolate Covered Oreos that are easy to make and incredibly rewarding. The joy of creating these sweet indulgences at home not only satisfies your taste buds but also evokes cherished memories and instills a sense of pride in your baking skills. I’ve poured my heart into this recipe, and I can’t wait for you to experience the happiness they bring!
Be sure to give them a try and feel free to share your thoughts in the comments below! And don’t forget to check out my other delightful recipes for more sweet inspirations. Happy baking!
Print
Tempting Chocolate Covered Oreos
- Total Time: 30 minutes
- Yield: 20 servings 1x
- Diet: Vegetarian
Description
Indulge in homemade Chocolate Covered Oreos, a delightful twist on the classic treat, customizable with your favorite toppings.
Ingredients
- 20 Oreo Cookies
- 1 cup Chocolate Chips (milk or dark)
- Sprinkles (optional)
Instructions
- In a microwave-safe bowl, combine chocolate chips. Microwave in 30-second increments, stirring until smooth (1-2 minutes total).
- Use a fork to dip each Oreo into the melted chocolate, ensuring it is completely coated.
- Place chocolate-covered Oreos onto a parchment-lined baking sheet.
- Sprinkle toppings if desired before the chocolate hardens.
- Allow to set at room temperature for 20-30 minutes or refrigerate for 10-15 minutes.
Notes
Use high-quality chocolate for the best flavor. Store in an airtight container at room temperature for up to 1 week.
- Prep Time: 15 minutes
- Cook Time: 5 minutes
- Category: Dessert
- Method: No-Bake
- Cuisine: American
Nutrition
- Serving Size: 1 cookie
- Calories: 90
- Sugar: 8g
- Sodium: 140mg
- Fat: 5g
- Saturated Fat: 2g
- Unsaturated Fat: 3g
- Trans Fat: 0g
- Carbohydrates: 13g
- Fiber: 0g
- Protein: 1g
- Cholesterol: 0mg
🥗 Free Custom Keto Meal Plan?
Do you want to lose weight while still enjoying delicious Asian & Thai Fusion meals? Take this quick quiz to get your personalized Keto plan based on your favorite foods!
- ✅ No more guessing what to eat
- ✅ Delicious & easy-to-make recipes
- ✅ Tailored to your body type
Get My Custom Plan Now! →
*Over 100,000+ people have transformed their lives with this quiz.