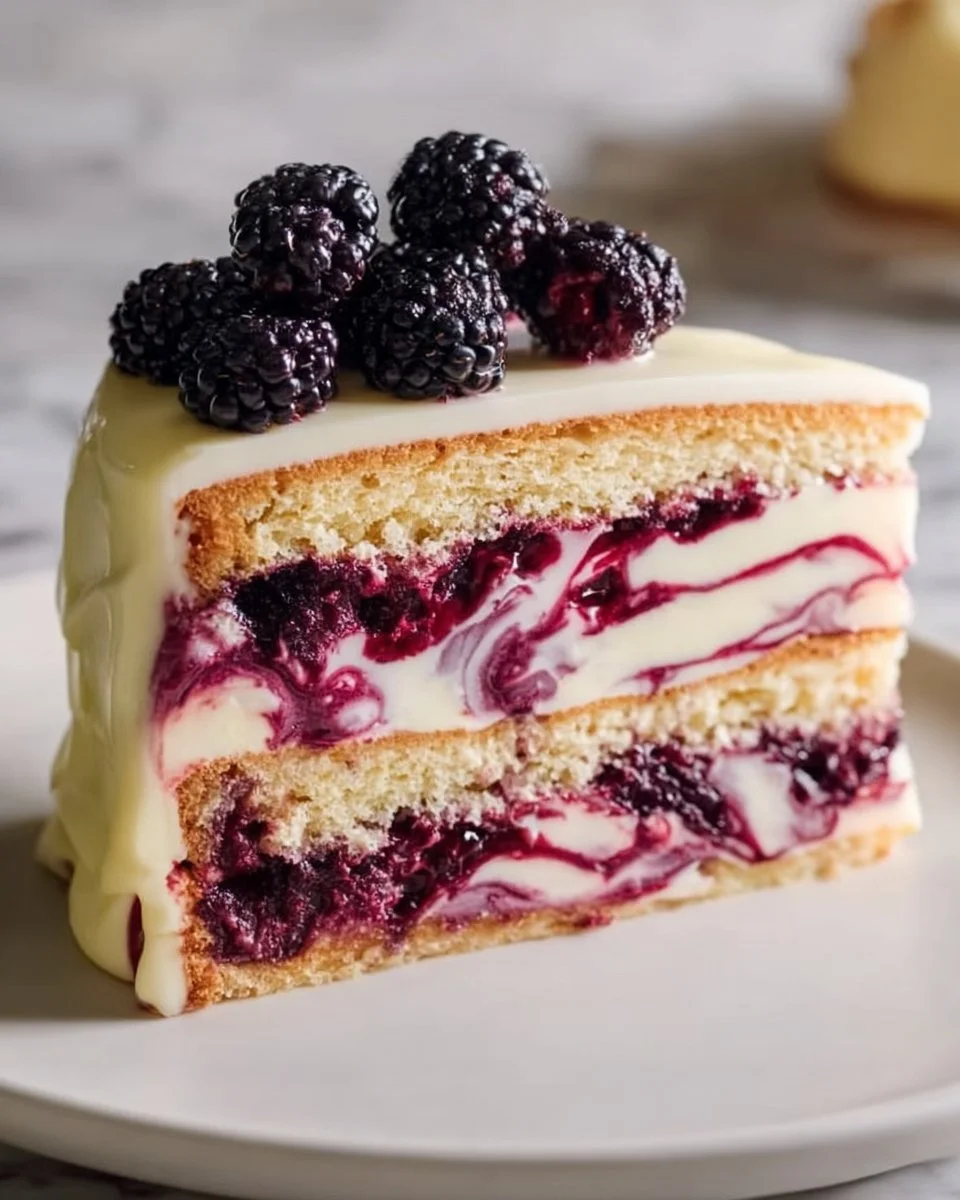
Delightfully Delicious Mulberry Cake: A Recipe to Cherish
There’s something magical about the first taste of a homemade dessert that transports you to your childhood kitchen. For me, that dessert is undeniably Mulberry Cake. Growing up, my grandmother would whip up her signature mulberry cake during summer vacations, filling our home with the sweet, tangy aroma of fresh mulberries. Those moments, laden with laughter and the clatter of mixing bowls, crafted the best memories of my life.
So, what makes Mulberry Cake so special? It’s not just the fresh, vibrant flavors; it’s the warm nostalgia that brings my family together—each slice a slice of home. This recipe stands apart from others because of its light, moist crumb and the vibrant, juicy pops of mulberries in every bite, blended beautifully with the creaminess of yogurt and the richness of butter. Trust me, once you try this cake, it’ll become a favorite in your home too!
In this post, I’ll share not just how to create this delightful bake, but also tips and tricks I’ve learned over countless attempts. Whether you’re a seasoned baker or a novice, I promise you’ll be able to recreate this masterpiece and fill your kitchen with the love and warmth of a homemade Mulberry Cake.
What Are Mulberry Cakes?
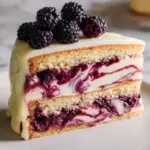
Mulberry Cake has its roots in traditional home baking, where fresh, seasonal ingredients were celebrated for their flavors and versatility. Crafted with plump, ripe mulberries, this cake boasts a unique combination of sweetness and a subtle tartness. The texture is a delightful cross between a dessert and a muffin—light and airy yet indulgent, making it the perfect companion for afternoon tea or a sweet ending to any meal.
What sets Mulberry Cake apart? It’s the vibrant bursts of juicy mulberries that dance on your palate, complemented by the buttery richness and slight tang from yogurt. Ideal for summer gatherings or cozy winter evenings, this cake never fails to impress. Plus, it’s a fantastic way to use up fresh mulberries if you happen to find yourself with a surplus!
Why You’ll Love This Recipe
Homemade Goodness: There’s nothing quite like the taste of a freshly baked cake from your own oven. Unlike store-bought options that can often feel stale or overly sweet, this Mulberry Cake is made with love and the perfect balance of flavors, allowing the deliciousness of the mulberries to shine.
Budget-Friendly: You won’t need to break the bank to whip up this delightful treat! Most of the ingredients are pantry staples, making it a budget-friendly option for those sweet cravings without the expensive price tag of bakery items.
Customization Options: Want to make it more decadent? Add a layer of cream cheese frosting or some chopped nuts for extra crunch. You can even switch up the flavor by incorporating lemon zest or ginger for an exciting twist.
Simple to Make: This Mulberry Cake is easy enough for beginners. The steps are straightforward, and I’ve included tips along the way to help you troubleshoot any hiccups. Plus, it only takes about 40 minutes to whip together—perfect for a last-minute get-together!
Nostalgic Recipe: This isn’t just a cake; it’s a connection to memories of family gatherings and treasured moments. Each slice tells a story, and I can’t wait for you to create new memories with this recipe!
Ingredients
For the Cake:
- 2 cups fresh mulberries: Always go fresh if possible! If using frozen, ensure they are thawed and drained.
- 1 cup all-purpose flour: Use a good quality flour for the best results. For a gluten-free option, you can substitute with a gluten-free flour blend.
- 1 cup plain yogurt: Greek yogurt adds richness. Feel free to use a dairy-free alternative if needed!
- 1/2 cup sugar: Adjust according to your taste preference; brown sugar can add a deeper flavor.
- 1/2 cup butter, softened: Room temperature butter is key for a fluffy texture—think soft, but not melted.
- 2 large eggs: Ensure they’re at room temperature for better mixing.
- 1 teaspoon baking powder: Helps the cake rise beautifully.
- 1/2 teaspoon baking soda: A little boost for fluffiness.
- 1/2 teaspoon salt: To balance the sweetness.
- 1 teaspoon vanilla extract: Always opt for pure vanilla for the best flavor.
Prep Notes:
- Please have your butter and eggs at room temperature for ideal mixing.
- If you have a specific brand of yogurt you love (I swear by Fage Greek Yogurt!), feel free to use it.
Step-by-Step Instructions
Prepare Your Pan: Preheat the oven to 350°F (175°C) and grease and flour a standard 9-inch cake pan (or line it with parchment paper for easy removal).
Cream Butter and Sugar: In a large mixing bowl, cream together the softened butter and sugar until light and fluffy—about 3-5 minutes. This whisking incorporates air, leading to a light texture.
Add Eggs: Beat in the eggs one at a time, ensuring each is fully combined before adding the next.
Mix in Yogurt and Vanilla: Stir in the yogurt and vanilla extract. The mixture will be slightly chunky but that’s okay!
Combine Dry Ingredients: In another bowl, whisk together the flour, baking powder, baking soda, and salt until well blended.
Bring it Together: Gradually add the dry ingredients to the wet mixture, stirring gently until just combined. Be careful not to over-mix—you want to keep that fluff!
Fold in Mulberries: Gently fold in the fresh mulberries, taking care not to break them too much; you want those beautiful bursts of color.
Pour and Spread: Transfer the cake batter into the prepared pan and spread it evenly.
Bake to Perfection: Bake for 30-35 minutes or until a toothpick inserted into the center comes out clean. The cake should have a lovely golden hue.
Cool: Allow to cool in the pan for about 10 minutes before transferring to a wire rack to cool completely.

Expert Tips & Tricks
Storage: Keep your cake wrapped tightly in plastic wrap at room temperature for up to 3 days. It can also be frozen, but make sure to wrap it well; it’ll last for about 3 months in the freezer.
Make-Ahead: You can prepare the batter a day in advance. Just refrigerate it and bring it to room temperature before baking.
Troubleshooting: If your cake sinks in the middle, it might be due to over-mixing or a too-wet batter. Ensure you measure your ingredients accurately, and don’t over-mix once the flour is in!
Variations: Feel free to substitute buttermilk for yogurt for a slight tang. Adding a sprinkle of cinnamon elevates the flavor, too!
Serve with Style: Top your cake with whipped cream and a few extra mulberries for that beautiful dessert presentation that delights the eyes and the taste buds.
Serving Suggestions
This Mulberry Cake is perfect on its own, but you can easily elevate it with a dollop of whipped cream or a scoop of vanilla ice cream for those hot summer days. I love serving it alongside a refreshing fruit salad or even a cup of freshly brewed coffee. Perfect for brunch gatherings, intimate dinners, or as a sweet treat at picnics!
Variations & Substitutions
- Lemon Zest: Add a tablespoon of fresh lemon zest to brighten up the flavor.
- Nuts: Toss in some chopped walnuts or almonds for an added crunch.
- Vegan Option: Substitute eggs with flax eggs (1 tablespoon flaxseed meal + 3 tablespoons water for each egg), replace yogurt with unsweetened applesauce, and choose a plant-based butter.
Nutrition & Storage Info
- Prep Time: 10 minutes
- Cook Time: 30-35 minutes
- Total Time: 45 minutes
- Yield: 8 servings
- Estimated Calories: Approximately 200 calories per slice
Storage Instructions: Store the cake at room temperature for up to 3 days, or refrigerate for up to a week. For long-term storage, freeze for up to 3 months.
FAQ SECTION
Can I use frozen mulberries?
Yes, but be sure to thaw and drain them well before incorporating them into the batter.What can I substitute for yogurt?
You can use buttermilk or sour cream as alternatives that will maintain the cake’s texture.How can I tell when the cake is done?
A toothpick inserted into the center should come out clean or with a few moist crumbs.Why did my cake sink?
Common causes include over-mixing or an incorrect oven temperature. Make sure to measure ingredients carefully!How do I store leftovers?
Wrap tightly with plastic wrap or foil and store in an airtight container at room temperature.Can I double the recipe?
Yes, simply double the ingredients and use a larger pan—but watch the baking time.Can I use other fruit?
Absolutely! Peaches, blueberries, or raspberries work wonderfully, each adding their unique flair.What’s the best way to reheat the cake?
Microwave a slice for about 10-15 seconds or warm in a low oven until just heated through.How long does it last in the freezer?
Wrapped tightly, the cake can be stored in the freezer for up to three months.Can I add frosting?
Yes, cream cheese frosting or a light glaze would complement the flavors beautifully!
Conclusion
So, there you have it—your guide to creating a delicious, comforting Mulberry Cake that wraps memories in each bite. I encourage you to try this recipe, embrace the process, and most importantly, share it with your loved ones. The sweetness of homemade baking is a gift in itself, and I can’t wait to hear how it turns out for you. Leave a comment below with your results or any tips you’ve discovered along the way! And don’t forget to check out my other dreamy cake recipes for your next baking adventure!
Delightfully Delicious Mulberry Cake
- Total Time: 45 minutes
- Yield: 8 servings 1x
- Diet: Vegetarian
Description
A nostalgic homemade Mulberry Cake filled with fresh, vibrant flavors and a moist crumb, perfect for any occasion.
Ingredients
- 2 cups fresh mulberries
- 1 cup all-purpose flour
- 1 cup plain yogurt
- 1/2 cup sugar
- 1/2 cup butter, softened
- 2 large eggs
- 1 teaspoon baking powder
- 1/2 teaspoon baking soda
- 1/2 teaspoon salt
- 1 teaspoon vanilla extract
Instructions
- Preheat the oven to 350°F (175°C) and grease and flour a 9-inch cake pan.
- Cream together the softened butter and sugar until light and fluffy—about 3-5 minutes.
- Add the eggs one at a time, ensuring each is fully combined.
- Mix in the yogurt and vanilla extract.
- Combine the flour, baking powder, baking soda, and salt in a separate bowl.
- Gradually add the dry ingredients to the wet mixture, stirring gently until just combined.
- Fold in the fresh mulberries, being careful not to break them too much.
- Transfer the batter into the prepared pan and spread it evenly.
- Bake for 30-35 minutes or until a toothpick inserted comes out clean.
- Allow to cool in the pan for 10 minutes before transferring to a wire rack.
Notes
Store the cake at room temperature for up to 3 days or freeze for up to 3 months.
- Prep Time: 10 minutes
- Cook Time: 35 minutes
- Category: Dessert
- Method: Baking
- Cuisine: American
Nutrition
- Serving Size: 1 slice
- Calories: 200
- Sugar: 10g
- Sodium: 150mg
- Fat: 9g
- Saturated Fat: 5g
- Unsaturated Fat: 4g
- Trans Fat: 0g
- Carbohydrates: 25g
- Fiber: 2g
- Protein: 4g
- Cholesterol: 40mg
🥗 Free Custom Keto Meal Plan?
Do you want to lose weight while still enjoying delicious Asian & Thai Fusion meals? Take this quick quiz to get your personalized Keto plan based on your favorite foods!
- ✅ No more guessing what to eat
- ✅ Delicious & easy-to-make recipes
- ✅ Tailored to your body type
Get My Custom Plan Now! →
*Over 100,000+ people have transformed their lives with this quiz.