Irresistible Pizza Sliders: Your New Favorite Comforting Snack
Picture this: it’s Friday night, the whole family is gathered around the TV, and the aroma of melting cheese fills the air. As we flip through countless streaming options, someone inevitably shouts, “Pizza!” But let me tell you about a delightful twist that’ll send your pizza night into overdrive: Pizza Sliders! These little bundles of joy have transformed my family’s movie nights into comfort food celebrations.
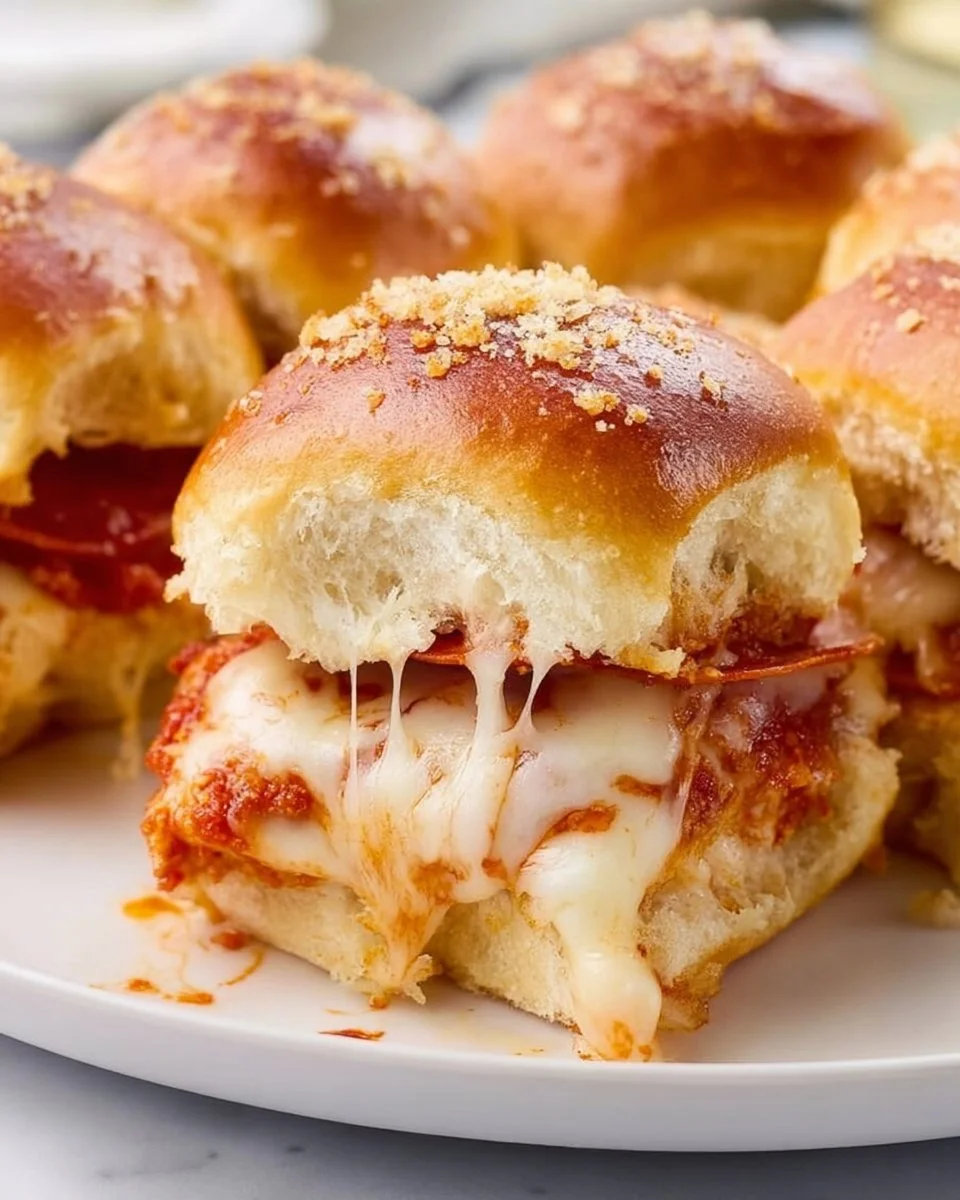
When I first tried making these sliders, I was immediately transported back to my childhood—gathered around the table, slices of gooey pizza in hand, laughter echoing through the house. But here’s the kicker: they are much more than just a mini version of your average pizza. These sliders combine soft, sweet Hawaiian rolls and mouthwatering toppings that create a dish so delicious, you’ll never want to order takeout again.
Not only are they quick to assemble, but these Pizza Sliders also allow for endless customization, making them perfect for picky eaters and adventurous foodies alike. Today, I’ll be sharing my cherished recipe with you and teaching you how to make these scrumptious sliders your own. Get ready for a culinary adventure where every bite is a slice of happiness!
What Are Pizza Sliders?
Pizza Sliders have become a total game-changer at gatherings, game days, or simply as a cozy family dinner. Think of them as a mini-pizza experience, but tucked between fluffy Hawaiian rolls! Originating as a creative solution for using leftover ingredients and fitting into that crowd-pleasing category, they deliver on flavor and comfort.
Taste-wise, they offer a delightful experience. The rolls, with their sweet undertones, are the perfect contrast to the savory goodness of the tomato sauce and cheese. Each bite yields a delightful texture, as the slightly crispy top gives way to gooey, melted cheese and flavorful toppings inside. What makes these sliders unique is their versatility; you can easily customize them to suit any palate or dietary preference.
Make them for a game night, a birthday party, or a casual weeknight dinner, and let the universality of pizza bring everyone together in delicious harmony!
Why You’ll Love This Recipe
Quick and Easy: Life can get busy, but this recipe takes just 30 minutes from start to finish! You’ll be enjoying warm sliders in no time.
Cost-Effective: Why splurge on takeout when you can whip up a batch of these little beauties for a fraction of the cost? With an average estimated cost of under $10 for a batch, you’ll save your wallet without sacrificing flavor.
Customizable: Whether you’re a meat lover, vegetarian, or even vegan, there’s a topping combo for everyone. Add your favorite veggies, switch up the cheese, or even try a different sauce like pesto or alfredo.
Family-Friendly: Kids adore them, and so do adults! These sliders are a hit at gatherings, and after making them just once, you can bet your family will ask for them again.
No Baking Skills Required: Don’t worry if you’re a novice cook; these Pizza Sliders are as forgiving as they are delicious! All you need is a willingness to have fun in the kitchen.
Trust me, I’ve compared these sliders to the store-bought versions, and the home-cooked ones win every time. Plus, who can resist that fresh, homemade taste?
Ingredients
Here’s what you’ll need for a batch of Pizza Sliders, plus a few notes on ingredient quality:
- 12 Hawaiian Rolls: Look for fresh, soft rolls for that melt-in-your-mouth texture. Brands like King’s Hawaiian are a favorite.
- 1 cup Pizza Sauce: Your choice! Opt for a robust tomato sauce or homemade—whichever makes your taste buds sing.
- 1 cup Shredded Mozzarella Cheese: Freshly shredded cheese melts better than pre-shredded; I love using Whole Foods’ mozzarella.
- 1/2 cup Sliced Pepperoni: The classic choice! You can find turkey or vegetarian options if you prefer.
- 1/2 cup Diced Bell Peppers (Optional): Feel free to toss in any veggies that you like!
- 1/2 tsp Italian seasoning: This adds a beautiful depth of flavor to the sliders.
- 2 tbsp Butter, Melted: Real butter always wins for the best flavor! Make sure it’s at room temperature for easy brushing.
Prep Notes: Allow the butter to come to room temperature before using it, making it much easier to spread!
Step-by-Step Instructions
Preheat your oven to 350°F (175°C). This is where the magic begins, so let’s get that oven warmed up!
Slice the Hawaiian rolls in half and place the bottom halves on a baking sheet. Keep them all together to maintain that slider shape.
Spread pizza sauce evenly over the rolls. It’s all about the sauce—make sure every nook and cranny is covered!
Layer shredded mozzarella cheese, pepperoni, and any additional toppings on top of the sauce. I like to pile it on!
Sprinkle Italian seasoning over the toppings. A little sprinkle goes a long way here—don’t skimp!
Place the top halves of the rolls on the sliders. It’s time to close them up!
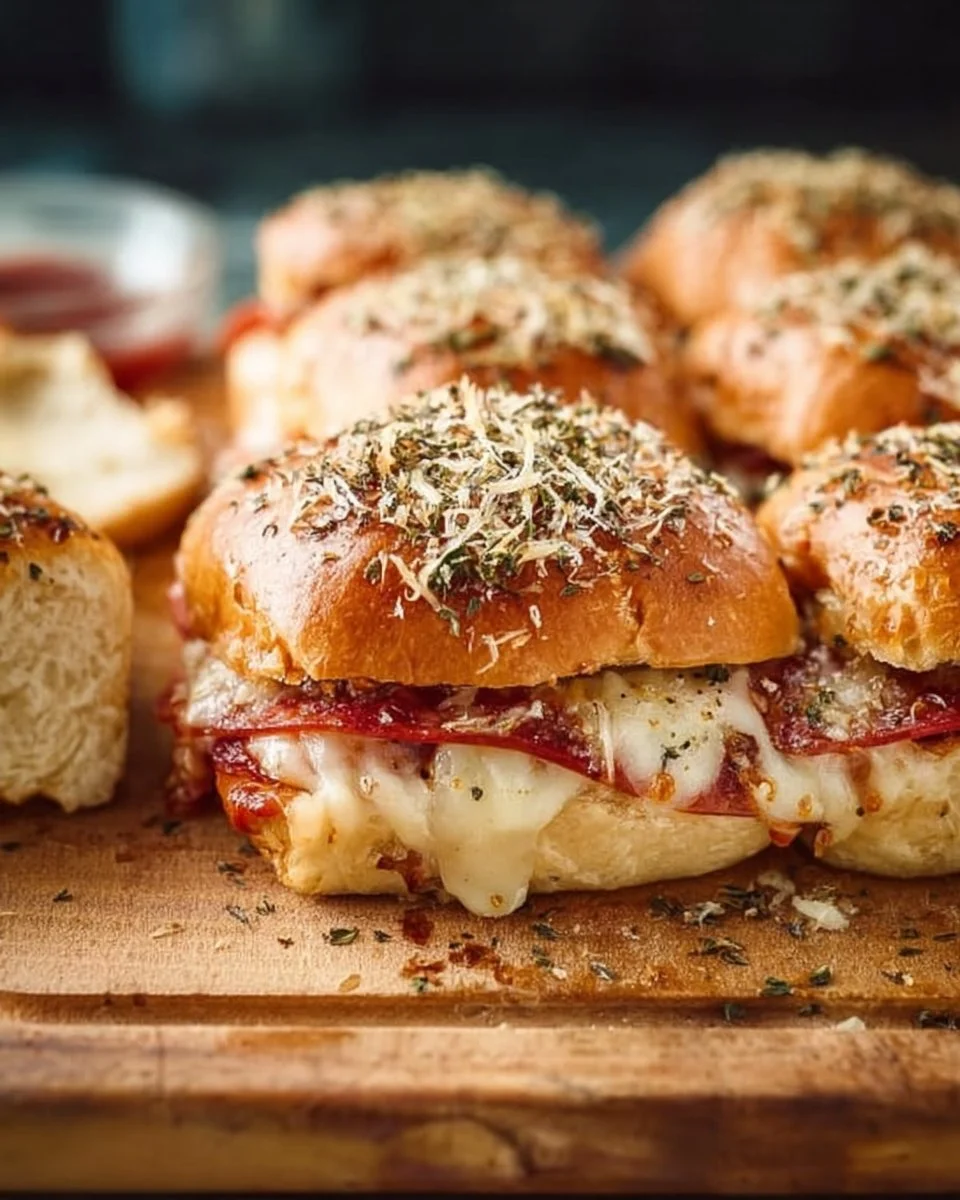
Brush the melted butter over the tops of the rolls. This gives an incredible golden brown finish and an irresistible buttery flavor.
Bake in the preheated oven for about 10-15 minutes until the cheese is melted and the tops are golden brown. Keep an eye on them! You’ll know they’re done by that fragrant allure.
Slice and serve warm. I can’t stress enough how delicious they are fresh out of the oven!
Chef’s Tips:
- Avoid soggy sliders by not over-saturating them with sauce.
- If using frozen rolls, let them thaw before assembling.
Expert Tips & Tricks
To ensure your Pizza Sliders are perfect every time, here are some insider tips:
Storage Recommendations: Leftovers? Store them in an airtight container in the fridge for up to three days. Reheat in the oven for best results!
Make-Ahead Instructions: You can assemble the sliders a few hours in advance. Just cover and refrigerate until you’re ready to bake.
Troubleshooting Common Problems: If your sliders come out a tad too soggy, try reducing the amount of sauce next time or bake them a few minutes longer to allow moisture to evaporate.
Experiment with Cheese: Don’t limit yourself to mozzarella—try provolone or even a blend for something unique!
Presentation: For a fun twist, serve sliders with a side of dipping sauces—think ranch or marinara!
Serving Suggestions
These Pizza Sliders are a star on their own, but if you want to jazz up your meal, serve them alongside a fresh garden salad or crispy potato wedges. For a cozy movie night, pair with some popcorn and your favorite vintage movie!
When it comes to presenting them, a wooden board or a bright plate with some fresh herbs makes a stunning display. Whether it’s game day or a family gathering, these sliders fit beautifully into any occasion.
Variations & Substitutions
There are endless possibilities when it comes to flavor combinations for your Pizza Sliders:
- Meat Lovers: Add cooked sausage or ham alongside the pepperoni for extra heartiness.
- Veggie Delight: Load up the bell peppers, mushrooms, and even spinach for a healthy take.
- Spicy Kick: Toss in some jalapeños or buffalo sauce for a zesty spin.
If you have dietary restrictions, gluten-free rolls can be swapped in easily, and vegan cheese works perfectly too!
Nutrition & Storage Info
- Prep Time: 10 minutes
- Cook Time: 15 minutes
- Total Time: 25 minutes
- Yield: 12 servings
- Estimated Calories Per Serving: 210 calories
Storage Instructions:
- Room Temp: Best enjoyed fresh, but can be kept for a couple of hours at room temperature.
- Fridge: Store for up to 3 days in the refrigerator.
- Freezer: Freeze individually wrapped sliders for up to 2 months. Reheat in the oven, not the microwave, for best texture!
FAQ Section
Can I make these Pizza Sliders vegetarian?
Absolutely! Just skip the pepperoni and add more veggies or try a veggie sausage.Can I freeze leftovers?
Yes! Wrap them well and store them in an airtight container. They’ll last for up to two months.How do I prevent soggy sliders?
Trim back on the sauce or bake them a little longer to get that crispy top!What if I don’t have Hawaiian rolls?
You can use regular dinner rolls; just keep an eye on the bake time as they may need slight adjustments!Can I grill these sliders?
Yes! Assemble on the grill and cook until the cheese is melted for a smoky flavor.What’s the best way to reheat leftovers?
The oven is the best method for restoring that original crispy texture—just wrap in foil and heat at 350°F.Can I add other cheeses?
Definitely! Give cheddar or pepper jack a try—experiment and see what you love!How long do these keep in the fridge?
They stay fresh in the fridge for about 3 days in an airtight container.Are these sliders kid-friendly?
For sure! Kids love them, and you can customize the ingredients to suit their tastes.Can I make these sliders in advance?
Yes, assemble them a few hours ahead of time, cover, and pop them in the oven later!
Conclusion
There you have it! These Pizza Sliders are sure to become your new go-to recipe for any gathering, cozy night in, or even a quick weeknight dinner. They bring joy, nostalgia, and a whole lot of flavor into your home—just as they have in mine.
I can’t wait for you to try this recipe and hear what your family thinks! Please share your thoughts in the comments, and check out my other comforting recipes on the blog for even more delicious ideas. Let’s make every bite an adventure!
Print
Irresistible Pizza Sliders
- Total Time: 25 minutes
- Yield: 12 servings 1x
- Diet: Vegetarian
Description
Quick and customizable Pizza Sliders made with Hawaiian rolls, pizza sauce, and gooey cheese, perfect for family gatherings or movie nights.
Ingredients
- 12 Hawaiian Rolls
- 1 cup Pizza Sauce
- 1 cup Shredded Mozzarella Cheese
- 1/2 cup Sliced Pepperoni
- 1/2 cup Diced Bell Peppers (Optional)
- 1/2 tsp Italian seasoning
- 2 tbsp Butter, Melted
Instructions
- Preheat your oven to 350°F (175°C).
- Slice the Hawaiian rolls in half and place the bottom halves on a baking sheet.
- Spread pizza sauce evenly over the rolls.
- Layer shredded mozzarella cheese, pepperoni, and any additional toppings on top of the sauce.
- Sprinkle Italian seasoning over the toppings.
- Place the top halves of the rolls on the sliders.
- Brush the melted butter over the tops of the rolls.
- Bake in the preheated oven for about 10-15 minutes until the cheese is melted and the tops are golden brown.
- Slice and serve warm.
Notes
Allow the butter to come to room temperature for easy brushing. Avoid soggy sliders by not over-saturating them with sauce. Leftovers can be stored in an airtight container for up to three days.
- Prep Time: 10 minutes
- Cook Time: 15 minutes
- Category: Snack
- Method: Baking
- Cuisine: American
Nutrition
- Serving Size: 1 slider
- Calories: 210
- Sugar: 2g
- Sodium: 450mg
- Fat: 9g
- Saturated Fat: 4g
- Unsaturated Fat: 5g
- Trans Fat: 0g
- Carbohydrates: 25g
- Fiber: 1g
- Protein: 8g
- Cholesterol: 20mg
🥗 Free Custom Keto Meal Plan?
Do you want to lose weight while still enjoying delicious Asian & Thai Fusion meals? Take this quick quiz to get your personalized Keto plan based on your favorite foods!
- ✅ No more guessing what to eat
- ✅ Delicious & easy-to-make recipes
- ✅ Tailored to your body type
Get My Custom Plan Now! →
*Over 100,000+ people have transformed their lives with this quiz.