Table of Contents
Table of Contents
Irresistible S’mores Pops: Your New Favorite Sweet Treat!
As a child, there was nothing quite like the magic of a camping trip, roasting marshmallows over a crackling fire and melting chocolate between graham crackers. S’mores are a nostalgia-laden adventure that transport me back to those warm summer nights spent with family under a blanket of stars. Fast forward to today, and I’ve taken that beloved classic experience and whipped it into something even more delectable: S’mores Pops!
These delightful treats not only encapsulate all the gooey, crunchy, and chocolatey flavors of traditional s’mores but also offer a portable twist that makes them perfect for parties, picnics, or just those days when you need a quick pick-me-up. Unlike store-bought s’mores treats that can be overly processed and lacking in the joy of homemade goodness, S’mores Pops give you the richness of quality ingredients that you can customize to suit your taste!
In this post, I’ll guide you through every step to create your own S’mores Pops—from the easy ingredients to some chef’s tips sprinkled along the way. By the end, you’ll not only have a scrumptious treat in hand but also a family recipe that might just become a beloved tradition.
What Are S’mores Pops?
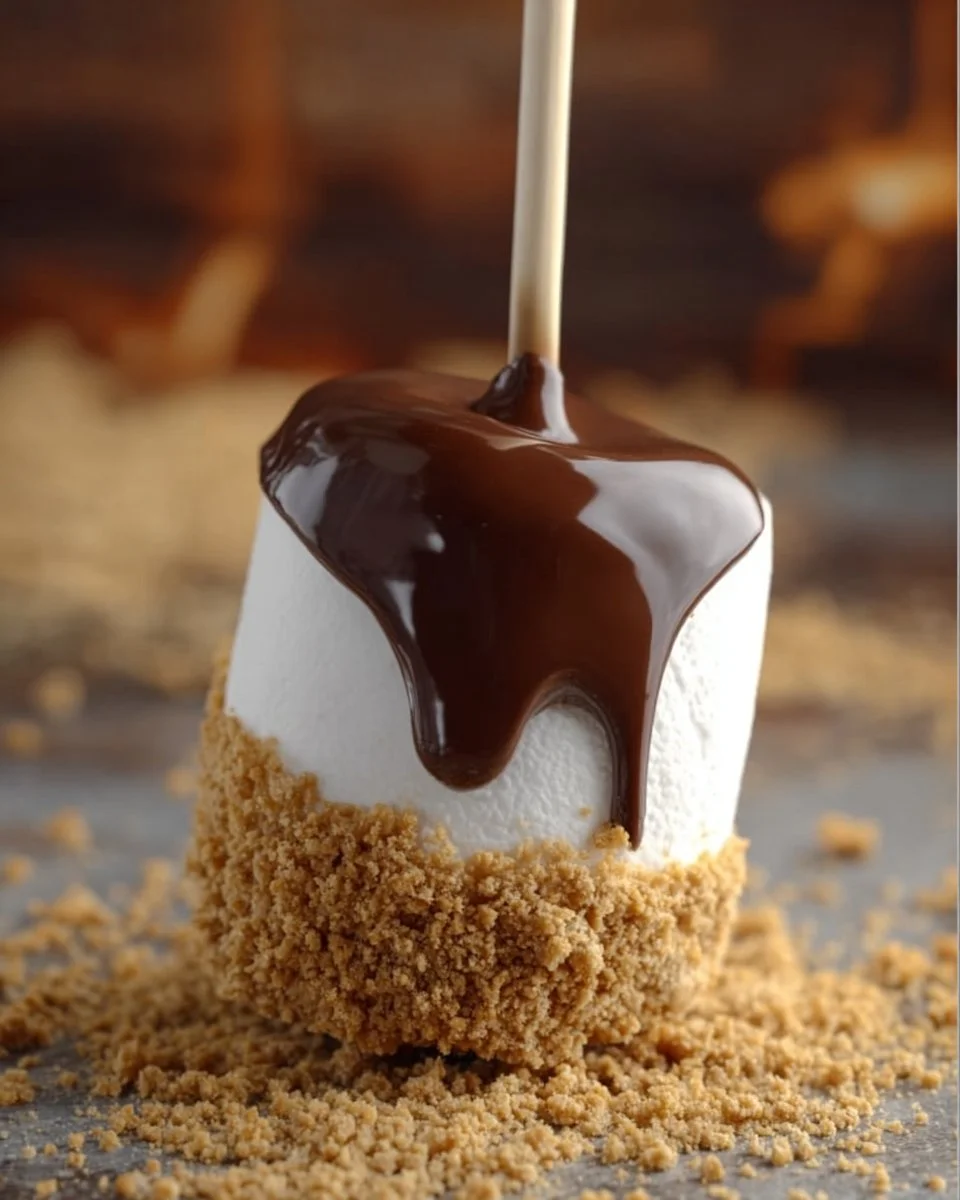
S’mores Pops are an innovative spin on the classic campfire favorite. These fun, hand-held treats consist of a combination of crushed graham crackers, fluffy mini marshmallows, and rich chocolate, all skillfully combined into pop-able goodness on a stick. Perfect for satisfying your sweet tooth, they offer a delightful crunch from the graham crackers, a warm, gooey center from the marshmallows, and a smooth, silky coat of chocolate.
Originating from the age-old tradition of making s’mores, these pops are a celebratory nod to summer nights spent around the campfire. They hold a unique charm, essentially capturing the essence of s’mores while making them fun and accessible year-round—no campfire required. Whether you’re celebrating a birthday, packing a picnic, or just craving a sweet treat, S’mores Pops are versatile and perfect for any occasion!
Why You’ll Love This Recipe
Child-Friendly Fun: Sticking things on a popsicle stick makes everything more fun, especially for kids! These S’mores Pops are perfect for little hands and come with the bonus of being a less messy and more portable version of classic s’mores.
Easy-to-Follow Recipe: You honestly don’t need to be a pro in the kitchen to whip these up. With just a handful of ingredients and a few simple steps, you’ll be on your way to creating something delicious in no time!
Cost-Effective: Unlike other dessert options that require a long list of pricey ingredients, this recipe uses common pantry staples. Making S’mores Pops at home is not only budget-friendly but allows you to treat your family without breaking the bank.
Customization Galore: The flexibility of this recipe allows you to let your creativity shine! Swap out semi-sweet chocolate for white chocolate or dark chocolate, add nuts, or even infuse some flavored extracts to create unique flavor experiences.
Quick Preparation: With a total time of about 30 minutes, you can create these treats quickly, making them an awesome last-minute dessert option.
If you’re tired of the same-old store-bought desserts that lack heart and soul, this recipe promises the homemade charm and love that everyone seeks.
Ingredients
Here’s everything you’ll need to create your scrumptious S’mores Pops:
- 4 graham crackers, crushed: Choose a good-quality brand; I love Honey Maid for its classic flavor.
- 1 cup mini marshmallows: The tiny ones are key for even melting inside your pops! Feel free to use a brand with no artificial ingredients.
- 1 cup semi-sweet chocolate chips: I highly recommend using Guittard chocolate chips for their rich taste and smooth melting quality, but your go-to brand will work just fine.
- Popsicle sticks: Look for sturdy, wood ones.
- Sprinkles (optional): Add a pop of color that’s perfect for parties—choose your favorites!
Prep Notes: Ensure your butter (if you choose to add later) is at room temperature for smooth mixing and don’t skimp on ingredient quality—it truly makes a difference!
Step-by-Step Instructions
Step 1: Melt the Chocolate
In a microwave-safe bowl, melt the chocolate chips in 30-second intervals, stirring after each interval until smooth. It should take about 1-2 minutes total. Watch closely to avoid seizing.
Chef’s Tip: Avoid using chocolate with added fat, as it won’t melt smoothly.
Step 2: Mix the Graham Crackers and Marshmallows
In another bowl, combine the crushed graham crackers and mini marshmallows. Use a spatula to fold them gently until well mixed—this ensures every pop will have that quintessential s’mores flavor.
Step 3: Create Your Pops
Dip one end of each popsicle stick into the melted chocolate before inserting it into the graham cracker mixture. This acts as a glue and helps hold the pop together. Aim for a golf-ball-sized scoop for balance.
Step 4: Setting the Pops
Let the pops sit on wax paper for about 5-10 minutes so the chocolate can harden a bit.
Step 5: Additional Chocolate Dip & Decoration
If desired, dip the pops into the remaining melted chocolate and sprinkle with graham cracker crumbs or sprinkles. Allow to set again.
Step 6: Enjoy
Finally, dig in! Your homemade S’mores Pops are ready to be devoured.
Expert Tips & Tricks
Storage: These pops can be stored in an airtight container at room temperature for up to 3 days. If you must, you can refrigerate them for a colder treat!
Make-Ahead Instructions: You can definitely prep these ahead of time. Just make sure the chocolate is completely set before stacking them up.
Troubleshooting: If your chocolate thickens or cools too quickly, pop it back in the microwave for 10-second increments, stirring until smooth.
Freshness Check: Always check your ingredients for freshness. Stale graham crackers can dull the flavor of your pops.
Chocolate Swaps: Feel free to experiment with different chocolate types and even white chocolate for a fun twist!
Layering: For an extra layer of flavor, try layering in a spoonful of peanut butter or caramel before adding the marshmallows.
Serving Suggestions
S’mores Pops are delightful on their own, but pair them alongside a cold glass of milk or a mug of hot cocoa for the ultimate indulgent experience—perfect for cozy nights in! For presentation, place them in a mason jar or on a fun platter, and consider serving them on a rustic wooden board for a charming picnic vibe. They are perfect for gatherings, game nights, or even a fun themed birthday party!
Variations & Substitutions
Flavor Combinations: Try swapping graham crackers for chocolate wafers, or add some crushed peppermint for a refreshing twist during the holidays. Peanut butter or Nutella can also be layered in for a rich surprise!
Dietary Restrictions: Use gluten-free graham crackers, dairy-free chocolate, or sugar-free marshmallows to cater to different dietary needs.
Seasonal Variations: During cooler months, make Gingerbread S’mores Pops by swapping in ginger snaps and cinnamon-flavored marshmallows!
Nutrition & Storage Info
- Prep time: 10 minutes
- Cook time: 5 minutes
- Total time: 30 minutes
- Yield: About 8 pops
- Estimated calories per serving: 200-250 (depending on exact brands used)
- Storage: Keep at room temperature for up to 3 days in an airtight container. They can last around 1-2 weeks in the refrigerator or can be frozen for up to a month.
FAQ Section
Can I use larger marshmallows?
Absolutely! Just be mindful that they may not melt as evenly, so cut them in half.What kind of chocolate is best?
Semi-sweet chocolate is classic, but feel free to explore dark or milk options based on your taste.Can these pops be made vegan?
Yes! Opt for dairy-free chocolate and use vegan marshmallows.Do I need to refrigerate these?
They can be kept at room temperature for short periods, but refrigeration extends their shelf life.Can I use store-bought ingredients?
Yes, many pre-made ingredients are available, but remember homemade offers a more personal touch.Can I dip them in different toppings?
Definitely! Try crushed nuts, shredded coconut, or even toffee bits for crunch.How do I prevent soggy pops?
Make sure to let the chocolate set completely before storing or stacking the pops.Are these gluten-free?
You can make them gluten-free by using gluten-free graham crackers.What if I don’t have popsicle sticks?
Skewers or sturdy toothpicks work in a pinch!How can I make these ahead of time?
Assemble, set, and freeze! Just thaw before serving.
Conclusion
To sum it up, S’mores Pops are not just a delightful treat; they’re a delicious memory wrapped around a stick. With easy prep and endless customization options, you’ll be crafting these pops in no time, so why not try making them today? Your taste buds will thank you! And I’d love to hear how they turn out for you—drop a comment below or share your sprinkle choices! Check out other sweet recipes on my blog for more inspirations that evoke those warm and fuzzy memories of togetherness.
Happy baking!
Print
S’mores Pops
- Total Time: 30
- Yield: 8 pops 1x
- Diet: Vegetarian
Description
Delightful and portable S’mores Pops that encapsulate the classic flavor of s’mores in a fun, hand-held treat.
Ingredients
- 4 graham crackers, crushed
- 1 cup mini marshmallows
- 1 cup semi-sweet chocolate chips
- Popsicle sticks
- Sprinkles (optional)
Instructions
- Melt the chocolate: In a microwave-safe bowl, melt the chocolate chips in 30-second intervals, stirring after each until smooth.
- Mix the graham crackers and marshmallows: In another bowl, combine the crushed graham crackers and mini marshmallows, folding gently to mix.
- Create your pops: Dip one end of each popsicle stick into the melted chocolate, then insert it into the graham cracker mixture.
- Set the pops: Let the pops sit on wax paper for about 5-10 minutes to harden.
- Additional dip & decoration: Dip the pops into any remaining melted chocolate and sprinkle with graham cracker crumbs or sprinkles. Allow to set again.
- Enjoy: Dig in and enjoy your homemade S’mores Pops!
Notes
These pops can be stored at room temperature for up to 3 days and can be refrigerated for freshness. Customize with different chocolates or add-ins as desired.
- Prep Time: 10
- Cook Time: 5
- Category: Dessert
- Method: No-Bake
- Cuisine: American
Nutrition
- Serving Size: 1 pop
- Calories: 225
- Sugar: 22g
- Sodium: 20mg
- Fat: 12g
- Saturated Fat: 7g
- Unsaturated Fat: 4g
- Trans Fat: 0g
- Carbohydrates: 30g
- Fiber: 1g
- Protein: 2g
- Cholesterol: 5mg
Ask the Community
🥗 Free Custom Keto Meal Plan?
Do you want to lose weight while still enjoying delicious Asian & Thai Fusion meals? Take this quick quiz to get your personalized Keto plan based on your favorite foods!
- ✅ No more guessing what to eat
- ✅ Delicious & easy-to-make recipes
- ✅ Tailored to your body type
Get My Custom Plan Now! →
*Over 100,000+ people have transformed their lives with this quiz.