Table of Contents
Table of Contents
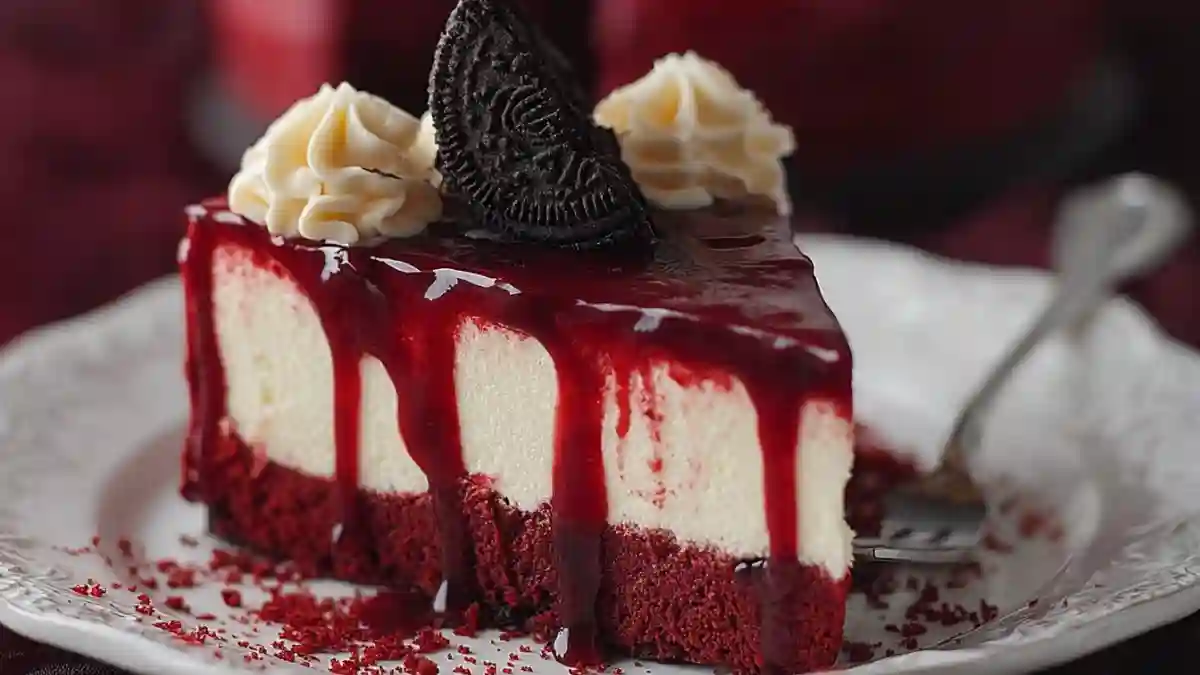
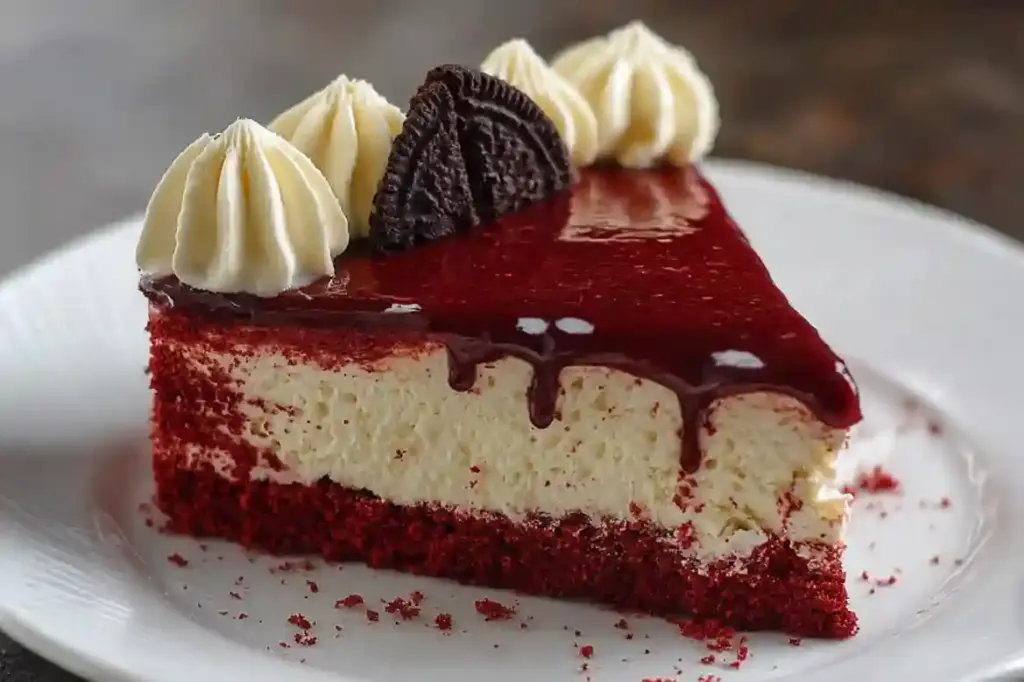
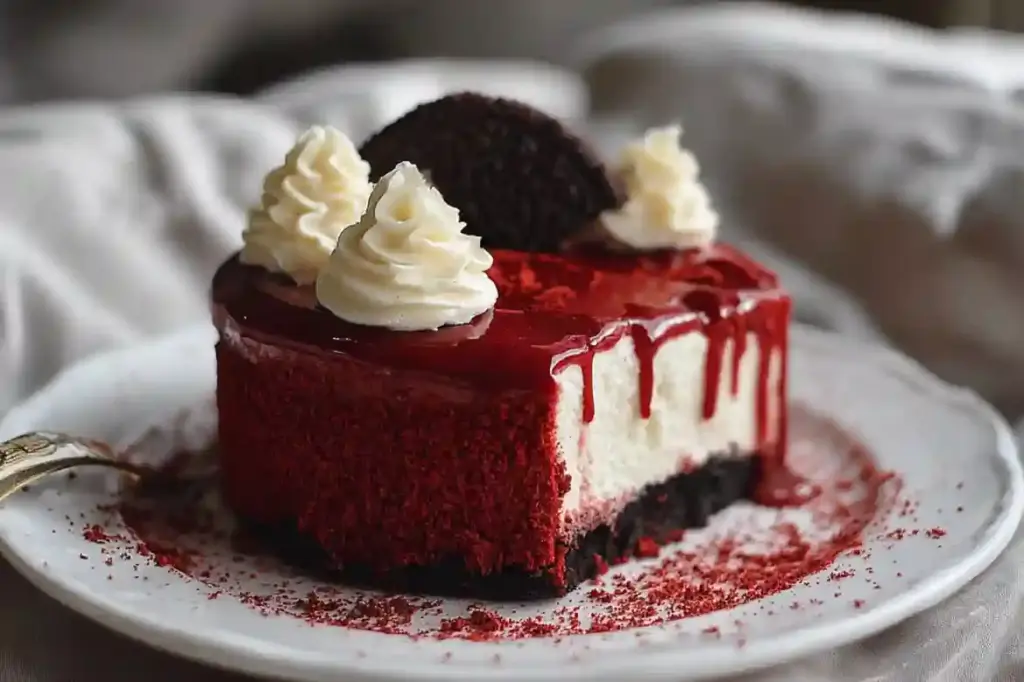
Growing up, the arrival of fall in my household sparkled with joy and excitement (and maybe a little spookiness). Halloween meant not only costumes and trick-or-treating but also indulging in all things sweet and decadent. One treat that always had a place on our dessert table was the Vampire Bite Red Velvet Cheesecake, with its rich crimson color and creamy texture embodying the season’s essence. This indulgent cheesecake isn’t just a feast for the eyes—each slice offers a velvety blend of rich chocolate and the classic allure of red velvet cake.
What makes this Vampire Bite Red Velvet Cheesecake stand out from other recipes is the unique combination of chocolate cookie crust, luscious cream cheese filling, and the dramatic drizzle of dark chocolate. It’s not just dessert; it’s a celebration of comfort and memory, a dessert that brings family together. Picture this: the moment you slice into it, the gorgeous red hue spilling onto your plate, and as you take the first bite, the creamy texture dances on your taste buds, wrapping you in warmth.
In this recipe, I promise to guide you through every step to create your own masterpiece. Whether you’re whipping it up for a spooky soirée or a cozy family gathering, let’s dive into the enchanting details of the Vampire Bite Red Velvet Cheesecake!
What Are Vampire Bite Red Velvet Cheesecake?
Ah, the alluring Vampire Bite Red Velvet Cheesecake—a delightful twist on the traditional red velvet cake, famed for its striking color and decadent flavor. The origins of red velvet cake date back to the 1920s and have evolved over the decades to become a beloved classic. Pair that gorgeous hue with the rich, creamy filling of cheesecake, and you’ve created a dessert that tantalizes the senses.
When you take a bite, you’re met with the perfect balance of velvety cream cheese, rich chocolate from the cookie crust, and just a hint of sweetness that lingers on your palate. The unique combination of textures—a crunchy crust, silky filling, and an optional dark chocolate drizzle—makes this cheesecake undeniably unforgettable.
Planning a Halloween get-together? Or maybe a cozy date night? The Vampire Bite Red Velvet Cheesecake is the perfect conversation starter and ever-so-ready to impress your guests with its bold colors and tantalizing flavors.
Why You’ll Love This Recipe
Unparalleled Flavor: This cheesecake strikes a perfect harmony between the classic rich chocolate and the delicate flavor of red velvet. You won’t find anything quite like it in store-bought options!
Cost-Effective: Making your cheesecake at home is often significantly cheaper than purchasing one from a bakery, and you get to use high-quality ingredients for a superior taste.
Customizable: This recipe offers plenty of opportunities for customization. Want a little more chocolate? Add it! Prefer a lighter cheesecake? Adjust the cream cheese content. The sky’s the limit!
Easy Steps: Don’t let the word “cheesecake” scare you. Although it seems fancy, this recipe is beginner-friendly. With practice, you’ll be layering and baking like a pro in no time!
Perfect for Any Occasion: Whether it’s a holiday gathering, a birthday bash, or a casual family dinner, this dessert never fails to impress—and sparks joy!
Choosing the homemade route really allows you to create something not only delicious but created with love, making it extra special for everyone at the table.
Ingredients Section
To create your own Vampire Bite Red Velvet Cheesecake, gather the following ingredients:
- 1 ½ cups chocolate cookie crumbs (Look for brands like Oreo for the classic taste)
- ¼ cup unsalted butter, melted (I recommend using Kerrygold for its rich flavor)
- 24 oz (680g) cream cheese, softened (Use full-fat cream cheese for the best texture)
- 1 cup granulated sugar
- ¼ cup unsweetened cocoa powder (Valrhona is a great brand for rich chocolate flavor)
- 1 tbsp red gel food coloring (Don’t skimp on the gel food coloring to achieve that vibrant hue)
- 3 large eggs (Ensure they are at room temperature for better incorporation)
- 1 tsp vanilla extract (Always go for pure vanilla for the best aroma)
- ⅓ cup dark chocolate sauce (Use a high-quality dark chocolate sauce for drizzling)
Prep Notes
- Make sure the butter and cream cheese are at room temperature before mixing to ensure a smooth batter.
Step-By-Step Instructions
Prepping Your Space
Preheat Oven: Preheat your oven to 160°C (325°F). Lightly grease a 23-cm (9-inch) springform pan with some cooking spray or a bit of butter for easy removal later.
Make the Crust: In a bowl, mix the chocolate cookie crumbs and melted butter until well combined—this should resemble wet sand. Press the mixture firmly into the bottom of the springform pan. Use the bottom of a flat measuring cup to ensure it’s even.
Cheesecake Filling
Cream Cheese Mixture: In a stand mixer, beat the softened cream cheese until it’s smooth and creamy. Gradually add in the granulated sugar, cocoa powder, and red food coloring. Mix until fully combined—don’t skimp on scraping down the sides of the bowl to incorporate everything evenly.
Egg Incorporation: Add the eggs one at a time, mixing well after each addition until fully incorporated. Finally, add the vanilla extract and mix until smooth.
Pour and Smooth: Pour the cheesecake filling over your prepared crust and gently smooth the top with a spatula.
Baking
Bake: Bake for 50–55 minutes, or until the edges are set and the center jiggles slightly when you gently shake the pan. It should not be overly wobbly—look for a slight jiggle like a quivering dance.
Cool Down: Once baked, turn off the oven and leave the cheesecake inside for about 30 minutes. This helps prevent cracking.
Chill: Remove from the oven and allow it to cool at room temperature. Then, refrigerate for at least 4 hours, or overnight for best results. Patience is key!
Finishing Touches: Once fully chilled, drizzle with dark chocolate sauce before slicing and serving. You can also garnish with whipped cream for extra flair!
Chef’s Tips
- Avoid Over-Mixing: When adding the eggs, mix just until they are combined to avoid incorporating too much air into the cheesecake, which can cause it to crack.
- Leave Room for Jiggle: The center should remain a little jiggly but set. It will firm as it cools in the refrigerator.
- Use Hot Water Bath: For an ultra-smooth texture, consider using a water bath while baking—wrap the outside of the springform pan with foil and place it in a larger pan filled with hot water.
Expert Tips & Tricks
Quality Counts: Invest in high-quality ingredients to elevate the flavors of your cheesecake. Cheap cream cheese will result in a lesser taste and texture.
Storage: Store any leftovers in an airtight container in the refrigerator for up to 5 days. You can also freeze cheesecake slices for up to 3 months—just be sure to wrap each slice tightly in plastic wrap prior to freezing.
Make-Ahead: This cheesecake is perfect for preparing in advance! It tastes even better the day after it’s made, making it ideal for party prep.
Troubleshooting: If your cheesecake cracks, don’t worry! A drizzle of chocolate sauce can hide a multitude of baking sins, and the taste will remain incredible.
Mixing Tips: Avoid using cold ingredients to prevent lumps. Always allow cream cheese and eggs to come to room temperature before mixing.
Serving Suggestions
Serve your Vampire Bite Red Velvet Cheesecake alongside a dollop of homemade whipped cream or a scoop of vanilla ice cream. For a seasonal touch, consider pairing it with fresh raspberries or a berry compote for an added layer of flavor—plus, the contrast of colors is stunning! This dessert is perfect for Halloween parties, holiday gatherings, or special family occasions.
Variations & Substitutions
Flavor Combinations: Swap out the dark chocolate drizzle for white chocolate for a contrasting effect. Feeling adventurous? A layer of raspberry or cherry sauce beneath the cheesecake can elevate it even further.
Dietary Adaptations: For a gluten-free option, substitute chocolate cookie crumbs with gluten-free cookies or even almond flour. Vegan? Swap cream cheese for a vegan cream cheese alternative, and use flax eggs instead of regular eggs.
Seasonal Twists: Think pumpkin for a Halloween-themed twist or a hint of peppermint extract for the holiday season—let your creativity run wild!
Nutrition & Storage Info
- Prep time: 30 minutes
- Cook time: 55 minutes
- Total time: 5 hours + chilling (up to overnight)
- Yield: 12 servings
- Estimated calories per serving: 300 (varies based on ingredients and portion size)
- Storage Instructions: Store in the refrigerator for 5 days. Freeze slices for up to 3 months.
FAQ Section
Can I use regular food coloring instead of gel?
Yes, but gel food coloring offers a bolder and more vibrant color without adding extra liquid.What can I substitute for cream cheese?
You can try mascarpone or a vegan cream cheese alternative for a different taste.How do I prevent my cheesecake from cracking?
Don’t overmix, use room-temperature ingredients, and consider a water bath.Can I make mini cheesecakes?
Absolutely! Use a muffin tin and line with cupcake liners. Adjust the baking time to around 20-25 minutes.How can I tell when my cheesecake is done?
The edges should look set while the center has a slight jiggle when shaken gently.What’s the best way to remove the cheesecake from the pan?
Let it chill fully, then run a knife around the edges before unclipping your springform pan.Can I use a regular cake pan instead?
Yes, but you may need to adjust the baking time, and transferring could be trickier.How long can I keep leftovers?
In the fridge, it’s best within 5 days; freeze for longer storage.Do I need to bake the crust first?
No need for a pre-bake; the crust will firm up beautifully while baking with the filling.What’s a good way to garnish it?
Fresh berries, whipped cream, or chocolate shavings make fabulous garnishes!
Conclusion
The Vampire Bite Red Velvet Cheesecake is a show-stopping dessert that captures the essence of sweetness, nostalgia, and pure indulgence. Anyone you serve this to will be enchanted by its beauty and taste! I encourage you to try this simple yet sophisticated recipe at home and create your own lasting memories around the table. I’d love to hear your feedback—so please share your experiences in the comments below! If you’re looking for more irresistible recipes, don’t forget to explore my blog for delightful treats that will make your taste buds dance!
White Chocolate Raspberry Cheesecake
Strawberry Banana Cheesecake Cookies
Print
Vampire Bite Red Velvet Cheesecake
- Total Time: 300 minutes
- Yield: 12 servings 1x
- Diet: Vegetarian
Description
An indulgent cheesecake blending rich chocolate and the allure of red velvet, perfect for Halloween celebrations.
Ingredients
- 1 ½ cups chocolate cookie crumbs
- ¼ cup unsalted butter, melted
- 24 oz (680g) cream cheese, softened
- 1 cup granulated sugar
- ¼ cup unsweetened cocoa powder
- 1 tbsp red gel food coloring
- 3 large eggs
- 1 tsp vanilla extract
- ⅓ cup dark chocolate sauce
Instructions
- Preheat your oven to 160°C (325°F) and grease a 9-inch springform pan.
- Mix the chocolate cookie crumbs and melted butter until it resembles wet sand, then press into the bottom of the pan.
- In a stand mixer, beat the cream cheese until smooth, then add sugar, cocoa, and food coloring, mixing until combined.
- Add eggs one at a time and mix until smooth. Stir in vanilla extract.
- Pour the filling over the crust, smoothing the top with a spatula.
- Bake for 50–55 minutes until edges are set and center jiggles slightly.
- Turn off the oven and leave cheesecake inside for 30 minutes to prevent cracking.
- Allow to cool at room temperature then refrigerate for at least 4 hours or overnight.
- Drizzle with dark chocolate sauce before serving.
Notes
For best results, ensure all ingredients are at room temperature before mixing. A water bath can help achieve a smoother texture.
- Prep Time: 30 minutes
- Cook Time: 55 minutes
- Category: Dessert
- Method: Baking
- Cuisine: American
Nutrition
- Serving Size: 1 slice
- Calories: 300
- Sugar: 18g
- Sodium: 250mg
- Fat: 20g
- Saturated Fat: 10g
- Unsaturated Fat: 8g
- Trans Fat: 0g
- Carbohydrates: 30g
- Fiber: 1g
- Protein: 5g
- Cholesterol: 80mg
Ask the Community
🥗 Free Custom Keto Meal Plan?
Do you want to lose weight while still enjoying delicious Asian & Thai Fusion meals? Take this quick quiz to get your personalized Keto plan based on your favorite foods!
- ✅ No more guessing what to eat
- ✅ Delicious & easy-to-make recipes
- ✅ Tailored to your body type
Get My Custom Plan Now! →
*Over 100,000+ people have transformed their lives with this quiz.