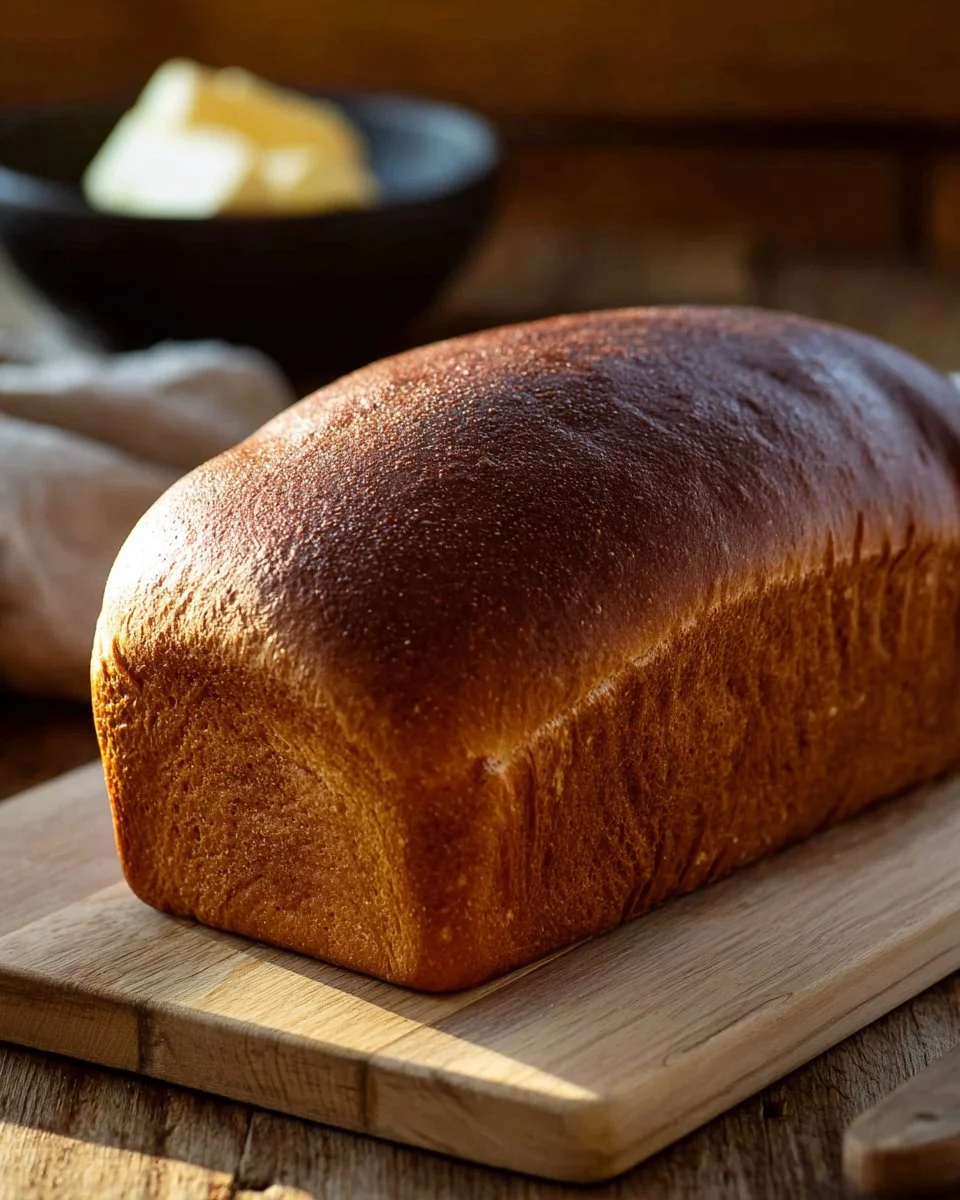
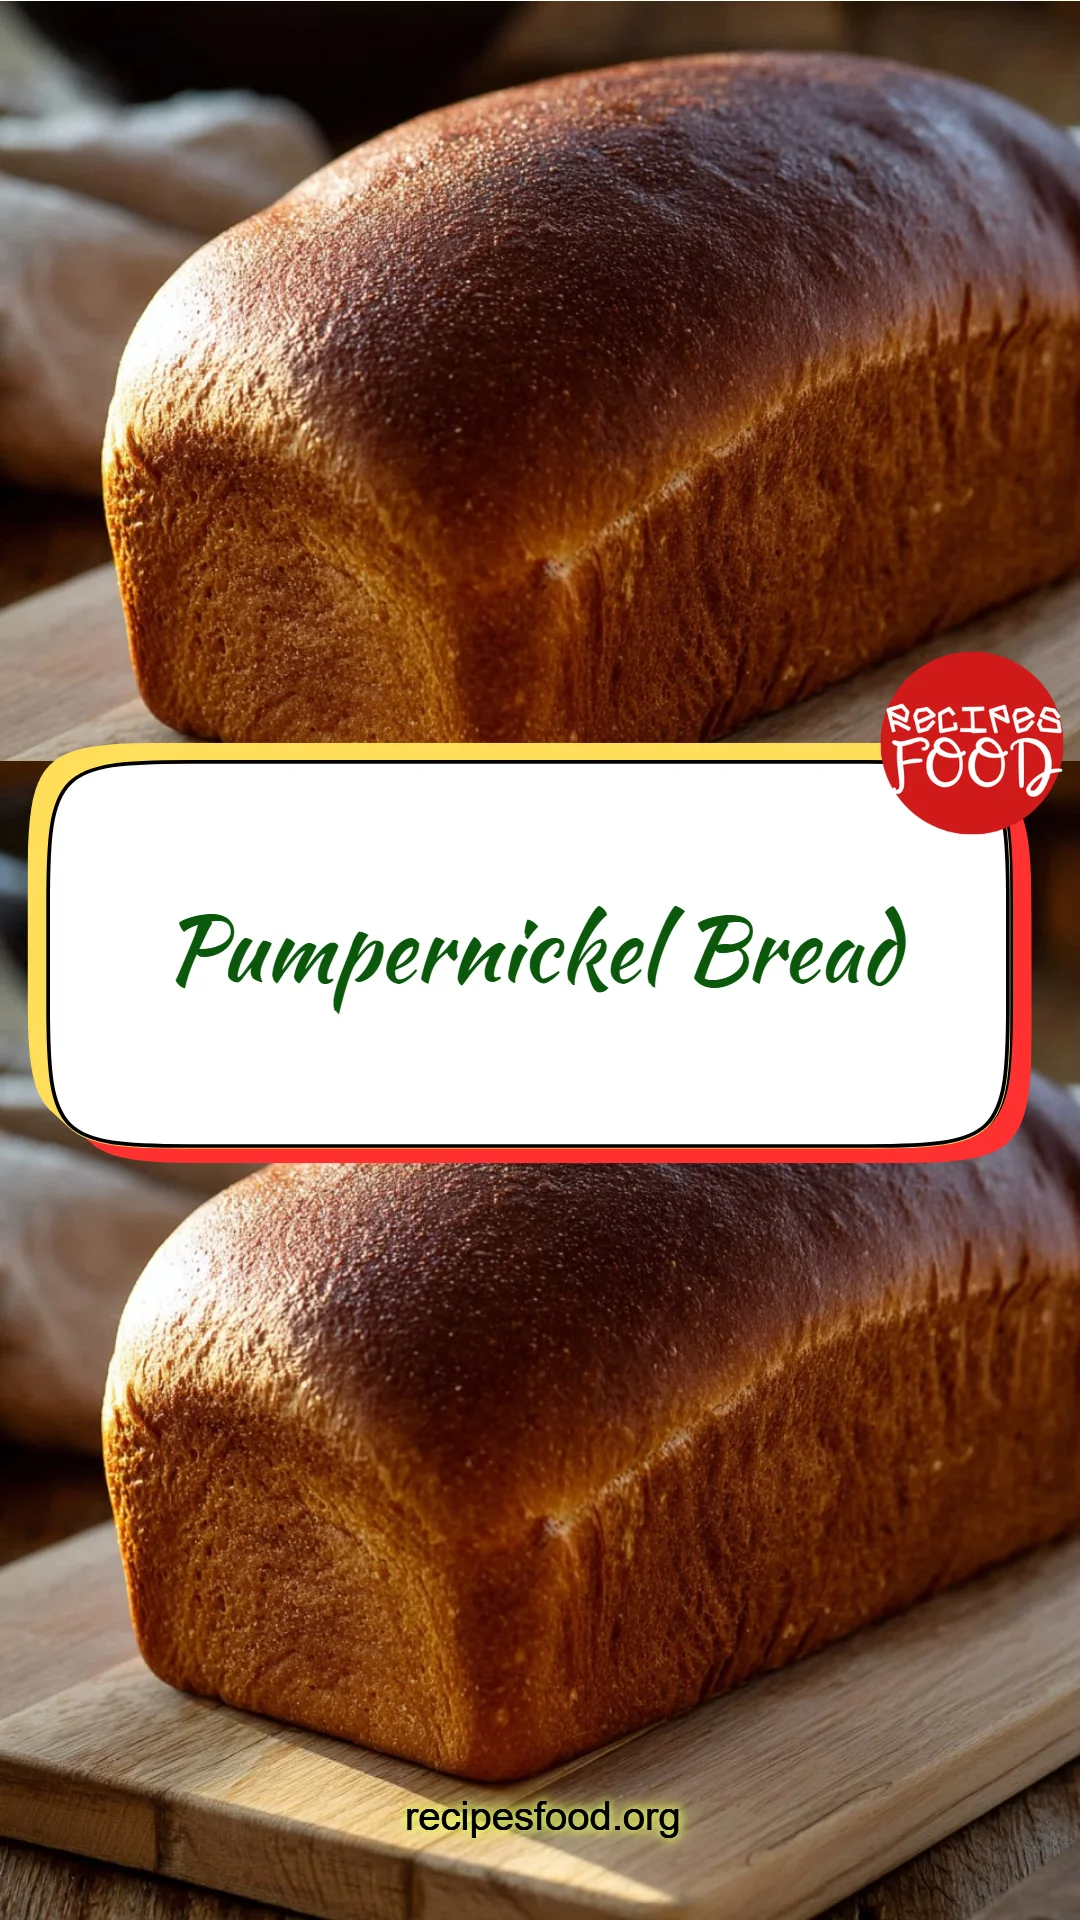
Discover Irresistible Pumpernickel Bread: A Hearty Delight You’ll Crave
Have you ever walked into a bakery and been greeted by the intoxicating aroma of freshly baked bread? For me, that moment transports me straight to my grandmother’s kitchen, where the comforting scent of pumpernickel bread filled the air. My family has always cherished this deep, dark bread, not just for its hearty taste but also for the warmth of the memories tied to it.
Pumpernickel bread stands out with its earthy flavor and dense, moist crumb. It’s a bread that tells stories of gatherings and celebrations—a slice often enjoyed with a rich spread or simply with butter on a rainy day. Trust me; this recipe is a cut above the rest because it delivers an authentic taste without the hefty price tag from gourmet bakeries. Plus, it’s well worth your time—every knead and rise brings you closer to something truly divine.
In this post, you’ll learn the secrets behind crafting your very own pumpernickel bread, ensuring it turns out perfect every single time. Get ready to create something magical that will fill your home with love and nostalgia!
What Are Pumpernickel Bread?
Pumpernickel bread has roots that weave back to Germany in the 17th century. It was traditionally made using coarsely ground rye flour and allowed to bake for an extended period at low temperatures, giving it a signature dark color and a rich, unique flavor. The subtle sweetness from the molasses and hints of cocoa add a layer of complexity, making pumpernickel extraordinarily delicious.
The texture of pumpernickel bread is dense yet moist, distinguished by its dark brown, almost chocolaty crust. This earthy bread isn’t just for snacking; it’s fabulous paired with cheeses, cured meats, or as the base for an impressive sandwich. Whether you’re celebrating big moments or simply enjoying a quiet evening at home, pumpernickel bread is versatile enough for all occasions.
So why should you whip up a loaf today? Because there’s nothing quite like the satisfaction of baking from scratch—and this bread is a stellar way to showcase your skills!
Why You’ll Love This Recipe
1. Cost-Effective Enjoyment
Homemade pumpernickel bread is not only fresher but also much more economical than artisanal versions found in stores. With just a handful of quality ingredients, you can produce dozens of delicious slices at a fraction of the cost.
2. Mouthwatering Customization
This recipe is a fantastic canvas! Whether you want to add some seeds, nuts, or even spices, the options are endless. Feel free to experiment, making each loaf uniquely yours.
3. Easier Than You Think!
While the whole process may seem time-consuming, the hands-on time is minimal. Most of the hours spent are just the dough resting, allowing you to sip tea or catch up on your favorite show.
4. Satisfy Your Cravings
The deep, rich flavor of homemade pumpernickel is unbeatable. Whether you enjoy your bread with a spread or a hearty topping, its complexity will elevate any meal.
5. Bake with Love
There’s something incredibly cathartic about kneading dough. Plus, the smell of baking bread wafting through your home creates an atmosphere of comfort and warmth that is hard to resist.
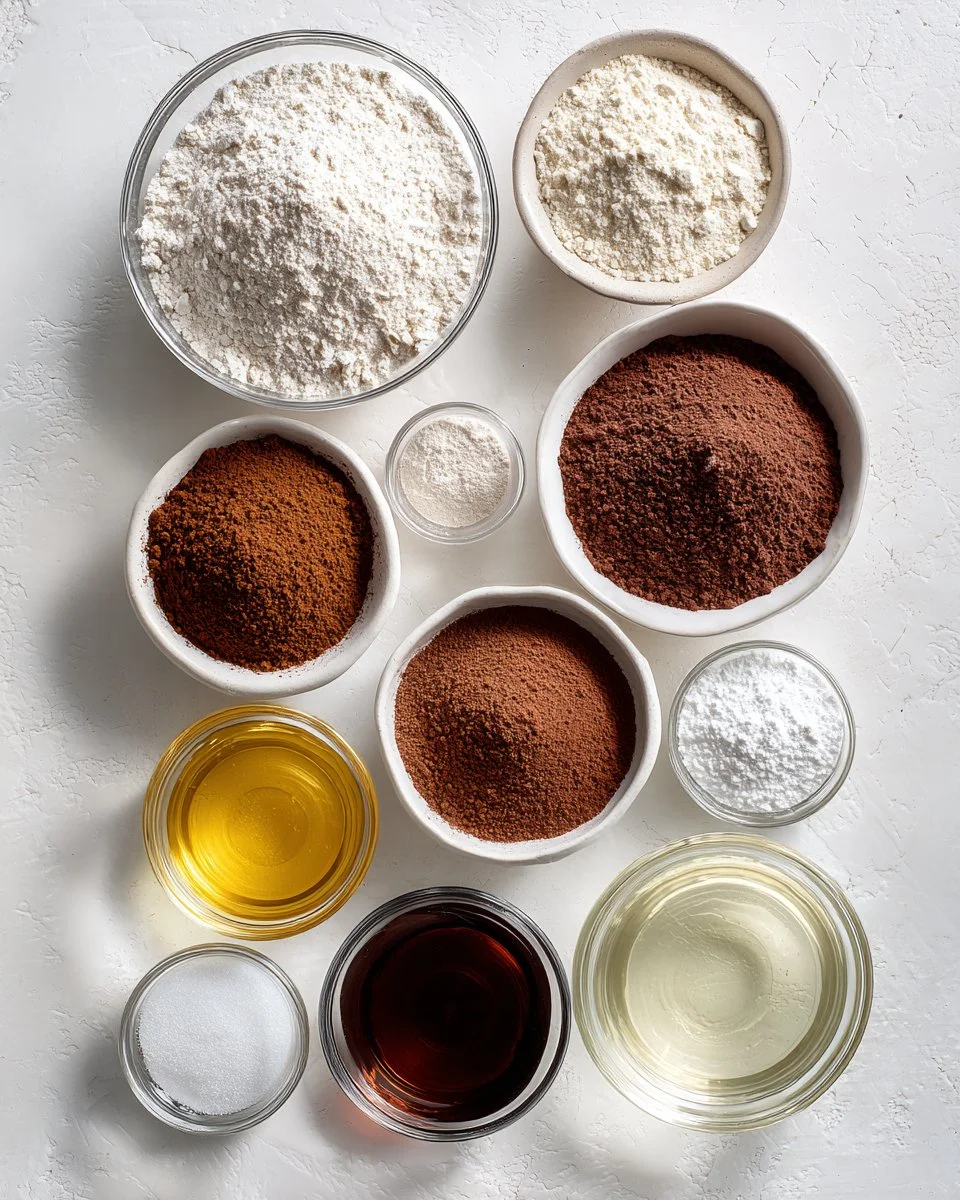
Ingredients
2 ½ cups all-purpose flour
- Important for the base; I recommend using King Arthur Flour for consistent results.
1 cup bread flour
- This helps to provide better texture and structure.
1 cup medium rye flour
- Adds authenticity; feel free to substitute with whole wheat if needed.
2 tablespoons unsweetened cocoa powder
- Choose high-quality, Dutch-processed cocoa for richness; I love Hershey’s or Ghirardelli.
5 teaspoons instant yeast
- No need to proof! Red Star is a reliable brand.
1 tablespoon granulated sugar
- Just a hint to enhance the natural flavors.
1 tablespoon kosher salt
- Essential for flavor; use Diamond Crystal for best results.
1 ½ cups warm water (105-115 degrees F)
- About the temperature of a warm bath, important for yeast activation.
½ cup molasses
- Opt for unsulfured molasses for rich flavor; Grandma’s is a favorite of mine.
2 tablespoons vegetable oil
- Can be substituted with melted butter for extra richness.
Prep notes: Ensure your ingredients are at room temperature for best results!
Step-by-Step Instructions
Prepare Your Pan
Spray a 9×5-inch loaf pan with nonstick cooking spray and set aside.Combine Dry Ingredients
In a large bowl, whisk together all-purpose flour, bread flour, rye flour, cocoa powder, instant yeast, sugar, and salt.Mix Wet Ingredients
In the bowl of a stand mixer fitted with a dough hook, mix warm water, molasses, and vegetable oil until combined.Form the Dough
Gradually add the dry ingredients to the wet mixture and mix on low speed until a dough forms (about 1-2 minutes).Knead it Out
Knead the dough for 5-8 minutes on low speed until smooth and elastic. If kneading by hand, it’ll take about 8-10 minutes. You want the dough to spring back lightly when poked.First Rise
Place your dough in an oiled bowl, covering it with a damp cloth. Let it rise in a warm place until doubled in size (about 60-90 minutes).Shape the Dough
Roll the dough out on a floured surface into a rectangle about 1 inch thick.Form a Log
Roll tightly from the short end to create a log, pinching the seams to seal.Second Rise
Place the seam-side down in the prepared loaf pan. Cover and let it rise until doubled (about 45 minutes).Preheat the Oven
Preheat to 375°F (190°C).Bake
Bake for 50-55 minutes or until the bread sounds hollow when tapped.Cooling
Let it cool completely on a wire rack before slicing. The aroma will be torturous, I promise!Storage
Store at room temperature for up to 3 days or freeze for up to 8 weeks.
Pro tip: If you decide to freeze, slice the loaf first so you can grab just what you need!
Expert Tips & Tricks
- Ingredient Temperature: Ensuring everything is at room temperature makes kneading easier.
- Flour Quality: Always opt for high-quality flour for the best results. It makes a world of difference in flavor and texture.
- Storing Bread: If you’ll be consuming your bread within a few days, store it in a bread box or wrapped in a kitchen towel. Avoid plastic as it traps moisture and can make the crust soggy.
- Make-Ahead: Knead the dough and let it rise the night before. Punch it down and shape it in the morning for fresh bread with minimal effort.
- Troubleshooting Yeast: If your dough doesn’t rise, your yeast might be dead—check its expiration date and store it in a cool, dry place.
- Experimentation: Don’t hesitate to add seeds or nuts for extra flavor and nutrition!
Serving Suggestions
Pumpernickel bread is a superstar in the kitchen! It pairs beautifully with cream cheese and smoked salmon for brunch or sliced thin with a hearty beef stew. Present it on a wooden board with a variety of cheeses and charcuterie for an elegant appetizer.
Celebrate occasions like holidays by serving it with an array of spreads or use it as the base for a delicious Reuben sandwich. The possibilities are endless, so slather, stack, and enjoy!
Variations & Substitutions
- Flavor Combinations: Consider adding caraway seeds or garlic powder for additional layers of flavor.
- Dietary Adaptations: For a gluten-free version, substitute gluten-free flour blends but be aware the texture may vary.
- Seasonal Swaps: During the holidays, mix in nuts or dried fruits to create sweet variations perfect for festive gatherings.
Nutrition & Storage Info
- Prep Time: 15 minutes
- Cook Time: 55 minutes
- Total Time: 2 hours (including rising)
- Yield: 1 loaf (approximately 12 slices)
- Estimated Calories: 120 calories per slice
- Storage: Store at room temperature for up to 3 days, in the fridge for up to 1 week, or freeze for up to 2 months.
FAQ Section
What can I use instead of rye flour?
You can substitute with whole wheat flour, but the flavor will be different.Why is my bread too dense?
Over-kneading or not allowing the bread to rise enough can contribute to density.Can I use other sweeteners instead of molasses?
Honey or maple syrup work well, but they will alter the flavor subtly.How do I know when the bread is done?
It should sound hollow when tapped on the bottom or register at least 190°F inside.Can I double the recipe?
Absolutely! Just ensure you have a bowl large enough for the dough’s rise.Does pumpernickel bread freeze well?
Yes, it freezes beautifully sliced. Just wrap each slice individually in plastic and then place in a freezer bag.What spreads pair well with pumpernickel?
Cream cheese, hummus, or butter are all delightful choices!Do I have to use cocoa powder?
If you prefer not to use cocoa, you can omit it, but the bread’s color and flavor will change.Can I make pumpernickel in a bread machine?
Yes, follow your machine’s instructions using the dough cycle, and bake in a traditional oven.What’s the best way to slice pumpernickel bread?
Use a serrated bread knife for the best results and to avoid squishing the loaf.
Conclusion
This pumpernickel bread recipe is not just a treat for the taste buds; it’s a journey through flavor and nostalgia. The warmth it brings to any table, coupled with the easy process of making it, makes this a must-try culinary adventure. I invite you to experience the magic of your own homemade loaf, and I can’t wait to hear how it turns out!
Don’t forget to leave your thoughts in the comments below, and be sure to check out my other bread recipes—there’s plenty more to explore on the blog! Happy baking!
Print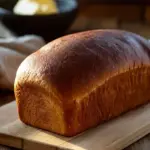
Irresistible Pumpernickel Bread
- Total Time: 120 minutes
- Yield: 1 loaf (approximately 12 slices) 1x
- Diet: Vegetarian
Description
A hearty and flavorful pumpernickel bread, perfect for sandwiches or served with spreads.
Ingredients
- 2 ½ cups all-purpose flour
- 1 cup bread flour
- 1 cup medium rye flour
- 2 tablespoons unsweetened cocoa powder
- 5 teaspoons instant yeast
- 1 tablespoon granulated sugar
- 1 tablespoon kosher salt
- 1 ½ cups warm water (105-115°F)
- ½ cup molasses
- 2 tablespoons vegetable oil
Instructions
- Prepare your pan by spraying a 9×5-inch loaf pan with nonstick cooking spray and set aside.
- Combine dry ingredients in a large bowl: all-purpose flour, bread flour, rye flour, cocoa powder, instant yeast, sugar, and salt.
- Mix wet ingredients in the bowl of a stand mixer fitted with a dough hook: warm water, molasses, and vegetable oil until combined.
- Form the dough by gradually adding the dry ingredients to the wet mixture and mix on low speed until a dough forms (about 1-2 minutes).
- Knead the dough for 5-8 minutes on low speed until smooth and elastic.
- Place your dough in an oiled bowl, covering it with a damp cloth. Let it rise in a warm place until doubled in size (about 60-90 minutes).
- Roll the dough out on a floured surface into a rectangle about 1 inch thick.
- Roll tightly from the short end to create a log, pinching the seams to seal.
- Place the seam-side down in the prepared loaf pan. Cover and let it rise until doubled (about 45 minutes).
- Preheat the oven to 375°F (190°C).
- Bake for 50-55 minutes or until the bread sounds hollow when tapped.
- Cool completely on a wire rack before slicing.
Notes
Store at room temperature for up to 3 days or freeze for up to 2 months. Slice before freezing for convenience.
- Prep Time: 15 minutes
- Cook Time: 55 minutes
- Category: Bread
- Method: Baking
- Cuisine: German
Nutrition
- Serving Size: 1 slice
- Calories: 120
- Sugar: 8g
- Sodium: 400mg
- Fat: 3g
- Saturated Fat: 0g
- Unsaturated Fat: 2g
- Trans Fat: 0g
- Carbohydrates: 22g
- Fiber: 3g
- Protein: 4g
- Cholesterol: 0mg
🥗 Free Custom Keto Meal Plan?
Do you want to lose weight while still enjoying delicious Asian & Thai Fusion meals? Take this quick quiz to get your personalized Keto plan based on your favorite foods!
- ✅ No more guessing what to eat
- ✅ Delicious & easy-to-make recipes
- ✅ Tailored to your body type
Get My Custom Plan Now! →
*Over 100,000+ people have transformed their lives with this quiz.