Irresistible Dairy-Free Protein Ice Cream Bars: A Sweet Way to Boost Your Day
As summer rolled in, my kids were clamoring for ice cream yet again—our favorite treat to cool off from the scorching sun. But this time, I wanted something a little different: something deliciously indulgent but healthier. That’s when I found inspiration in the vibrant world of Protein Ice Cream Bars (Dairy Free). Little did I know, these bars would not only satisfy my kids’ sweet tooth but would also allow me to sneak in some protein without anyone batting an eye.
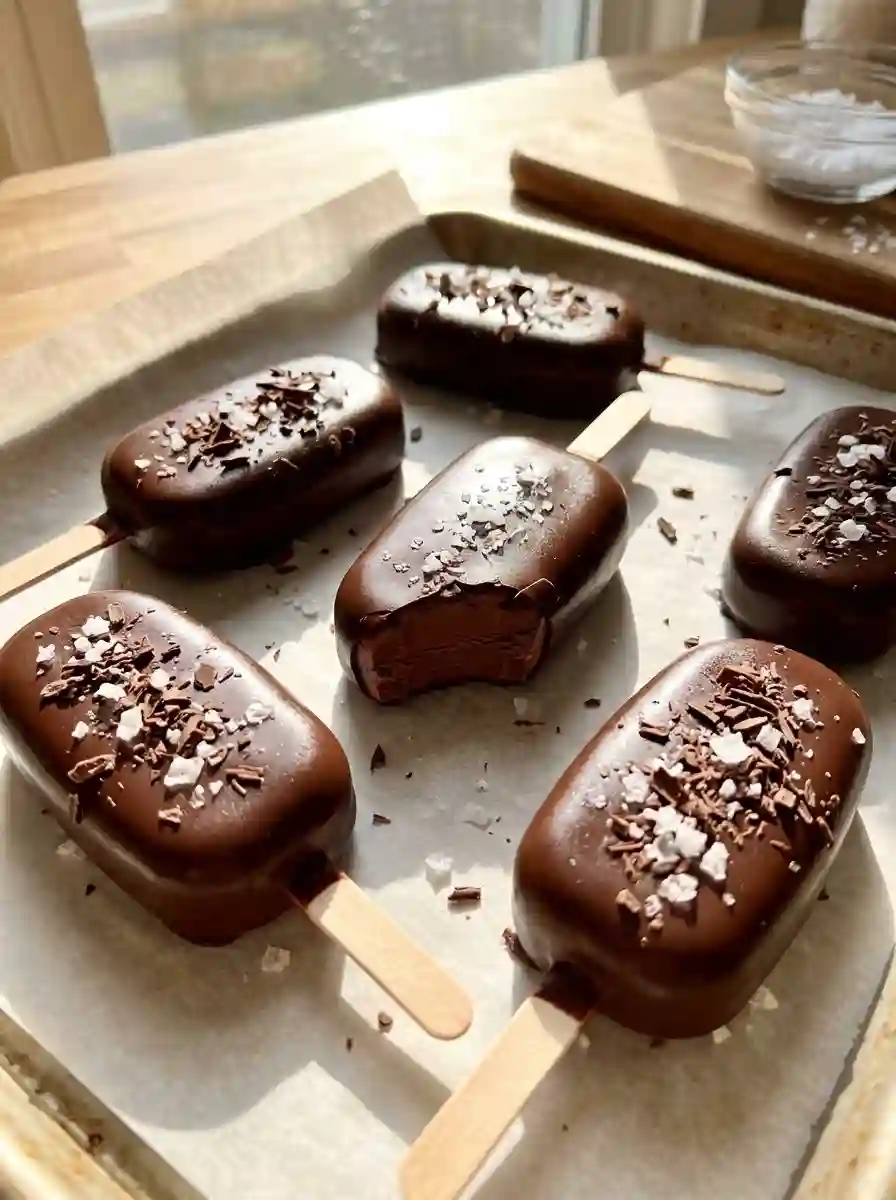
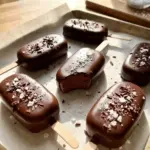
These bars are a delightful twist on our traditional ice cream experience. With their rich, creamy texture and delightful chocolatey coating, they bring the nostalgia of ice cream truck visits right into our kitchen. The combination of coconut cream and sunbutter brings a unique creaminess that sets them apart from store-bought options. Plus, they’re simple to whip up, making them a perfect weekend project to enjoy together as a family or stash in the freezer for a quick snack.
In this recipe, you’ll discover the magic of crafting your own Protein Ice Cream Bars that not only nourish but also create lasting memories with loved ones. Let’s dive in and get you feeling like a kitchen superstar!
What Are Protein Ice Cream Bars (Dairy Free)?
Protein Ice Cream Bars (Dairy Free) are a delightful creation that merges the comforting taste of ice cream bars with the nutritional punch of a protein boost. Originating from the need for clean, healthy snacks, these bars have become increasingly popular among health-conscious foodies and families alike.
They boast a luxurious texture, courtesy of coconut cream, which lends a velvety mouthfeel. The sunbutter not only adds creaminess but also brings a nutty flavor that complements the rich dark chocolate coating beautifully. Unique to this recipe is the addition of hemp protein powder, allowing you to indulge in a sweet treat while still packing in protein.
These bars are perfect for any occasion—whether you’re hosting a summer barbecue, looking for a post-workout snack, or simply craving something sweet yet wholesome. When you make them at home, you’re in control of every ingredient, making them a healthier alternative to typical ice cream bars filled with additives and preservatives.
Why You’ll Love This Recipe
Health-Conscious Indulgence: Unlike many commercial ice cream bars that are loaded with sugar and unhealthy fats, these Protein Ice Cream Bars (Dairy Free) keep things clean. With coconut cream, sunbutter, and hemp protein, they serve up nourishment without sacrificing taste.
Customization Galore: Feel like changing things up? You can easily switch out sunbutter for your favorite nut or seed butter, or try different flavors of protein powder to keep it exciting. Want a chocolate-peanut butter combo? Go for it!
Cost-Effective: Making these bars at home is not only fun but also economical. A batch of these bars typically costs less than pre-packaged versions while yielding more servings. Plus, you can control the portion sizes!
Simple to Make: This recipe is easy enough for kids to help with, giving you a bonding experience that feels special. From melting chocolate to mixing batters, there’s plenty of room for little hands to jump in.
Deliciously Satisfying: The creamy texture paired with the crunchy chocolate shell creates a harmonious balance that is utterly gratifying. You won’t even miss traditional ice cream!
By dedicating a small amount of time in the kitchen, you’ll have a freezer stocked with delightful treats ready for any occasion—talk about a win-win!
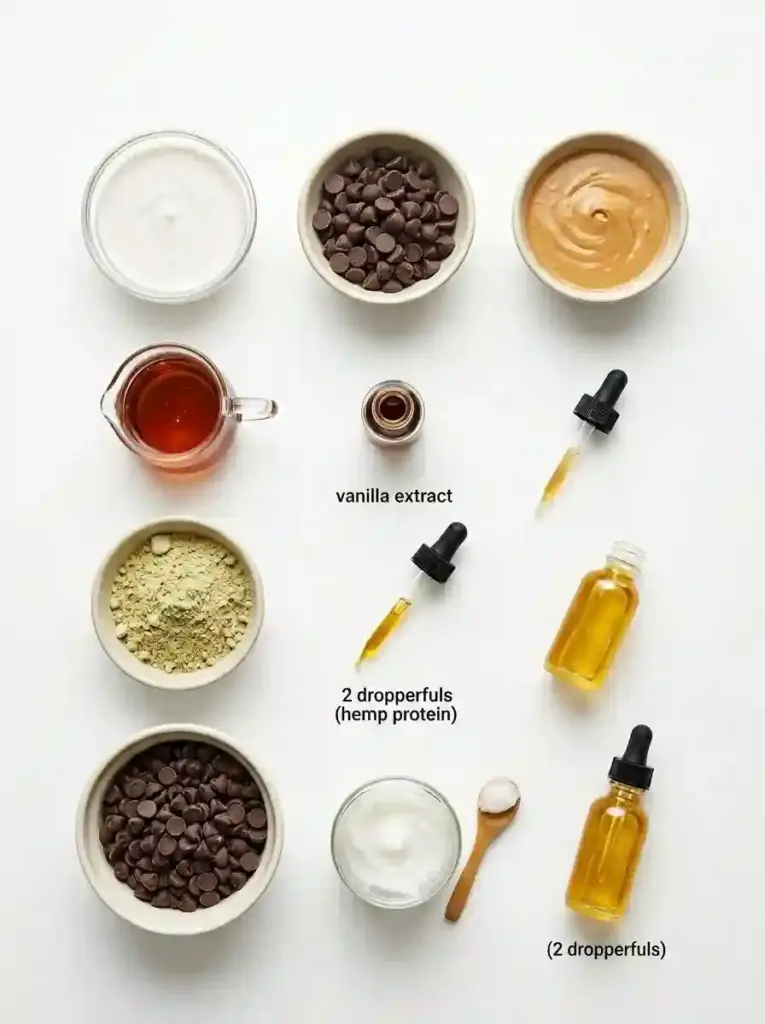
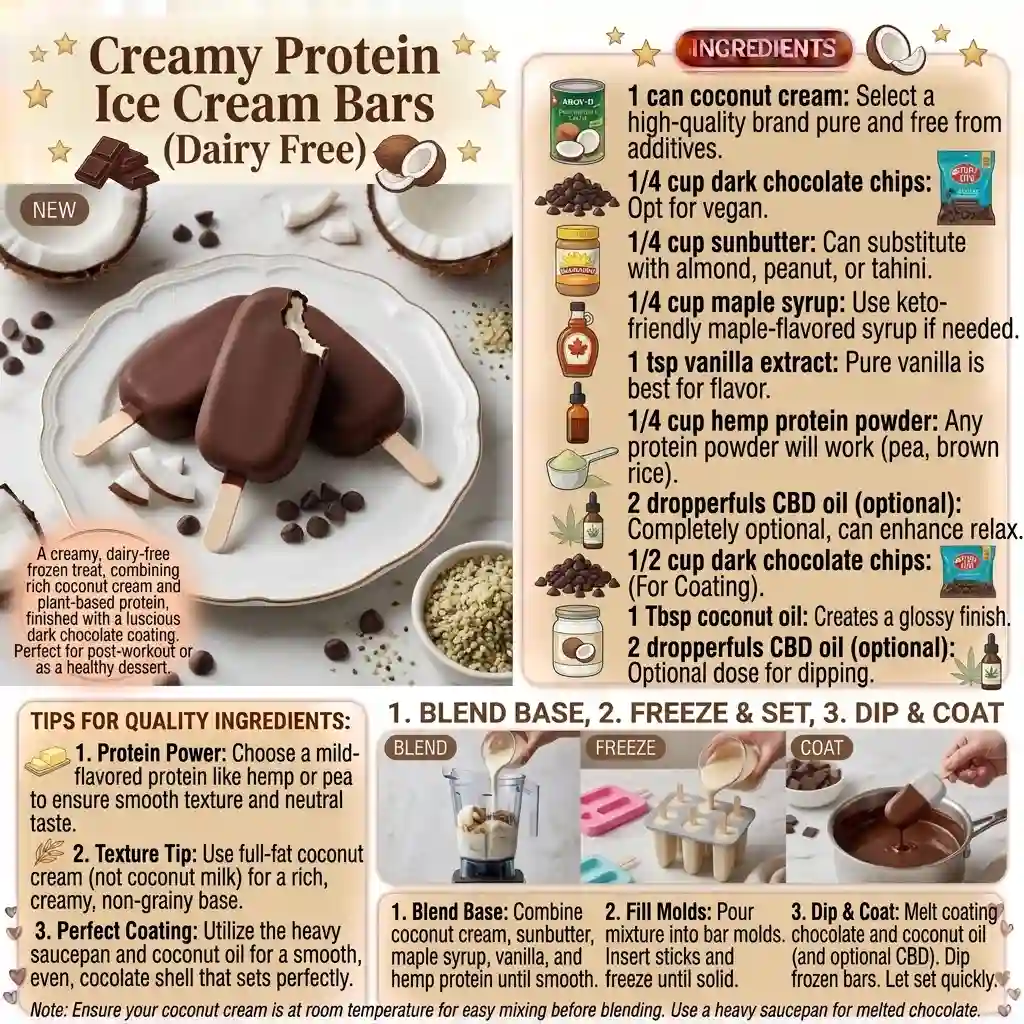
Ingredients
- 1 cup coconut cream: look for a high-quality brand (like Aroy-D) that is pure and free from additives.
- 1/4 cup dark chocolate chips: opt for vegan chocolate chips if necessary, such as Enjoy Life brand.
- 1/4 cup sunbutter: feel free to substitute with almond butter, peanut butter, or tahini.
- 1/4 cup maple syrup: for a keto-friendly version, use maple-flavored syrup.
- 1 tsp vanilla extract: use pure vanilla extract for a stronger flavor.
- 1/4 cup hemp protein powder: any protein powder will work, including pea or brown rice.
- 2 dropperfuls CBD oil (optional): note that this can enhance relaxation but is completely optional.
- 1/2 cup dark chocolate chips: again, look for dairy-free versions.
- 1 Tbsp coconut oil: this will help create a glossy finish for the chocolate coating.
- 2 dropperfuls CBD oil (optional): a second dose for dipping, if desired.
Prep Notes: Make sure your coconut cream is at room temperature for easy mixing, and use a heavy saucepan for the melted chocolate to prevent it from getting too hot.
Step-by-Step Instructions
Melt the Chocolate: In a small saucepan over low heat, melt the coconut cream and 1/4 cup of dark chocolate chips. Stir occasionally until completely melted. This should take about 3-5 minutes.
Mix the Filling: Once melted, remove from the heat and mix in sunbutter, maple syrup, vanilla, hemp protein powder, and CBD oil (if using). Whisk until the mixture is smooth and creamy—this should take about a minute.
Pour into Molds: Carefully pour the filling into silicone popsicle molds, filling them about 3/4 full. Insert popsicle sticks and freeze for at least 2 hours, or until firm.
Prepare Chocolate Coating: While the filling is freezing, melt the remaining 1/2 cup dark chocolate chips with 1 Tbsp coconut oil in the same saucepan. If you’re using CBD oil, mix it in now for added benefits.
Dip the Bars: Once the filling is fully frozen, remove the ice cream fillings from the molds. Carefully dip each bar into the melted chocolate, letting any excess drip off.
Lay to Cool: Place the dipped bars on a baking sheet lined with parchment paper.
Add Toppings (Optional): While the chocolate shell is still warm, feel free to sprinkle on toppings like flaked salt, sprinkles, bee pollen, or chia seeds.
Freeze: Return the bars to the freezer for about 30 minutes, or until the chocolate shell is solid.
Enjoy: Serve immediately or store them in an airtight bag in the freezer for up to two months.
Storage Tips: Place a piece of parchment paper between bars if stacking them in a container to prevent sticking.
Expert Tips & Troubleshooting
- Avoid Overheating: When melting chocolate, embrace low heat. If chocolate seizes, add a tiny bit of coconut oil and reheat gently.
- Storage Tips: Store your bars in an airtight container in the freezer and consume them within two months to maintain their quality.
- Make-Ahead: These bars are great for meal prep—make a big batch and enjoy them throughout the week.
- Common Issues: If the filling seems too runny, give it a little more time in the freezer before dipping. If the chocolate doesn’t stick, try refrigerating the bars for a few minutes to ensure they’re very cold before dipping.
Serving Suggestions
These Protein Ice Cream Bars (Dairy Free) are perfect on their own, but if you’re looking to elevate the experience, pair them with fresh fruit like strawberries or blueberries for a refreshing contrast. Serve them as a fun dessert at summer gatherings, grill parties, or even as a protein-packed post-workout treat. For a delightful presentation, stack a couple of bars on a rustic wooden platter with colorful sprigs of mint or flowers for that summer vibe!
Variations & Substitutions
- Flavorful Add-Ins: Try mixing in pureed fruits like bananas or strawberries into the base before freezing for a fruity twist.
- Seasonal Changes: For a festive spin, try adding pumpkin spice during the fall or make a cherry coconut version during the summer.
- Dietary Mixes: This recipe is easily adaptable for vegan, paleo, and keto diets by substituting ingredients as needed—like using sugar-free chocolate or agave syrup instead of maple syrup.
Nutrition & Storage Info
- Prep Time: 15 minutes
- Cook Time: 10 minutes
- Total Time: 2 hours and 25 minutes (including freezing)
- Yield: About 8 bars
- Estimated Calories: Approximately 180 calories per bar
- Storage: Store the bars in an airtight container in the freezer. They will last for up to two months.
FAQ Section
Can I use a different protein powder?
Absolutely! You can substitute hemp protein with pea protein, whey, or any other type you prefer.Is it possible to make these nut-free?
Yes! Simply use sunflower seed butter instead of other nut butters, and confirm that the chocolate chips are nut-free.What if I don’t have popsicle molds?
You can use paper cups—just insert popsicle sticks once the mixture has set slightly in the freezer.Can I make these without CBD oil?
Definitely! The CBD oil is optional and can be omitted without affecting the base recipe.How do I prevent the chocolate from cracking?
Dip the bars when they are very cold. If possible, chill them for a few minutes after dipping to solidify the chocolate quickly.Can I sweeten these more?
If you like them sweeter, feel free to increase the maple syrup to your desired level of sweetness.What’s the best way to store leftovers?
Place them in an airtight freezer bag or container, separating layers with parchment paper.Can these melt on a hot day?
Yes! These bars are best enjoyed soon after being taken out of the freezer, especially on hot days.Are these suitable for children?
Yes! Kids love them, just be sure they aren’t sensitive to any ingredients used.Can I add toppings?
Absolutely! Get creative with nuts, seeds, or drizzles of nut butter for extra flair.
Conclusion
These Protein Ice Cream Bars (Dairy Free) shine not just because of their delicious flavor, but because they allow you to indulge without guilt. Each bite is like a hug from the inside, filled with nutrients and love. I can’t wait for you to try making these at home and join the ranks of happy snack lovers.
After you whip up a batch, please let me know what you think! I love hearing your feedback and any creative twists you come up with. For more delicious healthy treats, check out my blog for recipes that will keep you and your loved ones feeling good and satisfied.No-Churn Mulberry Ice Cream,Cookie Dough Ice Cream Cake.

Irresistible Dairy-Free Protein Ice Cream Bars
- Total Time: 145 minutes
- Yield: 8 servings 1x
- Diet: Vegan
Description
Delightful dairy-free protein ice cream bars that combine rich coconut cream and sunbutter for a healthy, indulgent treat.
Ingredients
- 1 cup coconut cream
- 1/4 cup dark chocolate chips
- 1/4 cup sunbutter
- 1/4 cup maple syrup
- 1 tsp vanilla extract
- 1/4 cup hemp protein powder
- 2 dropperfuls CBD oil (optional)
- 1/2 cup dark chocolate chips
- 1 Tbsp coconut oil
- 2 dropperfuls CBD oil (optional)
Instructions
- Melt the chocolate: In a small saucepan over low heat, melt the coconut cream and 1/4 cup of dark chocolate chips. Stir occasionally until completely melted, about 3-5 minutes.
- Mix the filling: Remove from heat and mix in sunbutter, maple syrup, vanilla, hemp protein powder, and CBD oil (if using). Whisk until smooth, about 1 minute.
- Pour into molds: Pour the filling into silicone popsicle molds, filling them about 3/4 full. Insert popsicle sticks and freeze for at least 2 hours, or until firm.
- Prepare chocolate coating: While the filling is freezing, melt the remaining 1/2 cup dark chocolate chips with 1 Tbsp coconut oil in the same saucepan.
- Dip the bars: Once frozen, remove the ice cream bars from the molds and dip each bar into the melted chocolate, letting excess drip off.
- Lay to cool: Place the dipped bars on a baking sheet lined with parchment paper.
- Add toppings (optional): While warm, sprinkle on toppings like flaked salt, sprinkles, or chia seeds.
- Freeze: Return the bars to the freezer for about 30 minutes, or until the chocolate shell is solid.
- Enjoy: Serve immediately or store in an airtight bag in the freezer for up to two months.
Notes
Use high-quality coconut cream and maintain low heat while melting chocolate to avoid seizing.
- Prep Time: 15 minutes
- Cook Time: 10 minutes
- Category: Dessert
- Method: Freezing
- Cuisine: American
Nutrition
- Serving Size: 1 bar
- Calories: 180
- Sugar: 8g
- Sodium: 50mg
- Fat: 11g
- Saturated Fat: 4g
- Unsaturated Fat: 7g
- Trans Fat: 0g
- Carbohydrates: 17g
- Fiber: 3g
- Protein: 5g
- Cholesterol: 0mg
🥗 Free Custom Keto Meal Plan?
Do you want to lose weight while still enjoying delicious Asian & Thai Fusion meals? Take this quick quiz to get your personalized Keto plan based on your favorite foods!
- ✅ No more guessing what to eat
- ✅ Delicious & easy-to-make recipes
- ✅ Tailored to your body type
Get My Custom Plan Now! →
*Over 100,000+ people have transformed their lives with this quiz.