Table of Contents
There’s something magical about dessert—especially when it evokes cherished memories. I remember the first time I baked a batch of brownies with my mom; the kitchen was filled with the intoxicating aroma of chocolate that wafted through our home. Years later, I took that same recipe and combined it with my love for cheesecake to create Loaded Brownie Cheesecake Cups. Trust me when I say these little delights are a game-changer for any occasion!
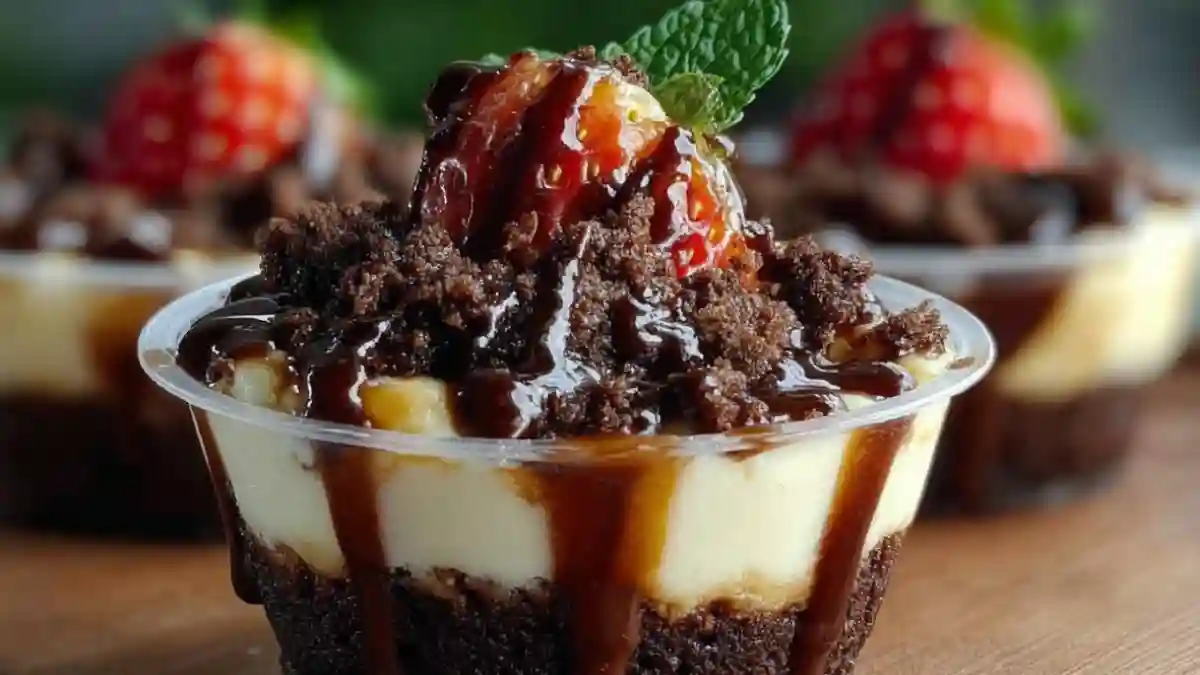
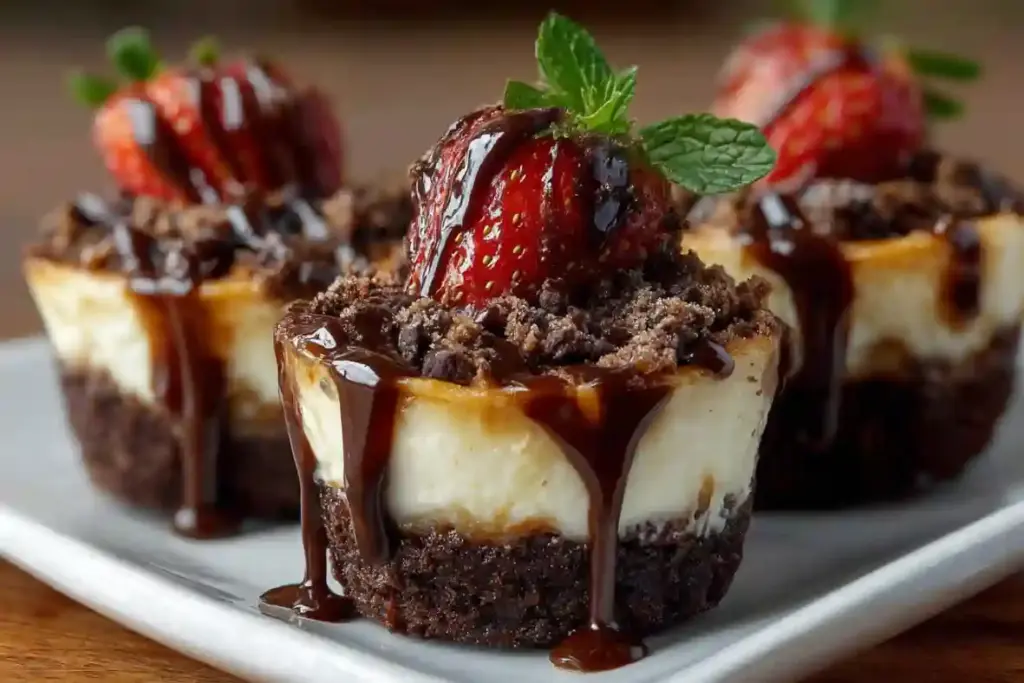
These cups are not just your average dessert; they boast a rich and fudgy brownie base topped with a smooth and creamy cheesecake mixture, all generously drizzled with luscious chocolate ganache and gooey caramel. Unlike traditional cheesecake or standalone brownies, these layered treats capture the best of both worlds in every single bite. The stories I’ve shared over these delicious cups have created bonds with family and friends, turning simple recipes into cherished heirlooms. You’re in for a treat as I guide you step-by-step through this indulgent recipe, sharing all my tips and tricks along the way. Get ready to impress your loved ones and satisfy their sweet cravings!
What Are Loaded Brownie Cheesecake Cups?
Loaded Brownie Cheesecake Cups are a delightful fusion of two classic American desserts—the rich, fudgy texture of brownies and the creamy, tangy luxury of cheesecake—all served in a cute, portable single-serving cup. Originally inspired by the need for elegant, portion-controlled desserts at gatherings, these cups have taken on a life of their own in my kitchen. Each bite delivers a perfect symphony of textures and flavours: the chewy brownie crumbles form a sturdy, chocolatey base, melting beautifully into the light and fluffy cheesecake layer, all topped off by silky ganache, sweet caramel, and an extra sprinkle of brownie goodness.
These cups are ideal for any celebratory moment—whether it’s a birthday party, a festive holiday gathering, a cosy night in with friends, or simply a craving for something truly special. They are not just visually appealing with their distinct layers, but also provide an incredibly satisfying taste experience, bursting with decadent chocolate and creamy flavours that will have your guests begging for the recipe.
Why You’ll Love This Recipe
You might be wondering, “Why should I choose this recipe for my next dessert?” Let me share a few compelling reasons:
- Ultimate Indulgence: The combination of fudgy brownies and creamy cheesecake in a single, perfectly portioned serving is pure bliss! Unlike many store-bought options that can be overly sweet or lack texture, these homemade cups boast incredible depth of flavour and a freshness that’s simply hard to beat. Each bite is a luxurious experience.
- Budget-Friendly: Making these Loaded Brownie Cheesecake Cups at home is not only a fun and rewarding baking project but also surprisingly cost-effective. You can enjoy gourmet-level desserts without breaking the bank. Why pay $5 or more at a bakery for a single serving when you can create a whole batch for a fraction of the cost?
- Customisation Galore: This recipe is an open canvas for your creativity! Want to make them gluten-free? Simply substitute your favourite gluten-free brownie mix or recipe. Prefer a fruity twist? Add layers of berry compote or fresh berries in between. These cups are incredibly adaptable, allowing you to customise them based on your preferences or dietary needs.
- Easy and Fun: Don’t let the layered appearance intimidate you! The recipe is incredibly straightforward and perfect for bakers of all levels, from beginners to seasoned pros. If you’ve ever made brownies or whipped cream, you can handle this recipe with confidence. The process is enjoyable, and the results are truly rewarding.
- Make Ahead Perfection: These cups can be made well in advance, which is a lifesaver when you want to impress at a dinner party, family gathering, or holiday celebration. Just make sure to let them chill in the refrigerator for at least an hour before serving, allowing the flavours to meld perfectly and the layers to set beautifully. The longer they chill, the better they taste!
You won’t regret giving these Loaded Brownie Cheesecake Cups a try. I’m certain they’ll quickly find their way into your list of go-to decadent desserts!
Ingredients Section
Here’s what you’ll need to create your magnificent Loaded Brownie Cheesecake Cups. Using quality ingredients truly elevates the final masterpiece.
- 2 cups Fudgy brownies, crumbled: This is your delicious base! You can use your favourite homemade fudgy brownie recipe, or for convenience, a high-quality store-bought fudgy brownie mix prepared according to package directions. If making from scratch, I recommend using a quality chocolate (like Ghirardelli or Callebaut) for an extra-rich, fudgy texture.
- 1.5 cups Cream cheese, softened: Essential for the creamy, tangy cheesecake layer. Please use full-fat, brick-style cream cheese (like Philadelphia Cream Cheese) for the best flavour, richness, and consistency. Avoid whipped or low-fat varieties, as they can result in a thinner, less stable filling.
- 0.5 cup Powdered sugar (confectioners’ sugar): Provides just the right amount of sweetness to the cheesecake filling. Sifting it will help prevent any lumps and ensure a perfectly smooth consistency.
- 1 teaspoon Vanilla extract: For an authentic, warm flavour in the cheesecake filling. Always opt for pure vanilla extract over imitation for the best taste.
- 1 cup Heavy whipping cream, very cold: This is whipped to stiff peaks to create a light and airy cheesecake layer. Ensure your cream is very cold for the best volume and stability when whipping.
- 1 cup Chocolate ganache: A luscious topping that adds intense chocolate flavour and a luxurious texture. You can easily make ganache by melting good-quality chocolate chips or chopped chocolate with warm heavy cream (ratio typically 1:1 chocolate to cream). Alternatively, a store-bought chocolate fudge topping can work in a pinch.
- 0.5 cup Caramel sauce: Adds a gooey, sweet, and buttery contrast. Store-bought caramel sauce is perfectly fine for convenience, but homemade caramel is unbeatable if you have the time and desire for extra decadence!
- 1 cup Extra brownie crumbs: Reserved for the final topping, these add an irresistible crunch and visual appeal to each cup.
Prep Notes: To ensure a perfectly smooth, lump-free cream cheese filling and well-whipped cream, it is crucial that your cream cheese and heavy cream are at room temperature (for the cream cheese) and very cold (for the heavy cream). This attention to temperature will significantly ease the mixing process and result in the best textures.
Step-by-Step Instructions
Now that you’re armed with all the ingredients, let’s bring these Decadent Loaded Brownie Cheesecake Cups to life!
- Prepare the Cream Cheese Mixture: In a large mixing bowl (or the bowl of a stand mixer fitted with the paddle attachment), beat the softened cream cheese with the powdered sugar and vanilla extract on medium speed. Mix until the mixture is completely smooth, light, and fluffy, scraping down the sides of your bowl halfway through to ensure an even mix. This should take about 2-3 minutes.
- Whip the Heavy Cream: In a separate, chilled bowl (using a metal bowl that’s been in the freezer for 10-15 minutes can help!), whip the very cold heavy cream using an electric mixer (or stand mixer with a whisk attachment) on high speed. Whip until it forms stiff peaks. Be careful not to overwhip; you want silky, not grainy, whipped cream.
- Visual Cue: The cream should hold its shape firmly when you lift the whisk out of the bowl.
- Combine the Cheesecake Filling: Gently fold the whipped cream into the cream cheese mixture using a spatula until just combined. The goal is to keep that light fluffiness from the whipped cream incorporated into the smooth cream cheese base.
- Common Mistake to Avoid: Over-mixing at this stage can deflate your whipped cream, leading to a denser, less airy cheesecake layer. Mix just until no streaks of white cream remain.
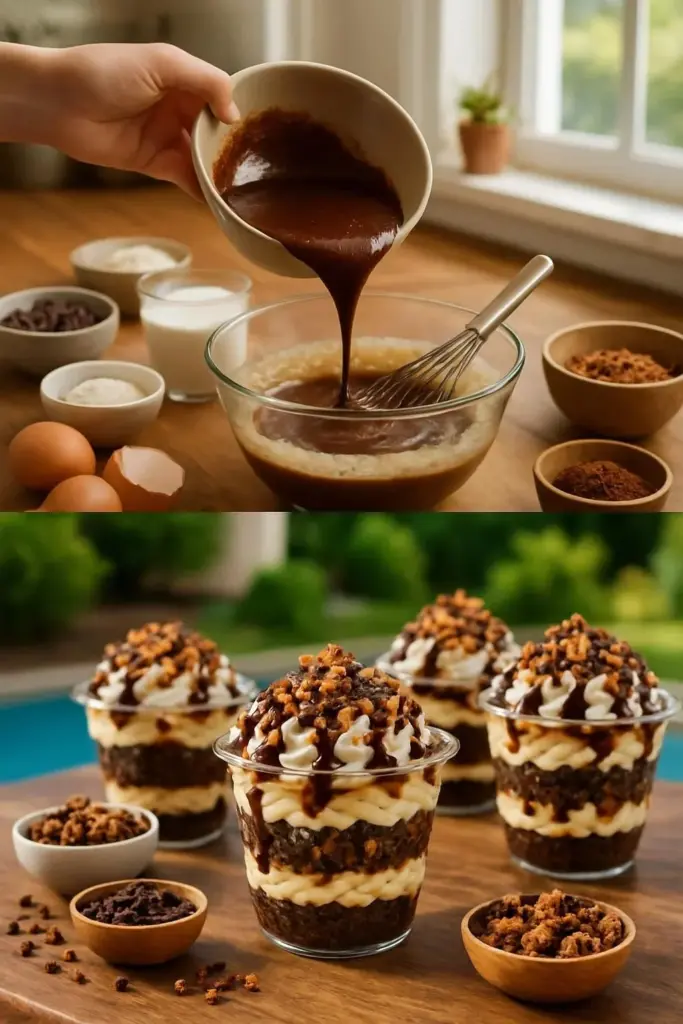
- Layer Your Cups: Grab your serving cups (clear cups work best for showing off the layers!). Start by spooning about 1-2 tablespoons of crumbled brownies into the bottom of each cup, gently packing them down to form a sturdy base. Next, add a layer of the prepared cheesecake filling on top, using about 2-3 tablespoons per cup. You can use a spoon or a piping bag for neater layers.
- Repeat the Layers (and Load it Up!): Drizzle a generous amount of chocolate ganache and caramel sauce on top of the cheesecake filling layer. Repeat the layering process: add another layer of crumbled brownies, followed by more cheesecake filling. Continue layering until the cups are nearly full, aiming to finish with a final layer of the creamy cheesecake filling for a smooth top.
- Finish Up: Top each cup with the extra brownie crumbs for texture. Then, add a final, decadent drizzle of both chocolate ganache and caramel sauces over the top of each cup.
- Chill for Perfection: Place the assembled cups in the refrigerator for at least 1 hour before serving. This crucial chilling time allows the flavours to meld beautifully and the cheesecake layers to set properly, resulting in the perfect texture.
- Chef’s Tip: These cups can be stored in the fridge for up to 3 days, making them absolutely perfect for making ahead for parties or special occasions!
Expert Tips & Tricks
Achieve dessert perfection every time with these valuable insights:
- Quality Ingredients Matter: While you can save time with store-bought brownies, using high-quality chocolate for your ganache and full-fat cream cheese for your filling truly elevates the end result. Brands like Ghirardelli for chocolate and Philadelphia cream cheese can make a significant difference in the flavour and texture of your Loaded Brownie Cheesecake Cups.
- Proper Storage Recommendations: Keep the assembled cups covered tightly (with plastic wrap or an airtight lid) in the refrigerator to maintain their freshness, creamy texture, and prevent them from absorbing fridge odours. They last wonderfully for up to 3 days when stored this way.
- Make-Ahead Instructions: These cups are a dream for entertaining because they are perfect for making ahead! Prepare the cups the day before your event. The flavours deepen and meld beautifully as they chill overnight, meaning they’ll taste even better on serving day!
- Troubleshooting Common Problems: If your cheesecake layers seem too thin or start to crack, the most common culprit is overmixing the cream cheese and whipped cream mixture. Remember, gentle folding is key to maintaining the airy, light texture of the whipped cream, which contributes to the cheesecake’s smoothness and stability.
- Freezing for Longer Storage: If you want to store them for longer, these cups freeze well! Freeze them before adding the final layer of drizzles (ganache and caramel) and extra brownie crumbs. Once frozen solid, wrap them individually in plastic wrap and store in an airtight freezer-safe container for up to 1 month. Defrost them in the fridge overnight before serving, and then add fresh drizzles of ganache and caramel for the best presentation and taste.
Serving Suggestions
These Loaded Brownie Cheesecake Cups are a divine dessert on their own, but you can enhance the experience with these pairing ideas:
- For an extra level of decadence, consider serving them alongside a small scoop of premium vanilla bean ice cream or a dollop of freshly whipped cream.
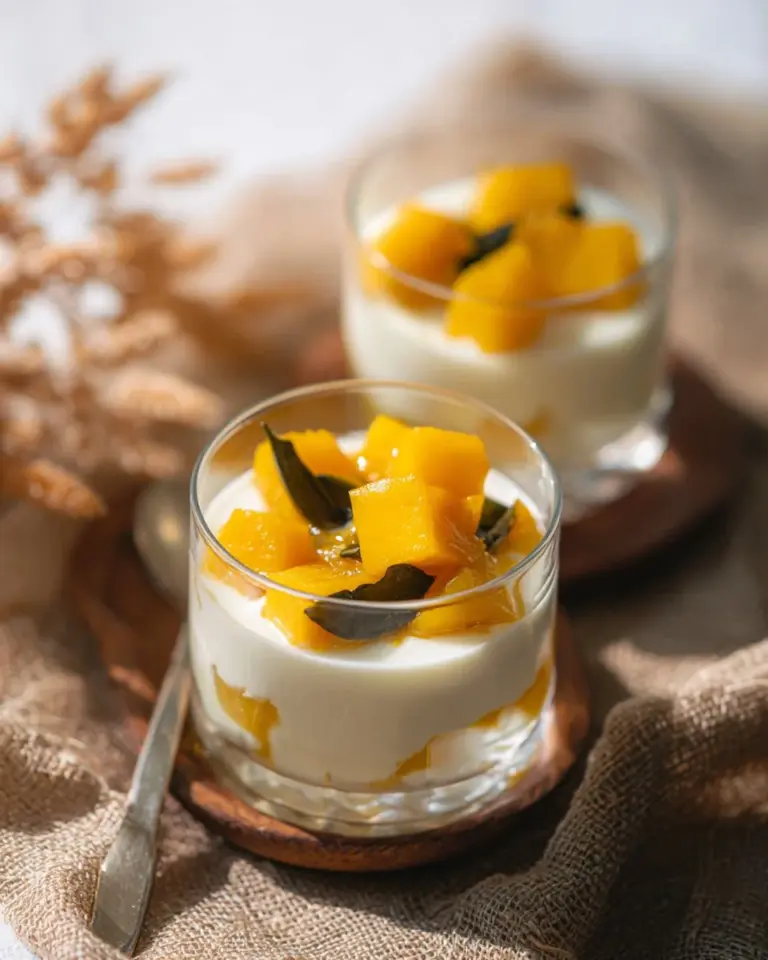
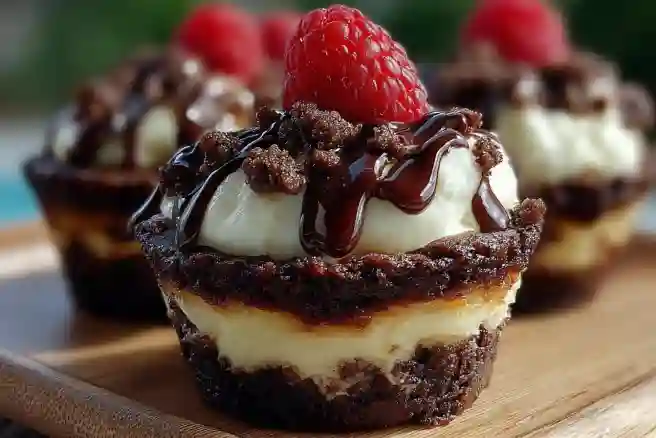
- Offer them fresh berries (like raspberries or sliced strawberries) for a refreshing contrast that cuts through the richness.
- Present them in colourful, clear cups or mini mason jars topped with extra whipped cream and a sprinkle of cocoa powder for a festive and visually appealing touch at birthday parties, holiday gatherings, or even a sophisticated brunch.
Variations & Substitutions
Unleash your inner pastry chef and get creative with these delicious adaptations:
- Different Flavour Combinations:
- Try adding a thin layer of raspberry or strawberry puree in between the cheesecake layers for a fruity, tangy burst.
- Swap out the chocolate ganache for a white chocolate ganache or even a peanut butter sauce if you’re feeling adventurous and love that flavour combo!
- Mix in mini chocolate chips, chopped nuts, or even crushed candy bar pieces into the brownie or cheesecake layer.
- Dietary Restrictions:
- For those with gluten sensitivities, use your favourite gluten-free brownie mix or recipe for the base.
- Dairy-free cream cheese and whipped cream alternatives (often made from coconut, almond, or oat milk) are widely available and can be used to accommodate lactose-intolerant friends, though the texture might vary slightly.
- Seasonal Variations:
- In the fall, why not add a hint of pumpkin pie spice or cinnamon to the cheesecake filling for a cosy, autumnal touch?
- For summer, fresh mint leaves or a vibrant berry coulis can completely transform the flavour profile, making them light and refreshing.
- During the holidays, add a sprinkle of peppermint dust or crushed candy canes for a festive twist!
Nutrition & Storage Info
- Prep Time: 30 minutes
- Cook Time: 0 minutes (assuming pre-made brownies)
- Total Time: 1 hour (plus chilling time for setting)
- Yield: Approximately 12 servings
- Estimated Calories per Serving: 300-350 calories (Please note: This is an estimate and can vary significantly based on the specific ingredients used, their fat/sugar content, and the exact portion sizes. Adding extra toppings will increase the calorie count.)
Storage Instructions:
- Room Temperature: Not recommended once assembled due to the cream cheese and dairy.
- Fridge: Store assembled cups in an airtight container in the refrigerator for up to 3 days for optimal freshness and texture.
- Freezer: Can be frozen for up to 1 month (see expert tips above for specific instructions on freezing before adding toppings).
FAQ Section
- Can I use store-bought brownies for this recipe? Absolutely! Store-bought fudgy brownies or a pre-made brownie mix prepared according to package directions work perfectly and can save you valuable time.
- What’s the best way to whip heavy cream to stiff peaks? Use a very chilled bowl and beaters (place them in the freezer for 10-15 minutes beforehand), and ensure your heavy cream is cold. Start beating at a medium speed and gradually increase to high until stiff peaks form.
- What if my cheesecake mixture is too thick or stiff? If your cream cheese mixture seems too thick after combining, you can add a tablespoon or two of milk or a little extra heavy cream (unwhipped) to loosen it up slightly without compromising its texture too much.
- How can I make these cups more festive for the holidays? To make them more festive, use themed paper or clear plastic cups. For Christmas, add a sprinkle of crushed candy canes or edible glitter. For Halloween, try orange and black sprinkles. For Valentine’s Day, use red berries!
- Can I make these cups in advance for a party? Yes! They are actually perfect for prepping a day ahead. Assemble them completely, cover loosely with plastic wrap, and let them chill in the refrigerator overnight. The flavours will meld beautifully.
- What’s a common error to avoid when making the cheesecake layer? The most common error is overmixing the whipped cream or over-folding the whipped cream into the cream cheese mixture. Gentle folding is key to keeping air in the mixture, which results in a light and fluffy cheesecake layer.
- Can I substitute other flavours for the chocolate ganache and caramel? Definitely! You can try a peanut butter sauce, a raspberry or strawberry coulis, a lemon curd, or even a white chocolate drizzle for delightful alternatives.
- Are these cups freezer-friendly? Yes! They are freezer-friendly if you freeze them before adding the final layer of toppings (ganache, caramel, and extra crumbs). Once defrosted in the fridge, you can add fresh toppings for the best experience.
- How do I avoid soggy brownies at the bottom of the cups? Ensure your brownie layer is crumbled well and that you pack it down gently rather than compressing it too densely. Also, ensure your ganache and caramel aren’t too hot when drizzling, as excessive heat could soften the brownie too much.
- Can I use different types of cream cheese? For the best flavour and texture, full-fat, block-style cream cheese yields the most decadent results. While low-fat versions can work if you’re looking to cut calories, they may result in a slightly softer or less rich cheesecake layer.
Conclusion
And there you have it—Loaded Brownie Cheesecake Cups that are sure to impress everyone at your next gathering! They beautifully bring together the nostalgic flavours of fudgy brownies with the rich, creamy tang of cheesecake, creating a dessert that’s both incredibly indulgent and wonderfully comforting. I can’t wait for you to try this recipe—it’s truly one of my family’s all-time favourites, and I know it will become one of yours too!
Please share your thoughts and any delightful twists you made in the comments below! Plus, be sure to check out other divine recipes on my blog, including my famous Banana Chocolate Chip Cookies and Classic Tiramisu. Happy baking and sweet cravings!
Print
Loaded Brownie Cheesecake Cups
- Total Time: 2 hrs 40 mins (includes chilling)
- Yield: 18 cups
- Diet: Vegetarian
Description
Decadent individual desserts featuring a fudgy brownie base, creamy cheesecake layer, and all your favorite toppings – the perfect bite-sized indulgence for any occasion!
Ingredients
2 cups Fudgy brownies, crumbled
1.5 cups Cream cheese, softened(like Philadelphia Cream Cheese)
0.5 cup Powdered sugar
1 teaspoon Vanilla extract
1 cup Heavy whipping cream, very cold
1 cup Chocolate ganache
0.5 cup Caramel sauce
1 cup Extra brownie crumbs
Instructions
- Preheat oven to 350°F (175°C). Line 18 muffin cups with foil or parchment liners.
- Prepare brownie batter according to package directions. Divide evenly among cups (about 2 tbsp each).
- Beat cream cheese and sugar until smooth. Add egg and vanilla; mix just until combined.
- Spoon 1 tbsp cheesecake batter over each brownie layer. Smooth tops.
- Bake 18-22 minutes until cheesecake is set. Cool completely in pans.
- Chill 2 hours. Remove liners and top with desired combinations of sauces, candies and toppings.
- Serve chilled. Store leftovers refrigerated.
Notes
- For cleaner removal, spray liners lightly with cooking spray
- Can use homemade brownie recipe instead of mix
- Add 1 tbsp instant coffee to brownie mix for mocha flavor
- Freeze unfrosted cups up to 1 month – thaw before topping
- Prep Time: 20 mins
- Cook Time: 20 mins
- Category: Dessert
- Method: Baking
- Cuisine: American
Nutrition
- Serving Size: 1 cup (without toppings)
- Calories: 220
- Sugar: 20g
- Sodium: 120mg
- Fat: 12g
- Saturated Fat: 5g
- Unsaturated Fat: 6g
- Trans Fat: 0g
- Carbohydrates: 25g
- Fiber: 1g
- Protein: 3g
- Cholesterol: 35mg
Ask the Community
🥗 Free Custom Keto Meal Plan?
Do you want to lose weight while still enjoying delicious Asian & Thai Fusion meals? Take this quick quiz to get your personalized Keto plan based on your favorite foods!
- ✅ No more guessing what to eat
- ✅ Delicious & easy-to-make recipes
- ✅ Tailored to your body type
Get My Custom Plan Now! →
*Over 100,000+ people have transformed their lives with this quiz.