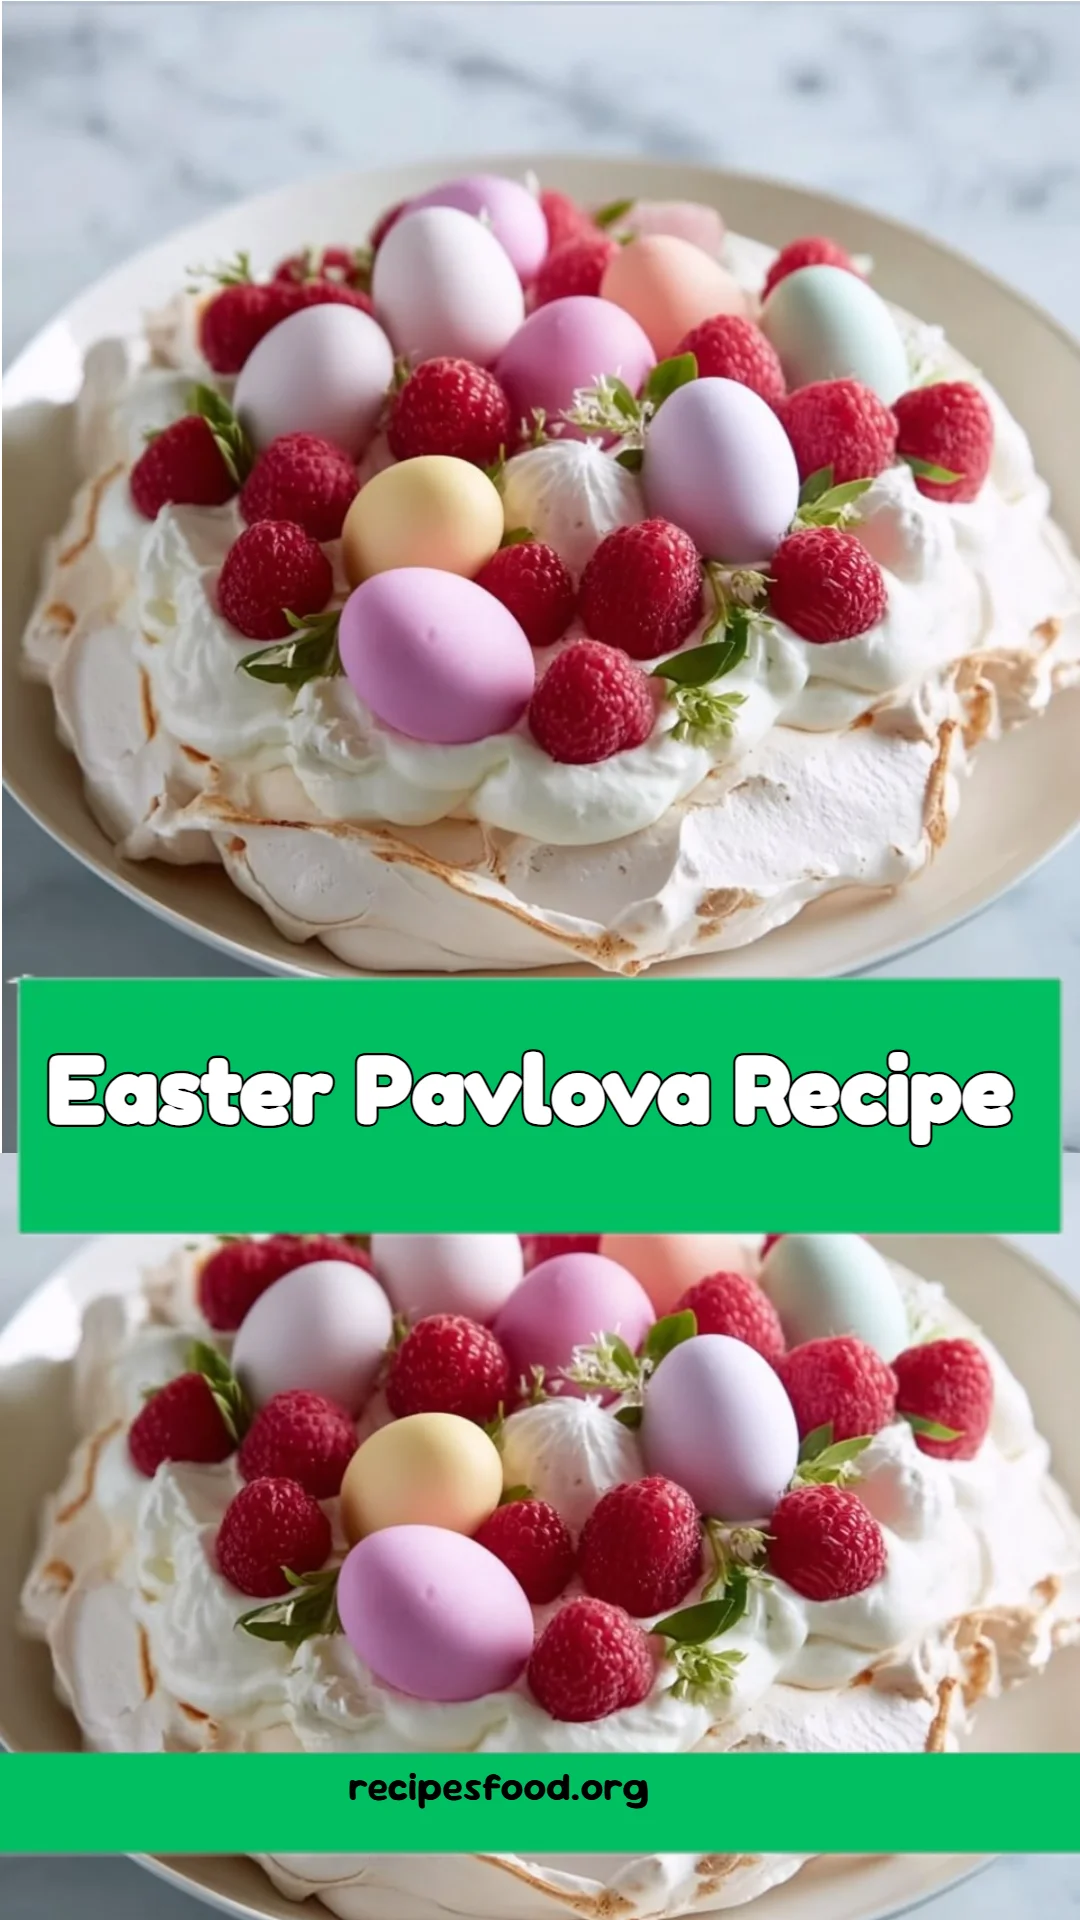
Heavenly Easter Pavlova: Light, Lovable, and Oh-So-Easy!
Ah, Easter. A time for family gatherings, vibrant spring blooms, and, of course, delicious desserts! One of my all-time favorite celebrations is the heavenly taste of an Easter Pavlova. Picture this: a delightful cloud of meringue, crisp on the outside, yet melt-in-your-mouth soft within, topped with an abundance of creamy whipped cream and a splash of fresh, juicy berries. It’s the kind of dessert that brings back memories of laughing around the dinner table, with my grandma gently fluffing up the meringue as we eagerly waited to taste her famous secret recipe.
What sets my Easter Pavlova apart is not just the ethereal texture and the sweetness balanced by a hint of acidity from fresh fruit, but it’s also the memories each slice holds. I’ve perfected this recipe over the years by making it more accessible without sacrificing flavor—because who has time for complicated? I promise this Easter Pavlova recipe will become a beautiful centerpiece on your table—and in your heart. Get ready to impress your loved ones and indulge in a dessert that’s as much about love as it is about flavor!
In this recipe, I’ll guide you through every step, share my best tips, and ensure you create a Pavlova that not only looks stunning but tastes like a dream. Let’s make this Easter unforgettable!
What is an Easter Pavlova?
The origins of the Pavlova dessert are a topic of playful debate between New Zealand and Australia, both claiming to have created this exquisite treat in honor of the famed ballerina Anna Pavlova. Regardless of its roots, one thing is unequivocal: Pavlova is a showstopper!
This iconic dessert features a base made from whipped egg whites combined with sugar—baked slowly at a low temperature to achieve a delightful crunchy shell while keeping the center beautifully soft and marshmallowy. Once cooled, it beckons to be adorned with a luscious layer of whipped cream and crowned with an array of colorful fruits. The immediate burst of flavors from creamy, sweet, and tangy truly makes it a delight to taste.
Perfect for Easter celebrations, this recipe allows for versatile touches—be it a mix of seasonal fruits, a drizzle of chocolate, or fresh flowers—all giving it that unique flair. So, whether to celebrate Easter or just bask in the joy of spring, there’s never a wrong time to whip up a Pavlova!
Why You’ll Love This Easter Pavlova Recipe
A Stunning Showpiece: Seriously, this dessert is Instagram- and family-photo ready! The sheer elegance of a blooming Pavlova graces your table, making it the star of any gathering.
Easy and Cost-Effective: Unlike other complex desserts that involve training as a pastry chef, this recipe keeps things simple. With minimal ingredients and straightforward steps, you’ll spend less money, and it’s way more satisfying to create at home than to buy from a bakery.
Customizable: Feel free to let your creative juices flow! You can switch out the berries for your favorites, add layers of passion fruit, or even create flavor variations by adding different extracts!
Make-ahead Magic: Pavlova can be made in advance—it’s the ultimate stress-buster! The meringue can be baked a day before, and just assemble it with whipped cream and toppings a few hours before serving.
Diet Friendly: Gluten-free and naturally low in calories if you keep portions in check! Your friends with dietary restrictions will thank you for this sweet treat.
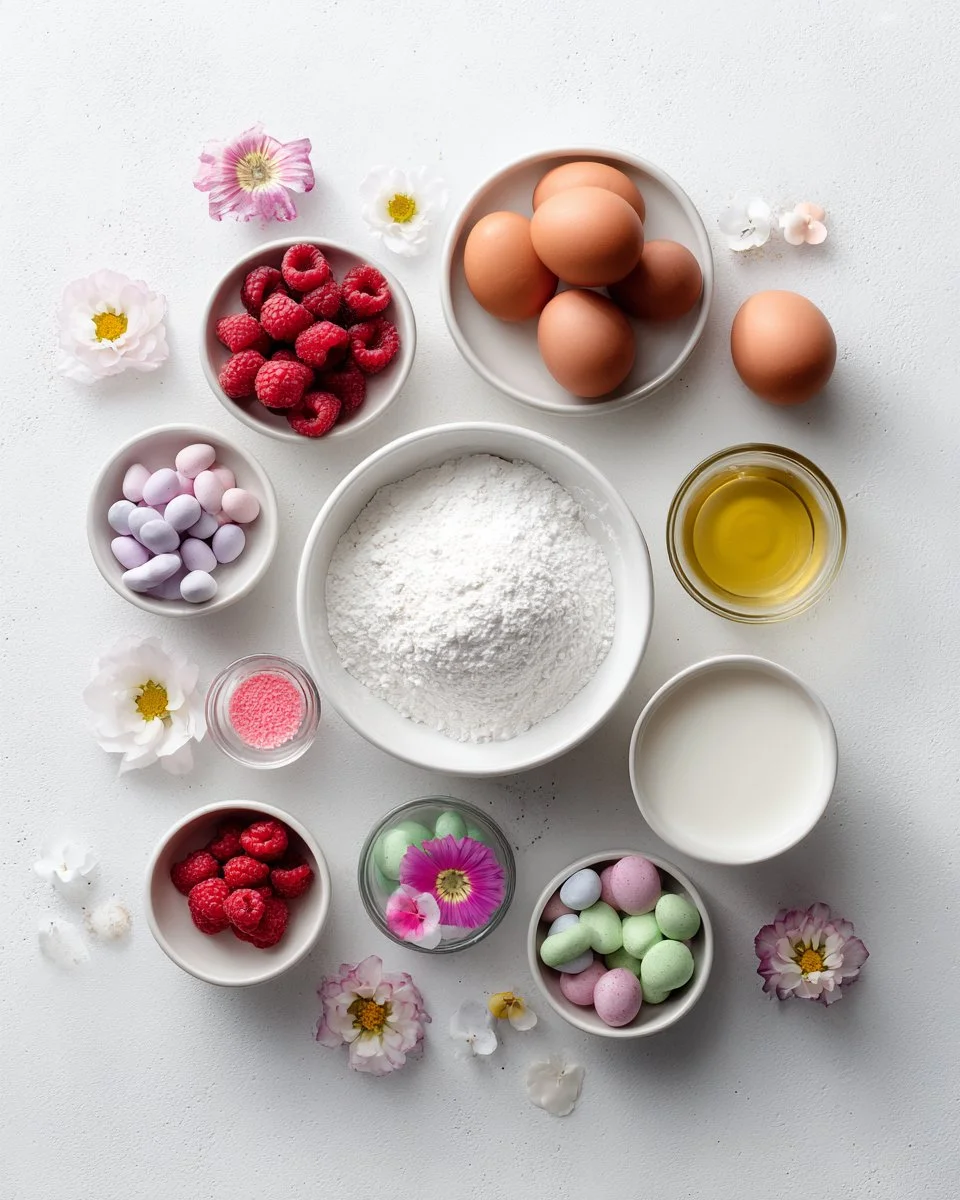
Ingredients
- 4 large egg whites, room temperature: Room temperature will give you the best volume for your meringue.
- 1 cup (200g) caster sugar: This finer sugar dissolves better, creating a smooth meringue.
- 1 tsp white vinegar: It helps stabilize the meringue. You can use lemon juice as a substitute.
- 2 tsp cornstarch: Adds structure while keeping the meringue light and airy.
- 1 tsp vanilla extract: For that sweet, aromatic touch; I recommend using pure vanilla for the best flavor.
- 1 cup heavy cream (cold): This will create a rich, luscious topping.
- 2 tbsp powdered sugar: To sweeten the whipped cream with finesse.
- 1/2 tsp vanilla extract: Just a touch more for the cream.
- 1 1/2 cups fresh raspberries: My favorite, but feel free to use strawberries or mixed berries!
- Edible flowers (such as violets, dianthus, or lavender): For that charming spring touch.
- Meringue eggs or mini pastel candies (store-bought or homemade): Optional, but they add playful flair!
Ingredient Quality
Using fresh, high-quality eggs makes a world of difference to your meringue’s structure and flavor. I recommend organic eggs whenever possible.
Step-by-Step Instructions
Preheat the Oven: Set your oven to 250°F (120°C). This low temperature helps create that perfect crunchy exterior. Line a baking sheet with parchment paper and draw an 8-inch circle on it as a guide.
Whip the Egg Whites: In a clean, dry mixing bowl, beat the egg whites on medium speed until soft peaks form (about 3-5 minutes).
Add Sugar Gradually: Now, gradually add the caster sugar, one tablespoon at a time, while continuing to mix on high speed. You’ll know it’s ready when the meringue is thick, glossy, and holds stiff peaks (this should take about 10 minutes).
Incorporate the Vinegar, Cornstarch, and Vanilla: Gently fold in the vinegar, cornstarch, and vanilla extract. This is where the magic happens!
Shape the Meringue: Using a spatula, spoon the meringue onto your prepared baking sheet, shaping it into a round with a shallow well in the center.
Bake: Place in the oven and bake for about 1 hour 15 minutes. When done, turn off the oven and let it cool down inside for an additional hour. This ensures it doesn’t crack due to temperature shock.
Whip the Cream: In a cold mixing bowl, beat the heavy cream with powdered sugar and vanilla extract until soft peaks form—this should take about 3-4 minutes.
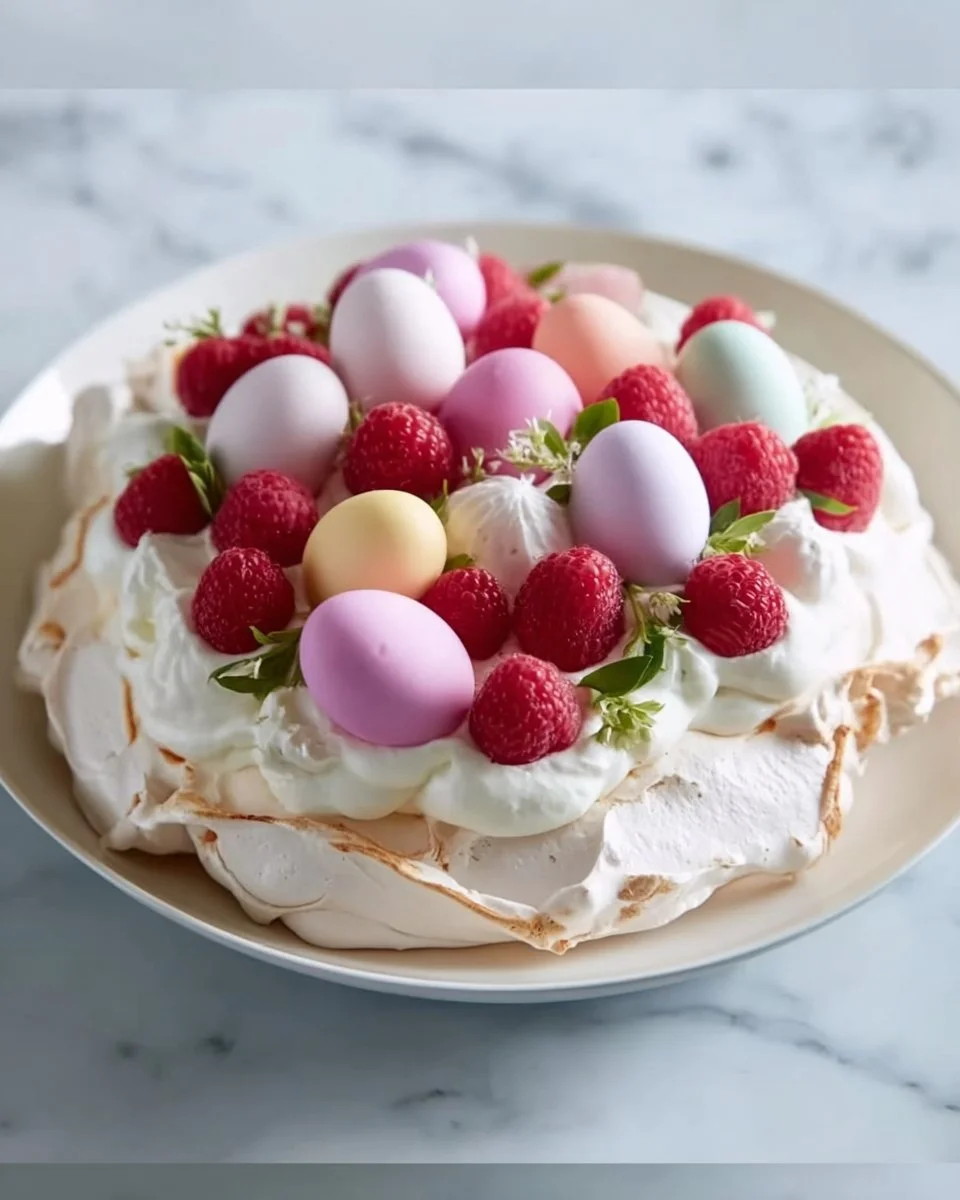
Assemble: Once your Pavlova is completely cooled, transfer it to a serving platter. Fill the well with the whipped cream, and top generously with fresh raspberries, edible flowers, and candies.
Serve: Enjoy immediately—the Pavlova is best served fresh!
Chef’s Tips:
- Avoid Humidity: Meringue doesn’t like moisture, so choose a dry day for baking if possible.
- Prevent Cracks: If cracks appear, don’t worry—those are just part of its charming personality!
Expert Tips & Tricks
Storage Recommendations: Unassembled meringue can be stored in an airtight container for up to 2 days. Once assembled, it’s best enjoyed the same day to maintain that delightful texture!
Make-ahead Magic: You can bake the meringue one day in advance and store it safely. Just top with cream and berries before serving.
Troubleshooting: If your meringue weeps or becomes sticky, it could be due to the humidity in the air or under-beating the egg whites. Always use a clean mixing bowl, as even a little grease can affect the whipping.
Stabilizing Whipped Cream: If you want to stabilize the whipped cream, consider adding a tablespoon of cream cheese or sour cream; it helps it hold its shape for longer.
Whisking by Hand: If you prefer a workout, you can whip the egg whites by hand! (I don’t recommend it unless you’re feeling particularly adventurous.)
Serving Suggestions
This Easter Pavlova pairs beautifully with a warm cup of tea or fresh coffee. For an extra treat, consider serving it alongside a fruit compote or a scoop of vanilla ice cream. Presentation ideas? Make it a centerpiece decorated with seasonal fruits and flowers—let your creativity shine through!
Variations & Substitutions
- Flavor Combinations: Swap out the raspberries for fresh strawberries, mango slices, or even citrus segments for a bright, zesty contrast.
- Diet-Friendly Options: For a lighter version, use a non-dairy whipped topping. You can also make a chocolate version by folding in cocoa powder into the meringue.
- Seasonal Variations: In the fall, how about a spiced pumpkin or salted caramel version? Winter cries out for cranberry and orange!
Nutrition & Storage Info
- Prep Time: 25 minutes
- Cook Time: 1 hour 15 minutes
- Total Time: 1 hour 40 minutes
- Yield: 8 servings
- Estimated Calories per Serving: 250 calories
- Storage: Unassembled, keep at room temperature in an airtight container for up to 2 days. Assembled, consume within a few hours for the best quality.
FAQ Section
Can I make Pavlova in a humid climate?
Yes, but it’s best to choose a dry day for better results. If possible, use a dehumidifier where you’re working.What can I use instead of caster sugar?
While caster sugar is ideal, you can blend granulated sugar in a blender for a finer texture.How do I know when my meringue is done?
When it’s thick, glossy, and holds stiff peaks. You can rub a small amount between your fingers; it should feel smooth without any sugar granules.Is Pavlova gluten-free?
Yes! This recipe contains no gluten ingredients, making it suitable for those with gluten intolerances.Can I freeze leftovers?
It’s not ideal, as the texture may change. However, the meringue itself (unassembled) can be frozen, tightly wrapped, for up to a month.How long can I keep my Pavlova?
Assembled, it’s best to enjoy within a few hours. The meringue can last in a cool, dry place for up to 2 days.Can I use different fruits?
Absolutely! Use any fruit you love, like kiwi, blueberries, or pomegranate seeds, to give it your personal touch.What if my meringue cracks?
Embrace the cracks! They are a natural part of a Pavlova’s character.Can I flavored meringue?
Yes! Adding a bit of cocoa powder or matcha will give it a unique twist.Is there an alternative to using eggs?
There are vegan options using aquafaba (the liquid from chickpeas) to create a meringue-like foam.
Conclusion
This Easter Pavlova is not just a dessert; it’s a slice of joy wrapped in memories and flavors that connect us with loved ones. I hope you try this recipe and discover the joy of creating something beautiful and delicious at home. Don’t forget to share your experiences in the comments, and feel free to check out my other delightful spring recipes on the blog—let’s keep the lovely flavors rolling! Happy baking!
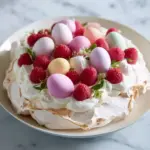
Heavenly Easter Pavlova
- Total Time: 100 minutes
- Yield: 8 servings 1x
- Diet: Gluten-Free
Description
A delightful Easter Pavlova featuring a crunchy meringue shell topped with creamy whipped cream and fresh juicy berries.
Ingredients
- 4 large egg whites, room temperature
- 1 cup (200g) caster sugar
- 1 tsp white vinegar
- 2 tsp cornstarch
- 1 tsp vanilla extract
- 1 cup heavy cream (cold)
- 2 tbsp powdered sugar
- 1/2 tsp vanilla extract
- 1 1/2 cups fresh raspberries
- Edible flowers (such as violets, dianthus, or lavender)
- Meringue eggs or mini pastel candies (optional)
Instructions
- Preheat the Oven: Set your oven to 250°F (120°C) and line a baking sheet with parchment paper.
- Whip the Egg Whites: Beat the egg whites on medium speed until soft peaks form (about 3-5 minutes).
- Add Sugar Gradually: Gradually add the caster sugar, one tablespoon at a time, while mixing on high speed until thick and glossy (about 10 minutes).
- Incorporate Ingredients: Gently fold in the vinegar, cornstarch, and vanilla extract.
- Shape the Meringue: Spoon the meringue onto the prepared baking sheet, shaping it into a round with a shallow well in the center.
- Bake: Bake for about 1 hour 15 minutes, then turn off the oven and let it cool inside for another hour.
- Whip the Cream: Beat the heavy cream with powdered sugar and vanilla extract until soft peaks form (about 3-4 minutes).
- Assemble: Fill the well of the meringue with whipped cream and top with raspberries, edible flowers, and candies.
- Serve: Enjoy immediately.
Notes
Avoid baking on humid days to prevent the meringue from weeping. Assemble right before serving for the best texture.
- Prep Time: 25 minutes
- Cook Time: 75 minutes
- Category: Dessert
- Method: Baking
- Cuisine: Australian/New Zealand
Nutrition
- Serving Size: 1 serving
- Calories: 250
- Sugar: 21g
- Sodium: 25mg
- Fat: 15g
- Saturated Fat: 10g
- Unsaturated Fat: 5g
- Trans Fat: 0g
- Carbohydrates: 28g
- Fiber: 1g
- Protein: 3g
- Cholesterol: 70mg
🥗 Free Custom Keto Meal Plan?
Do you want to lose weight while still enjoying delicious Asian & Thai Fusion meals? Take this quick quiz to get your personalized Keto plan based on your favorite foods!
- ✅ No more guessing what to eat
- ✅ Delicious & easy-to-make recipes
- ✅ Tailored to your body type
Get My Custom Plan Now! →
*Over 100,000+ people have transformed their lives with this quiz.