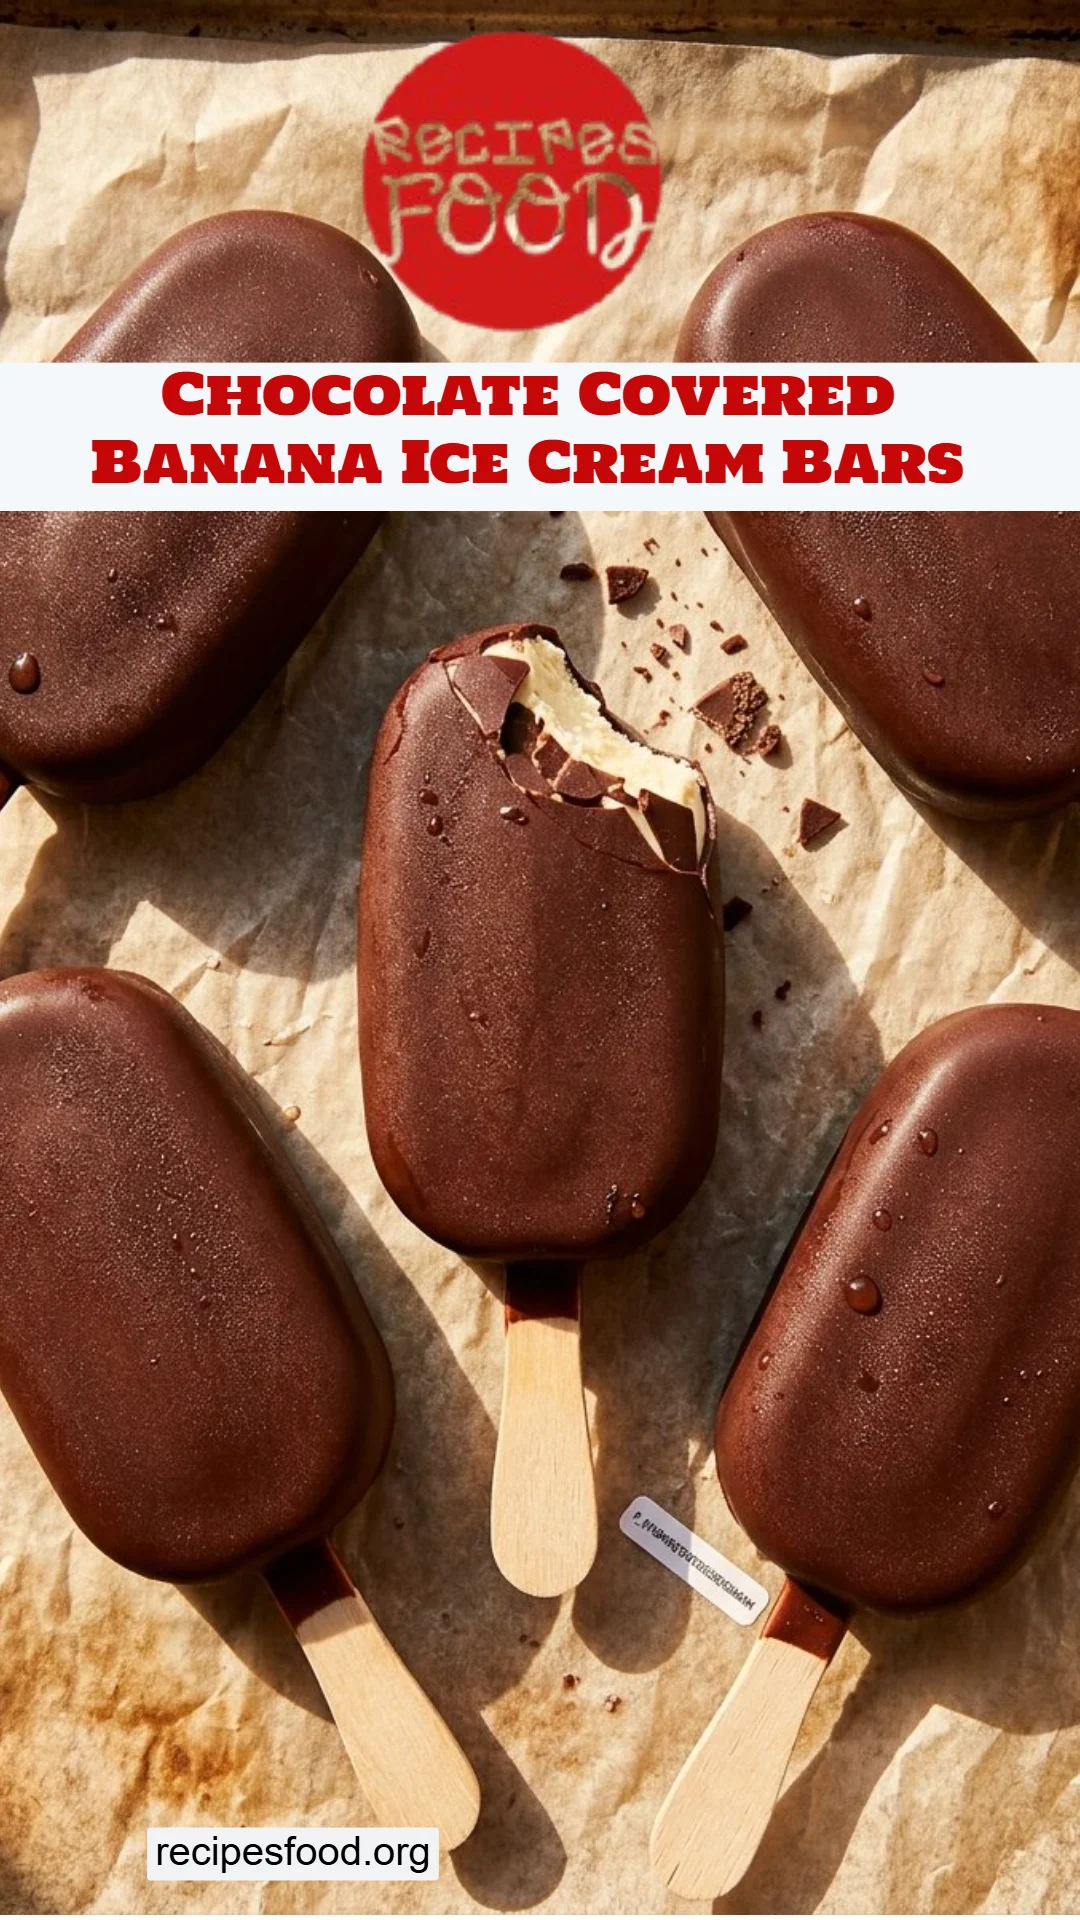
Irresistible Chocolate Covered Banana Ice Cream Bars: A Delightful Summer Treat
Ah, summertime! The season of backyard barbecues, lazy afternoons, and of course, the quintessential ice cream cravings. I’ll never forget those sun-soaked days as a child, when my family would indulge in frozen treats after spending hours playing outside. One of my all-time favorites was the beloved chocolate-covered banana ice cream bar. There’s something magical about the creamy banana flavor paired with rich chocolate that brings pure joy with every bite!
These Chocolate Covered Banana Ice Cream Bars take me back to those carefree summer days, but they come with a modern twist. Unlike store-bought frozen treats that can be filled with artificial ingredients and too much sugar, this simple recipe allows you to create a healthier version at home. With just a handful of wholesome ingredients, you can whip up these delightful bars in no time, making them the perfect addition to your summer gatherings or a family movie night.
So, grab your blender and let’s dive into the delicious world of these Chocolate Covered Banana Ice Cream Bars! I promise you’ll not only satisfy your sweet tooth but also create unforgettable memories with your loved ones along the way.
What Are Chocolate Covered Banana Ice Cream Bars?
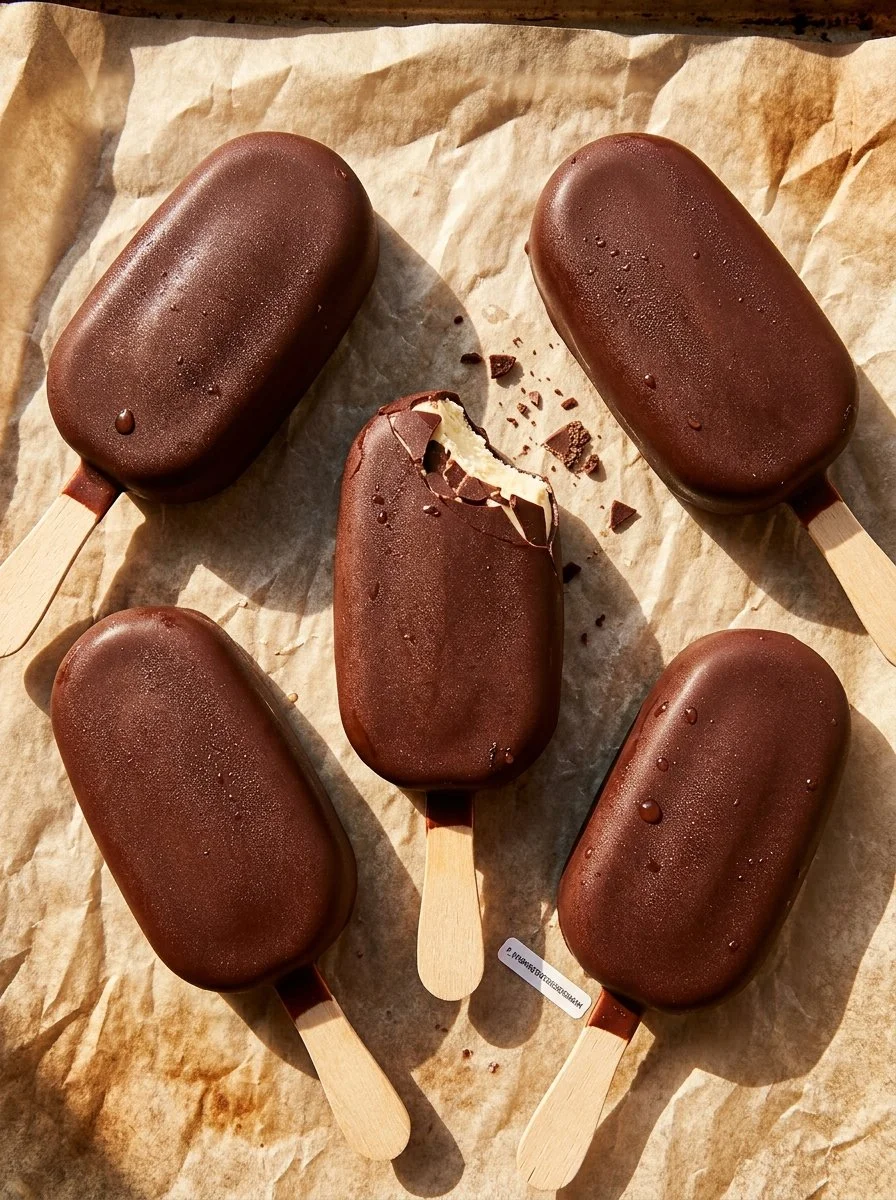
Chocolate Covered Banana Ice Cream Bars are a frozen treat that combines the deliciousness of ripe bananas with a creamy texture, all enrobed in a silky layer of rich chocolate. Originating from the desire to enjoy a guilt-free ice cream experience, these bars have grown in popularity for good reason. You get the natural sweetness of the bananas intertwined with a hint of nut butter, which provides a beautiful creaminess that rivals any premium ice cream.
Once you take a bite, you’ll experience the delightful contrast of smooth, frozen banana filling and the lush chocolate coating. Each layer melts in your mouth, creating a symphony of flavors and textures that’s simply irresistible. Whether you’re prepping for a summer party or just need something sweet after a long day, these bars are the perfect choice.
Why You’ll Love This Recipe
Healthier Option: Unlike store-bought ice cream bars filled with additives, these homemade delights boast all-natural ingredients. You’ll find ripe bananas, nut butter, and high-quality chocolate as the stars of the show. You can indulge in a guilt-free treat that feels luxurious without the extra sugar crash!
Cost-Effective and Simple: Making your ice cream bars at home is incredibly budget-friendly compared to buying a box from the store. With just a few bananas and some pantry staples, you’ll create a dozen bars for a fraction of the price.
Endless Customization: Want to mix things up? Feel free to adapt this recipe to suit your taste. Add a pinch of cinnamon for warmth or swap the nut butter for your favorite flavor—it’s entirely up to you!
Quick Prep Time: Even though the bars need to freeze for a few hours, the actual prep time is a breeze. You’ll have these whipped up in about 15 minutes, leaving you plenty of time to work on that summer playlist or just relax in the sun.
Family Fun Activity: This recipe is a great way to involve the kids in the kitchen. From blending the ingredients to dipping the bars in chocolate, everyone can join in on the fun. Plus, the smiles on their faces as they enjoy these delicious treats are truly priceless!
Ingredients Section
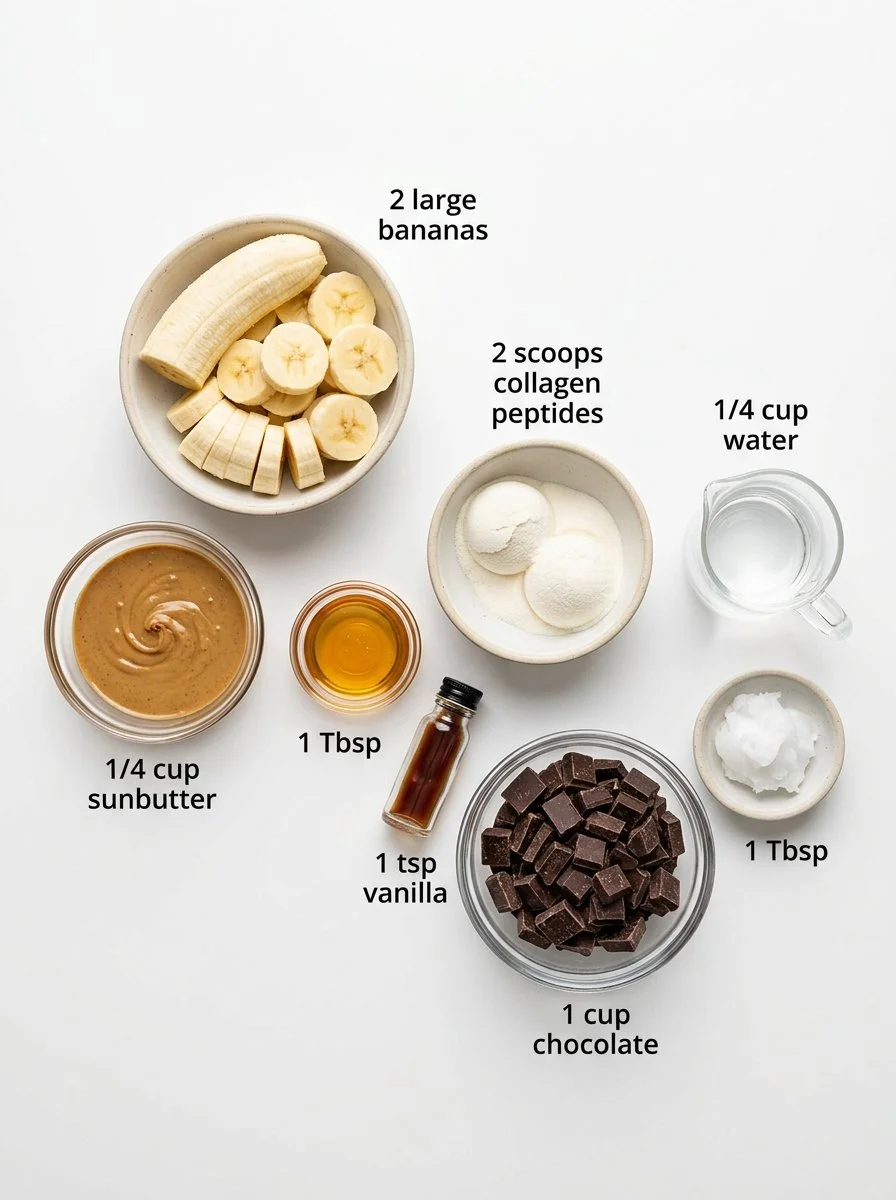
- 2 large, ripe bananas (about 210g): Make sure they’re speckled for optimal sweetness and creaminess.
- 1/4 cup sunbutter (or any creamy nut/seed butter): I love using Justin’s almond butter for its rich flavor, but feel free to choose any nut or seed butter you prefer!
- 1 Tbsp honey (or maple syrup): This adds just the right amount of sweetness. If you’re vegan, opt for maple syrup.
- 1 tsp vanilla extract: Pure vanilla makes all the difference! I recommend Nielsen-Massey for exceptional quality.
- 2 scoops collagen (optional): A great addition for added protein and health benefits, but not necessary for taste.
- 1/4 cup water: Helps blend the ingredients smoothly.
- 1 cup dark chocolate chunks (or chips): Use high-quality chocolate like Ghirardelli’s for the best flavor.
- 1 Tbsp coconut oil: Helps to achieve that glossy, luscious coating.
Prep Notes: Make sure to have your bananas at room temperature for easier blending. If using nut butter straight from the fridge, allow it to warm slightly as well!
Step-by-Step Instructions
Blend the Filling: Place all filling ingredients in your blender. Blend the mixture until it has a smooth, consistent texture—around 1-2 minutes on high speed. Stop occasionally to scrape down the sides to ensure everything is well combined.
Mold the Bars: Place a popsicle stick into each slot of the silicone popsicle mold (it usually makes about 8 ice cream bars). Pour the ice cream filling into the molds, leaving a little room at the top.
Freeze Until Solid: Carefully put the molds on a baking sheet to catch any potential spills. Set them in the freezer for at least 4 hours, or until the filling is completely frozen solid. If you’re using larger molds, you may need to freeze them longer.
Make the Chocolate Coating: Once frozen, make the chocolate coating. Place the chocolate and coconut oil in a small saucepan over low heat. Stir frequently until melted and smooth—this should take about 5-7 minutes. Alternatively, you can microwave the chocolate in 30-second intervals, stirring in between.
Dip the Bars: Remove the ice cream bars from the mold and dip each bar one at a time into the melted chocolate. For convenience, you may pour the chocolate into a glass or ceramic cup for easy dipping.
Set the Chocolate: Place the dipped bars onto a sheet of parchment paper to set. Allow them to sit at room temperature for about 5-10 minutes until the chocolate has hardened, or pop them back in the freezer for quicker results.
Chef’s Tip: If the chocolate is too thick for easy dipping, you can add a little more coconut oil to thin it out. This will also give you that beautiful shine!
Common Mistakes to Avoid: For the best texture, make sure your bananas are very ripe. Unripe bananas can lead to a grainy texture in the finished bars.
Expert Tips & Troubleshooting
Storage Recommendations: These bars can store in the freezer for up to 2 months, but I doubt they’ll last that long!
Make-Ahead Instructions: You can prep the filling a day in advance. Just blend everything and keep it in the fridge until you’re ready to pour it into molds.
Troubleshooting Common Problems:
- If the bars stick to the mold, try running warm water over the outside of the mold. This usually helps release them easily.
- If your chocolate isn’t melting smoothly, it may be too hot or too cold—aim for a gentle, steady heat.
Consistency Check: Ensure your filling is blended until very smooth. A bit of texture is okay, but if you notice clumps, blend a bit longer.
Flavor Improv: Experiment with adding mini chocolate chips to the banana mixture for a delightful surprise in each bar!
Serving Suggestions
These Chocolate Covered Banana Ice Cream Bars are delicious on their own, but if you’re looking for something extra, why not serve them alongside a scoop of vanilla bean ice cream? For a delightful presentation, drizzle some extra melted chocolate over the top and sprinkle with crushed nuts or flaky sea salt. Perfect for a summer barbecue or a cozy movie night, these bars will be the star of any gathering!
Variations & Substitutions
- Flavors: Add natural flavorings like peanut butter or cocoa powder for a different twist. Try tossing in some crushed cookies or dried fruit for added texture.
- Dietary Restrictions: Make these gluten-free with certified GF oats or use a nut-free butter to cater to allergies.
- Seasonal Treats: During fall, blend in some pumpkin puree and spice for a seasonal take on these delicious bars!
Nutrition & Storage Info
- Prep Time: 15 minutes
- Cook Time: 0 minutes
- Total Time: 4+ hours (mostly freeze time)
- Yield: About 8 ice cream bars
- Estimated Calories: Approximately 150 calories per bar (varies based on ingredients used)
- Storage Instructions: Keep in an airtight container in the freezer. They last for up to 2 months.
FAQ Section
Can I use frozen bananas?
Yes! Frozen bananas work wonderfully, just let them thaw slightly before blending.How can I make these bars vegan?
Use maple syrup instead of honey and ensure your chocolate is dairy-free.Can I use milk chocolate instead of dark chocolate?
Absolutely! Use whatever chocolate you prefer, just keep in mind the sweetness level will change.What other nut butters work well?
Almond butter, cashew butter, or even tahini would be fantastic in this recipe!How do I know when the bars are frozen?
They should be firm to the touch and hold their shape without any give.Is it necessary to add collagen?
Not at all! It’s purely optional for an extra protein boost.Can I double this recipe?
Totally! Just use larger molds or freeze in batches.What’s the best way to dip the bars?
You can use a small cup or a deep bowl to dip the bars for easier coating.Can I add toppings?
Yes! Crushed nuts, shredded coconut, or sprinkles make delightful additions.What if I don’t have popsicle molds?
You can use small paper cups or even ice cube trays—just make sure to insert sticks!
Conclusion
These Chocolate Covered Banana Ice Cream Bars are not just a treat; they’re a celebration of summer, family, and the joy of creating something special together. Their irresistible flavor and simplicity make them a must-try this season. I can’t wait for you to dive into this recipe, and I’d love to hear how your bars turn out! Drop a comment below and check out some of my other frozen dessert recipes to keep the fun going. Here’s to sweet summer memories and delicious homemade treats!
Print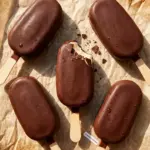
Chocolate Covered Banana Ice Cream Bars
- Total Time: 240 minutes
- Yield: 8 servings 1x
- Diet: Vegan
Description
A delightful and healthier version of the classic chocolate-covered banana ice cream bars, perfect for summer.
Ingredients
- 2 large, ripe bananas (about 210g)
- 1/4 cup sunbutter (or any creamy nut/seed butter)
- 1 Tbsp honey (or maple syrup)
- 1 tsp vanilla extract
- 2 scoops collagen (optional)
- 1/4 cup water
- 1 cup dark chocolate chunks (or chips)
- 1 Tbsp coconut oil
Instructions
- Blend the filling: Place all filling ingredients in your blender and blend until smooth (about 1-2 minutes).
- Mold the bars: Insert popsicle sticks into a silicone mold and pour the filling, leaving room at the top.
- Freeze until solid: Place molds on a baking sheet and freeze for at least 4 hours until fully frozen.
- Make the chocolate coating: Melt chocolate and coconut oil together over low heat or in the microwave.
- Dip the bars: Remove bars from the mold and dip each into the melted chocolate.
- Set the chocolate: Place dipped bars on parchment paper to set at room temperature or in the freezer.
Notes
Ensure bananas are very ripe for optimal creaminess. If the chocolate is thick, add more coconut oil for easier dipping.
- Prep Time: 15 minutes
- Cook Time: 0 minutes
- Category: Dessert
- Method: Freezing
- Cuisine: American
Nutrition
- Serving Size: 1 bar
- Calories: 150
- Sugar: 10g
- Sodium: 30mg
- Fat: 9g
- Saturated Fat: 5g
- Unsaturated Fat: 4g
- Trans Fat: 0g
- Carbohydrates: 15g
- Fiber: 2g
- Protein: 3g
- Cholesterol: 0mg
🥗 Free Custom Keto Meal Plan?
Do you want to lose weight while still enjoying delicious Asian & Thai Fusion meals? Take this quick quiz to get your personalized Keto plan based on your favorite foods!
- ✅ No more guessing what to eat
- ✅ Delicious & easy-to-make recipes
- ✅ Tailored to your body type
Get My Custom Plan Now! →
*Over 100,000+ people have transformed their lives with this quiz.