Delicious Cherry Juice: The Homemade Elixir to Brighten Your Days
Growing up, my summers were ensured by the delicious scent of cherries wafting through my grandmother’s kitchen. I still remember the afternoons spent pitting those vibrant red jewels, the juice dribbling down our fingers, and the echo of laughter bouncing off the walls. Making Cherry Juice was not just a recipe; it was an experience that brought our family together, creating memories that I now cherish dearly.
What makes my homemade cherry juice recipe stand out? It’s that perfect blend of sweetness and tartness that you simply can’t find in store-bought versions! You know that artificial taste that lingers? That’s nowhere to be found here. Instead, you get pure, refreshing flavors bursting with health benefits—far superior to anything you’d pick up in a carton.
Get ready to learn about my tried-and-true method for crafting this delicious cherry juice! By the time we’re done, you’ll not only be sipping on a glass of vibrant cherry goodness but also sharing your own family tales with every drop that hits your lips.
What Are Cherry Juices?
Cherry juice comes from the humble cherry fruit, a small, round stone fruit that shines in hues of red and black, bursting with flavor and vibrant color. Cherries have been enjoyed since ancient times, often celebrated for their sweet, juicy flesh and tangy undertones.
Each sip of cherry juice feels like a summer day—refreshing and full of zest. The texture is smooth, yet it retains tiny flecks of the fruit, creating a delightful sensory experience. What makes this juice unique is not just its flavor but also the health benefits it offers. Packed with antioxidants, it can help reduce inflammation, aid sleep, and is known for boosting heart health.
So when should you whip up a batch? Whether you’re preparing for a cozy gathering, want an indulgent drink to serve at brunch, or just crave a refreshing pick-me-up, cherry juice is your best bet.
Why You’ll Love This Recipe
Fresh and Natural: Unlike store-bought cherry juices that can be loaded with added sugars and preservatives, my recipe is 100% natural, letting the authentic cherry flavor shine through. You can taste the difference!
Cost-Effective: Have you ever looked at the price tag of premium cherry juice? Making it at home saves you money and allows you to control the quality of your ingredients. You’ll be surprised at how affordable a batch can be compared to those little bottles at the store!
Customizable: This recipe is versatile! Keen for a little zing? Add some ginger. Want it sweeter? Feel free to adjust the sugar level or add other fruits like strawberries or plums. This juice can be as unique as you are!
Easy and Fun: I promise you don’t need to be a culinary expert to nail this recipe. It’s straightforward, with a simple process that’s fun to do alone or with your family, just like we used to do in my grandma’s kitchen.
Make-Ahead Magic: This cherry juice can easily be made in batches, perfect for meal prep! Store it in your fridge or even freeze portions for those impromptu summer drinks.
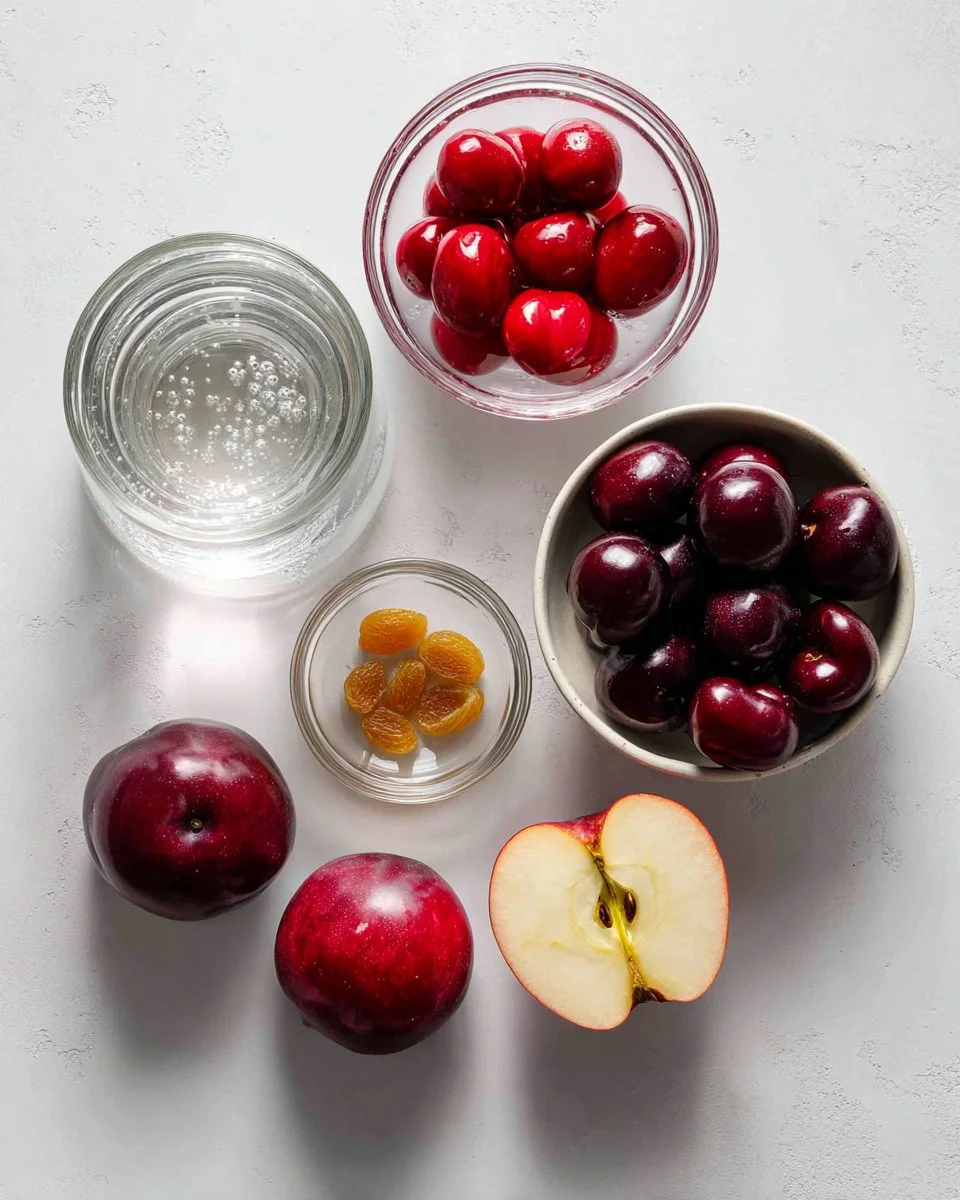
Ingredients
- 3.5 litres filtered water: Use filtered for a clean taste—this is your canvas!
- 8 cups fresh cherries, pitted (optional): Look for plump, dark fruits for the best flavor.
- 6 red plums, pits removed: Sweet, vibrant, and a delightful addition!
- 1 cup golden raisins: They add natural sweetness and depth to the juice.
- 1 apple, cored and halved: It brings a lovely hint of sweetness that balances the tartness of the cherries and plums.
Ingredient Quality and Substitutions
The quality of your ingredients will directly affect the taste of the juice. Opt for organic cherries and plums when possible for richer flavors.
- Cherries: If fresh isn’t available, consider frozen cherries, but avoid overly sweetened varieties.
- Plums: You can substitute with other stone fruits like apricots or peaches for different flavor profiles.
- Raisins: For a lighter sweetness, substitute with honey or maple syrup, adjusting as needed.
Pro Tip: Ensure your fruits are at room temperature before starting for easier blending and juicing.
Step-by-Step Instructions
Prepare the pot: Start by adding 3.5 litres of filtered water to a large pot. Use a sturdy, heavy-bottomed pot to ensure even cooking.
Add the fruits: Toss in the 8 cups of fresh cherries (pitted if you prefer), 6 red plums, 1 apple, and 1 cup of golden raisins. Give everything a gentle stir, allowing the flavors to mingle.
Bring to a boil: Heat on high until the mixture comes to a rolling boil. Keep an eye on it, as you don’t want it to spill over!
Simmer it down: Once boiling, carefully semi-cover the pot with a lid to avoid splatters and reduce the heat to medium-low. Let it simmer for 60 minutes, stirring occasionally—allow each fruit’s essence to infuse the water.
Strain the mixture: After 60 minutes, carefully use a sieve or kitchen spider to remove the fruit from the pot. Set the fruit aside; these can be enjoyed later on toast with a dollop of mascarpone or a drizzle of honey.
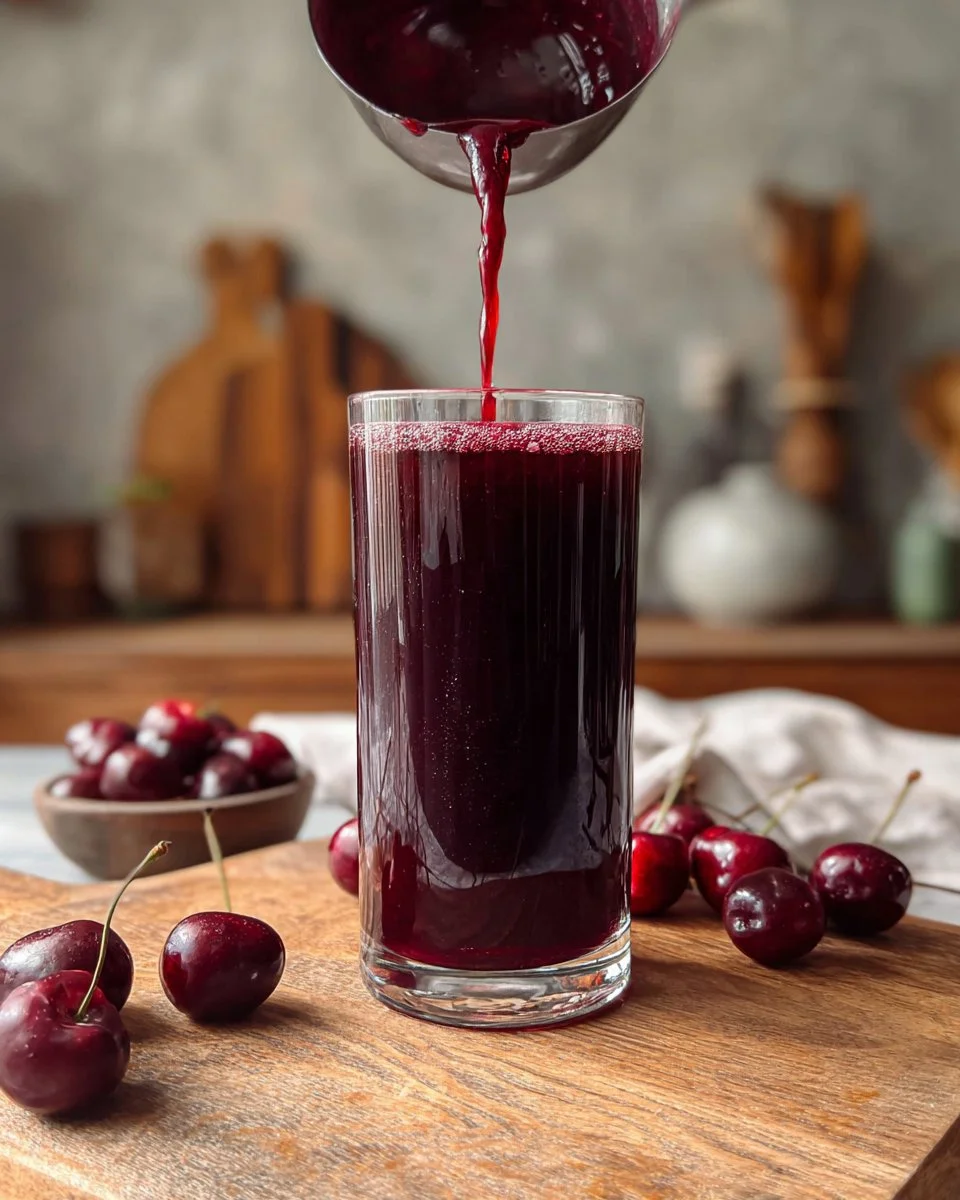
Cool and store: Allow the liquid to reach room temperature, then strain the juice into a bowl or mason jars. Chill in the fridge. When you’re ready to serve, pour over ice for a refreshing drink!
Chef’s Tips
- Visual cues: When simmering, you’ll see the cherries start to burst. This is a good sign that the flavors are being released!
- Common mistakes: Avoid overcooking, as it can lead to a bitter taste. Taste during the simmering process!

Expert Tips & Tricks
Storage: Store homemade cherry juice in sealed mason jars in your fridge for up to a week. If you’re freezing it, do so in ice cube trays for easy access later!
Make-Ahead Magic: Feel free to make larger batches and freeze in portions; it’ll be your secret weapon for summer refreshments.
Troubleshooting: If your juice tastes too tart, try blending in a touch of honey or simple syrup. Always taste as you go!
Infusions: Want to try something different? Add slices of fresh ginger or mint leaves while simmering for an elevated flavor profile.
Presentation: Serve in a beautiful glass with a sprig of mint for an elegant touch at gatherings.
Serving Suggestions
This cherry juice is versatile! Enjoy it cold over ice as a refreshing drink, or mix it into cocktails for a summer twist. Pair it with fresh cheese platters, light salads, or grilled chicken for a delightful summer meal. For a special occasion, serve it with sparkling water for a festive ‘mocktail’ vibe.
Variations & Substitutions
- Flavor Combinations: Experiment with basil or lavender for a unique herbal twist.
- Dietary Options: For a sugar-free version, try using stevia or monk fruit instead of sugar.
- Seasonal Twists: In fall, mix in apples and cinnamon for a cozy twist, or add berries in early summer for a mixed fruit delight.
Nutrition & Storage Info
- Prep Time: 15 minutes
- Cook Time: 1 hour
- Total Time: 1 hour 15 minutes
- Yield: Approximately 12-16 servings
- Estimated Calories: 70 calories per serving
- Storage Instructions: Keep it refrigerated for up to a week. Freeze for long-term storage, up to 3 months.
FAQ Section
Can I use frozen cherries?
Absolutely! Just be aware that they may need a bit longer to simmer.Is this recipe suitable for canning?
Yes! If you want to can it, ensure you follow proper canning procedures.What other fruits can I add?
Feel free to experiment with nectarines, berries, or even citrus for a refreshing twist!How should I sweeten if desired?
You’re welcome to adjust to taste—honey, agave syrup, or even sugar can be used.Can I serve this juice hot?
Definitely! Warm cherry juice can be a cozy treat for chilly evenings.What’s the best way to store leftover juice?
Store in glass jars, sealed, in the refrigerator for quick access to that vibrant flavor.Do I need to filter the juice?
If you prefer a thicker texture, feel free not to strain it completely.What health benefits does cherry juice have?
It’s packed with antioxidants and anti-inflammatory properties, supporting heart health and sleep quality.Can I mix this with alcohol?
Yes! Cherry juice pairs deliciously with vodka or champagne for a delightful summer cocktail.How long does it take to thaw from the freezer?
Thaw overnight in the refrigerator for best results.
Conclusion
This Cherry Juice recipe isn’t just about creating a drink; it’s a beautiful reminder of family connections, summer days, and the joy of homemade goodness. I encourage you to dive in, try it out, and let the flavors take you on a nostalgic journey. Your kitchen will thank you, and I’d love to hear your thoughts—drop a comment with your experiences! For more delicious recipes, check out my blog for other refreshing drinks and sweet treats. Happy juicing!
Print
Delicious Cherry Juice
- Total Time: 75 minutes
- Yield: 12-16 servings 1x
- Diet: Vegetarian
Description
A refreshing and natural homemade cherry juice that captures the essence of summer with its perfect blend of sweetness and tartness.
Ingredients
- 3.5 litres filtered water
- 8 cups fresh cherries, pitted
- 6 red plums, pits removed
- 1 cup golden raisins
- 1 apple, cored and halved
Instructions
- Prepare the pot: Add 3.5 litres of filtered water to a large pot.
- Add the fruits: Toss in the cherries, plums, apple, and golden raisins; stir gently.
- Bring to a boil: Heat on high until the mixture reaches a rolling boil.
- Simmer it down: Once boiling, semi-cover the pot and reduce heat to medium-low, simmer for 60 minutes.
- Strain the mixture: Remove the fruit from the pot using a sieve or kitchen spider.
- Cool and store: Allow the liquid to cool, then strain into bowls or mason jars; chill in the fridge before serving.
Notes
Store homemade cherry juice in sealed mason jars for up to a week. Freezing portions can provide easy access for future use.
- Prep Time: 15 minutes
- Cook Time: 60 minutes
- Category: Beverage
- Method: Steeping
- Cuisine: American
Nutrition
- Serving Size: 1 serving
- Calories: 70
- Sugar: 12g
- Sodium: 10mg
- Fat: 0g
- Saturated Fat: 0g
- Unsaturated Fat: 0g
- Trans Fat: 0g
- Carbohydrates: 17g
- Fiber: 1g
- Protein: 1g
- Cholesterol: 0mg
🥗 Free Custom Keto Meal Plan?
Do you want to lose weight while still enjoying delicious Asian & Thai Fusion meals? Take this quick quiz to get your personalized Keto plan based on your favorite foods!
- ✅ No more guessing what to eat
- ✅ Delicious & easy-to-make recipes
- ✅ Tailored to your body type
Get My Custom Plan Now! →
*Over 100,000+ people have transformed their lives with this quiz.