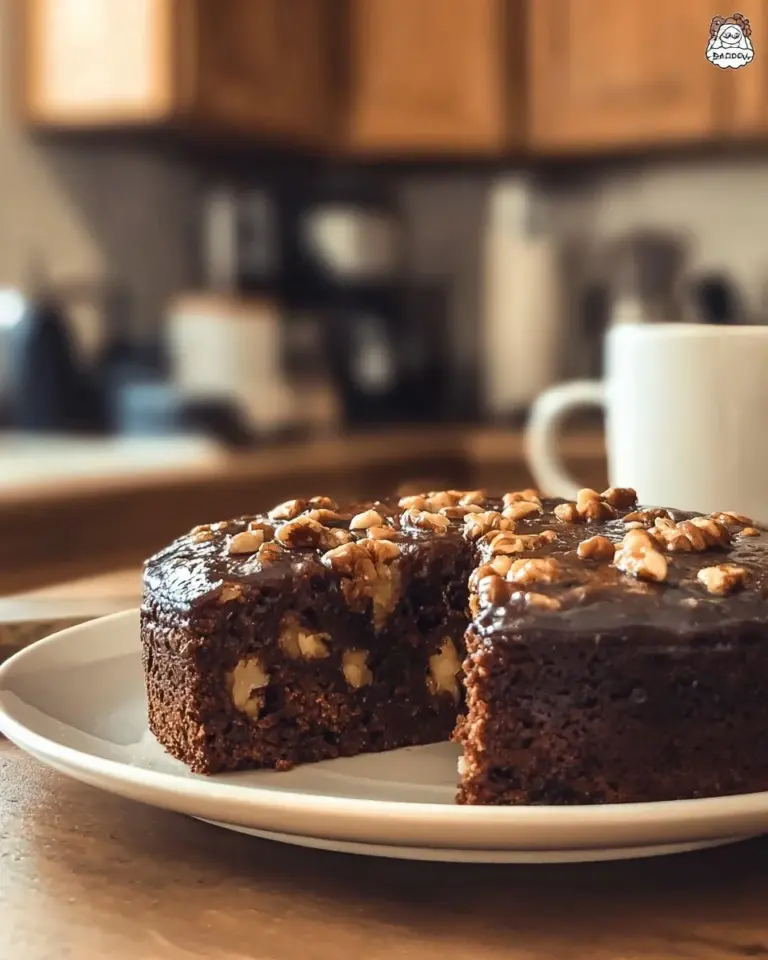
Irresistible Carmelita Cookies: The Ultimate Comfort Treat!
When the world feels like it’s spinning out of control, there’s nothing quite as comforting as a warm cookie fresh from the oven. I remember Saturday afternoons spent in my grandmother’s cozy kitchen, where the scent of caramel mingled with chocolate and the laughter of my family filled the air. Her famous Carmelita Cookies became a staple in our household—a sweet treat that brought everyone together. These delightful cookies are layered with chocolate, oats, and a gooey caramel center that makes them utterly irresistible.
What makes my version of Carmelita Cookies stand out from others? It’s all about the love and attention you pour into them (along with a few secret tips I’ve picked up along the way!). Whether you’re a novice baker or a seasoned pro, these cookies will evoke not only sweet memories but also new ones you’ll create as you share them with friends and family. In this post, I’ll guide you through creating these heavenly cookies, packed with comforting flavors and a sprinkle of nostalgia. Ready to discover the magic of Carmelita Cookies? Let’s dive in!
What Are Carmelita Cookies?
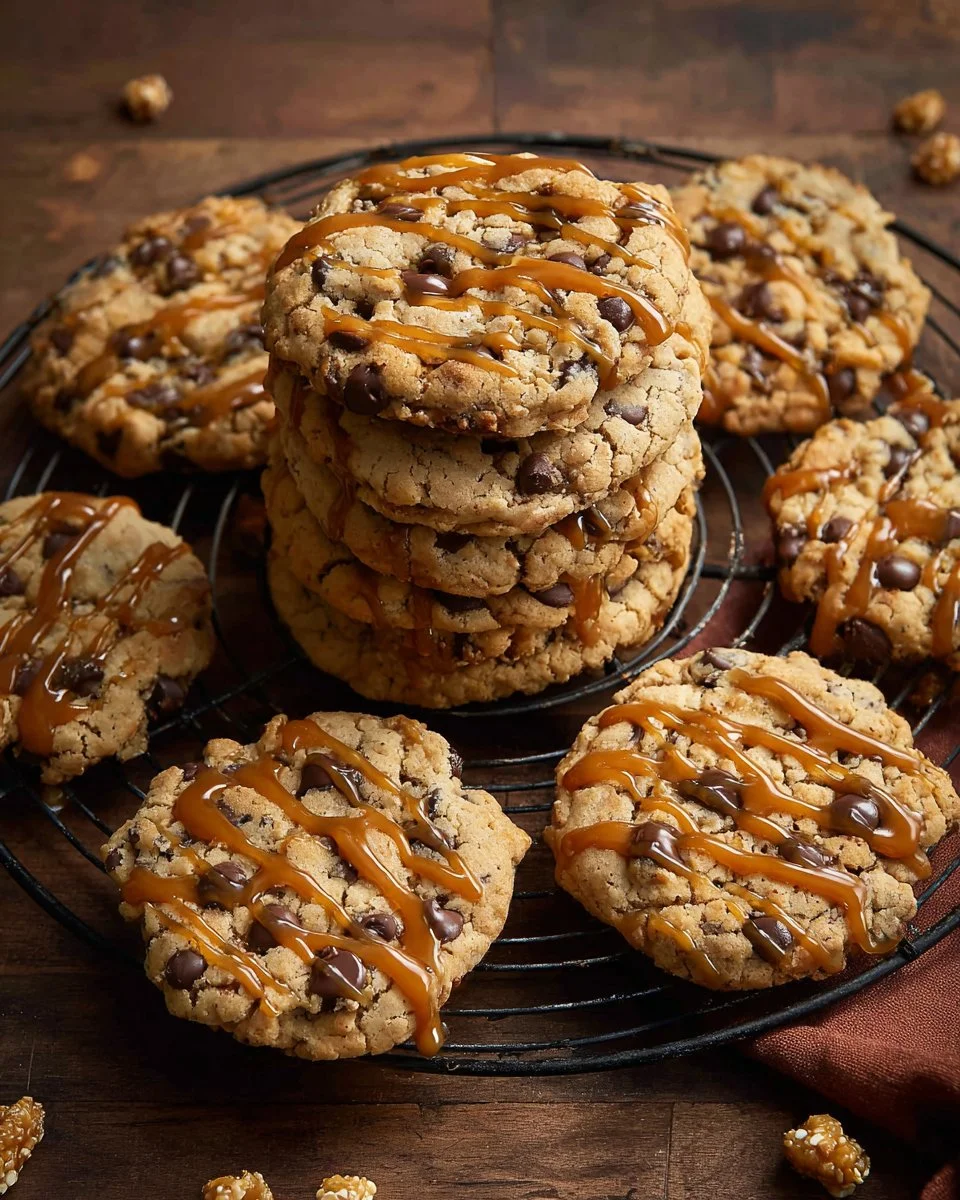
Originating from the classic cookie realm, Carmelita Cookies are a delicious blend of chocolate, oats, and caramel that create a uniquely satisfying texture and flavor. What sets them apart is the combination of crisp, chewy layers topped with a gooey caramel heart that melts in your mouth. Imagine biting into a cookie that’s crunchy on the outside, chewy on the inside, and laced with rich caramel and chocolate—pure bliss!
These cookies are perfect for any occasion, whether it’s a family gathering, a cozy movie night, or simply a treat to enjoy alone with your favorite book. Whipping up a batch of Carmelita Cookies not only fills your home with an inviting aroma but also provides a warm embrace in cookie form. They’re not just a dessert; they’re a little slice of happiness that brings people together.
Why You’ll Love This Recipe
Homemade Goodness: Forget store-bought versions laden with preservatives. These Carmelita Cookies are made from simple, wholesome ingredients that you can pronounce! You’re in control of the quality.
Easy to Make: This recipe is straightforward and requires minimal effort. With just a few mixing bowls and a stand mixer, you can have a delightful batch ready in less than an hour.
Cost-Effective: Homemade cookies save you money compared to pricey gourmet cookies from the bakery. Plus, you can make a large batch that lasts several days—if they don’t disappear first!
Customization Options: Want to switch things up? You can play with the flavor combinations by adding nuts, dried fruits, or even different types of chocolate. The possibilities for creating your variant of Carmelita Cookies are endless.
Perfect for Any Occasion: Whether it’s back-to-school, a holiday party, or just a Friday night treat, these cookies fit any celebration perfectly. Plus, they’ll wow your family and friends!
By the end of this post, you will feel ready to tackle these Carmelita Cookies, earning your spot as the cookie queen or king in your household!
Ingredients
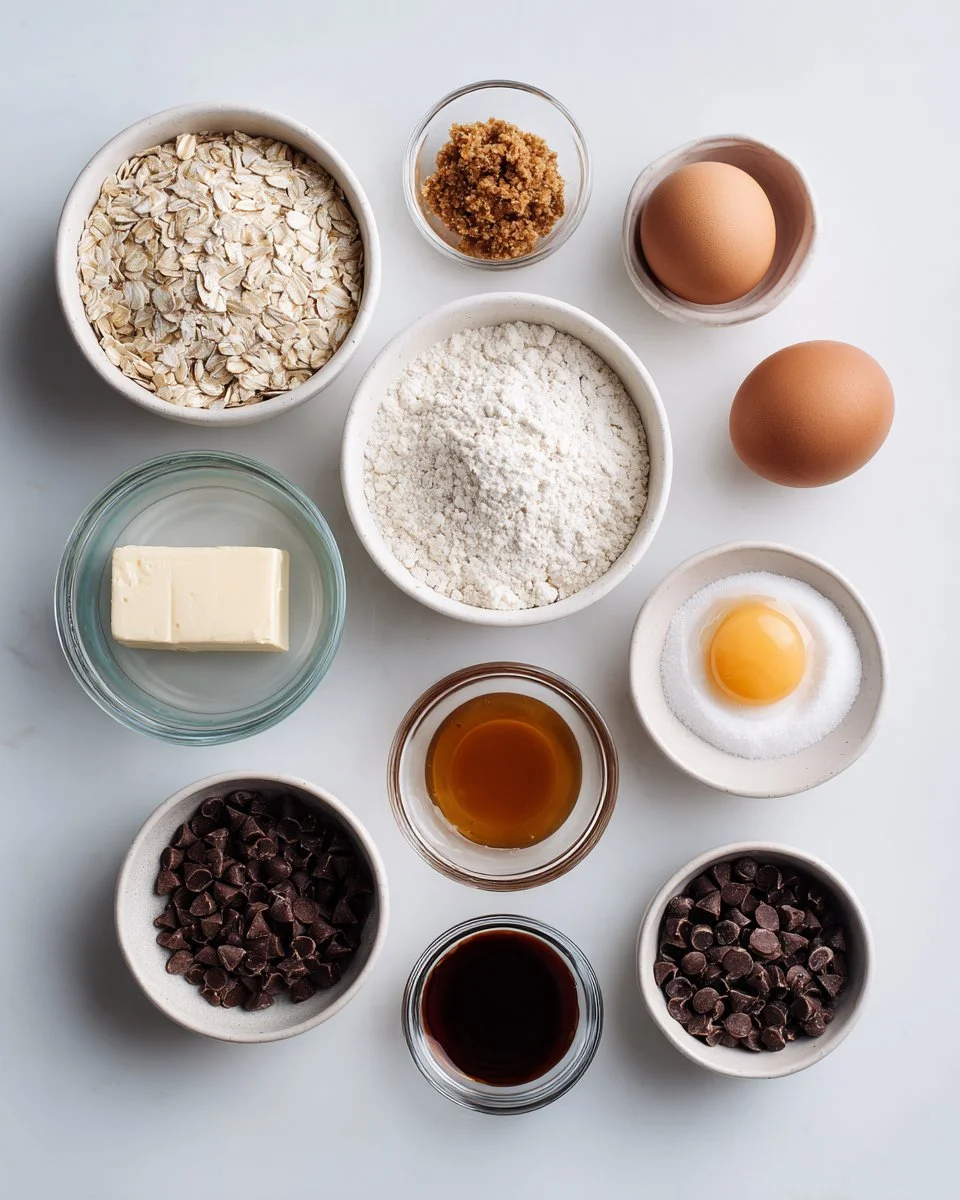
Here’s what you need to whip up these delicious Carmelita Cookies—quality ingredients make all the difference!
- 2 cups old-fashioned oats: Old-fashioned oats provide great texture; avoid instant oats for the best results.
- 1 ½ cups all-purpose flour: I recommend using unbleached flour for a richer taste.
- ½ teaspoon baking powder: This gives the cookies a little lift!
- ½ teaspoon baking soda: Another leavening agent to ensure perfect texture.
- ½ teaspoon kosher salt: Balances the sweetness!
- ½ cup unsalted butter, room temperature: Soften your butter before mixing; it should be easy to press your finger into but not melted.
- 1 cup light brown sugar, packed: Brown sugar adds a lovely caramel flavor!
- 2 large eggs, room temperature: Ensure they’re at room temperature for even mixing.
- 1 tablespoon molasses: This is my secret ingredient for a deeper sweetness!
- 1 teaspoon vanilla extract: Use pure vanilla for the best flavor.
- 1 cup caramel bits: These melt beautifully for that gooey center.
- 1 cup semi-sweet chocolate chips: Use high-quality chips for richer chocolate flavor.
- Caramel sauce, for garnish: Drizzle this on top before serving for extra decadence.
Step-by-Step Instructions
Ready to get baking? Let’s turn your kitchen into a cookie paradise!
Preheat Your Oven: Set your oven to 400°F (200°C) and line a baking sheet with parchment paper. This will keep your cookies from sticking!
Mix Dry Ingredients: In a large mixing bowl, whisk together the oats, flour, baking powder, baking soda, and salt. This ensures even distribution of the leavening agents.
Prepare Wet Ingredients: In the bowl of a stand mixer fitted with the paddle attachment, combine the room-temperature butter and brown sugar. Beat on low speed until smooth and creamy.
Chef’s Tip: Always scrape down the bowl with a spatula to ensure everything is mixed well.
Add Eggs and Flavorings: Add the eggs, molasses, and vanilla extract to the butter mixture. Mix until fully incorporated.
Combine Dry and Wet Ingredients: With the mixer on low, slowly add the dry ingredient mixture. Mix until just incorporated; don’t overdo it!
Stir in Caramel and Chocolate: Gently fold in the caramel bits and chocolate chips using a spatula. You want to distribute them evenly without overmixing.
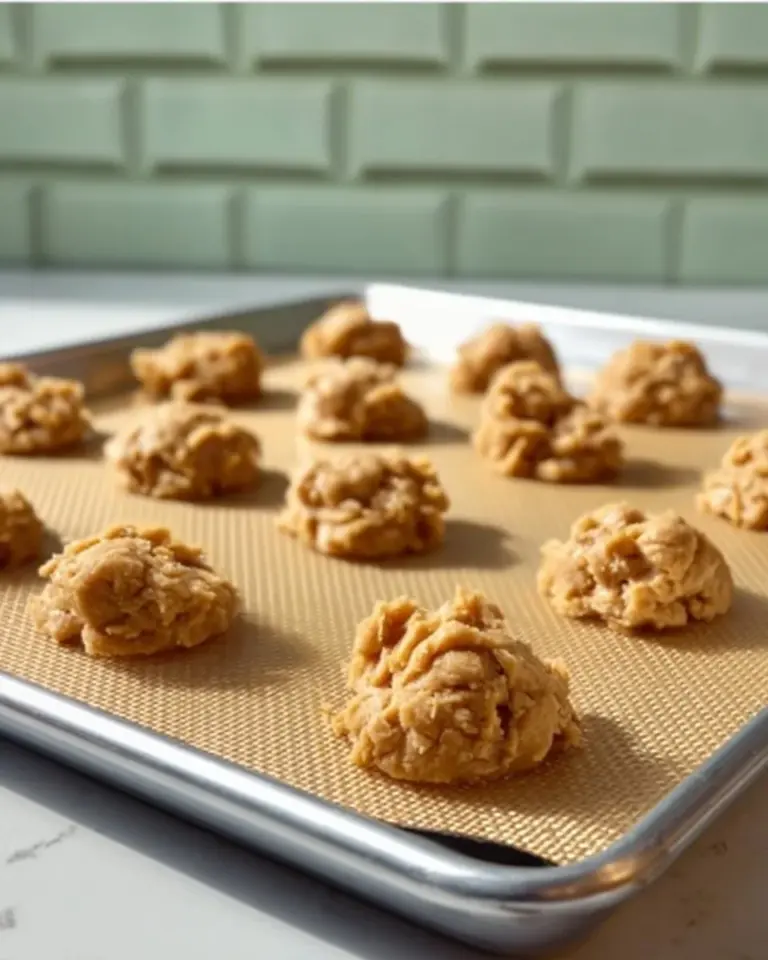
Scoop the Dough: Using a 2-tablespoon scoop, drop the cookie dough onto the prepared baking sheet. Gently press each cookie down to flatten them slightly.
Bake: Place the cookies in the preheated oven and bake for 7-8 minutes. They might look slightly doughy in the center, but that’s perfect!
Cool Down: Let the cookies rest on the baking sheet for a couple of minutes, then transfer them to a wire rack to cool completely.
Drizzle with Caramel: Before serving, drizzle with caramel sauce. This adds an extra layer of indulgence that you won’t want to miss!
Expert Tips & Tricks
Storage: Keep your cookies in an airtight container at room temperature for up to 1 week. They can also be frozen for up to 3 months. Just make sure to let them cool completely before freezing!
Make-Ahead: You can prepare the dough a day in advance. Just wrap it tightly in plastic wrap and refrigerate until you’re ready to bake.
Troubleshooting: If your cookies spread too much, try chilling the dough for about 30 minutes before baking. This helps them hold their shape better.
Customize Your Treats: Feel free to swap the semi-sweet chocolate chips for milk or dark chocolate, or add in some chopped nuts for an extra crunch.
Don’t Skip the Resting Time: Allowing the cookies to sit on the baking sheet before transferring them helps them set properly.
Double Up: This recipe is easy to double if you’re planning for a crowd or want extra to share!
Serving Suggestions
These Carmelita Cookies are delicious on their own but feel free to elevate your dessert by serving them alongside:
- A scoop of vanilla ice cream: The warm cookies and cold ice cream make for a heavenly combination.
- A drizzle of fresh espresso: Perfect for coffee lovers who want a sweet afternoon pick-me-up.
- A sprinkle of sea salt: To enhance those rich caramel and chocolate flavors.
For a special occasion, you can arrange the cookies on a decorative platter and drizzle with extra caramel sauce. Trust me; they will be the star of your dessert table!
Variations & Substitutions
- Chocolate Swirls: Try adding some melted peanut butter or Nutella into the mix for a unique twist!
- Nut-Free Version: Omit any nuts added and use dairy-free chocolate for an allergy-friendly treat.
- Seasonal Flavors: Consider adding pumpkin spice or nutmeg for autumn, or crushed peppermint candies for the holiday season.
Nutrition & Storage Info
- Prep Time: 15 minutes
- Cook Time: 8 minutes
- Total Time: 23 minutes
- Yield: Approximately 24 cookies
- Estimated Calories per Serving: 180 calories per cookie
Storage Instructions: Keep at room temperature in an airtight container for up to 1 week. For longer storage, freeze them for up to 3 months.
FAQ
Can I substitute the caramel bits?
Yes! You can use homemade caramel chunks or even soft caramels if you cut them into smaller pieces.What if I don’t have molasses?
You can substitute with dark corn syrup, though the flavor will be slightly different.Can I use quick oats instead of old-fashioned oats?
While it’s better to use old-fashioned oats for texture, you can use quick oats in a pinch; just know they may result in a softer cookie.What can I serve these cookies with?
They pair wonderfully with coffee, milk, or vanilla ice cream for a delightful dessert experience.Why do my cookies spread too much?
If the dough is too warm or if extra butter is added, this can cause spreading. Make sure to chill your dough if necessary.How can I ensure my cookies are chewy?
Avoid overbaking them! Pull them out when they look slightly underdone, as they will continue to cook after being taken out of the oven.Can I make these gluten-free?
You can use a gluten-free all-purpose flour blend. Just ensure that all ingredients used are certified gluten-free.How do I store leftover cookies?
Keep them in an airtight container or bag away from heat for optimal freshness.Can I mix different types of chocolate?
Absolutely! Try a mix of dark chocolate, white chocolate, or even caramel chocolate chips for a fun twist.Why are my cookies dry?
Overbaking is usually the culprit. Make sure to follow timing closely and allow cookies to rest on the baking sheet.

Conclusion
Creating these Carmelita Cookies is more than just baking; it’s about crafting memories that fill your home with joy and comfort. They’ll quickly become a favorite for your family and friends, just as they are in mine. I invite you to try this recipe and share your thoughts in the comments below—I would love to hear how they turned out for you! And while you’re here, check out my other delightful recipes that celebrate the joys of baking. Happy baking!
Print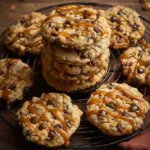
Irresistible Carmelita Cookies
- Total Time: 23 minutes
- Yield: About 24 cookies 1x
- Diet: Vegetarian
Description
Delicious layered cookies with chocolate, oats, and a gooey caramel center that offer a comforting treat.
Ingredients
- 2 cups old-fashioned oats
- 1 ½ cups all-purpose flour
- ½ teaspoon baking powder
- ½ teaspoon baking soda
- ½ teaspoon kosher salt
- ½ cup unsalted butter, room temperature
- 1 cup light brown sugar, packed
- 2 large eggs, room temperature
- 1 tablespoon molasses
- 1 teaspoon vanilla extract
- 1 cup caramel bits
- 1 cup semi-sweet chocolate chips
- Caramel sauce, for garnish
Instructions
- Preheat your oven to 400°F (200°C) and line a baking sheet with parchment paper.
- Mix the oats, flour, baking powder, baking soda, and salt in a large mixing bowl.
- Prepare the butter and brown sugar in a stand mixer, beating until smooth and creamy.
- Add the eggs, molasses, and vanilla extract, mixing until fully incorporated.
- Combine the dry ingredients with the wet mixture, mixing until just incorporated.
- Stir in the caramel bits and chocolate chips gently using a spatula.
- Scoop the dough onto the prepared baking sheet and flatten them slightly.
- Bake for 7-8 minutes, until slightly doughy in the center.
- Cool the cookies on a wire rack and drizzle with caramel sauce before serving.
Notes
Store in an airtight container at room temperature for up to 1 week or freeze for up to 3 months.
- Prep Time: 15 minutes
- Cook Time: 8 minutes
- Category: Dessert
- Method: Baking
- Cuisine: American
Nutrition
- Serving Size: 1 cookie
- Calories: 180
- Sugar: 15g
- Sodium: 100mg
- Fat: 7g
- Saturated Fat: 4g
- Unsaturated Fat: 2g
- Trans Fat: 0g
- Carbohydrates: 25g
- Fiber: 2g
- Protein: 2g
- Cholesterol: 25mg
🥗 Free Custom Keto Meal Plan?
Do you want to lose weight while still enjoying delicious Asian & Thai Fusion meals? Take this quick quiz to get your personalized Keto plan based on your favorite foods!
- ✅ No more guessing what to eat
- ✅ Delicious & easy-to-make recipes
- ✅ Tailored to your body type
Get My Custom Plan Now! →
*Over 100,000+ people have transformed their lives with this quiz.