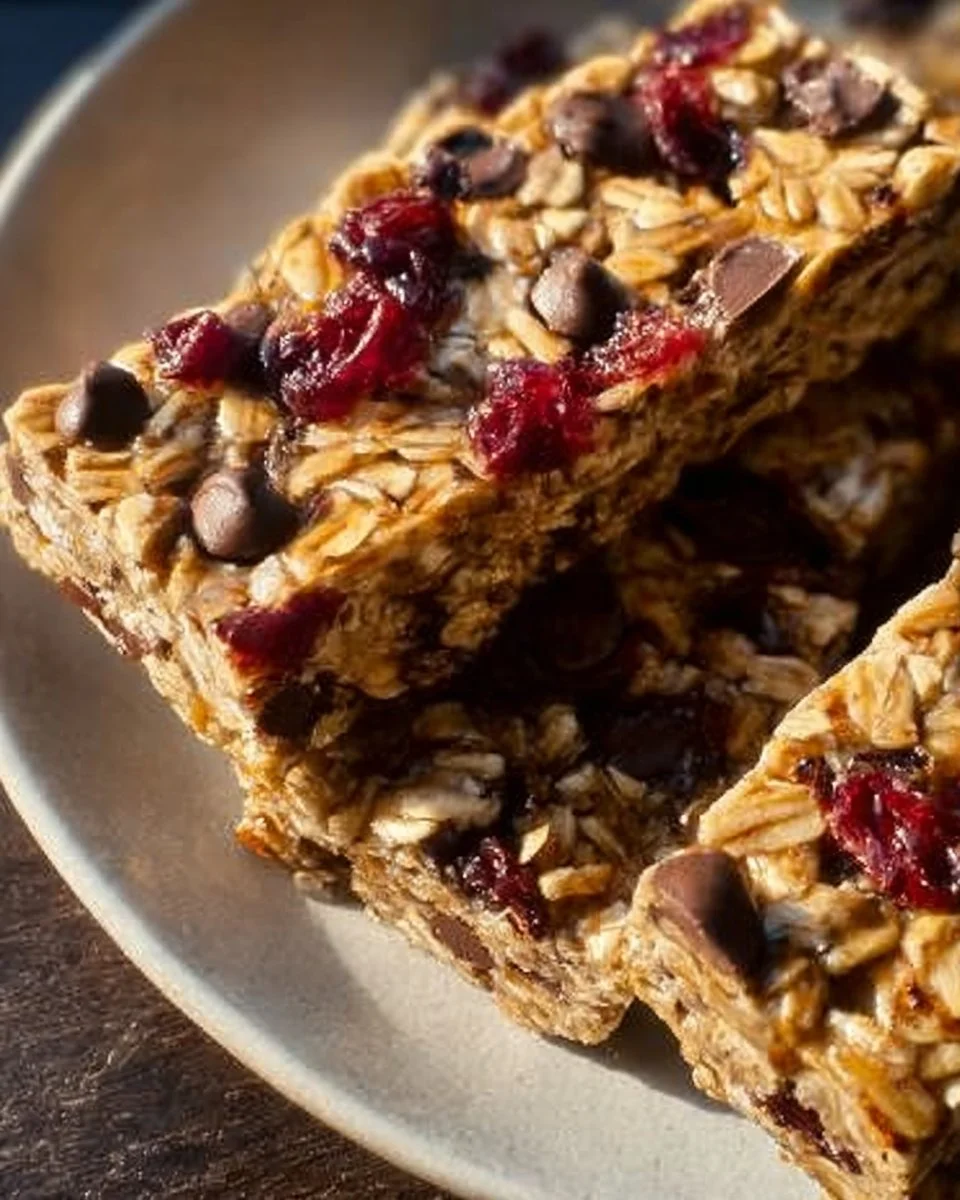
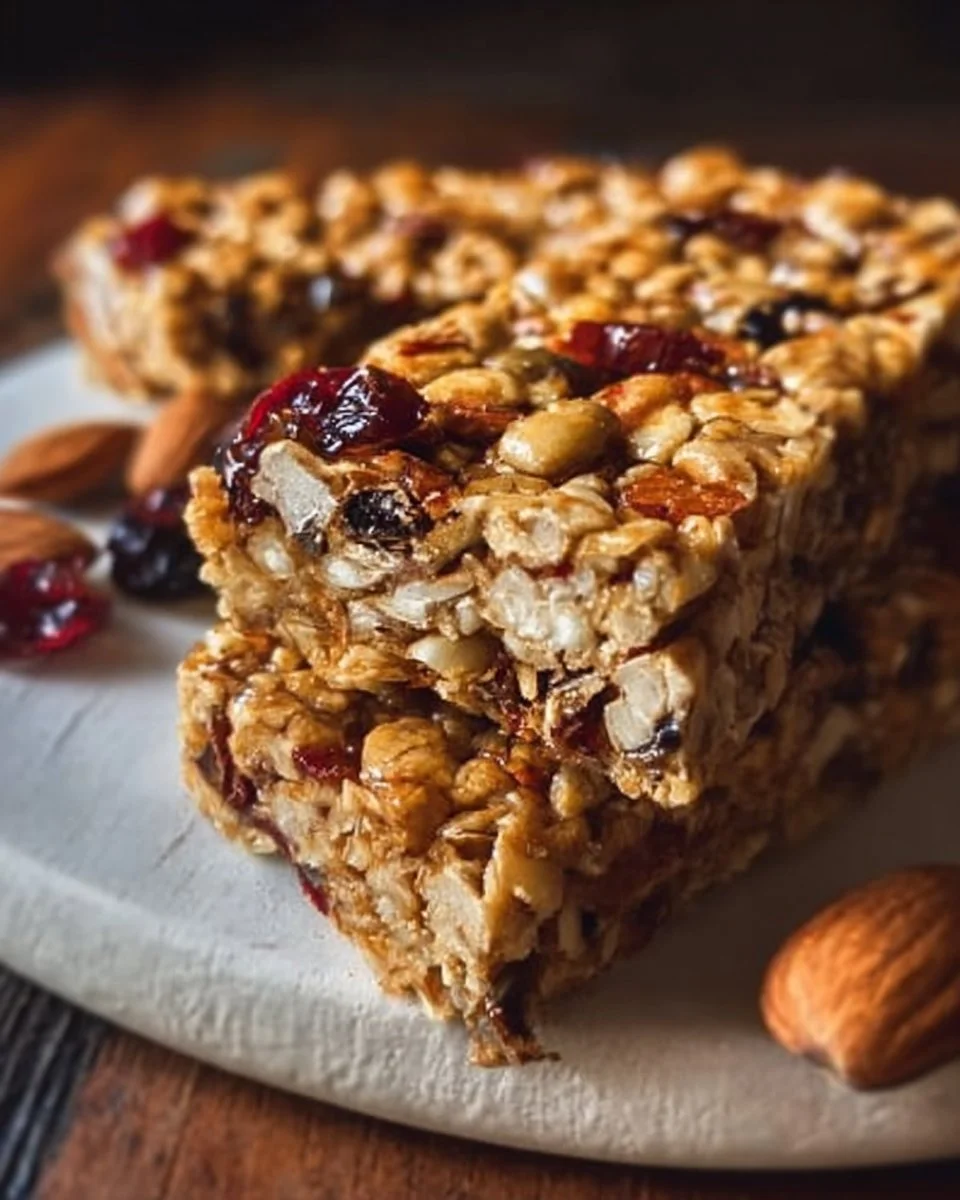
Irresistible Homemade Granola Bars: Your New Favorite Snack!
Ah, the comfort of a homemade granola bar! I can’t help but smile when I think back to my childhood. Every weekend, my mom would whip up a batch of her famous granola bars, filling our cozy kitchen with the irresistible aroma of honey, oats, and toasted nuts. These weren’t just any granola bars; they held a world of memories—after-school snacks, long road trips, and lazy Sunday picnics at the park. Today, I’m excited to share my version of these delightful treats: Homemade Granola Bars that are wholesome, customizable, and oh-so-delicious!
What makes these granola bars special? They’re not only packed with nutrients but also tailored to your tastes and dietary needs. Unlike many store-bought versions filled with preservatives and added sugars, my recipe allows you to control every ingredient, ensuring a snack that’s both healthy and satisfying. By the end of this post, you’ll not only discover how to create your own delicious homemade granola bars, but you’ll also find endless possibilities to make them uniquely yours. So, let’s dive in!
What Are Homemade Granola Bars?
Granola bars have a fascinating history, originating in the late 19th century as part of a health craze that focused on whole grains and nutritious snacking. Today, they continue to be a staple snack, cherished for their chewy texture, nutty flavors, and the way they keep hunger at bay. Imagine biting into a perfectly baked bar—slightly crunchy on the outside while the inside offers a delightful chewiness, bursting with flavors of honey, nut butter, and your choice of mix-ins.
What makes Homemade Granola Bars unique is the freedom to mix and match ingredients that resonate with your taste buds! Whether you prefer a nutty almond base or want to add chocolate chips, the choice is entirely yours. These are not just snacks; they’re the perfect on-the-go energy boost, breakfast option, or weekly meal prep miracle. You can whip them up when you’re busy or when you have guests. They truly fit any occasion!
Why You’ll Love This Recipe
Healthier Choice: Since these are Homemade Granola Bars, you have complete control over what goes in. That means you can ditch the excessive sugars and processed ingredients found in many store-bought versions. Plus, the nuts and oats provide excellent fiber and protein—perfect for fueling your day!
Customization: Love chocolate? Throw in some dark chocolate chips! Prefer a fruity twist? Dried cranberries or apricots can add that delightful sweetness you crave. You can make these bars suit your mood, dietary preferences, or even the season.
Cost-effectiveness: Let’s be real: store-bought granola bars can add up quickly, especially if you consume them regularly. With this easy recipe, you can create multiple batches for a fraction of the cost. Just think about what else you can spend those dollars on!
Time investment: Don’t worry if you’re short on time! These bars come together in under 30 minutes with minimal cooking. Trust me; you’ll be surprised at how simple it is to make something that looks and tastes gourmet.
Delicious Versatility: From breakfast to snacks and even lunchbox treats, these granola bars are incredibly versatile. They satisfy sweet cravings without the guilt, making them perfect for both kids and adults alike!
Ingredients Section
To craft the ultimate Homemade Granola Bars, gather the following:
- 2 cups rolled oats: opt for old-fashioned oats for the best texture.
- 1 cup nuts (almonds, walnuts, or your choice): toasted for extra flavor—try mixing a few types!
- 1/2 cup honey or maple syrup: the sweetener of your choice! For a deeper flavor, I love using maple.
- 1/2 cup nut butter (peanut butter or almond butter): make sure it’s at room temperature for easy mixing.
- 1 teaspoon vanilla extract: pure extract adds depth—my go-to brand is Simply Organic.
- 1/2 teaspoon salt: balances out the sweetness!
- Optional: dried fruits, chocolate chips, or seeds—get creative!
Prep Notes:
- Ensure your nut butter is at room temperature for easy combining.
- If using sticky honey, lightly warm it to make measurements easier.
Step-by-Step Instructions
Preheat the oven to 350°F (175°C) and line a baking dish (typically an 8×8-inch pan) with parchment paper. This ensures easy removal later on.
In a large bowl, mix together the oats, nuts, salt, and any optional ingredients. Chef’s Tip: Chopping the nuts into smaller bits will give you a more uniform bar!
In a small saucepan over low heat, combine the honey (or maple syrup) and nut butter until melted and smooth—about 3-4 minutes. Stir in the vanilla extract. You want it lovely and runny!
Pour the wet mixture over the dry ingredients and mix until well combined. Common mistake alert! Make sure everything is evenly coated. No one likes dry bites!
Press the mixture firmly into the prepared baking dish in an even layer. Chef’s Tip: Use a spatula or your hands (dampened slightly) to compact it well—this helps the bars hold together nicely.
Bake for 15-20 minutes or until lightly golden. Keep an eye on them; ovens vary! You’ll know they’re done when they smell heavenly.
Allow to cool completely before cutting into bars. Enjoy your healthy snack!

Expert Tips & Tricks
Storage recommendations: These granola bars can be stored in an airtight container for up to a week at room temperature or 10-14 days in the refrigerator. For longer storage, you can freeze them for up to three months!
Make-ahead instructions: Preparing a batch ahead of time ensures you always have a healthy snack on hand. Just wrap individual bars in foil or parchment for grab-and-go convenience.
Troubleshooting: If your bars are crumbling, try using a little more nut butter or sweetener next time to make them stick together better.
Add-ins are key!: Consider adding chia seeds, flaxseed meal, or even protein powder for an extra nutritional punch.
Don’t be afraid to experiment: Switching up nut butters or the types of nuts gives you endless variations—I’ve even tried them with sunflower seed butter, and they were fantastic!
Serving Suggestions
These Homemade Granola Bars are perfect on their own, but you can take them to the next level with a few accompaniments. Pair them with a tall glass of cold almond milk or a dollop of Greek yogurt topped with fresh berries for a delicious breakfast or snack combo. For special occasions, wrap them stylishly in parchment paper and twine to impress your guests during brunch or a picnic.
Variations & Substitutions
There are so many ways to switch things up with these granola bars!
- Flavor combinations: Try adding a dash of cinnamon for a cozy autumn flavor or a tablespoon of cocoa powder for a chocolatey variant.
- Dietary adaptations: If you’re looking for a nut-free version, substitute with seeds like pumpkin or sunflower seeds. For a vegan option, ensure your nut butter is dairy-free.
- Seasonal variations: In the fall, consider adding pumpkin puree and spices for a festive twist, while winter could inspire peppermint extract and dark chocolate chips.
Nutrition & Storage Info
- Prep Time: 10 minutes
- Cook Time: 15-20 minutes
- Total Time: 30-35 minutes
- Yield: Approximately 12 bars
- Estimated Calories per Serving: 180 calories (calories can vary based on mix-ins)
- Storage Instructions: Store in an airtight container at room temperature for up to a week; refrigerate for up to two weeks or freeze for up to three months.
FAQ Section
Can I use quick oats instead of rolled oats?
- Yes, but quick oats will yield a softer texture. Rolled oats provide a heartier chew!
How can I make these bars gluten-free?
- Ensure you use certified gluten-free oats and check any nut butter or additional ingredients for gluten.
What’s the best way to cut these bars?
- A sharp knife works best, and you can even run it under hot water for clean cuts.
Can I add protein powder to the mixture?
- Absolutely! Just replace a small amount of the oats or nut butter with protein powder for an extra boost.
How do I know when they’re done baking?
- Look for a light golden brown around the edges and a pleasant aroma; they will firm up a bit as they cool.
Are these bars suitable for kids?
- Definitely! They’re nutritious and can be customized to suit younger taste buds.
What’s the best way to store leftovers?
- Keep them in an airtight container at room temperature or in the fridge for longer freshness.
Are these bars vegan?
- They can be made vegan by using maple syrup and choosing a vegan nut butter.
Can I add fresh fruits?
- Fresh fruits might make the bars soggy, but you can include dried fruits for added flavor.
How can I make these more filling?
- Add seeds or even some rolled protein powder to increase the nutrient density and make them more satisfying.
Conclusion
These Homemade Granola Bars are truly a labor of love, filled with the essence of comfort and nourishment. They’re not just a snack; they hold the potential for countless memories to be made. I’m thrilled for you to give them a try! I’d love to hear how your batch turns out—did you customize them or stick to the classic recipe? Don’t forget to share your feedback in the comments below, and check out more delicious recipes on my blog that will inspire your kitchen adventures! Happy snacking!
Print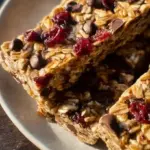
Irresistible Homemade Granola Bars
- Total Time: 30 minutes
- Yield: 12 bars 1x
- Diet: Vegetarian
Description
Delicious and customizable homemade granola bars, perfect for a healthy snack or breakfast option packed with nutrients.
Ingredients
- 2 cups rolled oats
- 1 cup nuts (almonds, walnuts, or your choice)
- 1/2 cup honey or maple syrup
- 1/2 cup nut butter (peanut butter or almond butter)
- 1 teaspoon vanilla extract
- 1/2 teaspoon salt
- Optional: dried fruits, chocolate chips, or seeds
Instructions
- Preheat the oven to 350°F (175°C) and line a baking dish with parchment paper.
- In a large bowl, mix together the oats, nuts, salt, and any optional ingredients.
- In a small saucepan over low heat, combine the honey (or maple syrup) and nut butter until melted and smooth (about 3-4 minutes). Stir in the vanilla extract.
- Pour the wet mixture over the dry ingredients and mix until well combined.
- Press the mixture into the prepared baking dish in an even layer.
- Bake for 15-20 minutes or until lightly golden.
- Allow to cool completely before cutting into bars.
Notes
Store in an airtight container for up to a week at room temperature or 10-14 days in the refrigerator.
- Prep Time: 10 minutes
- Cook Time: 20 minutes
- Category: Snack
- Method: Baking
- Cuisine: American
Nutrition
- Serving Size: 1 bar
- Calories: 180
- Sugar: 8g
- Sodium: 100mg
- Fat: 7g
- Saturated Fat: 1g
- Unsaturated Fat: 6g
- Trans Fat: 0g
- Carbohydrates: 25g
- Fiber: 3g
- Protein: 5g
- Cholesterol: 0mg
🥗 Free Custom Keto Meal Plan?
Do you want to lose weight while still enjoying delicious Asian & Thai Fusion meals? Take this quick quiz to get your personalized Keto plan based on your favorite foods!
- ✅ No more guessing what to eat
- ✅ Delicious & easy-to-make recipes
- ✅ Tailored to your body type
Get My Custom Plan Now! →
*Over 100,000+ people have transformed their lives with this quiz.