Irresistibly Delicious Homemade Tart Crust: The Ultimate Recipe You’ll Love!
Every great dessert starts with a solid foundation, and for me, that’s always been my beloved Homemade Tart Crust. I remember the first time I stood in my grandmother’s cozy kitchen, her apron dusted with flour as we worked side by side, crafting the perfect crust for her famous fruit tarts. The smell of baked pastry filled the air, mixing with laughter and sweet stories from her youth, creating a bond that I cherish to this day.
What makes this tart crust special is its delicate buttery flavor and crumbly texture, far superior to store-bought versions. Each bite is a nostalgic journey, transporting me back to those sunlit afternoons spent with my grandmother. Unlike other recipes that leave you with either a soggy disaster or a dense brick, this particular crust strikes the perfect balance of firmness and flakiness.
In this post, I promise to share with you not only the recipe but also the little tips and tricks I’ve picked up along the way to make sure your homemade tart crust shines like a star. Whether you’re filling it with rich chocolate ganache or a light, zesty lemon filling, this crust will become your new secret weapon in the kitchen!
What Are Homemade Tart Crusts?
Tart crusts have a rich culinary history, often associated with French pastry techniques. These delightful pastry bases are typically made from a mix of flour, butter, sugar, and water, and they serve as the perfect canvas for various sweet or savory fillings. Their taste is characterized by a rich, buttery flavor complemented by a crumbly and slightly flaky texture, making each bite an indulgent experience.
What makes a Homemade Tart Crust unique is its versatility and ability to elevate any dessert. You could, of course, opt for a pre-made version from the grocery store, but there’s something so rewarding about crafting it yourself. Not only is the batter customizable, but you can make it exactly to your liking, adjusting sweetness or flavorings, perfect for celebrating heartfelt occasions, holidays, or just a personal indulgence!
When the craving strikes, this crust is the answer. It’s perfect for tartlets at tea time or a show-stopping dessert for family gatherings. Every time I whip up a batch, I can feel the love and the memory of those cherished moments in the kitchen.
Why You’ll Love This Recipe
Superior Flavor and Texture: Compared to the cardboard-like texture of store-bought crusts, homemade is simply unbeatable! The fresh butter and sugar create a symphony of flavor that enhances any filling, whether it’s a sweet fruit compote or a rich custard.
Cost-Effective: Making your own Homemade Tart Crust saves you money. Think about it: a few basic ingredients yield several tarts, whereas buying a single pre-made shell could cost you just about the same!
Customization Galore: The beauty of this recipe lies in its adaptability. Want a nutty flavor? Swap some of the flour for ground almonds. Craving a hint of spice? A dash of cinnamon or vanilla extract can personalize it to your taste.
Simplicity: Yes, this crust might appear sophisticated, but it’s incredibly easy to make. If you can mix and roll dough, you can create a tart crust! Plus, you’ll impress your friends with your pastry skills.
Perfect for Any Occasion: Whether you’re hosting a fancy dinner party or enjoying a quiet night in with a movie, this crust fits the bill. You can serve it with a classic pastry cream filling for a traditional dessert or get creative with seasonal fruits.
Ingredients
For your Homemade Tart Crust, you’ll need the following ingredients:
1 1/4 cups all-purpose flour: Use a high-quality brand like King Arthur Flour for the best results. If you’re gluten-free, you can substitute with a 1:1 gluten-free flour blend.
1/2 cup unsalted butter, cold and cubed: Always opt for unsalted for better control of your flavors. Make sure it’s taken out of the fridge just before starting for the best results.
1/4 cup powdered sugar: Sifting it helps eliminate lumps and ensures a smooth texture.
1/4 teaspoon salt: This enhances the flavor of the crust. Use fine sea salt for an exquisite taste.
1 egg yolk: I prefer using large organic eggs for a richer flavor.
1-2 tablespoons cold water: Adjust the amount based on the humidity—less if it’s humid and more if it’s dry.
Prep Notes
- You can also use vegan butter for a dairy-free version.
- Ensure your butter is cubed and chilled for a flaky crust.
Step-by-Step Instructions
Combine Dry Ingredients: In a mixing bowl, whisk together 1 1/4 cups all-purpose flour, 1/4 cup powdered sugar, and 1/4 teaspoon salt until evenly incorporated.
Cut in Butter: Add the 1/2 cup cold butter, using a pastry cutter or your fingertips, until the mixture resembles coarse crumbs. This step is crucial for creating that flaky texture.
Incorporate Egg Yolk: Stir in 1 egg yolk, mixing until just combined. You’ll want the dough to be cohesive but not overly worked.
Add Cold Water: Gradually mix in 1-2 tablespoons of cold water, one tablespoon at a time, until the dough holds together. Aim for a moist but not sticky consistency.
Chill the Dough: Shape the dough into a disk, wrap it in plastic wrap, and refrigerate for at least 30 minutes. This rest period allows the gluten to relax and makes the dough easier to roll.
Preheat the Oven: As the dough chills, preheat your oven to 400°F (200°C), allowing both the crust and filling to bake evenly.
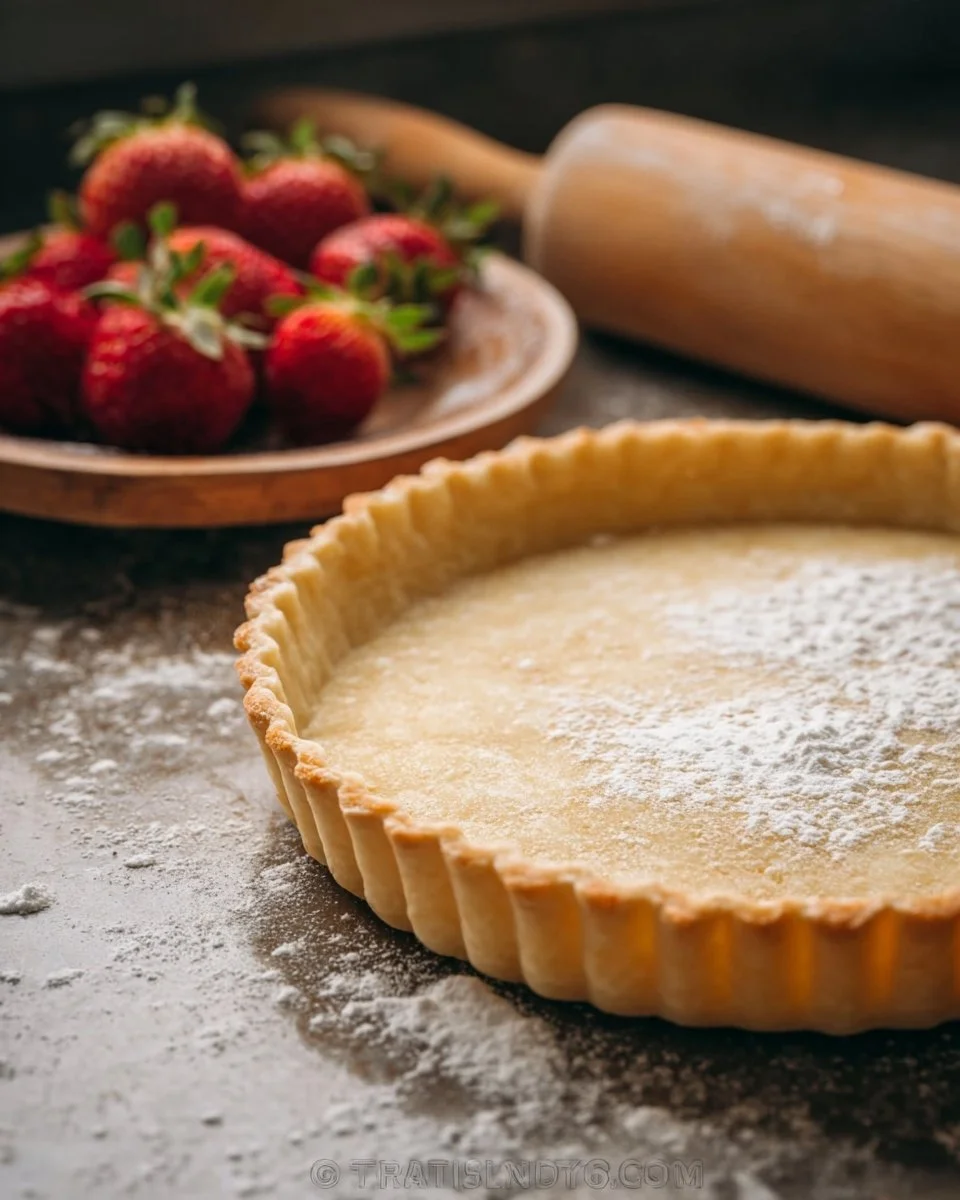
Roll Out the Dough: On a lightly floured surface, roll out the dough to fit your tart pan. Aim for about a 1/8-inch thickness.
Prepare for Baking: Transfer the dough to a tart pan, trimming any excess. Prick the bottom with a fork to prevent bubbling, then pop it into the oven.
Bake: Bake for 15-20 minutes or until golden brown. Keep an eye on it towards the end for that beautiful color!
Cool and Fill: Let the crust cool completely before filling it with your desired filling.
Chef’s Tips
- Make sure your butter remains cold throughout the process for a flaky crust.
- Avoid over-mixing the dough to maintain texture.
- If the dough cracks while rolling, simply patch it back together—your filling will cover imperfections!
Expert Tips & Tricks
Storage: This dough can be made ahead of time and frozen for up to 2 months. Just let it defrost in the refrigerator overnight before using.
To Blind Bake or Not: If your filling doesn’t require further baking, blind bake your crust by adding pie weights or dried beans to prevent it from puffing up.
Common Mistakes: Avoid overworking the dough—this can lead to toughness. Instead, mix just until the ingredients combine.
Make-Ahead: You can prep crusts a day in advance, saving valuable time on the day of your event.
Troubleshooting: If your dough cracks while rolling, simply patch it up; it’ll bake wonderfully, and no one will notice.
Serving Suggestions
Once your Homemade Tart Crust is baked and cooled, the possibilities are endless!
Fillings: Pair it with classic pastry creams, fresh fruits, or even a rich chocolate ganache for a decadent treat.
Presentation: Dust the finished tart with powdered sugar, add a dollop of whipped cream, or serve it with a side of vanilla ice cream for an unforgettable dessert.
Occasions: This tart is perfect for birthdays, family gatherings, or even cozy date nights. Trust me, no one will turn down a slice of this beauty!
Variations & Substitutions
Flavor Combinations: Add lemon zest or almond extract to the dough for a unique flavor profile.
Dietary Restrictions: For gluten-free tarts, use almond flour or gluten-free flour blends. For vegan options, substitute butter with a plant-based alternative and omit the egg yolk.
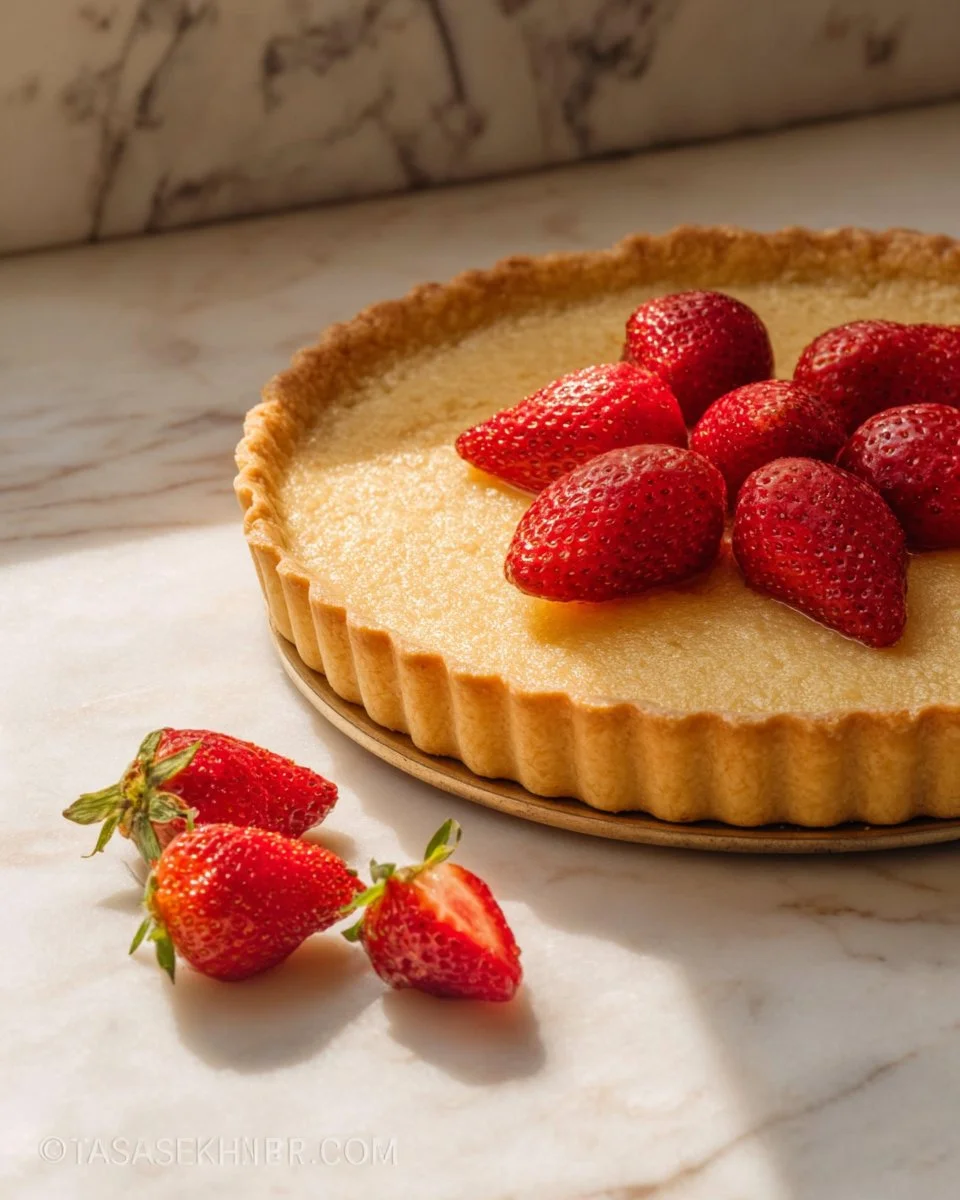
Seasonal Variations: Top with seasonal fruits like fresh strawberries in summer, roasted apples in fall, or citrus fruits in winter to keep things exciting year-round!
Nutrition & Storage Info
- Prep Time: 15 minutes (plus chilling)
- Cook Time: 15-20 minutes
- Total Time: 45 minutes
- Yield: 8 slices
- Estimated Calories: Approximately 180 calories per slice
- Storage Instructions: Store at room temperature for up to 2 days. For longer storage, keep in the fridge for up to 5 days or freeze for up to 2 months.
FAQ Section
1. Can I make the crust ahead of time?
Absolutely! You can prepare the dough in advance and freeze it for up to 2 months. Just thaw it in the fridge when ready to use.
2. What can I use if I don’t have powdered sugar?
You can blend granulated sugar in a blender to create a homemade powdered sugar substitute.
3. My crust puffed up while baking. What happened?
This typically means the dough wasn’t pricked enough. Be sure to prick the bottom and sides well before baking.
4. Can I fill the tart crust while it’s still warm?
It’s best to let it cool completely before adding any cream-based fillings to prevent melting.
5. What fillings pair well with this tart crust?
Think fruit preserves, pastry creams, chocolate ganache, or custard-based fillings. The options are endless!
6. Can I use a different type of flour?
Yes, feel free to experiment with alternatives like almond flour or a gluten-free blend to suit your dietary needs.
7. Will the tart crust turn soggy if filled too early?
Yes, to prevent sogginess, always wait until the crust cools and use thick fillings.
8. How long will the crust last once filled?
Once filled, it’s best enjoyed within 2-3 days for optimal freshness.
9. How do I prevent the edges from burning during baking?
Check the tart halfway through baking and shield the edges with aluminum foil if they begin to brown too quickly.
10. Should I grease the tart pan?
It’s not necessary with this recipe, but if you’re using a non-stick tart pan, a light coating of butter can help with removal.
Conclusion
There you have it—a foolproof recipe for Homemade Tart Crust that bridges the gap between nostalgia and modern baking. It’s more than just a crust; it’s a reminder of cherished moments spent with loved ones and a surefire way to impress your friends and family. Don’t shy away from trying this recipe! I can’t wait to hear about your baking adventures and any fun twists you put on it.
Looking for more deliciousness? Check out my other pastry recipes on the blog that will leave you and your loved ones craving more!

Homemade Tart Crust
- Total Time: 45 minutes
- Yield: 8 servings 1x
- Diet: Vegetarian
Description
A versatile and delicious tart crust that provides a buttery, flaky foundation for any sweet or savory filling.
Ingredients
- 1 1/4 cups all-purpose flour
- 1/2 cup unsalted butter, cold and cubed
- 1/4 cup powdered sugar
- 1/4 teaspoon salt
- 1 egg yolk
- 1–2 tablespoons cold water
Instructions
- Combine dry ingredients: In a mixing bowl, whisk together flour, powdered sugar, and salt.
- Cut in butter: Add cold butter and mix until the mixture resembles coarse crumbs.
- Incorporate egg yolk: Stir in the egg yolk until just combined.
- Add cold water: Gradually mix in water until the dough holds together.
- Chill the dough: Shape into a disk, wrap in plastic, and refrigerate for at least 30 minutes.
- Preheat the oven: Preheat to 400°F (200°C).
- Roll out the dough: Roll out on a lightly floured surface to 1/8-inch thickness.
- Prepare for baking: Transfer to a tart pan, prick the bottom, and bake for 15-20 minutes until golden brown.
- Cool and fill: Let the crust cool completely before filling.
Notes
Ensure your butter is cold for a flakier texture. You can make the dough ahead of time and freeze for up to 2 months.
- Prep Time: 15 minutes
- Cook Time: 20 minutes
- Category: Dessert
- Method: Baking
- Cuisine: French
Nutrition
- Serving Size: 1 slice
- Calories: 180
- Sugar: 6g
- Sodium: 100mg
- Fat: 12g
- Saturated Fat: 7g
- Unsaturated Fat: 5g
- Trans Fat: 0g
- Carbohydrates: 20g
- Fiber: 1g
- Protein: 2g
- Cholesterol: 50mg
🥗 Free Custom Keto Meal Plan?
Do you want to lose weight while still enjoying delicious Asian & Thai Fusion meals? Take this quick quiz to get your personalized Keto plan based on your favorite foods!
- ✅ No more guessing what to eat
- ✅ Delicious & easy-to-make recipes
- ✅ Tailored to your body type
Get My Custom Plan Now! →
*Over 100,000+ people have transformed their lives with this quiz.