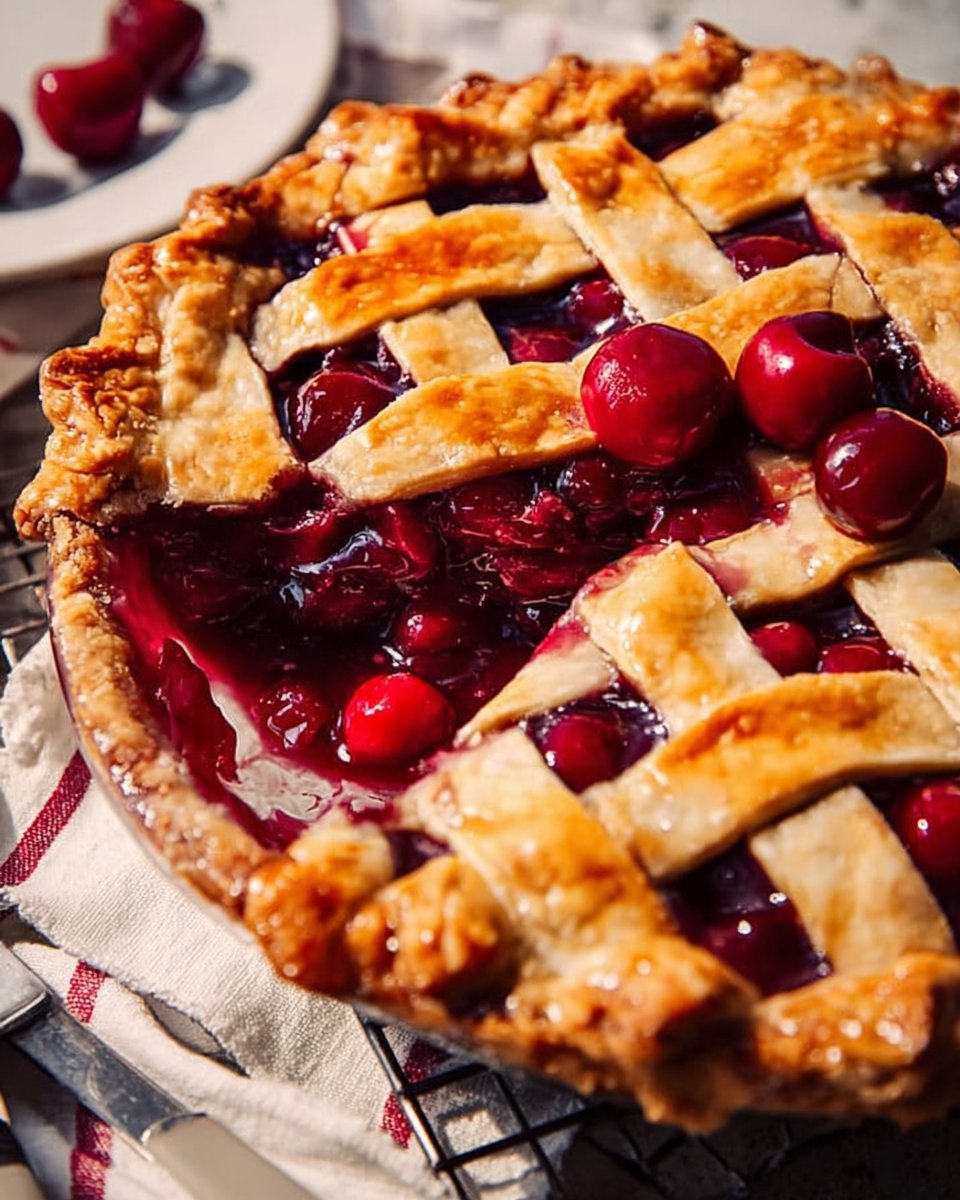
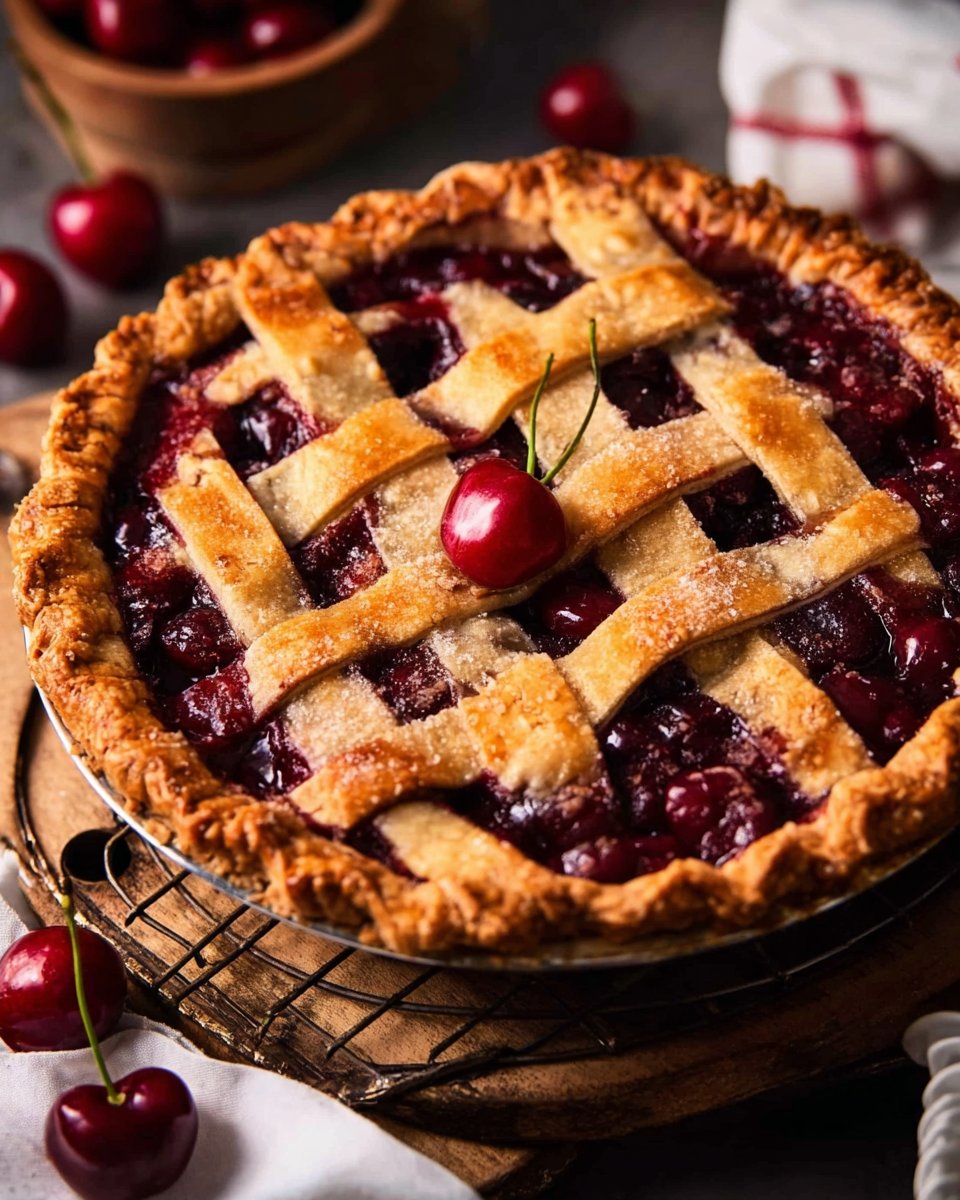
Irresistible Homemade Cherry Pie: The Ultimate Comfort Food
Ah, Homemade Cherry Pie—the scent of sweet cherries mingling with the buttery aroma of a perfectly baked crust evokes memories of summer afternoons spent in my grandmother’s kitchen. She would always say that nothing could replace the joy of a pie made from scratch, and boy, was she right! Each time we gathered to slice into her beautifully crafted pie, it was more than just dessert; it was a celebration of family, laughter, and love. What makes this Homemade Cherry Pie recipe so special is not just the heavenly combination of flavors but also the heartwarming stories shared over each slice.
Unlike other recipes you may come across, my take on Homemade Cherry Pie emphasizes fresh, natural ingredients and simple techniques that elevate it to the next level. Here, you’ll find tips to avoid common pitfalls (like a soggy bottom crust!) and ways to customize the filling to your personal taste. By the time you finish reading, you’ll be ready to make a pie that even Grandma would be proud of!
What Are Homemade Cherry Pies?
The origins of cherry pie date back centuries, with its roots in European cuisine. This delightful dessert combines sweet cherries—either fresh or preserved—with a tender, flaky crust. The key to a great cherry pie is the balance of sweetness from the cherries and the slight tartness that comes from the natural fruit.
When baked, Homemade Cherry Pie transforms into a warm, gooey treat with a golden-brown crust that’s both crispy and tender. Each bite delivers a symphony of flavors that dance on your palate. It’s perfect for summer barbecues, holiday gatherings, or even cozy evenings at home—anytime you’re craving a slice of comfort. There’s something undeniably nostalgic about a cherry pie that can make any occasion feel special.
Why You’ll Love This Recipe
Fresh Ingredients: Using 2 cups of fresh or frozen cherries means you’re getting the best flavor possible. There’s a noticeable difference between homemade and store-bought options, which often use artificial ingredients.
Cost-Effective: Making a Homemade Cherry Pie is surprisingly affordable. With a handful of ingredients, you can create a dessert that looks and tastes gourmet without breaking the bank.
Customization Options: Whether you prefer a sweeter filling or want to add a hint of spice with cinnamon or almond extract, this recipe is flexible. You can adjust it to fit your taste and dietary needs.
Satisfying to Make: While the process might seem daunting, trust me, it’s easier than you think! The joy of rolling out the pie crust and watching it transform in the oven is a baking experience like no other.
Impressive Presentation: Serve this pie at gatherings, and watch your friends and family swoon over its rustic design and mouth-watering aroma. It’s the kind of dessert that brings people together!
With these compelling reasons to dive into making your Homemade Cherry Pie, I can’t wait for you to experience the joy and deliciousness that awaits.
Ingredients
Before we get started, here’s what you’ll need to create your Homemade Cherry Pie:
- 2 cups fresh or frozen cherries: If using frozen, thaw and drain excess liquid. Fresh cherries yield the best flavors!
- 1 cup granulated sugar: You can adjust this based on your taste preference and the tartness of your cherries.
- 2 tablespoons cornstarch: This helps thicken the filling and gives it that lovely gooey texture.
- 1 tablespoon lemon juice: Freshly squeezed lemon juice brightens the flavors and balances the sweetness.
- 1 tablespoon butter: For added richness, my favorite is unsalted butter.
- 1 teaspoon vanilla extract: Opt for pure vanilla for the best flavor.
- 1 flaky butter pie crust: Store-bought is fine in a pinch, but I recommend making your own if you can.
Prep Notes
- Always use room temperature butter for the dough to ensure it’s easy to work with.
- For the cherries, I’ve found that a mix of sweet and sour varieties adds depth to the flavor.
Step-by-Step Instructions
Preheat your oven to 425°F (220°C). This temperature is crucial for a beautifully browned crust.
Prepare the filling: In a medium saucepan, combine the cherries, sugar, cornstarch, lemon juice, and vanilla extract. Cook over medium heat. Stir gently until the mixture begins to bubble and thicken, about 5-7 minutes. You’ll know it’s ready when the syrup clings to the back of a spoon.
Finish the filling: Remove from heat and stir in the butter until melted and well combined. Let it cool slightly while you prepare the crust.
Prepare the crust: Roll out your flaky butter pie crust on a lightly floured surface. Place one layer into a 9-inch pie pan, pressing gently to fit.
Fill the pie: Pour the cherry filling into the pie crust, spreading it evenly.
Top it off: Cover with the second crust, sealing the edges by crimping or pinching together. Make a few slits in the top crust for steam to escape. This will prevent a soggy pie!
Bake: Place your pie in the preheated oven and bake for 35-40 minutes, until the crust turns golden and the filling is bubbling up. Keep an eye on it; you may want to shield the edges with aluminum foil if they brown too quickly.
Cool and serve: Allow the pie to cool for at least an hour before serving. This lets the filling set for easier slicing.
Chef’s Tips
- Common Mistakes to Avoid: Make sure not to overwork your pie crust! Handle it gently to keep it flaky.
- Timing: While the filling takes just a few minutes, remember that the pie needs to bake for nearly 40 minutes, and cooling is essential for good slicing.
Expert Tips & Tricks
Storage Recommendations: Your Homemade Cherry Pie can be stored at room temperature for 2 days. If you want to keep it longer, refrigerate it for up to a week.
Make-ahead Instructions: Prepare the filling in advance and refrigerate it. You can also make the pie crust ahead of time and freeze it.
Troubleshooting Common Problems: If the pie crust is tough, it’s likely due to overworking the dough. Remember to keep it cool and operate quickly!
Reheating: Warm slices in the oven at 350°F (175°C) for 10-15 minutes for that fresh-out-of-the-oven taste.
Using Fresh Cherries: When working with fresh cherries, take the time to pit them carefully; it makes all the difference in the eating experience.
Flavor Enhancements: Consider adding a pinch of nutmeg or a dash of almond extract to elevate the flavor profile of your pie.
Serving Suggestions
Serve your Homemade Cherry Pie with a scoop of vanilla ice cream or a dollop of freshly whipped cream for an indulgent treat. If you’re feeling adventurous, drizzle some chocolate sauce on top!
Presentation can be as simple or elegant as you desire. A rustic pie looks charming on a wooden cutting board, while a slice plated with some fresh mint leaves adds a touch of sophistication. This pie is perfect for summer picnics, family gatherings, or a casual dinner party.
Variations & Substitutions
- Mixed Berry Pie: Substitute half the cherries with blueberries or raspberries for a delightful twist!
- Sugar Alternatives: Feel free to Sweeten things up with honey or maple syrup if you’re looking for a healthier option.
- Gluten-Free Option: Use a gluten-free pie crust to cater to dietary needs.
- Seasonal Spins: Try adding a little fresh peach or apricot to the filling for a seasonally inspired version.
Nutrition & Storage Info
- Prep time: 25 minutes
- Cook time: 40 minutes
- Total time: 1 hour 5 minutes
- Yield: Approximately 8 servings
- Estimated calories per serving: 250 calories (varies based on serving size and ingredients)
- Storage instructions: Room temp for up to 2 days, refrigerate for up to 1 week, or freeze for up to 3 months.
FAQ Section
1. Can I use canned cherries for this recipe?
Yes, but be sure to drain them well to avoid excess moisture.
2. How can I tell when the pie is done?
The crust should be golden brown, and the filling should be bubbly when the pie is ready.
3. What if my pie crust cracks?
Don’t worry! Just use a bit of extra crust to patch it up. It’s a rustic pie after all!
4. Can I freeze my cherry pie?
Absolutely! Just wrap it tightly in foil or plastic wrap and freeze for later.
5. What can I substitute for cornstarch?
You can use tapioca starch or arrowroot powder as a thickener.
6. How do I make a lattice top crust?
Cut your top dough into strips and weave them over the filling for a beautiful design.
7. Is it necessary to let the pie cool before slicing?
Yes! Cooling helps the filling to set, making it easier to cut neat slices.
8. Can I make a mini cherry pie?
Definitely! Use a muffin tin for mini versions of this classic dessert.
9. Is there a way to make my pie more tart?
Add less sugar to the filling, or mix in some sour cherries if available.
10. How do I prevent a soggy bottom crust?
Pre-bake your pie crust for 5-10 minutes before filling it.
Conclusion
This Homemade Cherry Pie recipe is a celebration of flavor, nostalgia, and simple, delicious baking. I hope it brings joy to your kitchen as it has to mine over the years. I encourage you to give it a try, and I can’t wait to hear how it turns out for you. Please share your thoughts in the comments below and don’t forget to check out other wonderful treat recipes on my blog—like my rich Chocolate Ganache Tart or my classic Apple Pie! Happy baking!
Print
Irresistible Homemade Cherry Pie: The Ultimate Comfort Food
- Total Time: 65 minutes
- Yield: 8 servings 1x
- Diet: Vegetarian
Description
A delightful Homemade Cherry Pie featuring fresh cherries, a buttery crust, and a sweet-tart filling that brings nostalgic comfort.
Ingredients
- 2 cups fresh or frozen cherries
- 1 cup granulated sugar
- 2 tablespoons cornstarch
- 1 tablespoon lemon juice
- 1 tablespoon butter
- 1 teaspoon vanilla extract
- 1 flaky butter pie crust
Instructions
- Preheat your oven to 425°F (220°C).
- In a medium saucepan, combine cherries, sugar, cornstarch, lemon juice, and vanilla extract. Cook over medium heat until bubbling and thickened (about 5-7 minutes).
- Remove from heat, stir in the butter until melted, and let it cool slightly.
- Roll out the pie crust and place in a 9-inch pie pan.
- Pour the cherry filling into the crust.
- Cover with the second crust, seal the edges, and cut slits for steam to escape.
- Bake for 35-40 minutes until the crust is golden and filling is bubbling. Shield edges with foil if browning too fast.
- Cool for at least an hour before serving.
Notes
Serve with vanilla ice cream or whipped cream for an indulgent treat.
- Prep Time: 25 minutes
- Cook Time: 40 minutes
- Category: Dessert
- Method: Baking
- Cuisine: American
Nutrition
- Serving Size: 1 slice
- Calories: 250
- Sugar: 20g
- Sodium: 150mg
- Fat: 10g
- Saturated Fat: 6g
- Unsaturated Fat: 4g
- Trans Fat: 0g
- Carbohydrates: 35g
- Fiber: 2g
- Protein: 2g
- Cholesterol: 25mg
🥗 Free Custom Keto Meal Plan?
Do you want to lose weight while still enjoying delicious Asian & Thai Fusion meals? Take this quick quiz to get your personalized Keto plan based on your favorite foods!
- ✅ No more guessing what to eat
- ✅ Delicious & easy-to-make recipes
- ✅ Tailored to your body type
Get My Custom Plan Now! →
*Over 100,000+ people have transformed their lives with this quiz.