# Irresistible Classic Peanut Butter Blossoms: Your Go-To Recipe for Comforting Cookies
## Introduction
There's something undeniably nostalgic about the smell of freshly baked cookies wafting through the house. When I was a child, my mom would whip up her famous Classic Peanut Butter Blossoms every holiday season. The anticipation of those soft, chewy cookies topped with a chocolate kiss was something I awaited all year. What makes these little delights even more special is the shared joy of making and devouring them with family, turning ordinary days into cherished memories.
This recipe not only brings back those warm feelings but also elevates the original Classic Peanut Butter Blossoms to a whole new level. With just the right balance of sweet and salty, these cookies are soft in the center with a slight crunch on the edges, perfectly accented by the melting chocolate treat on top. Unlike store-bought varieties that can be overly sweet or disappointing in texture, my homemade version combines quality ingredients and the love you can taste in every bite.
Join me on this delicious journey, and I promise you’ll learn how to craft the most scrumptious, heartwarming cookies that are perfect for any occasion!
## What Are Classic Peanut Butter Blossoms?
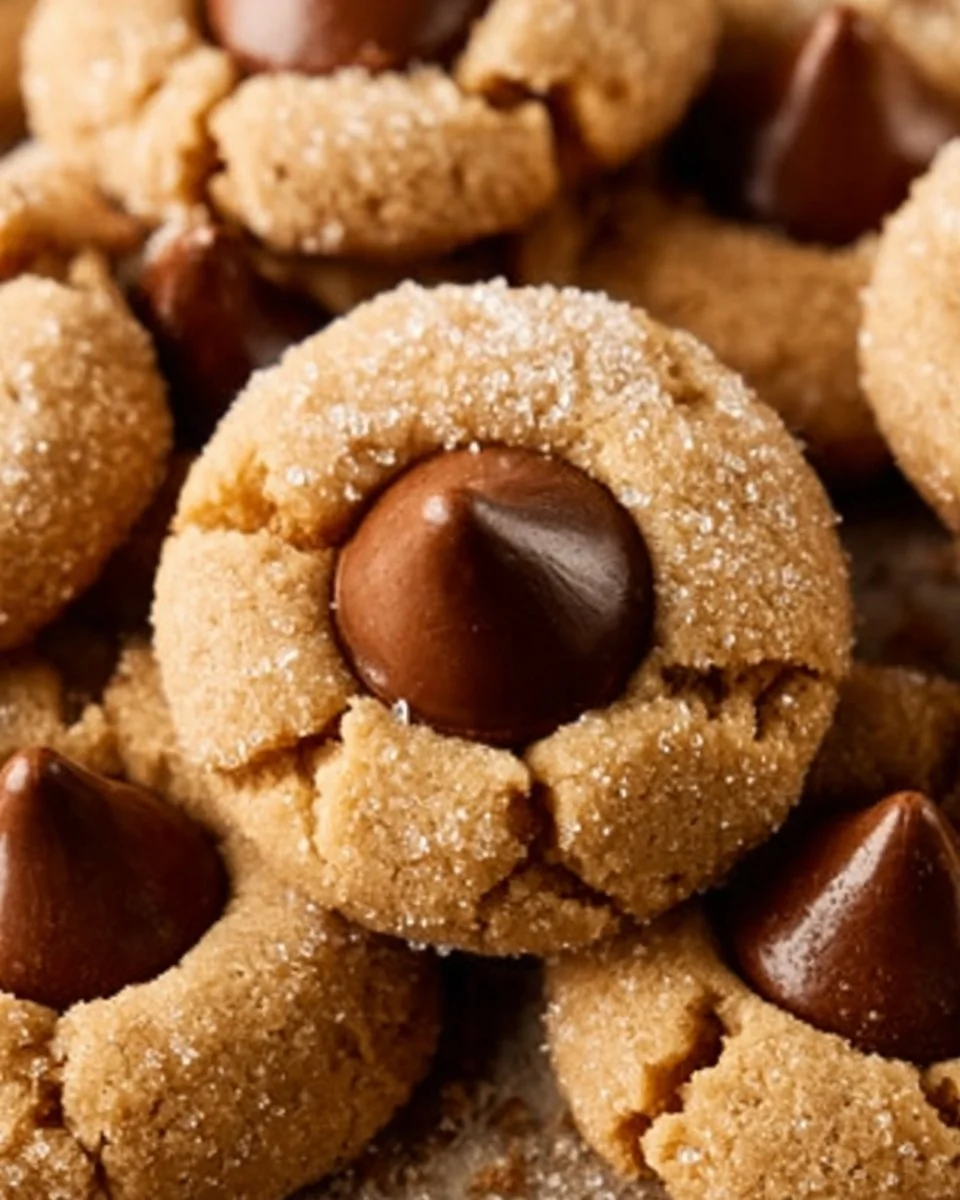
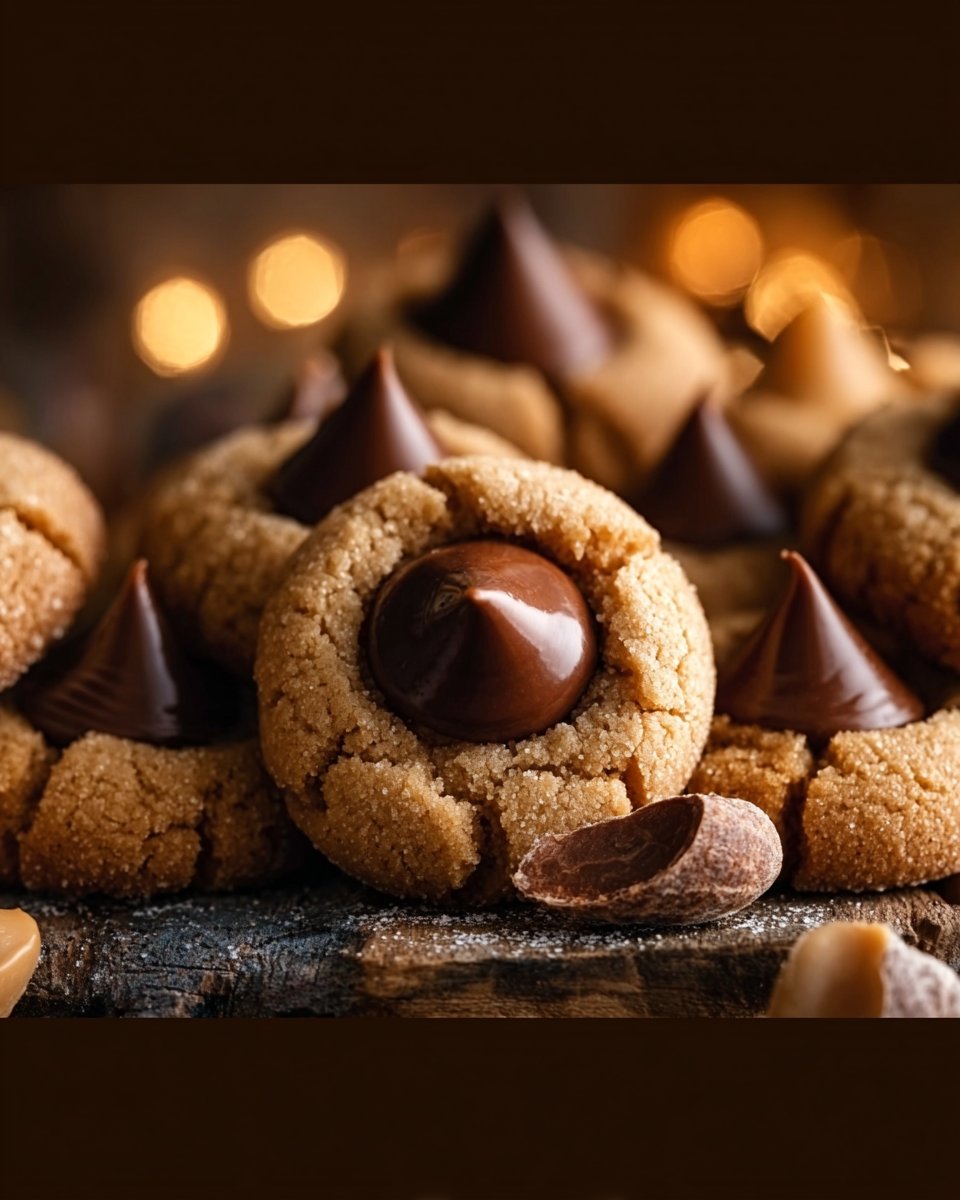
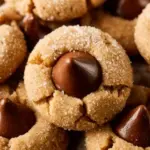
Classic Peanut Butter Blossoms trace their roots back to the 1930s and have become a beloved part of American baking culture. Picture this: a perfectly baked peanut butter cookie, slightly crispy on the outside and velvety smooth inside, topped with a rich, chocolatey Hershey's Kiss. These little cookies pack a delightful punch of flavor with a texture that's soft but not too crumbly, creating a perfect bite every time.
What sets them apart from other cookie recipes is their perfect blend of peanut butter richness and the sweetness of chocolate. They’re not just any cookie — they resonate with feelings of home and warmth, making them the ideal treat for holidays, family gatherings, or simply as a comforting snack on a cozy evening.
Baking these cookies is a breeze, making them great for both beginner bakers and seasoned pros. Whip up a batch when you're feeling nostalgic or to share with loved ones; they're guaranteed to bring smiles all around.
## Why You’ll Love This Recipe
1. **A Taste of Nostalgia**: These Classic Peanut Butter Blossoms remind us of childhood memories, filled with laughter and the smell of something sweet in the oven. While store-bought cookies often fall flat, these homemade delights capture that warm, comforting nostalgia in every bite.
2. **Budget-Friendly Deliciousness**: Why spend money on mass-produced cookies when you can make a batch at home for a fraction of the price? The ingredients are simple and accessible, making this recipe not only delicious but cost-effective!
3. **Customization to Your Heart's Content**: Do you like mixed-in chocolate chips or crushed nuts? Want to experiment with dark chocolate or even peanut butter cups on top? This recipe is your canvas to create a masterpiece, purely by adjusting the toppings or adding ingredients you love.
4. **Effortless Baking Experience**: Whether you’re baking solo or with kids, this recipe is straightforward and fun! It indeed can be a little messy, but that just adds to the joy. Plus, the gratification of crafting something homemade is unmatched.
5. **Batch Size Versatility**: If you need a small treat for a gathering or a large batch for a bake sale, this recipe is flexible. You can easily halve or double the ingredients to suit your needs. Plus, these cookies keep well, making them a perfect make-ahead treat!
## Ingredients Section
Let’s break down the ingredients you’ll need to create these delicious cookies:
1. **1 3/4 cup All-Purpose Flour** (Use a spoon to scoop flour for accurate measurement)
2. **1 tsp Baking Soda** (Leavening agent that gives the cookies a lift)
3. **1/2 tsp Salt** (Enhances flavor; don’t skip it!)
4. **1/2 cup Creamy Peanut Butter** (Use a high-quality brand like Jif or Skippy for the best flavor)
5. **1/2 cup Unsalted Butter** (room temperature; helps with creaming the sugar for a fluffy texture)
6. **1/2 cup Granulated Sugar** (light and crunchy sweetness)
7. **1/2 cup Light Brown Sugar** (lightly packed; adds moisture and depth)
8. **1 Large Egg** (room temperature; helps bind the mixture)
9. **2 tbsp Milk** (preferably whole milk for richness)
10. **1 tsp Vanilla Extract** (pure extract elevates flavors beautifully)
11. **1/2 cup Granulated Sugar** (additional for coating cookies; adds a beautiful texture)
12. **11 oz Bag of Hershey Kisses** (for that classic touch on top)
### Ingredient Quality and Substitutions
- **Peanut Butter**: While I love creamy peanut butter for this recipe, feel free to use crunchy if you enjoy the texture. Natural peanut butter might work, but make sure it's well-stirred for consistency.
- **Butter**: Always use unsalted butter to control the salt content. Brands like Kerrygold or Land O’Lakes offer great flavors.
- **Sugars**: For a deeper flavor, you can use dark brown sugar instead of light.
### Prep Notes
Remember, softened butter is key to getting that fluffy texture. Set your butter out ahead of time!
## Step-by-Step Instructions
1. **Mix Dry Ingredients**: In a medium bowl, whisk together the **all-purpose flour**, **baking soda**, and **salt**. Set aside.
2. **Cream Butter and Sugars**: Using a stand mixer or hand mixer fitted with a paddle attachment, **cream together** the **peanut butter**, **unsalted butter**, **granulated sugar**, and **light brown sugar** on medium-high speed until smooth and fluffy, about 2-3 minutes.
3. **Add Wet Ingredients**: With the mixer on low speed, add in the **egg**, **milk**, and **vanilla extract**. Scraping down the sides of the bowl as necessary.
4. **Incorporate Dry Mixture**: Gradually add the dry mixture to the wet mixture, mixing until fully combined. Be mindful not to overmix.
5. **Chill the Dough**: Place the cookie dough in a well-sealed food container or wrap it tightly with plastic wrap. Chill the dough in the refrigerator for **at least 1 hour** (this helps the flavors meld and gives the cookies a better texture).
6. **Prepare for Baking**: After the dough has chilled, preheat your oven to **375°F (190°C)**. Line two baking sheets with parchment paper or silicone mats.
7. **Shape Cookies**: Roll the chilled dough into **1-inch balls** using your hands. Roll each ball in the additional **granulated sugar** before placing them about **1 1/2 - 2 inches apart** on the lined baking sheets.
8. **First Bake**: Bake in the preheated oven for about **7-8 minutes**, or until just barely set. The cookies should look slightly underdone.
9. **Chocolate Kisses**: Remove the baking sheets from the oven and immediately press a **Hershey’s Kiss** onto the center of each cookie, pushing down gently to create that signature crackle around the edges.
10. **Second Bake**: Return to the oven for an additional **2 minutes**. This will help melt the chocolate and set the cookies perfectly.
11. **Cool Down**: Allow the cookies to cool on the baking sheet for **5-10 minutes** before transferring to a cooling rack to cool completely.
12. **Storage**: Store cookies in an airtight container with a slice of bread to maintain their freshness for up to a week.
## Expert Tips & Tricks
- **Chilling is Key**: Don’t skip the chilling step! It prevents the cookies from spreading too much during baking, ensuring they maintain their shape and texture.
- **Temperature Matters**: Make sure both the butter and egg are at room temperature for smooth mixing. Cold ingredients can lead to chunky dough.
- **Make Ahead**: You can prepare the dough ahead of time and store it in the fridge for up to **3 days** before baking. You can also freeze the unbaked dough balls for up to **3 months**. Just bake them straight from the freezer, adding a couple of extra minutes to the baking time.
- **Common Mistakes**: Avoid overmixing after adding the flour. This can toughen the cookies.
- **Storage Tips**: Keep these cookies in an airtight container at room temperature, and they'll stay fresh! Adding a slice of bread absorbs moisture, keeping them soft.
## Serving Suggestions
These Classic Peanut Butter Blossoms are perfect on their own, but why not up your hosting game? Serve them alongside a cold glass of milk for that classic pairing. For presentation, stack a few cookies in a beautiful jar on your kitchen counter or serve them on a festive platters during holiday gatherings. They’re perfect for birthday parties, family events, or cozy nights in, and they are sure to be a hit!
## Variations & Substitutions
- **Flavors for the Adventurous Baker**: Consider mixing in **chocolate chips**, **butterscotch chips**, or even **toffee bits** to amp up your cookie game.
- **Dietary Adaptations**: For gluten-free options, swap out the all-purpose flour for a high-quality gluten-free blend, and make sure to check the baking powder for gluten-free labeling. Vegan? Substitute the butter with coconut oil and use a flax egg.
- **Seasonal Twists**: Add a sprinkle of cinnamon during the holiday season, or swap the chocolate kisses for **peppermint candies** for a festive touch!
## Nutrition & Storage Info
- **Prep Time**: 20 minutes
- **Cook Time**: 10 minutes (plus chilling)
- **Total Time**: 1 hour 30 minutes (with chilling)
- **Yield**: Approximately 24 cookies
- **Estimated Calories per Serving**: ~120 calories per cookie
- **Storage Instructions**: Kept at room temperature, these cookies will maintain freshness for up to a week. If you want to extend their life, store them in the refrigerator or freeze them for long-term use.
## FAQ Section
1. **Can I make these cookies vegan?**
- Absolutely! You can swap the butter for coconut oil and use a flax egg instead of a regular egg.
2. **What if I don’t have baking soda?**
- Baking powder could be used instead, but the taste and texture might differ slightly. Use 1.5 tsp of baking powder instead of 1 tsp of baking soda.
3. **Can I freeze these cookies?**
- Yes! Bake and allow them to cool completely. Store in an airtight container; they will last about 3 months in the freezer.
4. **What’s the best way to store these cookies?**
- Store them in an airtight container at room temperature. Adding a slice of bread helps keep them soft!
5. **Why are my cookies flat?**
- Your butter may be too warm or possibly you didn’t chill your dough long enough. Chilling helps them keep their form while baking.
6. **Can I use natural peanut butter?**
- Yes, but ensure it's well-mixed and has a similar consistency to creamy peanut butter to achieve the best results.
7. **What should I do if my dough is too sticky?**
- If the dough is sticky, it may need more flour or you may want to chill it for a little longer before shaping.
8. **How do I know when cookies are done?**
- They should be set around the edges but still look slightly underbaked in the middle. They’ll firm up as they cool.
9. **What’s the secret to great cookie texture?**
- Using room temperature ingredients, not overmixing, and chilling the dough!
10. **Can I use different chocolates than Hershey Kisses?**
- Definitely! Try using peanut butter cups, dark chocolate, or even white chocolate for a unique twist!

## Conclusion
There you have it: a delightful, family-favorite recipe for Classic Peanut Butter Blossoms that transforms simple ingredients into a heartwarming experience. The journey from mixing to baking to indulging is filled with joy, nostalgia, and perhaps a little bit of mess — but that’s all part of the fun! I encourage you to try making these cookies yourself; share your experience in the comments! Don't forget to explore my other related recipes on the blog – there are plenty of warm, comforting delights waiting for you!
Irresistible Classic Peanut Butter Blossoms
- Total Time: 90 minutes
- Yield: 24 cookies 1x
- Diet: Vegetarian
Description
Classic Peanut Butter Blossoms are soft, chewy cookies topped with a chocolate kiss, perfect for any occasion.
Ingredients
Scale
- 1 3/4 cup All-Purpose Flour
- 1 tsp Baking Soda
- 1/2 tsp Salt
- 1/2 cup Creamy Peanut Butter
- 1/2 cup Unsalted Butter
- 1/2 cup Granulated Sugar
- 1/2 cup Light Brown Sugar
- 1 Large Egg
- 2 tbsp Milk
- 1 tsp Vanilla Extract
- 1/2 cup Granulated Sugar (for coating)
- 11 oz Bag of Hershey Kisses
Instructions
- In a medium bowl, whisk together the all-purpose flour, baking soda, and salt. Set aside.
- Using a stand mixer or hand mixer, cream together the peanut butter, unsalted butter, granulated sugar, and light brown sugar until smooth and fluffy, about 2-3 minutes.
- Add in the egg, milk, and vanilla extract, scraping down the sides of the bowl as necessary.
- Gradually add the dry mixture to the wet mixture, mixing until fully combined.
- Chill the dough in the refrigerator for at least 1 hour.
- Preheat your oven to 375°F (190°C) and line two baking sheets with parchment paper.
- Roll the chilled dough into 1-inch balls and coat them in granulated sugar.
- Place the balls 1 1/2 – 2 inches apart on the baking sheets.
- Bake for about 7-8 minutes, or until just barely set.
- Press a Hershey’s Kiss onto each cookie and return to the oven for an additional 2 minutes.
- Allow the cookies to cool on the baking sheet for 5-10 minutes before transferring to a cooling rack.
Notes
These cookies maintain freshness for up to a week in an airtight container. Use a slice of bread in the container to keep them soft.
- Prep Time: 20 minutes
- Cook Time: 10 minutes
- Category: Dessert
- Method: Baking
- Cuisine: American
Nutrition
- Serving Size: 1 cookie
- Calories: 120
- Sugar: 10g
- Sodium: 150mg
- Fat: 7g
- Saturated Fat: 3g
- Unsaturated Fat: 4g
- Trans Fat: 0g
- Carbohydrates: 15g
- Fiber: 0g
- Protein: 2g
- Cholesterol: 10mg
🥗 Free Custom Keto Meal Plan?
Do you want to lose weight while still enjoying delicious Asian & Thai Fusion meals? Take this quick quiz to get your personalized Keto plan based on your favorite foods!
- ✅ No more guessing what to eat
- ✅ Delicious & easy-to-make recipes
- ✅ Tailored to your body type
Get My Custom Plan Now! →
*Over 100,000+ people have transformed their lives with this quiz.