Table of Contents
Table of Contents
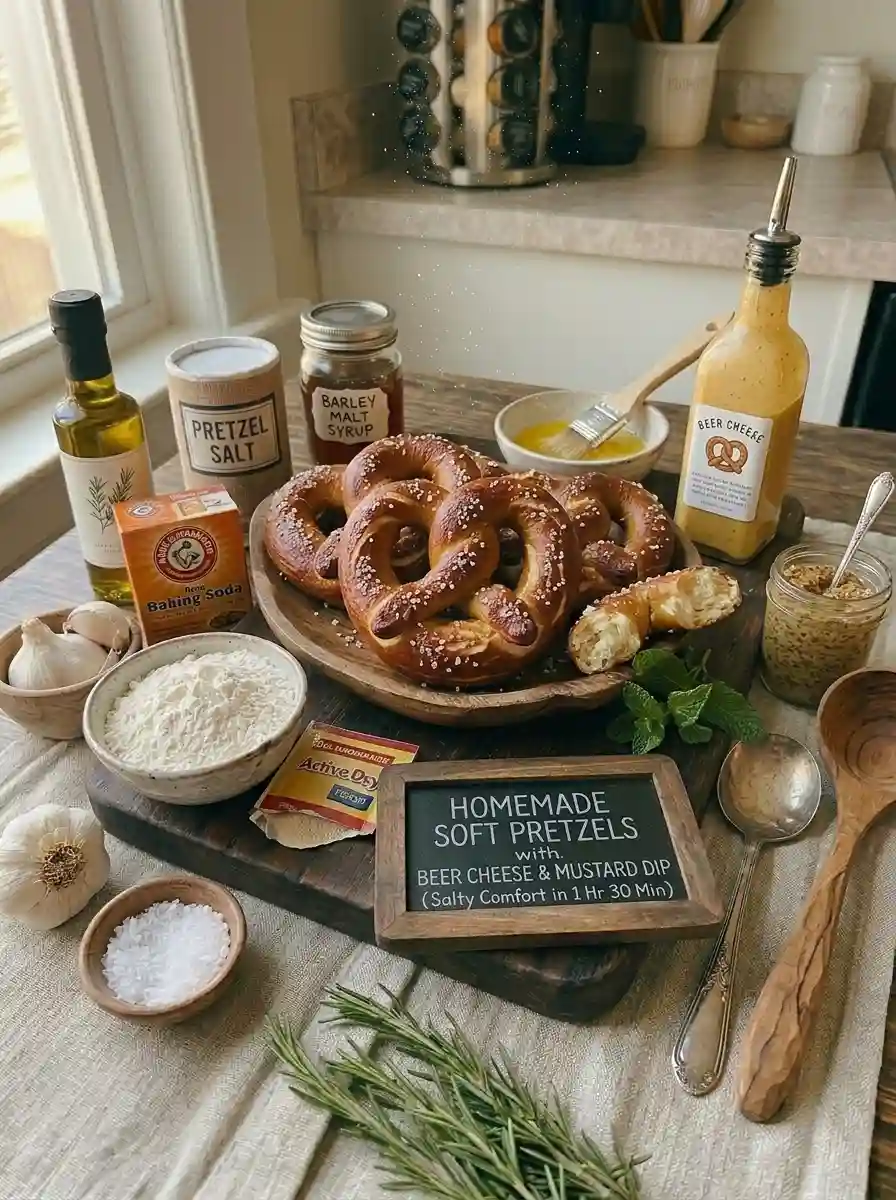
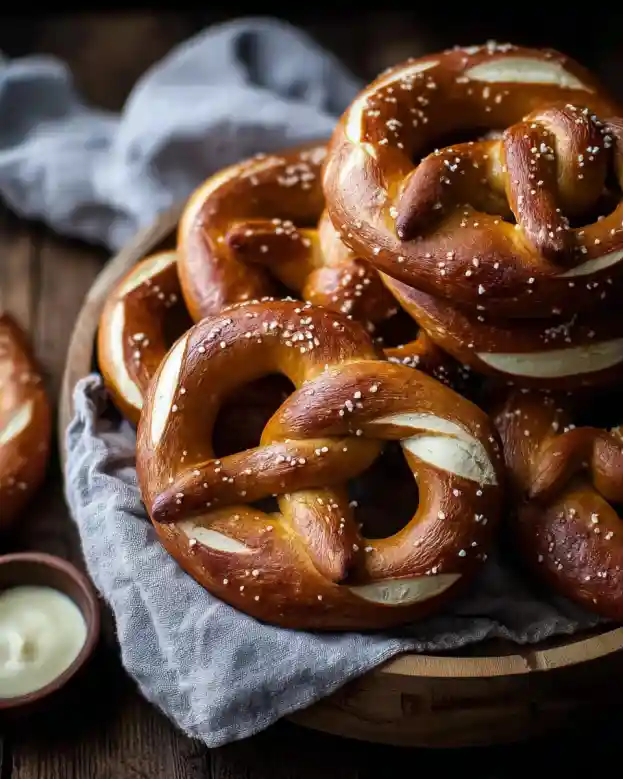
There’s something magical about biting into a warm, soft pretzel fresh from the oven. The chewy crust, golden brown and speckled with salt, paired with the pillowy, tender interior—it’s pure comfort food. These Homemade Soft Pretzels aren’t just a tasty treat but also a fun and rewarding baking project you can easily tackle in your kitchen.
Note: Active prep time is just 25 minutes. Let your oven do the rest!
Dietary Badges
- Vegetarian (Naturally!)
- Vegan Option (Use plant-based butter + skip egg wash)
- Dairy-Free Adaptable (Use oil instead of butter)
- Beginner-Friendly (Simple steps, minimal rise time)
- Make-Ahead Friendly (Freeze baked or unbaked)
The 3 Biggest Mistakes People Make with Soft Pretzels
Even simple yeast doughs can turn into a dense, pale, or bland disappointment if you fall into these common traps. Avoid these to guarantee chewy, golden, flavorful pretzels every time:
- Skipping the Baking Soda Bath (The Pale & Bland Trap): If you skip the alkaline bath, your pretzels will bake up pale, bread-like, and lack that signature pretzel flavor and chewy crust. The Fix: Don’t skip this step! The baking soda bath creates an alkaline environment that accelerates the Maillard reaction, giving pretzels their deep golden color, distinctive flavor, and chewy texture.
- Adding Too Much Flour (The Dense Pretzel Killer): If you keep adding flour to a sticky dough, you’ll end up with dense, tough pretzels instead of light, chewy ones. The Fix: A slightly tacky dough is normal! Add flour 1 tablespoon at a time only if the dough sticks excessively to your hands or bowl. The dough should feel soft and slightly tacky, not dry.
- Overproofing the Dough (The Flat Pretzel Problem): If you let the dough rise too long, the yeast exhausts its food supply, resulting in flat, dense pretzels with poor oven spring. The Fix: Let the dough rise just until doubled in size (about 1 hour at room temperature). For more flavor development, you can refrigerate the dough overnight (cold fermentation), but bring to room temperature before shaping.
Why This Works: The Science of Perfect Soft Pretzels
- Baking Soda Bath = Alkaline Magic: Dissolving baking soda in hot water creates an alkaline solution. When pretzels are dipped in this bath before baking, the alkaline environment accelerates the Maillard reaction (browning reaction) during baking. This creates the pretzel’s signature deep golden-brown crust, chewy texture, and distinctive slightly tangy flavor.
- Kneading Develops Gluten for Chewiness: Kneading the dough develops gluten strands, which give pretzels their characteristic chewy texture. The “windowpane test” (stretching a small piece of dough until it’s thin enough to see light through without tearing) confirms proper gluten development.
- Brief Rise Time = Convenience + Flavor: Unlike many yeast breads that require long rise times, this pretzel dough only needs 10-30 minutes to rest. This makes the recipe quick and accessible while still allowing the yeast to activate and the gluten to relax for easy shaping.
- Butter Finish = Richness & Shine: Brushing baked pretzels with melted butter adds richness, enhances flavor, and gives them an attractive glossy finish. The butter also helps coarse salt adhere to the surface.
Ingredients
Measurements are provided in both US Customary and Metric for precision. Your exact ingredients are kept intact, with proportions completed for perfect results.
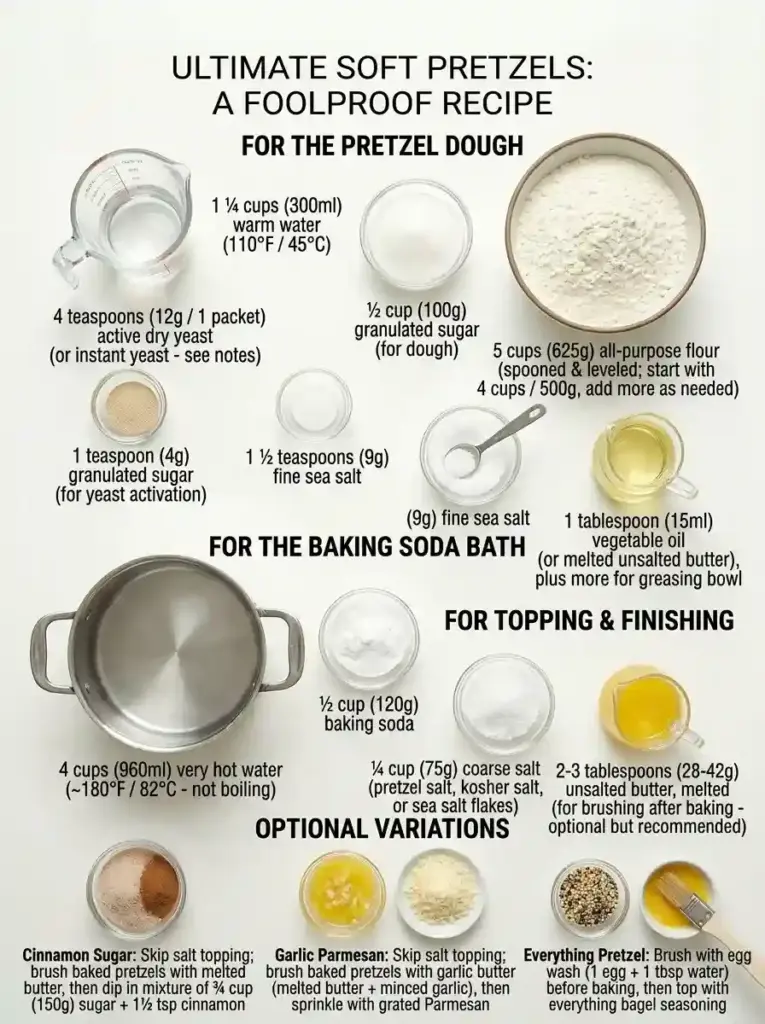
For the Pretzel Dough:
- 1 ¼ cups (300ml) warm water (110°F / 45°C)
- 4 teaspoons (12g / 1 packet) active dry yeast (or instant yeast – see notes)
- 1 teaspoon (4g) granulated sugar (for yeast activation)
- ½ cup (100g) granulated sugar (for dough)
- 5 cups (625g) all-purpose flour (spooned & leveled; start with 4 cups / 500g, add more as needed)
- 1 ½ teaspoons (9g) fine sea salt
- 1 tablespoon (15ml) vegetable oil (or melted unsalted butter), plus more for greasing bowl
For the Baking Soda Bath:
- 4 cups (960ml) very hot water (~180°F / 82°C – not boiling)
- ½ cup (120g) baking soda
For Topping & Finishing:
- ¼ cup (75g) coarse salt (pretzel salt, kosher salt, or sea salt flakes)
- 2-3 tablespoons (28-42g) unsalted butter, melted (for brushing after baking – optional but recommended)
Optional Variations:
- Cinnamon Sugar: Skip salt topping; brush baked pretzels with melted butter, then dip in mixture of ¾ cup (150g) sugar + 1 ½ tsp cinnamon
- Garlic Parmesan: Skip salt topping; brush baked pretzels with garlic butter (melted butter + minced garlic), then sprinkle with grated Parmesan
- Everything Pretzel: Brush with egg wash (1 egg + 1 tbsp water) before baking, then top with everything bagel seasoning
Step-by-Step Instructions (Optimized for Perfect Results)
1. Activate the Yeast (Foundation for Rise)
In a medium bowl, whisk together warm water (110°F / 45°C), yeast, and 1 teaspoon sugar. Let stand for 5-10 minutes until mixture is creamy and foamy. Pro-Tip: If using instant yeast, you can skip this step and add it directly to the flour.
2. Make the Dough (Knead for Chewiness)
In a large bowl or stand mixer fitted with dough hook, combine flour (start with 4 cups / 500g), ½ cup sugar, and 1 ½ teaspoons salt. Make a well in the center. Add the yeast mixture and 1 tablespoon oil to the well. Mix until a shaggy dough forms.
Kneading: Knead by hand on a lightly floured surface for 7-10 minutes, or in a stand mixer on medium speed for 5-7 minutes, until dough is smooth, elastic, and passes the windowpane test (stretch a small piece – it should thin without tearing). Dough Consistency: The dough should feel soft and slightly tacky, not dry. If too sticky, add flour 1 tablespoon at a time. If too dry, add water 1 tablespoon at a time.
3. First Rise (Flavor Development)
Lightly oil a large bowl. Place dough in bowl, turning to coat with oil. Cover with plastic wrap or damp kitchen towel. Let rise in a warm, draft-free place for 1 hour, or until doubled in size. Pro-Tip for Rising: For a warm, draft-free environment, place dough in your oven with just the oven light turned on (no heat).
4. Shape the Pretzels (The Fun Part!)
Preheat oven to 425°F (220°C). Line 2 baking sheets with parchment paper or silicone baking mats. Turn dough out onto a lightly floured surface. Divide into 12 equal pieces (about 3 oz / 85g each). Shaping Technique: Roll each piece into an 18-20 inch (45-50 cm) rope. Form a U-shape with the rope. Cross the ends over each other twice to form a twist. Bring the twisted ends down to the bottom of the U and press gently to seal. Place on prepared baking sheet. Pro-Tip: Keep shaped pretzels covered with a damp towel while shaping the rest to prevent drying.
5. Baking Soda Bath (The Secret Step)
In a large, wide bowl or pot, combine 4 cups very hot water (~180°F / 82°C) and ½ cup baking soda. Stir until baking soda is dissolved. Dipping: Using a slotted spatula or spider strainer, dip each shaped pretzel into the baking soda solution for 20-30 seconds per side. Allow excess liquid to drip off, then return to baking sheet. Critical: Do not exceed 30 seconds per side, or pretzels may develop a metallic taste.
6. Bake to Golden Perfection
Sprinkle dipped pretzels generously with coarse salt. Bake for 12-15 minutes, rotating sheets halfway through, until pretzels are deep golden brown. Doneness Test: Pretzels should be deeply golden (not pale) and sound hollow when tapped on the bottom.
7. Finish & Serve (The Grand Finale)
Remove pretzels from oven. For extra richness and shine, brush warm pretzels with melted butter. Serve warm with mustard, cheese sauce, or enjoy plain. Pro Move: For best texture, serve pretzels the same day they’re baked.
Flour & Yeast Swaps Guide
| Ingredient | Swap Options | Notes |
|---|---|---|
| All-Purpose Flour | Bread flour (for chewier texture), whole wheat flour (sub up to 50%) | Bread flour = more gluten = chewier; whole wheat = denser, nuttier flavor |
| Active Dry Yeast | Instant yeast (no need to dissolve first), fresh yeast (use 3x amount) | Instant yeast: add directly to flour; fresh yeast: crumble into warm water |
| Vegetable Oil | Melted unsalted butter, coconut oil (refined for neutral flavor) | Butter adds richness; coconut oil adds subtle tropical note |
| Coarse Salt | Pretzel salt, kosher salt, sea salt flakes, everything bagel seasoning | Pretzel salt = large crystals that don’t dissolve; everything seasoning = savory twist |
Pro-Tips for Next-Level Pretzels
- Measure Flour Accurately: Spoon flour into measuring cup and level with a knife (don’t scoop directly from bag). For best results, weigh flour (625g total).
- Don’t Rush the Kneading: Proper gluten development = chewy texture. Use the windowpane test to confirm doneness.
- Keep Water Hot for Bath: Use very hot (not boiling) water for the baking soda bath. If water cools too much, the alkaline reaction won’t be as effective.
- Work Quickly After Dipping: Dip pretzels just before baking to prevent the baking soda solution from making the dough soggy.
- Make-Ahead Magic: Shape pretzels, dip in baking soda bath, then freeze on baking sheet. Once frozen, transfer to freezer bag. Bake from frozen, adding 2-3 minutes to baking time.
- Reheat for Freshness: Reheat day-old pretzels in a 350°F (175°C) oven for 5 minutes to restore crispness.
Troubleshooting Table
| Problem | Cause & Solution |
|---|---|
| Pretzels are dense or tough | Cause: Too much flour, under-kneading, or overproofing. Solution: Measure flour accurately; knead until windowpane test passes; rise just until doubled. |
| Pretzels are pale or lack flavor | Cause: Skipped baking soda bath or bath water not hot enough. Solution: Always use baking soda bath with very hot water (~180°F); dip 20-30 seconds per side. |
| Pretzels have metallic taste | Cause: Dipped too long in baking soda bath. Solution: Limit dipping to 20-30 seconds per side maximum. |
| Salt won’t stick to pretzels | Cause: Pretzels too dry or no butter finish. Solution: Brush warm pretzels with melted butter before salting; salt immediately after buttering. |
| Pretzels spread or lose shape | Cause: Dough too warm or overproofed. Solution: Keep dough cool while shaping; don’t overproof; chill shaped pretzels 10 minutes before baking if needed. |
| Pretzels burn before cooking through | Cause: Oven too hot or pretzels too thick. Solution: Use oven thermometer to verify temperature; roll ropes to uniform 18-20 inch length; reduce oven temp to 400°F if browning too fast. |
Storage & Reheating
- Room Temperature: Store baked pretzels in an airtight container for up to 2 days. For best texture, reheat before serving.
- Freezer (Baked): Cool completely, then freeze in airtight container or freezer bag for up to 3 months. Reheat from frozen in 350°F (175°C) oven for 10-12 minutes.
- Freezer (Unbaked): After baking soda bath, freeze shaped pretzels on baking sheet. Once frozen, transfer to freezer bag. Bake from frozen at 425°F (220°C) for 15-18 minutes.
- Reheating: For best results, reheat in oven or toaster oven at 350°F (175°C) for 5 minutes. Microwave will make pretzels chewy but not crisp.
Nutrition Information (Per Pretzel)
Based on 12 servings (using standard ingredients). This is an estimate and may vary based on specific brands and portion sizes.
- Calories: ~240 kcal
- Total Fat: 2g (Saturated Fat: 1g)
- Carbohydrates: 49g
- Sugars: 9g
- Protein: 6g
- Sodium: 480mg (can be reduced by using less salt topping)
- Dietary Fiber: 2g
- Cholesterol: 0mg (if using oil; 5mg if using butter)
Disclaimer: This recipe is naturally Vegetarian. For Vegan, use plant-based butter or oil and skip egg wash if using variations. For Dairy-Free, use oil instead of butter.
Frequently Asked Questions
Can I use instant yeast instead of active dry yeast?
Yes! Instant yeast can be used in equal amounts (4 teaspoons). The key difference: instant yeast doesn’t need to be dissolved in water first—you can add it directly to the flour. If using instant yeast, skip the 10-minute activation step and proceed directly to mixing the dough. Rising times may be slightly shorter, so watch for the dough to double in size rather than relying strictly on time.
Why is the baking soda bath necessary?
The baking soda bath creates an alkaline environment that accelerates the Maillard reaction during baking. This chemical reaction is what gives pretzels their signature deep golden-brown crust, chewy texture, and distinctive slightly tangy flavor. Without this step, pretzels will bake up pale, bread-like, and lack the classic pretzel taste and texture.
My dough is too sticky—how much flour should I add?
A slightly tacky dough is normal and desirable for soft pretzels! Only add flour if the dough sticks excessively to your hands or bowl. Add flour 1 tablespoon at a time, kneading after each addition, until the dough feels soft and manageable but not dry. The dough should pass the “windowpane test”: stretch a small piece thin enough to see light through without tearing.
How do I shape pretzels if I’m a beginner?
Simple shaping method: 1) Roll dough into an 18-20 inch rope. 2) Form a U-shape. 3) Cross the ends over each other twice to create a twist. 4) Bring twisted ends down to the bottom of the U and press gently to seal. Don’t worry about perfection—rustic pretzels taste just as delicious! Watch a quick video tutorial for visual guidance if needed.
Can I make the dough ahead of time?
Yes! For same-day prep: let dough rise, then refrigerate covered for up to 24 hours. Bring to room temperature before shaping. For longer storage: freeze shaped, unbaked pretzels after the baking soda bath. Freeze on a baking sheet, then transfer to freezer bags. Bake from frozen, adding 2-3 minutes to baking time.
How long should I dip pretzels in the baking soda bath?
Dip each pretzel for 20-30 seconds per side maximum. Longer dipping can cause pretzels to develop a metallic or soapy taste. Use very hot water (~180°F / 82°C) for the bath—if water cools too much, the alkaline reaction won’t be as effective. Work quickly and bake pretzels immediately after dipping.
Can I make these pretzels vegan or dairy-free?
Yes! This recipe is easily adaptable: use vegetable oil instead of butter in the dough, and skip the butter brushing at the end (or use plant-based butter). For egg wash variations, use plant milk instead. The baking soda bath and salt topping are naturally vegan. Verify that your yeast and other ingredients are vegan-certified if needed.
Why did my pretzels turn out dense or tough?
Common causes: 1) Too much flour added during kneading—remember, slightly tacky dough is normal. 2) Under-kneading—knead until dough passes the windowpane test. 3) Overproofing—let dough rise just until doubled, not longer. 4) Oven temperature too low—use an oven thermometer to verify 425°F. Adjust these factors for lighter, chewier results next time.
How do I store and reheat leftover pretzels?
Store baked pretzels in an airtight container at room temperature for up to 2 days. For longer storage, freeze in airtight bags for up to 3 months. Reheat in a 350°F (175°C) oven for 5 minutes to restore crispness. Avoid microwaving, which makes pretzels chewy but not crisp. For frozen pretzels, bake from frozen at 425°F for 15-18 minutes.
What are some fun variations I can try?
Popular variations: 1) Cinnamon Sugar: Skip salt, brush baked pretzels with butter, dip in cinnamon-sugar mix. 2) Garlic Parmesan: Brush with garlic butter, sprinkle with Parmesan. 3) Everything Pretzel: Brush with egg wash, top with everything bagel seasoning. 4) Cheese-Stuffed: Add shredded cheddar to dough before shaping. Get creative—pretzels are a fun canvas for flavors!

Homemade Soft Pretzels
Ingredients
For the Dough
- 1½ cups cups warm water (110°F/45°C)
- 1 packet (2 1/4 teaspoons) active dry yeast
- 1 tbsp granulated sugar
- 4 cups all-purpose flour
- 1 tsp salt
- 2 tbsp unsalted butter, melted
For the Baking Soda Bath
- ¼ cup baking soda
- 4 cups water
For Topping
- 1 large egg, beaten
- Coarse sea salt or pretzel salt
Instructions
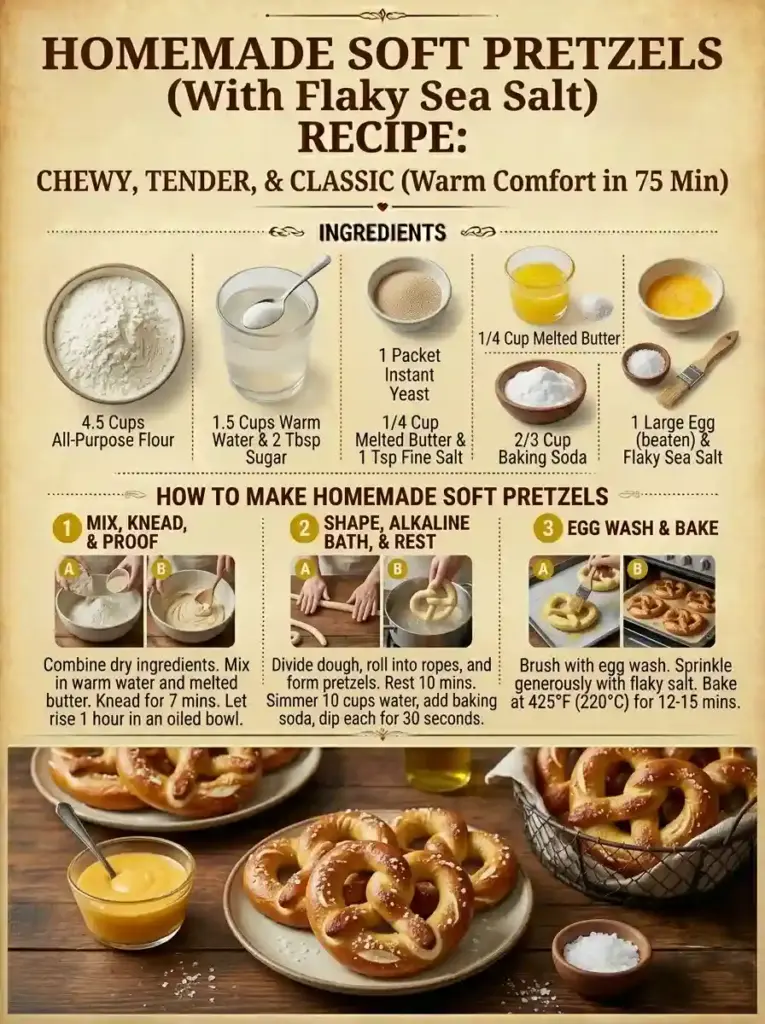
- Step 1: Make the DoughIn a large mixing bowl, combine warm water, yeast, and sugar. Stir gently and let sit for 5-7 minutes until frothy.Add flour, salt, and melted butter to the bowl. Mix until a shaggy dough forms.Transfer the dough to a lightly floured surface and knead for 8-10 minutes until smooth and elastic.
- Step 2: Let the Dough RisePlace the dough in a lightly greased bowl and cover with a clean kitchen towel.Let it rise in a warm spot for about 1 hour, or until it doubles in size.
- Step 3: Shape the PretzelsPreheat your oven to 450°F (230°C). Line two baking sheets with parchment paper.Punch down the risen dough and divide it into 8 equal pieces.Roll each piece into a 20-inch rope, then twist into a traditional pretzel shape.
- Step 4: Prepare the Baking Soda BathIn a large saucepan, bring 4 cups of water to a boil. Add baking soda and stir until dissolved.One at a time, carefully dip each pretzel into the bath for 30 seconds. Remove with a slotted spatula and place on the prepared baking sheets.
- Step 5: Add the Toppings and BakeBrush each pretzel with beaten egg and sprinkle with coarse salt.Bake for 12-15 minutes, or until golden brown.
Notes
- For a sweeter twist, skip the salt and brush the pretzels with melted butter after baking. Then coat with cinnamon sugar.
- If the dough feels too sticky, add a tablespoon of flour at a time during kneading until manageable.
🥗 Free Custom Keto Meal Plan?
Do you want to lose weight while still enjoying delicious Asian & Thai Fusion meals? Take this quick quiz to get your personalized Keto plan based on your favorite foods!
- ✅ No more guessing what to eat
- ✅ Delicious & easy-to-make recipes
- ✅ Tailored to your body type
Get My Custom Plan Now! →
*Over 100,000+ people have transformed their lives with this quiz.