Table of Contents
Table of Contents
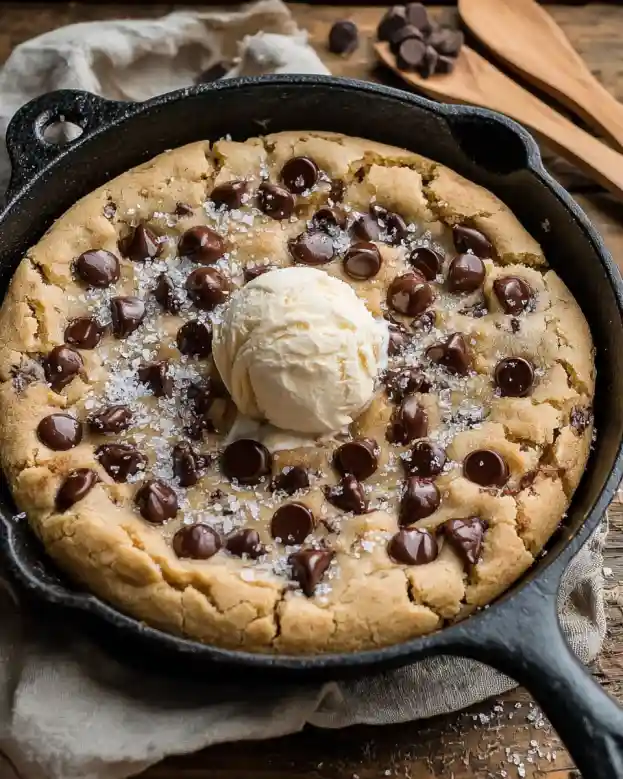
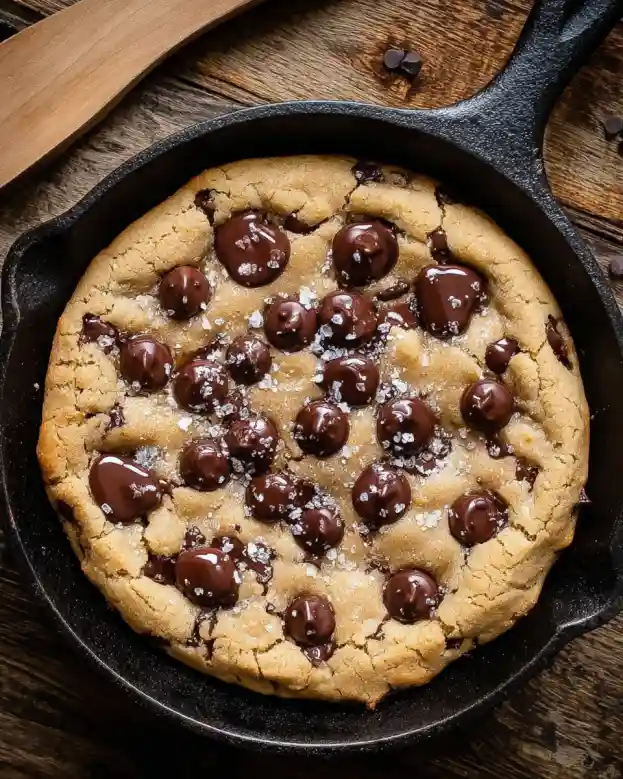
Picture this: a warm, gooey chocolate chip cookie baked in a cast iron skillet, with crisp edges, a fudgy center, and a sprinkle of flaky sea salt that makes every bite irresistible. This Salted Chewy Gooey Chocolate Chip Skillet Cookie is the ultimate crowd-pleaser—easy enough for a weeknight treat, impressive enough for guests, and endlessly customizable.
Note: Total time is just 35 minutes (10 min prep + 20-25 min bake). One skillet, minimal cleanup, maximum indulgence.
Dietary Badges
- Vegetarian
- Nut-Free (Easily adaptable)
- Gluten-Free Option (Use 1:1 GF flour blend)
- One-Pan Wonder
- Customizable for Any Occasion
The 3 Biggest Mistakes People Make with Skillet Cookies
Even simple desserts can turn into a dry, burnt, or dense disaster if you fall into these common traps. Avoid these to guarantee a perfect, gooey, chewy skillet cookie every time:
- Overbaking (The Gooey Killer): If you wait until the center looks “fully set” in the oven, it will be overcooked by the time it cools. The Fix: Bake until the edges are golden but the center still looks slightly underbaked and soft. The residual heat in the cast iron will finish the cooking perfectly.
- Skipping the Skillet Preheat (The Sticking Trap): Adding cookie dough to a cold skillet = stuck edges and uneven browning. The Fix: For the classic melted-butter-in-skillet method, preheat your cast iron over low heat for 2-3 minutes before adding butter. This creates that signature caramelized bottom crust.
- Cutting Too Soon (The Collapse Effect): It’s tempting to dig in the second it comes out of the oven. But if you slice immediately, the cookie hasn’t had time to set, and you’ll get a gooey mess instead of neat wedges. Let it rest for 10-15 minutes before serving. This allows the structure to firm up while keeping the center warm and fudgy.
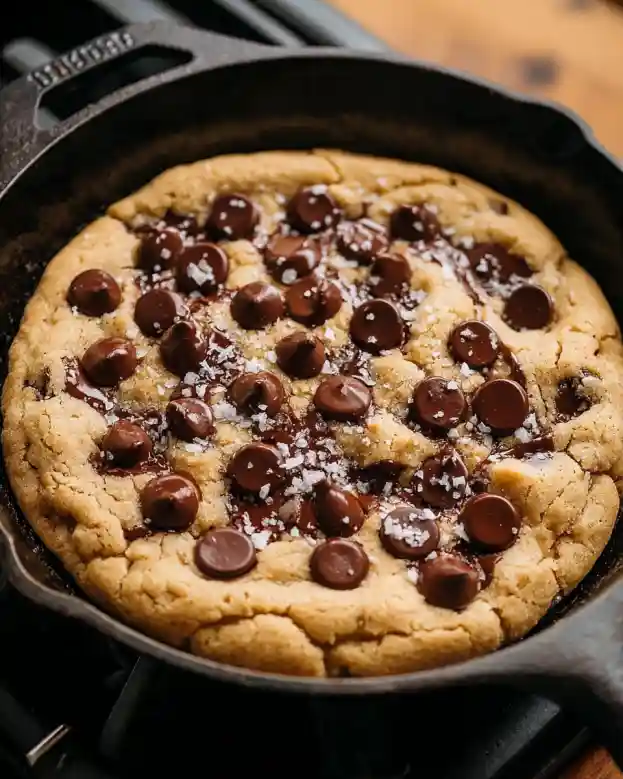
Why This Works: The Science of the Perfect Skillet Cookie
- Melted Butter = Chewy Texture: Unlike creamed butter (which incorporates air for a cakey texture), melted butter creates a denser, chewier cookie. The fat coats the flour proteins, limiting gluten development = tender, fudgy results.
- Brown Sugar Dominance = Gooey Center: Light brown sugar contains molasses, which is hygroscopic (attracts and retains moisture). Using equal parts brown and granulated sugar ensures the cookie stays soft and gooey longer, even as it cools.
- Cast Iron Magic: Cast iron retains and distributes heat evenly, creating crisp, caramelized edges while the center stays soft. Preheating the skillet jumpstarts the Maillard reaction (browning) for deeper flavor and that irresistible “crispy bottom” texture.
- Flaky Salt AFTER Baking: Adding salt post-bake preserves its crunchy texture and bright, contrasting flavor. Salt added before baking can dissolve into the dough, losing its signature pop.
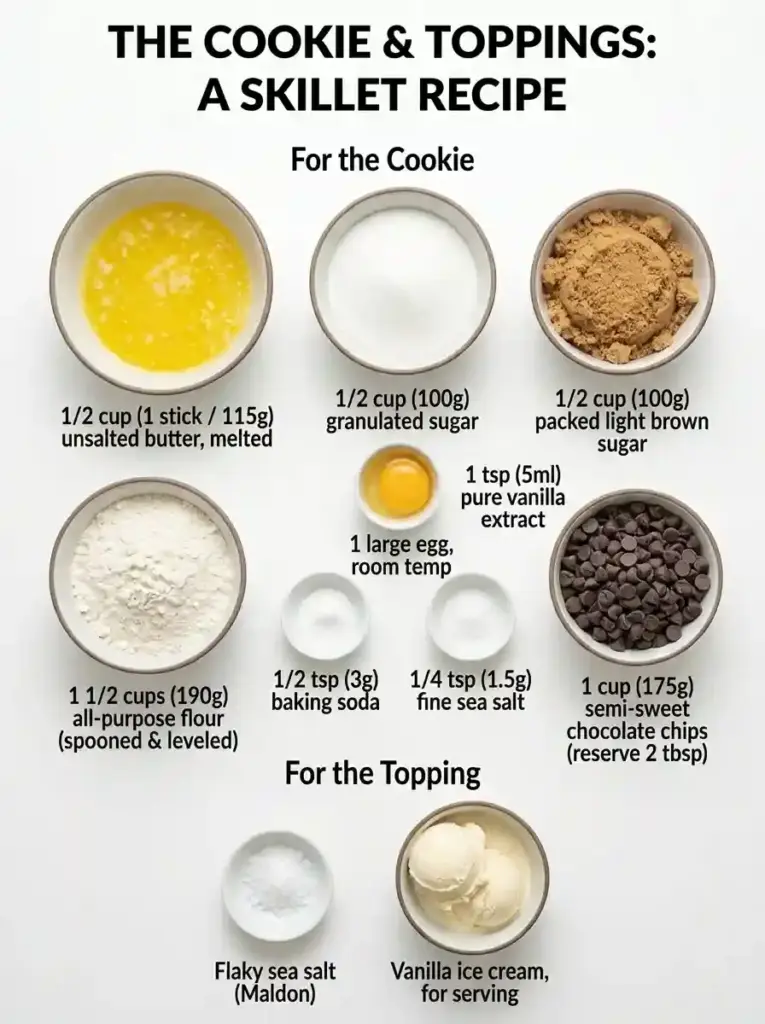
Ingredients
Measurements are provided in both US Customary and Metric for precision. Your exact ingredients are kept intact.
For the Cookie:
- ½ cup (1 stick / 115g) unsalted butter, melted (see Pro-Tip for brown butter option)
- ½ cup (100g) granulated sugar
- ½ cup (100g) packed light brown sugar
- 1 large egg, at room temperature
- 1 teaspoon (5ml) pure vanilla extract
- 1 ½ cups (190g) all-purpose flour (spooned & leveled for accuracy)
- ½ teaspoon (3g) baking soda
- ¼ teaspoon (1.5g) fine sea salt (plus more for topping)
- 1 cup (175g) semi-sweet chocolate chips (reserve 2 tbsp for topping)
For the Topping:
- Flaky sea salt (like Maldon), for finishing
- Vanilla ice cream, for serving (highly recommended!)
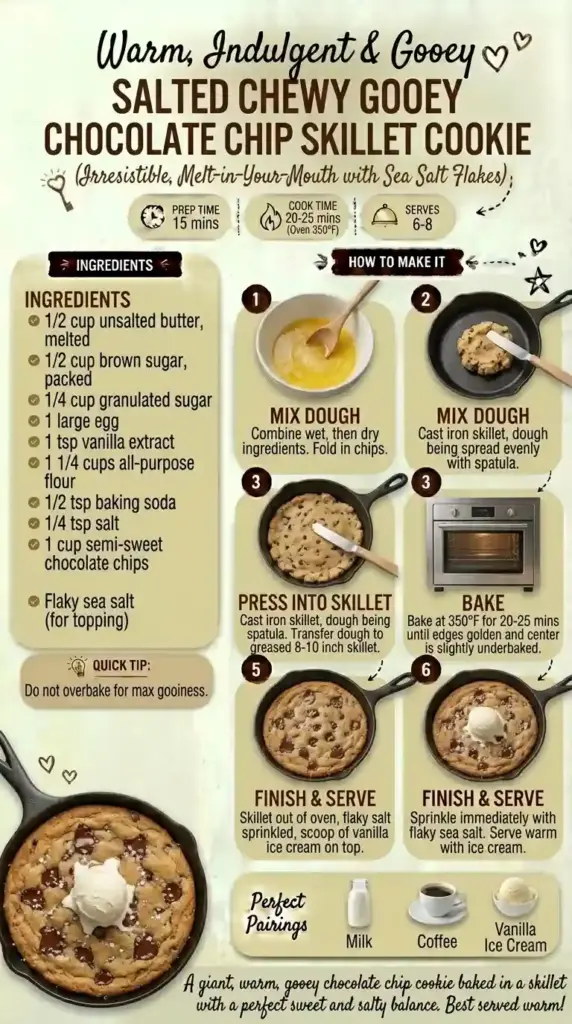
Step-by-Step Instructions (Optimized for Perfect Results)
1. Prep & Preheat
Preheat your oven to 350°F (175°C). Lightly grease a 10-inch cast iron skillet with a tiny bit of butter or non-stick spray. Pro-Tip: For extra insurance against sticking, line the bottom with a round of parchment paper after greasing.
2. Melt Butter & Mix Wet Ingredients (One-Pan Method)
Option A (Classic): Place the ½ cup melted butter in a medium bowl. Add the granulated sugar and brown sugar. Whisk vigorously for 1-2 minutes until the mixture is smooth and slightly glossy. This aerates the dough for a lighter texture. Option B (Gourmet Brown Butter): For deeper flavor, brown the butter first: melt butter in a light-colored saucepan over medium heat, swirling occasionally, until it foams, smells nutty, and shows golden-brown specks at the bottom (about 5-7 minutes). Immediately transfer to a heatproof bowl to cool 5 minutes before proceeding with sugars.
Whisk in the egg and vanilla extract until fully combined.
3. Add Dry Ingredients & Fold in Chocolate
Add the flour, baking soda, and ¼ teaspoon salt to the wet mixture. Switch to a spatula and mix just until no dry streaks remain—do not overmix. Gently fold in ¾ cup of the chocolate chips, reserving the rest for topping.
4. Press into Skillet & Top
Transfer the dough to your prepared skillet. Use damp hands or a spatula to press it into an even layer, all the way to the edges. Sprinkle the reserved 2 tbsp chocolate chips over the top for a picture-perfect finish.
5. Bake to “Just Barely Golden” Perfection
Bake for 20-25 minutes, rotating the skillet halfway through for even browning. Critical Doneness Test: The cookie is done when the edges are deep golden brown but the center still looks soft, puffy, and slightly underbaked. If you have an instant-read thermometer, the center should register 180°F (82°C). Do not overbake! The residual heat in the cast iron will continue to cook the center as it cools.
6. Cool, Salt & Serve
Remove the skillet from the oven and place it on a wire rack. Immediately sprinkle with flaky sea salt. Let it rest for 10-15 minutes before slicing. This allows the cookie to set for clean wedges while keeping the center gloriously gooey. Serve warm with scoops of vanilla ice cream!
Skillet Size & Scaling Guide
| Skillet Size | Dough Thickness | Bake Time | Yield | Notes |
|---|---|---|---|---|
| 8-inch | Thick & fudgy | 25-30 min | 6 servings | Check early; center stays very gooey |
| 10-inch (Standard) | Classic balance | 20-25 min | 8 servings | Recommended for best texture |
| 12-inch | Thinner & crispier | 18-22 min | 10-12 servings | Watch closely to avoid over-browning |
| Mini Skillets (4-6″) | Individual portions | 12-18 min | 4-6 servings | Place on baking sheet for easy handling |
Note: All times are for 350°F (175°C). Oven variations exist—start checking at the lower end of the range.
Pro-Tips for Next-Level Skillet Cookies
- Room-Temperature Egg = Smooth Dough: A cold egg can cause the melted butter to seize. Take the egg out 15-20 minutes before baking, or submerge it in warm water for 5 minutes to bring to room temp quickly.
- Don’t Overmix the Flour: Mixing just until combined prevents tough, dense cookies. A few small lumps are okay!
- Chill the Dough for Make-Ahead: Press the dough into the skillet, cover tightly, and refrigerate for up to 48 hours before baking. Add 2-3 minutes to the bake time if starting from cold.
- Freeze for Later: Bake, cool completely, slice into wedges, and freeze individually wrapped for up to 2 months. Reheat in a 350°F oven for 8-10 minutes to restore the gooey center.
- Customize Your Mix-Ins: Swap semi-sweet chips for dark chocolate, white chocolate, or butterscotch. Add ½ cup chopped nuts (pecans, walnuts) or a swirl of peanut butter for extra flair.
Troubleshooting Table
| Problem | Cause & Solution |
|---|---|
| Cookie is too cakey or dry | Cause: Overmixed dough, too much flour, or overbaked. Solution: Mix dry ingredients just until combined; spoon & level flour; bake until center is still soft. |
| Edges burn before center is done | Cause: Oven too hot, skillet too dark, or rack position too high. Solution: Use 325°F for darker skillets; place rack in center; tent edges with foil if browning too fast. |
| Cookie sticks to skillet | Cause: Skillet not greased well, or cut too soon. Solution: Grease + parchment paper; let cool 10-15 min before slicing to allow setting. |
| Center is too runny/raw | Cause: Underbaked or skillet too large (dough too thin). Solution: Bake until center reaches 180°F / 82°C; use recommended skillet size for dough amount. |
| Not salty enough / too salty | Cause: Flaky salt added before baking (dissolves) or too much fine salt in dough. Solution: Always add flaky salt AFTER baking; taste dough before adding extra salt. |
Storage & Reheating
- Room Temperature: Store covered in the skillet or an airtight container for up to 3 days. The cookie stays chewiest when kept at room temp.
- Refrigerator: For longer storage, refrigerate for up to 5 days. Bring to room temperature or reheat before serving for best texture.
- Reheating: Warm individual wedges in a 350°F (175°C) oven for 5-7 minutes to restore crisp edges and gooey center. Microwave for 10-15 seconds for speed (but edges will soften).
- Freezer: Freeze baked, cooled wedges in an airtight container for up to 2 months. Reheat from frozen in a 325°F oven for 12-15 minutes.
Nutrition Information (Per Serving)
Based on 8 servings (using standard ingredients). This is an estimate and may vary based on specific brands and portion sizes.
- Calories: ~420 kcal
- Total Fat: 20g (Saturated Fat: 12g)
- Carbohydrates: 56g
- Sugars: 28g
- Protein: 4g
- Sodium: 170mg
- Dietary Fiber: 2g
- Cholesterol: 50mg
Disclaimer: This recipe is naturally Vegetarian and Nut-Free. For a Gluten-Free version, substitute all-purpose flour with a 1:1 gluten-free baking blend (like Bob’s Red Mill or King Arthur).
Frequently Asked Questions
Can I use a different size skillet?
Yes! For an 8-inch skillet, the cookie will be thicker and need 25-30 minutes of baking. For a 12-inch skillet, it will be thinner and crispier, needing only 18-22 minutes. Always watch for the visual cues: golden edges and a soft, slightly underbaked center. Adjust your time accordingly!
How do I know when the skillet cookie is done?
The cookie is perfectly done when the edges are deep golden brown but the center still looks soft, puffy, and slightly underbaked. If you have an instant-read thermometer, the center should register 180°F (82°C). Remember: residual heat in the cast iron will continue to cook the center after removal from the oven, so don’t overbake!
Can I make this cookie ahead of time?
Absolutely! You can press the dough into the skillet, cover tightly, and refrigerate for up to 48 hours before baking. Add 2-3 minutes to the bake time if starting from cold. Alternatively, bake, cool completely, and store covered at room temperature for up to 3 days. Reheat gently before serving for that fresh-baked gooeyness.
Can I freeze this skillet cookie?
Yes! For best results: bake, cool completely, slice into wedges, and wrap individually in plastic wrap. Store in a freezer-safe bag for up to 2 months. To reheat, place frozen wedges in a 325°F (165°C) oven for 12-15 minutes, or thaw overnight in the fridge first for quicker reheating.
Can I use brown butter for extra flavor?
Yes! Brown butter adds an incredible nutty, caramelized depth. To make it: melt butter in a light-colored saucepan over medium heat, swirling occasionally, until it foams, smells nutty, and shows golden-brown specks (5-7 minutes). Immediately transfer to a heatproof bowl to cool 5 minutes before mixing with sugars. Reduce butter by 1 tbsp if skipping browning.
Why is my skillet cookie too cakey or dry?
This usually happens from overmixing the flour (develops too much gluten), using too much flour (measure by spooning & leveling, not scooping), or overbaking. Mix dry ingredients just until combined, and bake until the center is still soft. The residual heat will finish the cooking perfectly!
Can I make this gluten-free or vegan?
Yes! For gluten-free: substitute all-purpose flour with a 1:1 gluten-free baking blend (like Bob’s Red Mill or King Arthur). For vegan: use plant-based butter and a flax egg (1 tbsp ground flax + 3 tbsp water, let sit 5 minutes). Results may vary slightly but will still be delicious!
What’s the best way to serve this cookie?
Serve warm, straight from the skillet, with scoops of vanilla ice cream melting into the gooey center. For a fun presentation, let guests dig in with spoons communal-style, or slice into wedges for individual portions. A sprinkle of flaky sea salt on top just before serving adds the perfect sweet-salty contrast!
Can I add nuts or other mix-ins?
Definitely! Fold in ½ cup chopped pecans, walnuts, or hazelnuts for crunch. Other great additions: butterscotch chips, white chocolate chunks, a swirl of peanut butter, or even crushed pretzels for sweet-salty texture. Just keep total mix-ins around 1-1½ cups to avoid overwhelming the dough.
How do I reheat leftovers without losing the gooey center?
For best results: reheat individual wedges in a 350°F (175°C) oven for 5-7 minutes. This restores crisp edges while keeping the center warm and fudgy. Microwave works for speed (10-15 seconds) but will soften the edges. For frozen wedges, add a few extra minutes to the reheating time.
5-Ingredient Kale & Pineapple Smoothie Keto Recipe
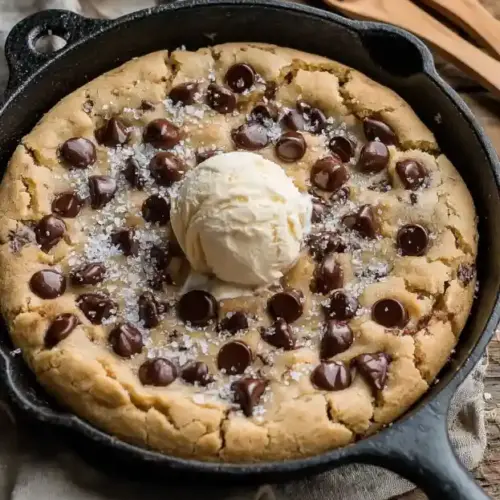
Chocolate Chip Skillet Cookie
Ingredients
For the Cookie
- ½ cup (1 stick) unsalted butter, melted
- ½ cup granulated sugar
- ½ cup packed light brown sugar
- 1 large egg
- 1 tsp pure vanilla extract
- 1½ cups all-purpose flour
- 1 tsp baking soda
- ¼ tsp salt
- 1 cup semi-sweet chocolate chips
For the Topping
- Flaky sea salt
Instructions
1. Prep & Preheat
Preheat your oven to 350°F (175°C). Lightly grease a 10-inch cast iron skillet with a tiny bit of butter or non-stick spray. Pro-Tip: For extra insurance against sticking, line the bottom with a round of parchment paper after greasing.2. Melt Butter & Mix Wet Ingredients (One-Pan Method)
Option A (Classic): Place the ½ cup melted butter in a medium bowl. Add the granulated sugar and brown sugar. Whisk vigorously for 1-2 minutes until the mixture is smooth and slightly glossy. This aerates the dough for a lighter texture. Option B (Gourmet Brown Butter): For deeper flavor, brown the butter first: melt butter in a light-colored saucepan over medium heat, swirling occasionally, until it foams, smells nutty, and shows golden-brown specks at the bottom (about 5-7 minutes). Immediately transfer to a heatproof bowl to cool 5 minutes before proceeding with sugars.Whisk in the egg and vanilla extract until fully combined.3. Add Dry Ingredients & Fold in Chocolate
Add the flour, baking soda, and ¼ teaspoon salt to the wet mixture. Switch to a spatula and mix just until no dry streaks remain—do not overmix. Gently fold in ¾ cup of the chocolate chips, reserving the rest for topping.4. Press into Skillet & Top
Transfer the dough to your prepared skillet. Use damp hands or a spatula to press it into an even layer, all the way to the edges. Sprinkle the reserved 2 tbsp chocolate chips over the top for a picture-perfect finish.5. Bake to "Just Barely Golden" Perfection
Bake for 20-25 minutes, rotating the skillet halfway through for even browning. Critical Doneness Test: The cookie is done when the edges are deep golden brown but the center still looks soft, puffy, and slightly underbaked. If you have an instant-read thermometer, the center should register 180°F (82°C). Do not overbake! The residual heat in the cast iron will continue to cook the center as it cools.6. Cool, Salt & Serve
Remove the skillet from the oven and place it on a wire rack. Immediately sprinkle with flaky sea salt. Let it rest for 10-15 minutes before slicing. This allows the cookie to set for clean wedges while keeping the center gloriously gooey. Serve warm with scoops of vanilla ice cream!
Notes
- For an extra gooey center, underbake the cookie slightly.
- Serve warm with a scoop of vanilla ice cream for the ultimate treat.
🥗 Free Custom Keto Meal Plan?
Do you want to lose weight while still enjoying delicious Asian & Thai Fusion meals? Take this quick quiz to get your personalized Keto plan based on your favorite foods!
- ✅ No more guessing what to eat
- ✅ Delicious & easy-to-make recipes
- ✅ Tailored to your body type
Get My Custom Plan Now! →
*Over 100,000+ people have transformed their lives with this quiz.