Indulge in Creamy Bliss: The Ultimate Dairy Queen Banana Milkshake Recipe
Who can resist the sweet, creamy delight of a banana milkshake? Growing up, my summers were filled with hot days, laughter, and the irresistible aroma of ripe bananas blending into chilled sugary bombs at our local Dairy Queen. Those trips with my family to grab a Dairy Queen Banana Milkshake became cherished traditions, a comforting routine wrapped in nostalgia. Every sip brought back memories of carefree days and playful banter, always topped with a cherry and a smile.
While I love those memories, I also love to recreate that experience at home. With my own spin on the classic Dairy Queen Banana Milkshake, I’ve perfected a recipe that elevates this treat to new heights! What makes my version special? It’s not just about the ingredients—it’s about the love and care infused in every blend, taking you back to those happy moments spent with loved ones. Plus, it’s super easy to whip up with just a few ingredients, ensuring you won’t have to wait in line for that pleasurable sip.
Join me on this journey as I share how you can create a homemade banana milkshake that’s not only refreshing but also tailored perfectly to your taste. Trust me; you’ll want to keep this recipe handy all summer long!
What Are Dairy Queen Banana Milkshakes?
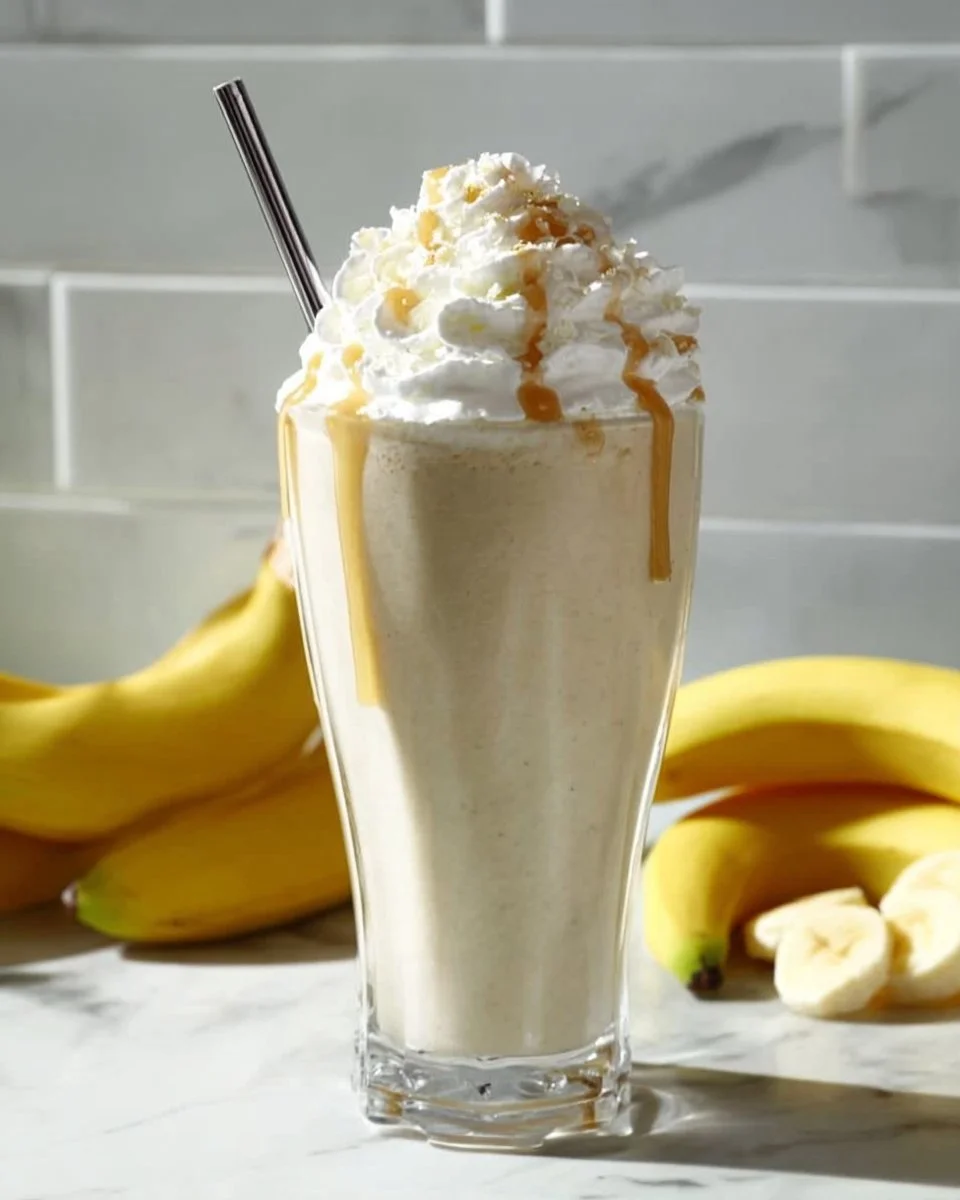
Dairy Queen Banana Milkshakes have been a beloved staple at ice cream shops for decades. Originating as a classic American dessert, this milkshake combines the luscious flavor of ripe bananas with rich vanilla ice cream and creamy milk. This simple yet decadent combination is blended to perfection, creating a wonderfully smooth and thick treat that dances on your taste buds with every sip.
The unique taste of a Dairy Queen Banana Milkshake comes from the balance between the natural sweetness of ripe bananas and the creaminess of high-quality ice cream. You’re not just sipping a milkshake; you’re indulging in an experience—a nostalgic trip down memory lane with every refreshing gulp.
They are perfect for any occasion: a hot summer day, a family barbecue, or simply as a comforting snack at home. Whenever you crave something sweet and indulgent, this banana milkshake is the answer.
Why You’ll Love This Recipe
Want to know why my version of the Dairy Queen Banana Milkshake is a must-try? Here are a few compelling reasons you’ll love this recipe:
Quality Ingredients: Using ripe bananas, creamy ice cream, and fresh milk ensures you’re treating yourself to a wholesome version of this classic. Forget artificial flavors; this milkshake bursts with natural flavors!
Cost-Effective: If you’re thinking about cost, homemade beats store-bought every time. For the price of one milkshake from Dairy Queen, you can make several servings at home—perfect for sharing!
Customize to Your Liking: You can easily tweak this recipe. Want more banana flavor? Add one more! Want to make it dairy-free? Go for almond milk or coconut milk and dairy-free ice cream.
Easy and Quick to Prepare: In just 5 minutes, you can create this delicious milkshake. It’s a zero-stress, all-fun recipe—perfect for those unexpected guests or sweet cravings.
Kids and Adults Love It: This is a recipe that appeals to all ages. The smile on a child’s face as they enjoy this milkshake is truly priceless—trust me, I’ve tested this with my little ones!
With just 5 simple minutes and pantry essentials, you can indulge in a homemade version that leaves Dairy Queen in the dust!
Ingredients
To whip up your very own Dairy Queen Banana Milkshake, gather the following ingredients:
- 2 ripe bananas: The riper they are, the sweeter your shake! Look for bananas with brown spots for maximum flavor.
- 2 cups vanilla ice cream: Aim for high-quality ice cream for the creamiest texture. Brands like Häagen-Dazs or Ben & Jerry’s work wonders!
- 1 cup milk: Use whole milk for the best creaminess, or substitute with almond or coconut milk for a lighter option.
- 1 teaspoon vanilla extract: A splash of pure vanilla extract adds a depth of flavor that is simply irresistible.
Prep Notes
- Make sure your bananas are at room temperature before blending for superior creaminess.
- You can let your ice cream sit for a bit so it softens slightly—this way, your blender has an easier job!
Step-by-Step Instructions
Now that we have the ingredients, let’s dive into the process of making this dreamy Dairy Queen Banana Milkshake:
Blend It Up: In a blender, combine the ripe bananas, vanilla ice cream, milk, and vanilla extract. Tip: Ensure the variables such as ice cream and milk are at room temperature to facilitate easier blending.
- Timing: Blend on high speed for about 30-45 seconds, scraping down the sides if necessary.
Check the Consistency: After blending, pause to give it a little taste! Adjust sweetness with more bananas or ice cream if desired. You want it smooth and creamy, so if it’s a bit thick for your liking, add a splash of milk.
Serve with Style: Once you achieve that perfect thickness, pour the milkshake into tall glasses (don’t forget the straws!) and serve immediately. You could top it with whipped cream or sprinkle some crushed nuts for an aesthetic touch!
Chef’s Tip: For a fun twist, drizzle some chocolate syrup on the inside of your serving glass before pouring in the milkshake—it’s visually stunning and adds extra flavor!
Expert Tips & Tricks
For the best results with your Dairy Queen Banana Milkshake, keep these expert tips in mind:
Optimal Bananas: Use perfectly ripe bananas for the sweetest taste. If they’re too green, your milkshake will lack the needed sweetness.
Ice Cream Quality: Using premium ice cream really does make a difference in taste and texture. Stay away from lower-quality options as they can lead to icy milkshakes.
Make Ahead: If you’re preparing for a party, you can blend the ingredients (excluding milk) a few hours ahead of time and store them in the fridge until you’re ready to blend and serve.
Storage: If you have leftovers, pour them in an airtight container and freeze them. When ready to enjoy again, let them thaw for about 20 minutes before blending to restore the creamy texture.
Don’t Overblend: Blending for too long can introduce air, making your shake frothy instead of thick. Stop when everything is perfectly combined!
Serving Suggestions
This Dairy Queen Banana Milkshake pairs wonderfully with a variety of treats. Here are some serving suggestions to elevate your experience:
Perfect Pairings: Serve them alongside homemade cookies, brownies, or a slice of decadent banana bread for a tantalizing dessert experience.
Presentation Ideas: Consider adding a cherry or whipped cream on top, and garnish with a sprinkle of cinnamon or grated chocolate. You can use colorful straws or even festive drinkware for seasonal flair.
Occasions: Ideal for birthday parties, summer barbecues, or movie nights—this treat is guaranteed to please!
Variations & Substitutions
Feel free to mix up this classic recipe with different flavor profiles:
Flavor Combos: Add a tablespoon of peanut butter for a deliciously nutty banana shake. Alternatively, a dash of chocolate syrup transforms it into a delightful chocolate banana milkshake.
Dietary Adaptations: For a healthier version, use Greek yogurt instead of ice cream or a non-dairy alternative to meet dietary restrictions. You can even adjust the milk to a plant-based option.
Seasonal Treats: For a festive twist, try adding pumpkin pie spice in the fall or a splash of peppermint extract during the winter holidays!
Nutrition & Storage Info
- Prep Time: 5 minutes
- Total Time: 5 minutes
- Yield: Approximately 4 servings
- Estimated Calories: Around 350 calories per serving (depending on specific brands of ingredients used)
Storage Instructions
- Room Temperature: Best served immediately; this milkshake is not suitable for long-term sitting out.
- Fridge: Enjoy right away or in an airtight container for about 1-2 hours.
- Freezer: Lasts up to 2 months in the freezer. To serve after freezing, let it sit out to soften before blending.
FAQ Section
1. Can I use frozen bananas?
Yes! Frozen bananas give a thicker texture to your milkshake. Just remember to let them sit at room temperature for about 10 minutes before blending for easy processing.
2. What can I use instead of vanilla ice cream?
You can substitute with any flavored ice cream you enjoy, such as banana or caramel. Non-dairy ice creams made from coconut or almond are great alternatives, too!
3. How can I thicken my milkshake?
If your milkshake is too thin, blend in more ice cream or add a bit of frozen banana to create that perfect creamy consistency.
4. How long does it stay fresh?
This milkshake is best enjoyed fresh but can be stored in the freezer for up to 2 months. Just allow it to thaw before enjoying again!
5. Can I make this vegan?
Absolutely! Use coconut or almond milk and vegan ice cream, and you’ve got a delightful vegan shake!
6. What toppings can I add?
Whipped cream, chocolate shavings, or even a sprinkle of cinnamon can elevate your milkshake to the next level.
7. Can this recipe be doubled?
Yes, this recipe can easily be scaled up to cater to larger gatherings. Just ensure your blender can handle the increased volume!
8. How do I prevent a frothy milkshake?
Avoid blending too long and start at a lower speed, gradually increasing.
9. Can I add additional flavors?
Absolutely! Experiment with almond extract, cinnamon, or even crushed cookies for added bursts of flavor.
10. Is this a kid-friendly recipe?
Yes! Kids love it, and it’s easy for them to help you out in making it. Just ensure they have supervision when using the blender.
Conclusion
There you have it! A heartwarming take on the beloved Dairy Queen Banana Milkshake that captures the essence of childhood joy. The taste, the memories—it’s all wrapped up in this delightful recipe. I encourage you to give it a try and see how it transforms your next sweet craving into a nostalgic treat!
I’d love to hear your thoughts and experiences with this recipe. Did your family love it? Did you customize it? Let me know in the comments! And while you’re here, don’t forget to check out my related recipes for other delicious milkshakes on the blog. Happy blending!
Print
Dairy Queen Banana Milkshake
- Total Time: 5 minutes
- Yield: 4 servings 1x
- Diet: Vegetarian
Description
A delightful and creamy homemade banana milkshake inspired by Dairy Queen, perfect for summer days.
Ingredients
- 2 ripe bananas
- 2 cups vanilla ice cream
- 1 cup milk
- 1 teaspoon vanilla extract
Instructions
- In a blender, combine the ripe bananas, vanilla ice cream, milk, and vanilla extract.
- Blend on high speed for about 30-45 seconds, scraping down the sides if necessary.
- Check the consistency and adjust sweetness if desired.
- Pour the milkshake into tall glasses and serve immediately, optionally topping with whipped cream or crushed nuts.
Notes
Use ripe bananas for maximum flavor and let the ice cream soften slightly for easier blending.
- Prep Time: 5 minutes
- Cook Time: 0 minutes
- Category: Dessert
- Method: Blending
- Cuisine: American
Nutrition
- Serving Size: 1 serving
- Calories: 350
- Sugar: 40g
- Sodium: 150mg
- Fat: 15g
- Saturated Fat: 9g
- Unsaturated Fat: 4g
- Trans Fat: 0g
- Carbohydrates: 50g
- Fiber: 2g
- Protein: 6g
- Cholesterol: 30mg
🥗 Free Custom Keto Meal Plan?
Do you want to lose weight while still enjoying delicious Asian & Thai Fusion meals? Take this quick quiz to get your personalized Keto plan based on your favorite foods!
- ✅ No more guessing what to eat
- ✅ Delicious & easy-to-make recipes
- ✅ Tailored to your body type
Get My Custom Plan Now! →
*Over 100,000+ people have transformed their lives with this quiz.