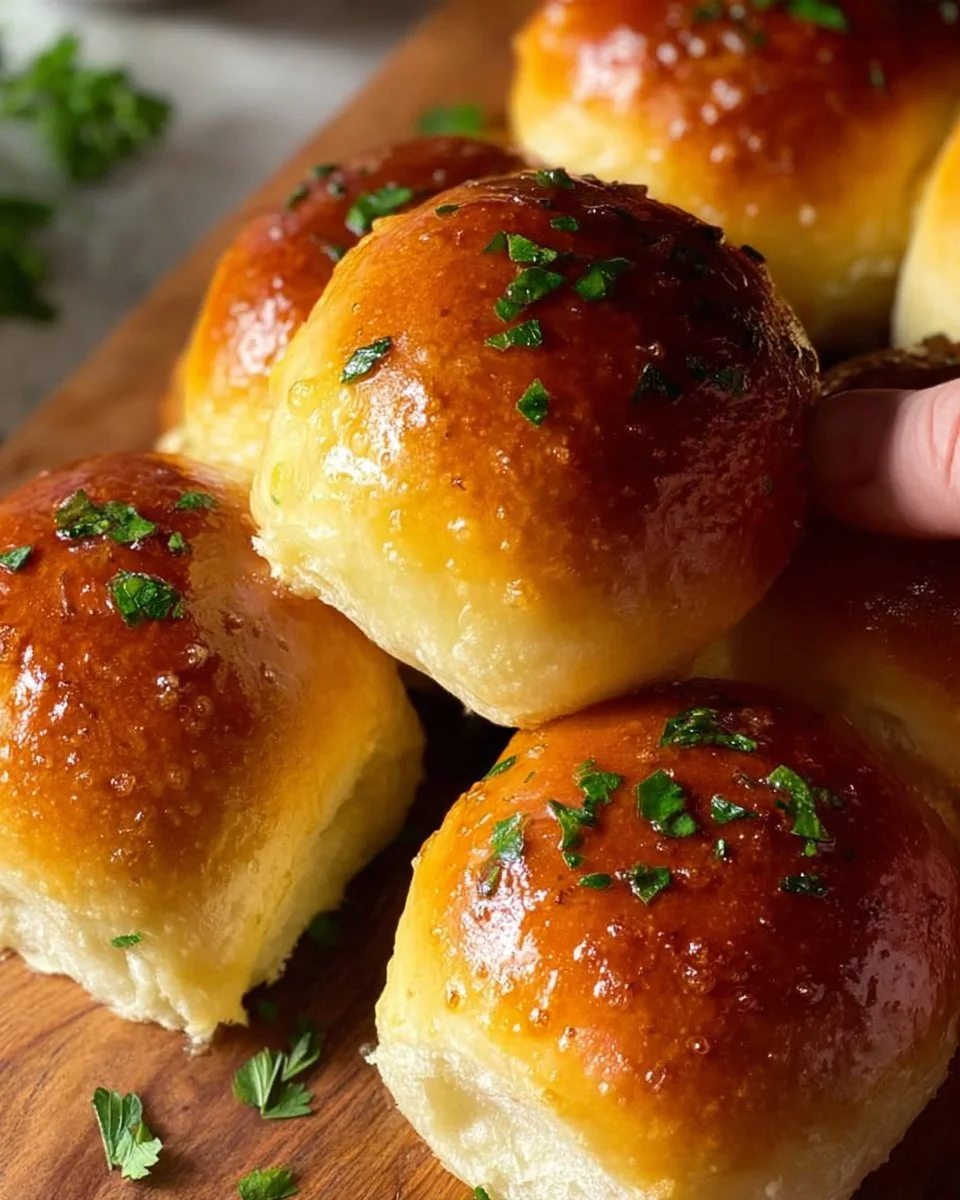
Irresistible Homemade Garlic Butter Dinner Rolls: Your New Favorite Comfort Food
Picture this: a chilly evening, your favorite sweater on, and the warm scent of freshly baked bread wafting through your home. As a passionate food lover and home baker, nothing brings me more joy than making a batch of Homemade Garlic Butter Dinner Rolls. These rolls have been the centerpiece of countless family dinners and holiday gatherings at my house, each bite bursting with buttery goodness and the rich flavor of garlic.
What sets my recipe apart? Unlike store-bought options, which often rely on preservatives and artificial flavors, these rolls are made with simple, wholesome ingredients. Kneading the dough by hand, watching it rise, and then savoring the moment when you pull those golden-brown rolls out of the oven makes the experience truly special. It’s not just about filling your stomach; it’s about creating cherished memories with each batch.
In this post, I’ll share my treasured recipe for Homemade Garlic Butter Dinner Rolls and guide you through each step. After trying this recipe, you’ll not only understand the magic of homemade rolls but also elevate your bread-baking skills to new heights.
What Are Homemade Garlic Butter Dinner Rolls?
Homemade Garlic Butter Dinner Rolls have a rich history, stemming from traditional bread-making techniques that have been passed down through generations. The essence of these rolls lies in their delightful balance of fluffiness and slight chewiness—a perfect complement to their savory garlic butter topping. Each roll is soft and pillowy on the inside, with a golden, crispy exterior that beckons you to take just one more.
The unique twist in these rolls comes from the aromatic garlic and fresh parsley, blending seamlessly into the buttery goodness. They are a versatile addition to any meal—whether served alongside a hearty stew, a comforting pasta dish, or even as a stand-alone snack. Whenever there’s a family gathering or a holiday feast, I reach for this recipe, knowing it will steal the spotlight every time.
Why You’ll Love This Recipe
1. Unmatched Freshness and Flavor
Nothing compares to the taste of freshly baked bread. Store-bought rolls often come with a list of ingredients you can’t pronounce, while these homemade beauties are crafted from simple, recognizable components. You can taste the difference!
2. Cost-Effective Delight
You can often find homemade rolls to be much cheaper than gourmet bakery versions. For the price of a few store-bought rolls, you can whip up a batch that yields about 12 fluffy individuals—perfect for sharing (or for keeping all to yourself!).
3. Customization Possibilities
Love cheese? Add some grated Parmesan into the dough! Feel like a twist? Try incorporating chopped rosemary or thyme. This is a base recipe that invites creativity and personalization to fit your family’s taste preferences.
4. Easy to Make, Perfect for Any Baker
It’s a common misconception that homemade bread is hard to make. In reality, this recipe is beginner-friendly. With just a few straightforward steps, even novice bakers can achieve mouthwatering results.
5. Perfect for Any Occasion
Whether you’re hosting a dinner party, preparing for Thanksgiving, or simply treating yourself to a cozy dinner at home, these rolls are sure to impress. Their warm, comforting flavor makes them suitable for any meal or event.
Ingredients Section
To whip up the Homemade Garlic Butter Dinner Rolls, you’ll need the following ingredients:
- 4 cups all-purpose flour: Opt for a brand like King Arthur Flour for consistent results.
- 1 packet (2 ¼ teaspoons) active dry yeast: Ensure it’s fresh for the best rise—check the expiration date.
- 1 teaspoon sugar: This helps to activate the yeast.
- 1 teaspoon salt: Balances flavors and strengthens the dough.
- 1 cup warm water (110°F): Important for activating the yeast—too hot will kill it.
- ¼ cup unsalted butter, melted: For richness; let it cool slightly before adding to the dough.
- 2 cloves garlic, minced: Fresh garlic provides that distinctly robust flavor.
- ¼ cup fresh parsley, chopped: For freshness and color.
- 1 egg, for egg wash: Gives a beautifully shiny and golden finish.
Prep Notes
- Use room temperature butter to ensure even mixing.
- Fresh herbs elevate flavor, so don’t skimp on the parsley!
Step-by-Step Instructions
Activate Yeast: In a small bowl, dissolve the yeast and sugar in warm water. Let it sit for about 5 minutes until bubbly.
- Chef’s Tip: If it doesn’t bubble, your yeast may be expired; start again with fresh yeast.
Make the Dough: In a large mixing bowl, combine flour and salt. Create a well in the center and add the yeast mixture along with the melted butter. Mix until a dough forms.
Knead the Dough: Transfer to a floured surface and knead for about 5-7 minutes until the dough is smooth and elastic.
- Common Mistake to Avoid: Don’t add too much flour while kneading; a slightly tacky dough is perfect.
First Rise: Place the dough in a greased bowl, cover with a towel, and let it rise in a warm place for about 1 hour or until doubled in size.
Preheat Oven: Preheat your oven to 350°F (175°C).
Shape Rolls: Punch down the dough and divide it into small equal portions (about 12). Shape each portion into a ball and place in a greased baking dish.
Garlic Butter Topping: In a small saucepan, melt the remaining butter and add minced garlic and parsley. Brush this mixture generously over the rolls.
Second Rise: Allow the rolls to rise again for about 30 minutes.
- Visual Cue: The rolls should puff up beautifully and touch each other.
Egg Wash: Brush the tops with the beaten egg for a golden finish.
Bake: Bake for 20-25 minutes until golden brown.
- Chef’s Tip: Rotate your pan halfway through baking for even browning.
- Serve: Serve warm and enjoy the aroma as they vanish off the plate!
Expert Tips & Tricks
- Dough Consistency: Ensure your dough is soft and slightly tacky; this leads to light rolls.
- Flavor Boost: Consider adding spices like garlic powder or Italian seasoning to the dough for extra flavor.
- Make-Ahead Instructions: You can make the dough in advance and refrigerate it after the first rise. Allow it to come to room temperature before shaping.
- Storage Recommendations: Store leftover rolls in an airtight container at room temperature for up to 3 days. You can also freeze them for up to 3 months—just reheat from frozen.
- Troubleshooting: If your rolls are too dense, ensure you didn’t rush the rising times or add too much flour during kneading.
Serving Suggestions
These Homemade Garlic Butter Dinner Rolls make an excellent accompaniment to stews, pastas, and hearty salads. For a lovely presentation, you can serve them in a warm basket lined with a tea towel, accompanied by a small dish of olive oil or honey for dipping. They’re perfect for casual family dinners, holiday feasts, or even as a lovely addition to a cozy date night at home!
Variations & Substitutions
- Cheesy Garlic Rolls: Add shredded cheese to the dough before baking for a melty twist.
- Herb-Infused Butter: Swap the parsley for chopped chives or dill for a different herbal note.
- Whole Wheat Flour: Substitute half of the all-purpose flour with whole wheat flour for a heartier roll.
- Seasonal: Try adding some pumpkin puree and spices for a fall-inspired twist.
Nutrition & Storage Info
- Prep Time: 15 minutes
- Cook Time: 25 minutes
- Total Time: 1 hour 40 minutes (including rising time)
- Yield: 12 rolls
- Estimated Calories: 150 calories per roll
- Storage Instructions: Store at room temperature for up to 3 days or freeze for up to 3 months.
FAQ Section
Can I use instant yeast instead of active dry yeast?
Yes, you can. Simply mix instant yeast directly with the dry ingredients without the need to activate it in warm water.What happens if my dough doesn’t rise?
This might be because the yeast was expired or the water was either too hot or too cold. Make sure to check your ingredients!How do I know when my rolls are done baking?
The rolls should be golden brown, and tapping the bottom should sound hollow.Can I add different herbs or spices?
Absolutely! Feel free to tailor the flavor with herbs like rosemary, thyme, or even some chili flakes for a kick.How can I make them gluten-free?
You can use a gluten-free all-purpose flour blend, but the texture may vary slightly.Can I make these rolls ahead of time?
Yes! You can shape the rolls, place them in the baking dish, cover, and refrigerate overnight before baking the next day.What should I do if I want a softer roll?
Adding a touch more butter to the dough can help, or you can brush melted butter on the tops right after they come out of the oven.Can I double this recipe?
Yes! Just ensure you have enough space in your mixing bowl and baking dish for the increased dough volume.What if I don’t have fresh garlic?
You can use garlic powder instead, but fresh garlic will provide a more robust flavor.Do these rolls freeze well?
Yes! You can freeze them after baking. Just place them in an airtight container or freezer bag.
Conclusion
These Homemade Garlic Butter Dinner Rolls are more than just a recipe; they’re an embodiment of home and warmth, perfect for creating unforgettable experiences around your dinner table. I hope you try making them and enjoy every cheesy, buttery bite! Feel free to share your thoughts and any variations you come up with in the comments—I’d love to hear your feedback. And if you’re looking for more comforting recipes, check out my blog for delightful pasta dishes and scrumptious desserts that will warm your heart! Happy baking!
Print
Homemade Garlic Butter Dinner Rolls
- Total Time: 100 minutes
- Yield: 12 rolls 1x
- Diet: Vegetarian
Description
Irresistible homemade rolls with a buttery garlic flavor, perfect for family dinners and gatherings.
Ingredients
- 4 cups all-purpose flour
- 1 packet (2 ¼ teaspoons) active dry yeast
- 1 teaspoon sugar
- 1 teaspoon salt
- 1 cup warm water (110°F)
- ¼ cup unsalted butter, melted
- 2 cloves garlic, minced
- ¼ cup fresh parsley, chopped
- 1 egg, for egg wash
Instructions
- In a small bowl, dissolve the yeast and sugar in warm water. Let it sit for about 5 minutes until bubbly.
- In a large mixing bowl, combine flour and salt. Create a well in the center and add the yeast mixture along with melted butter. Mix until a dough forms.
- Transfer to a floured surface and knead for about 5-7 minutes until the dough is smooth and elastic.
- Place the dough in a greased bowl, cover with a towel, and let it rise in a warm place for about 1 hour or until doubled in size.
- Preheat your oven to 350°F (175°C).
- Punch down the dough and divide it into approximately 12 small equal portions. Shape each portion into a ball and place in a greased baking dish.
- In a small saucepan, melt the remaining butter and add minced garlic and parsley. Brush this mixture generously over the rolls.
- Allow the rolls to rise again for about 30 minutes.
- Brush the tops with the beaten egg for a golden finish.
- Bake for 20-25 minutes until golden brown.
- Serve warm and enjoy.
Notes
Store leftover rolls in an airtight container at room temperature for up to 3 days or freeze for up to 3 months.
- Prep Time: 15 minutes
- Cook Time: 25 minutes
- Category: Bread
- Method: Baking
- Cuisine: American
Nutrition
- Serving Size: 1 roll
- Calories: 150
- Sugar: 1g
- Sodium: 300mg
- Fat: 7g
- Saturated Fat: 3g
- Unsaturated Fat: 4g
- Trans Fat: 0g
- Carbohydrates: 22g
- Fiber: 1g
- Protein: 4g
- Cholesterol: 40mg
🥗 Free Custom Keto Meal Plan?
Do you want to lose weight while still enjoying delicious Asian & Thai Fusion meals? Take this quick quiz to get your personalized Keto plan based on your favorite foods!
- ✅ No more guessing what to eat
- ✅ Delicious & easy-to-make recipes
- ✅ Tailored to your body type
Get My Custom Plan Now! →
*Over 100,000+ people have transformed their lives with this quiz.