Decadent Ninja Creami Cookie Butter Ice Cream: A Comforting Delight
If there’s one thing that brings my family together, it’s the indulgent magic of homemade ice cream. Growing up, we’d gather in the kitchen, laughter filling the air as my mom churned away on her trusty old ice cream maker. One flavor that always captured our hearts—and palates—was cookie butter. Fast-forward to today, and there’s no way I could resist whipping up my own version: the dreamy Ninja Creami Cookie Butter Ice Cream.
What makes this ice cream extraordinary is not just the creamy texture or the luscious, buttery taste; it’s that perfect balance of nostalgia and innovation. While many recipes out there can leave you with icy, crumbly results, my tried-and-true method guarantees a rich, velvety experience that melts in your mouth, reminding me of joyful family moments.
So, if you’re ready to infuse your kitchen with the warm spices and comforting sweetness of cookie butter, you’re in for a treat. In this post, I’ll guide you step-by-step to create your own batch of Ninja Creami Cookie Butter Ice Cream that will have your loved ones clamoring for seconds—even thirds!
What Are Ninja Creami Cookie Butter Ice Cream?
The origins of cookie butter are surprisingly delightful. Born out of the famous European speculoos cookies, cookie butter has become an irresistible sensation, especially in the U.S. Ninja Creami Cookie Butter Ice Cream is the perfect way to make the most of this beloved spread. Imagine enveloping that fabulous cookie flavor in a scoop of silky ice cream—that’s exactly what this dessert delivers.
In terms of taste and texture, this ice cream is a symphony of flavors, blending the spiced notes of cookie butter with a rich creaminess that can only come from high-quality ingredients. Each bite offers a satisfying creaminess paired with the unmistakable crunch of cookie bits, making it uniquely special. This is not just an ice cream; it’s a treat that deserves to be celebrated.
You’ll want to make this during a lazy summer afternoon or any chilly winter evening when comfort food calls your name. It’s perfect for family gatherings or simply as a way to enjoy a little self-care at home.
Why You’ll Love This Recipe
Here are five compelling reasons to make Ninja Creami Cookie Butter Ice Cream your new favorite treat:
Irresistibly Creamy Texture: Unlike many store-bought ice creams which can often be overly airy or icy, this homemade version boasts a creamy texture because of the heavy whipping cream and instant vanilla pudding mix. You won’t be left with that disappointing crumbly mess here!
Customization Galore: Let your creativity shine! Add a handful of chocolate chips, a swirl of caramel, or chunks of your favorite cookie dough to make it your own. This recipe is a blank canvas waiting for your personal touch.
Cost-Effective Indulgence: Making this ice cream at home is a fraction of the cost compared to what you’d pay for artisanal versions at ice cream parlors. Plus, you can effortlessly whip up batches for less than the price of one pint!
Quick Preparations: It takes minimal time to prep—just 10-15 minutes to mix up your ingredients. The hardest part? Waiting for the mixture to freeze overnight.
Fool-Proof Easy Recipe: For both novice and experienced home bakers, this recipe is super straightforward. With the help of the Ninja Creami, making ice cream has never been so simple and enjoyable.
Crafting Ninja Creami Cookie Butter Ice Cream isn’t just a cooking project; it’s a delightful experience filled with flavors, memories, and a touch of magic.
Ingredients Section
Essential Ingredients
- 1 cup whole milk: Always choose whole milk for a rich, creamy base.
- 2 TBSP instant vanilla pudding mix: Helps enhance the creaminess.
- 1/2 cup cookie butter: Don’t skimp on quality—go for brands like Trader Joe’s or Lotus for that authentic flavor.
- 1/2 cup heavy whipping cream: Use chilled, high-fat cream for the best texture.
Notes on Ingredient Quality/Substitutions
- If you want a lighter version, try half-and-half instead of heavy cream, but remember it may alter the texture.
- Use lactose-free milk and cream for a dairy-free adaptation.
Preparation Notes
- Let your cookie butter sit at room temperature for a few minutes before measuring—this makes it easier to incorporate.
- Make sure your heavy cream is chilled for the best whipping results.
Step-by-Step Instructions
Mix the Base: In a small bowl or large liquid measuring cup, combine 1 cup of whole milk and 2 TBSP of instant vanilla pudding mix. Whisk together thoroughly until the pudding mix dissolves completely, about 1-2 minutes.
Melt the Cookie Butter: Place 1/2 cup cookie butter in a microwave-safe bowl. Microwave for about 15-20 seconds until it’s smooth and more fluid. Stir well to combine any solid bits.
Combine Ingredients: Add the melted cookie butter to the milk and pudding mixture, whisking until well blended. You want a smooth mixture, without lumps.
Add Cream: Next, whisk in 1/2 cup of heavy whipping cream until thoroughly mixed.
Freeze the Mixture: Transfer this mixture to a Ninja Creami pint container and close the lid. Place it on a level surface in your freezer and freeze for at least 24 hours for optimal results.
Prepare for Churning: After the 24-hour freeze time, remove the pint from the freezer and take off the lid. Insert the pint container into the outer bowl apparatus and secure the outer bowl lid.
Churn the Ice Cream: Place the outer bowl into your Ninja Creami machine. Select the Ice Cream function and let the cycle complete, which should take about 3-5 minutes.
Check Consistency: Remove the pint and check the ice cream’s consistency. If it’s crumbly, reinsert the pint and use the Re-spin function for an additional processing time.
Mix-Ins (Optional): If you’re adding any mix-ins (like crushed cookies or chocolate chips), create a well in the center of the ice cream that is about 1/2 inch wide, extending to the bottom of the container. Add your selected mix-in and use the Mix-in function to thoroughly combine.
Chef’s Tips:
- Visual Cues: Look for a thick, creamy consistency before removing the pint. If it looks like snow, give it another whip!
- Common Mistakes: Avoid over-mixing after adding cream, as this can introduce too much air.
Expert Tips & Tricks
Storage: Store your Ninja Creami Cookie Butter Ice Cream in an airtight container in the freezer, where it will last for up to 2 weeks (if it lasts that long!).
Make-Ahead Instructions: You can prepare the mixture a couple of days in advance and stash it in the freezer, ready to churn whenever the craving hits.
Troubleshooting: If your ice cream remains too hard, allow it to sit at room temperature for a few minutes before serving.
Texture Tips: For a softer texture straight from the freezer, consider adding a tablespoon of your favorite spirit (like bourbon) to the mixture before freezing.
Garnishing Ideas: Serve with a sprinkle of crushed cookies or a drizzle of chocolate syrup on top for added flair.
Serving Suggestions
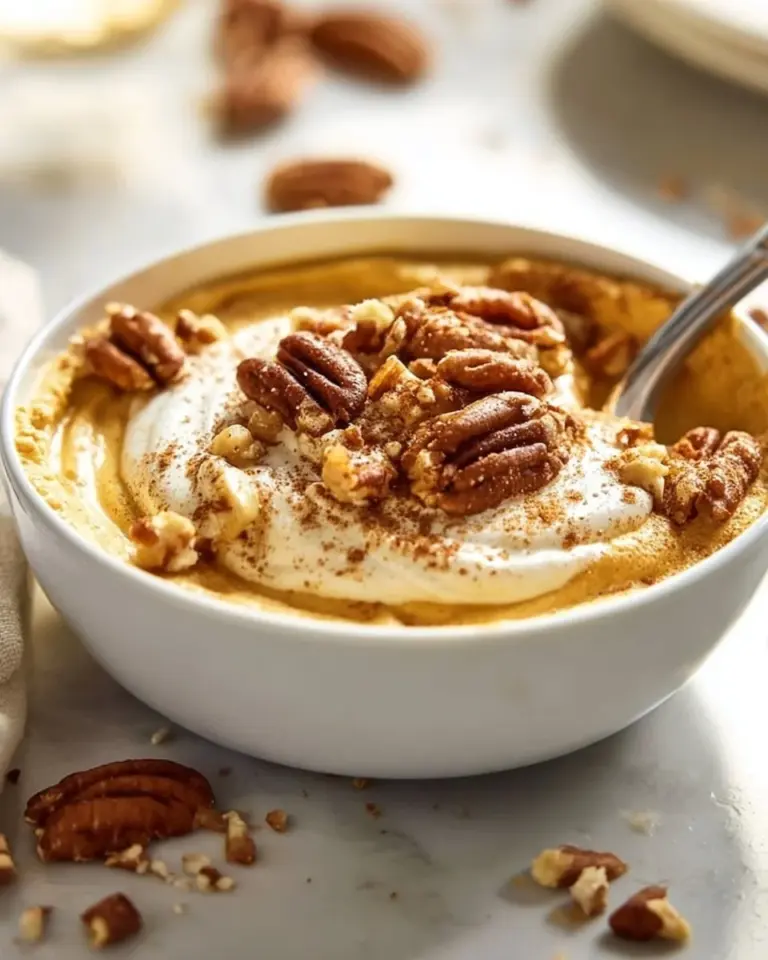
Serve your Ninja Creami Cookie Butter Ice Cream in fun, colorful bowls topped with a dollop of whipped cream, a few cookie crumbles, and maybe a drizzle of melted chocolate or caramel. Pair it with warm cookies or a slice of pie for an unforgettable dessert experience. It’s also perfect to scoop at birthday parties or summer barbecues, providing joy in every bite!
Variations & Substitutions
- Chocolate Lovers: Add cocoa powder for a rich chocolate version or swirl in chocolate fudge.
- Nutty Flavor: Try adding a tablespoon of almond or hazelnut butter for a nutty twist.
- Seasonal Spice: During the fall, incorporate pumpkin spice along with the cookie butter for a festive treat.
- Vegan Option: Replace heavy cream and whole milk with coconut milk or almond milk, and choose a vegan cookie butter brand.
Nutrition & Storage Info
- Prep Time: 10 minutes
- Total Time: 24 hours (including freezing)
- Yield: Approximately 4 servings
- Estimated Calories per Serving: About 300 calories
- Storage Instructions: Store in an airtight container in the freezer for up to 2 weeks for best flavor and texture.
FAQ Section
Can I use low-fat milk instead of whole milk?
While it’s possible, using low-fat milk will yield a less creamy texture. Whole milk is ideal for richness.How long does it take to freeze? Can I freeze for less time?
For best results, freeze for at least 24 hours. Freezing for less time may result in an icy texture.Is cookie butter gluten-free?
Most cookie butters are not gluten-free. Ensure to check the label if you have dietary restrictions.Can I make this without a Ninja Creami?
Yes! You can use a traditional ice cream maker, but the texture may vary, and additional churning time may be required.What if my ice cream is too hard after freezing?
Allow it to sit at room temperature for about 5-10 minutes before serving.How can I make this dairy-free?
Substitute with coconut milk and a dairy-free cookie butter.Can I use a different flavor of pudding mix?
Absolutely! Feel free to experiment with different flavors, but vanilla pairs best with cookie butter.What are some mix-in ideas?
You can add crushed cookies, sprinkles, chocolate chips, or even caramel swirls.Can I omit the pudding mix?
The pudding mix helps to create creaminess and stability. While you can omit it, the texture may be less creamy.How can I store leftovers?
Store in an airtight container in the freezer. For best quality, consume within two weeks.
Conclusion
Creating your own Ninja Creami Cookie Butter Ice Cream at home is simpler than it seems and oh so rewarding! With its silky texture, rich flavors, and the joy of customization, this recipe is sure to become a family favorite. I wholeheartedly encourage you to try it and make some delicious memories along the way. If you do give it a whirl, I’d love to hear your thoughts in the comments below! Plus, be sure to check out other delightful ice cream recipes on the blog—your sweet tooth will thank you!
Print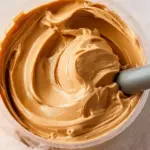
Ninja Creami Cookie Butter Ice Cream
- Total Time: 1440 minutes
- Yield: 4 servings 1x
- Diet: Vegetarian
Description
A creamy and nostalgic ice cream made with cookie butter, perfect for family gatherings or a cozy evening at home.
Ingredients
- 1 cup whole milk
- 2 tablespoons instant vanilla pudding mix
- 1/2 cup cookie butter
- 1/2 cup heavy whipping cream
Instructions
- In a small bowl or large liquid measuring cup, combine whole milk and instant vanilla pudding mix. Whisk until the pudding mix dissolves, about 1-2 minutes.
- Place cookie butter in a microwave-safe bowl and microwave for 15-20 seconds until smooth. Stir to combine any solid bits.
- Add melted cookie butter to milk and pudding mixture, whisk until smooth.
- Whisk in heavy whipping cream until thoroughly mixed.
- Transfer mixture to a Ninja Creami pint container, close the lid, and freeze for at least 24 hours.
- After freezing, remove the pint from the freezer and insert into the Ninja Creami machine.
- Select the Ice Cream function and let the cycle complete (3-5 minutes).
- If the consistency is crumbly, reinsert and use the Re-spin function.
- If desired, create a well in the center for mix-ins and use the Mix-in function to combine.
Notes
For a lighter version, use half-and-half instead of heavy cream. Store in an airtight container in the freezer for up to 2 weeks.
- Prep Time: 10 minutes
- Cook Time: 0 minutes
- Category: Dessert
- Method: Churning
- Cuisine: American
Nutrition
- Serving Size: 1 serving
- Calories: 300
- Sugar: 18g
- Sodium: 70mg
- Fat: 20g
- Saturated Fat: 10g
- Unsaturated Fat: 8g
- Trans Fat: 0g
- Carbohydrates: 30g
- Fiber: 1g
- Protein: 4g
- Cholesterol: 40mg
🥗 Free Custom Keto Meal Plan?
Do you want to lose weight while still enjoying delicious Asian & Thai Fusion meals? Take this quick quiz to get your personalized Keto plan based on your favorite foods!
- ✅ No more guessing what to eat
- ✅ Delicious & easy-to-make recipes
- ✅ Tailored to your body type
Get My Custom Plan Now! →
*Over 100,000+ people have transformed their lives with this quiz.