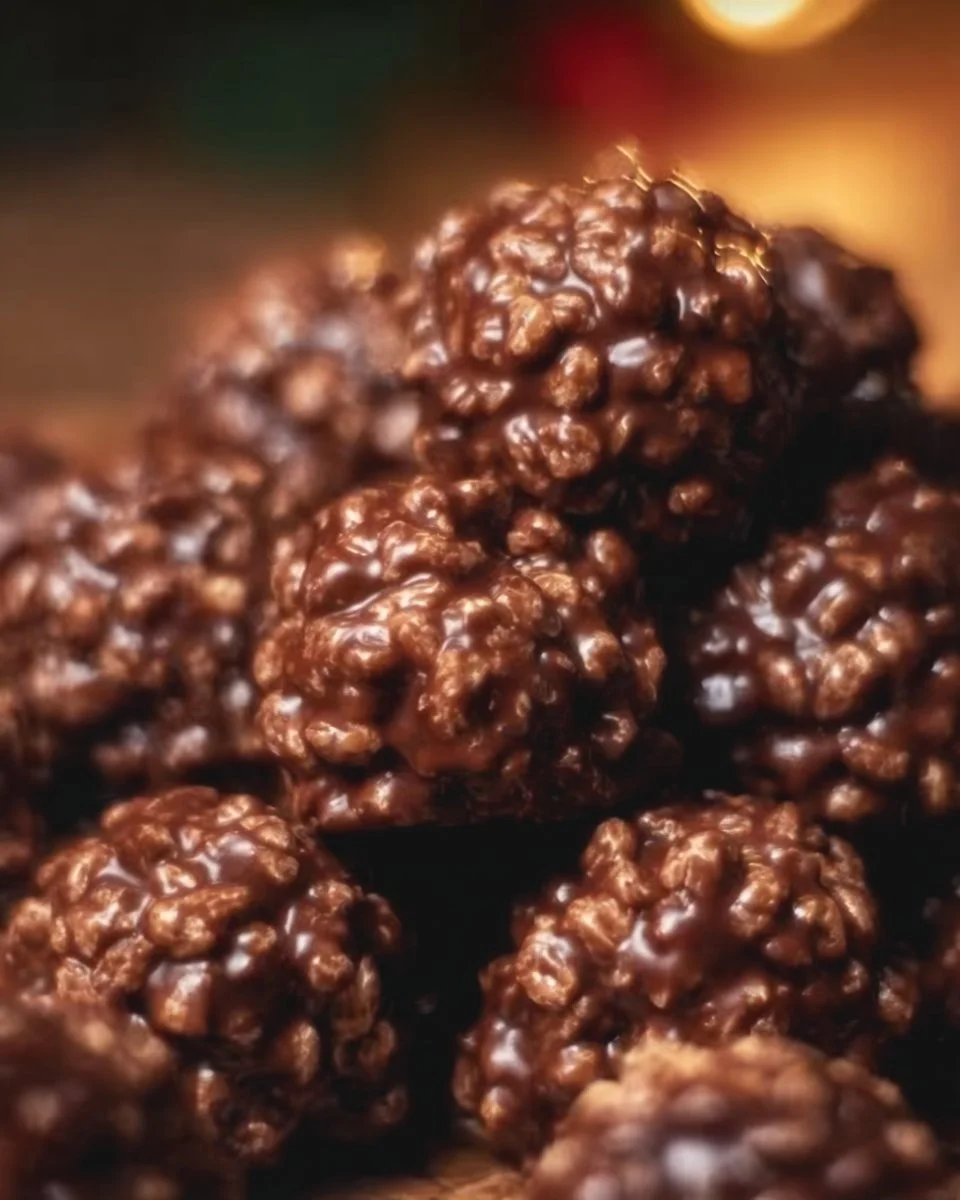
Unforgettable Chocolate Rice Krispie Balls: A Delectable No-Bake Delight!
Growing up, the kitchen was the heart of our home, filled with laughter and the sweet aroma of treats straight from the oven. One of my fondest memories is huddled around the kitchen table with my siblings, our hands sticky with melted chocolate as we crafted what we affectionately called "Chocolate Rice Krispie Balls." There was something magical about bringing together crunchy Rice Krispies, creamy peanut butter, and rich chocolate into one delightful bite. Unlike store-bought snacks that often have long ingredient lists, these homemade gems are simple, wholesome, and so much better.
What really makes these Chocolate Rice Krispie Balls special is that they not only satisfy your sweet tooth but also wrap you in nostalgia and comfort. They’re perfect for any occasion, whether it’s a cozy family movie night or a festive gathering with friends. Today, I’m excited to share this easy recipe that will not only ignite your creativity in the kitchen but also fill your home with joy and deliciousness. So, let’s dive in and learn how to make these delightful treats together!
What Are Chocolate Rice Krispie Balls?
Chocolate Rice Krispie Balls are a no-bake concoction that’s as fun to make as it is to eat! Their origins can be traced back to the classic American dessert scene, where Rice Krispies were mixed with marshmallows and butter to create the beloved crispy treats. However, this version takes it to another level. Imagine crispy, airy bites enveloped in silky chocolate and nutty peanut butter.
The beauty of these treats lies in their texture: the crunch of the Rice Krispies coupled with the gooeyness of chocolate makes for an irresistible combination. You can really feel that satisfying crunch when you take a bite, followed by the creamy richness that wraps everything in cozy flavors. Whether you’re making them for a special occasion or just because, these Chocolate Rice Krispie Balls are the ultimate way to indulge in nostalgia and creativity at once.
Why You’ll Love This Recipe
There are countless reasons to fall head over heels for this Chocolate Rice Krispie Balls recipe, and here are my top favorites:
Simplicity at Its Best: This is an easy recipe that doesn’t require a degree in culinary arts. If you can melt chocolate and stir, you can whip these up in no time! Plus, it only takes about 20 minutes from start to finish, making it an ideal treat for last-minute get-togethers.
Cost-Effective: Looking for a delicious treat that won’t empty your wallet? This recipe uses just a handful of pantry staples, making it a budget-friendly option compared to store-bought snacks.
Always Customize: One of the great things about Chocolate Rice Krispie Balls is their versatility. Feel free to mix in your favorite add-ins—try mini marshmallows, shredded coconut, or even colorful sprinkles for a fun twist!
Allergy-Friendly Options: If you have guests with dietary restrictions, these tasty bites can easily be modified. Make them nut-free by swapping peanut butter for sunflower seed butter, or use dairy-free chocolate for a vegan delight.
Memorable Moments: Let’s not forget the emotional aspect. This recipe will become a treasured part of your family traditions, making blissful memories for years to come.
Ingredients Section
Here’s everything you need to create these irresistible Chocolate Rice Krispie Balls:
3 cups Rice Krispies
- Note: Using fresh, crispy Rice Krispies provides the best texture. Store the box properly to avoid any stale bites!
1 cup chocolate chips
- Brand recommendation: I love using semi-sweet chocolate chips, but feel free to opt for dark or milk chocolate depending on your preference.
1/2 cup peanut butter
- Note: Use creamy peanut butter for a smooth texture. If you prefer crunchy peanut butter, go for it for that extra bite!
1/4 cup honey or corn syrup
- Note: Honey will add a touch of natural sweetness, while corn syrup helps hold everything together nicely. Choose based on your taste and pantry!
1 teaspoon vanilla extract
- A splash of quality vanilla extract elevates the flavor—trust me!
Prep Notes
- Ensure your butter is at room temperature for easier mixing.
- Gather all your ingredients before starting to streamline the process.
Step-by-Step Instructions
Let’s beautifully craft these Chocolate Rice Krispie Balls with the following detailed instructions:
Melt the Mixture: In a medium saucepan over low heat, combine 1 cup of chocolate chips and 1/2 cup peanut butter. Stir continuously until melted and smooth (this should take about 3-5 minutes). Chef’s Tip: Be careful not to burn the mixture; low and slow is key here!
Add Sweetness: Once everything is melted, remove from heat and stir in 1/4 cup honey or corn syrup and 1 teaspoon vanilla extract until fully incorporated. Allow the mixture to cool slightly (about 5 minutes).
Combine with Rice Krispies: In a large bowl, add 3 cups Rice Krispies. Pour the chocolate mixture over the cereal and gently fold until each Rice Krispie is evenly coated. Visual Cue: It should look glossy but not soggy.
Form the Balls: Allow the mixture to cool for another 5 minutes before using your hands to form small balls, about 1 inch in diameter.
Chill and Set: Place the balls on a baking sheet lined with parchment paper and let them cool completely (around 15–20 minutes) until firm to the touch.
Time to Enjoy: Once cooled, dig in and delight in your homemade no-bake Chocolate Rice Krispie Balls! You won’t be able to stop at just one!
Expert Tips & Tricks
For the best results and to make your baking journey even smoother, here are my top expert tips:
Storage Options: Keep your Chocolate Rice Krispie Balls in an airtight container at room temperature for up to 5 days. If you want to keep them longer, store them in the fridge for up to a week.
Make-Ahead Instructions: These are perfect for making ahead! Prepare them a day before a party and store them in the fridge. They’ll be ready to impress your guests when you need them!
Consistency Is Key: If your mixture is too meltdown or sticky to mold into balls, chill it in the fridge for a few minutes before forming the balls.
Don’t Rush the Cooling Process: Allowing your mixture to cool properly before forming the balls will prevent them from being too sticky, making it easier to handle.
Avoid Common Mistakes: One common mishap is burning your chocolate mixture—keep the heat low and stir often to prevent this.
Serving Suggestions
These Chocolate Rice Krispie Balls are delightful on their own, but here are some fun serving suggestions to elevate your treat experience:
Pair with Milk or Coffee: What could be better than enjoying these bites with a cold glass of milk or a warm cup of coffee? The contrast of textures and flavors will make for a delightful combination.
Presentation Ideas: Serve them on a decorative platter, dusted lightly with powdered sugar or drizzled with additional chocolate for an elegant touch.
Occasion Recommendations: These treats are perfect for birthday parties, school functions, or just a cozy night in. They also make adorable gifts when packaged in a clear cellophane bag tied with a lovely ribbon!
Variations & Substitutions
The beauty of Chocolate Rice Krispie Balls lies in their adaptability! Here are some fun variations to try:
Nutty Bliss: Swap out peanut butter for almond butter or cashew butter for a unique twist.
Festive Flavors: Add in seasonal mix-ins like crushed peppermint candies for Christmas or mini marshmallows for a s’mores-inspired treat.
Dietary Adaptations: To create a gluten-free version, simply use corn syrup and check that your Rice Krispies are labeled gluten-free. For a vegan alternative, replace the honey with agave syrup and opt for dairy-free chocolate chips.
Nutrition & Storage Info
- Prep Time: 10 minutes
- Cook Time: 10 minutes
- Total Time: 20 minutes
- Yield: Approximately 24 balls
- Calories per Serving: Around 130 calories per ball
- Storage Instructions: Store at room temperature in an airtight container for up to 5 days or in the fridge for up to a week.
FAQ Section
Can I use different cereal?
Yes! You can try using different cereals like Cheerios or Frosted Rice for a fun twist.What if my mixture is too sticky?
Refrigerate the mixture for a little while to make it easier to handle.How do I make them sweeter?
Increase the amount of honey or add a sprinkle of powdered sugar during mixing.Can I freeze these?
Absolutely! Freeze them in a single layer on a baking sheet, then transfer to a freezer-safe bag for up to 3 months.What type of chocolate should I use?
Use any type of chocolate you prefer—dark, milk, or white. Each will give a different flavor profile.How do I keep them from falling apart?
Make sure to coat the Rice Krispies evenly and allow them to set completely at room temperature.Can I add protein powder?
Yes! Just mix in a bit of protein powder along with the Rice Krispies for an added health boost.Why won’t my balls hold their shape?
Make sure your chocolate mixture had cooled slightly before forming. If it’s too warm, they won’t hold well.Can I use chocolate bars instead of chips?
Definitely! Chop chocolate bars into small pieces and use in place of chips.How can I make these gluten-free?
Ensure your Rice Krispies are labeled gluten-free and use corn syrup instead of honey if you’re unsure.
Conclusion
In a world filled with complicated recipes, these Chocolate Rice Krispie Balls stand out for their simplicity and undeniable appeal. Each bite is a combination of sweet nostalgia and crunchy bliss, perfect for indulging yourself or impressing guests. I can’t wait for you to try this recipe and experience the joy it brings. Don’t forget to leave your feedback or share your creative twists in the comments below! And for more delectable treats, be sure to check out my other delightful recipes on the blog. Happy baking!
Print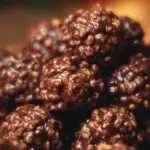
Chocolate Rice Krispie Balls
- Total Time: 20 minutes
- Yield: 24 balls 1x
- Diet: Vegetarian
Description
A delightful no-bake treat combining crunchy Rice Krispies, creamy peanut butter, and rich chocolate for a nostalgic flavor.
Ingredients
- 3 cups Rice Krispies
- 1 cup chocolate chips
- 1/2 cup peanut butter
- 1/4 cup honey or corn syrup
- 1 teaspoon vanilla extract
Instructions
- In a medium saucepan over low heat, combine 1 cup of chocolate chips and 1/2 cup peanut butter. Stir continuously until melted and smooth (about 3-5 minutes).
- Remove from heat and stir in 1/4 cup honey or corn syrup and 1 teaspoon vanilla extract, then allow the mixture to cool slightly (about 5 minutes).
- In a large bowl, add 3 cups Rice Krispies. Pour the chocolate mixture over the cereal and gently fold until the Rice Krispies are evenly coated.
- Allow the mixture to cool for another 5 minutes before forming small balls, about 1 inch in diameter.
- Place the balls on a baking sheet lined with parchment paper and let them cool completely (around 15–20 minutes) until firm to the touch.
- Once cooled, enjoy your homemade Chocolate Rice Krispie Balls!
Notes
Store in an airtight container for up to 5 days at room temperature or in the fridge for up to a week. These are perfect for making ahead of time!
- Prep Time: 10 minutes
- Cook Time: 10 minutes
- Category: Dessert
- Method: No-Bake
- Cuisine: American
Nutrition
- Serving Size: 1 ball
- Calories: 130
- Sugar: 10g
- Sodium: 60mg
- Fat: 7g
- Saturated Fat: 2g
- Unsaturated Fat: 5g
- Trans Fat: 0g
- Carbohydrates: 16g
- Fiber: 1g
- Protein: 2g
- Cholesterol: 0mg
🥗 Free Custom Keto Meal Plan?
Do you want to lose weight while still enjoying delicious Asian & Thai Fusion meals? Take this quick quiz to get your personalized Keto plan based on your favorite foods!
- ✅ No more guessing what to eat
- ✅ Delicious & easy-to-make recipes
- ✅ Tailored to your body type
Get My Custom Plan Now! →
*Over 100,000+ people have transformed their lives with this quiz.