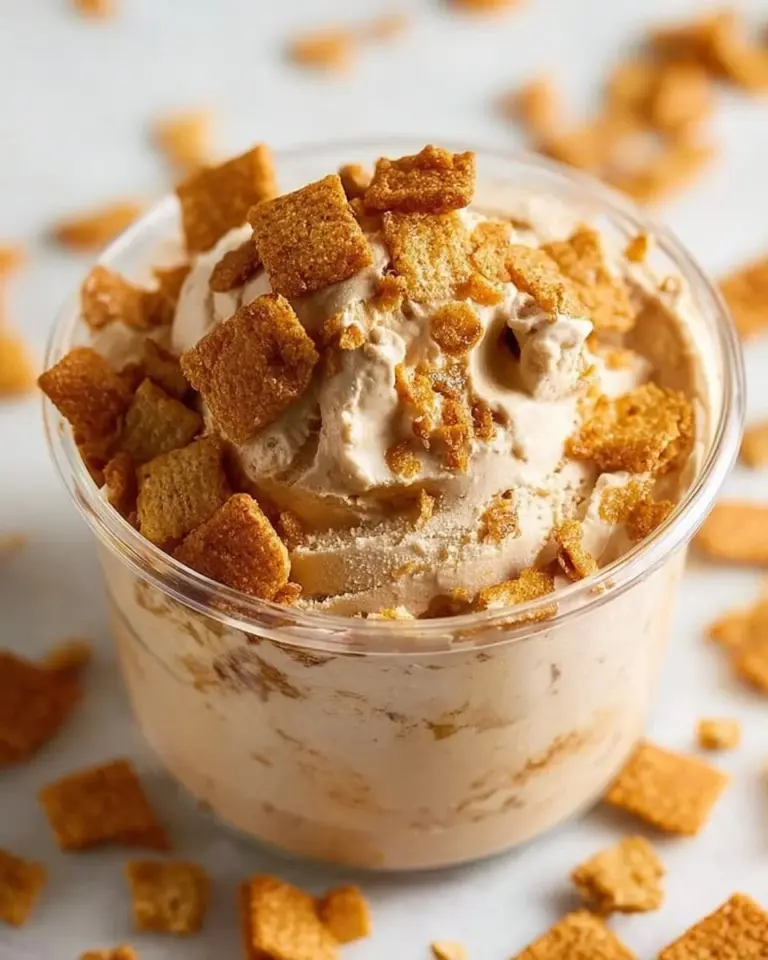

These July Rice Krispie Treats are the ultimate no-bake dessert for Independence Day, summer picnics, or patriotic gatherings. With their striking red, white, and blue layers and perfectly chewy texture, they are as visually stunning as they are delicious.
Note: Total time is just 20 minutes of active prep, plus 1 hour of setting time. No oven required!
Dietary Badges
- No-Bake (Oven-Free & Summer-Friendly)
- Nut-Free
- Vegetarian (Ensure your marshmallow brand uses no animal gelatin)
- Gluten-Free Option (Use certified GF crispy rice cereal)

The 3 Biggest Mistakes People Make with Rice Krispie Treats
Even the simplest recipes can go wrong if you fall into these common traps. Avoid these to guarantee a perfect, chewy texture every single time:
- Mixing Red and Blue Together (The “Purple” Disaster): If you add red and blue food coloring into the same pot of white marshmallow, you will get muddy purple treats, not patriotic layers. The Fix: You must divide the mixture into separate bowls to create distinct Red, White, and Blue layers.
- Cranking Up the Heat (The “Rock-Hard” Trap): If you melt the butter and marshmallows on high heat, the sugar crystallizes and your bars will dry out and become hard as a brick. Always melt on LOW heat. Patience is the secret to a soft, chewy treat.
- Compressing the Mixture (The Density Disaster): When pressing the cereal into the pan, it is incredibly tempting to pack it down tightly to get uniform edges. Don’t do it! Pressing too hard squeezes out the air pockets, resulting in dense, tough bars. Use a buttered spatula or parchment paper and press very gently just until it holds together.
Why This Works: The Science of the Perfect Treat
- Low & Slow Sugar Melting: Marshmallows are essentially sugar and gelatin. Gentle heat ensures the sugar dissolves smoothly without seizing or separating the butter, creating a glossy, cohesive binder for the cereal.
- Gel vs. Liquid Food Coloring: Using gel food coloring instead of liquid is crucial here. Liquid coloring adds excess water, which can make the marshmallow mixture seize, become slimy, or prevent the treats from setting properly. Gel provides vibrant, intense hues without altering the chemistry.
- The “Gooey Pocket” Trick: By reserving a small amount of mini marshmallows to stir in at the very end (off the heat), they soften without fully melting. This creates gourmet pockets of chewy marshmallow throughout the bars, preventing a uniformly stiff texture.
Ingredients
Measurements are provided in both US Customary and Metric for precision.

The Base:
- 6 cups (150g) Rice Krispies cereal (or any crispy rice cereal)
- 10 oz (280g) mini marshmallows (about 5.5 cups)
- 3 tbsp (45g) unsalted butter
- 1 tsp (5ml) vanilla extract (optional, but highly recommended for flavor depth)
The Colors & Decor:
- Red and blue gel food coloring
- 1/4 cup (30g) red, white, and blue sprinkles (divided)
- 1/2 cup (70g) mini marshmallows (optional, reserved for the “gooey pocket” trick or topping)
- Edible glitter (optional, for extra festive sparkle)
- Cooking spray or parchment paper (for the pan and tools)
Scaling & Pan Size Notes
- For Thick, Distinct Layers (Recommended): Use an 8×8-inch or 9×9-inch (20×20 cm or 23×23 cm) square pan. This yields 9 to 12 thick, beautiful bars where the red, white, and blue layers are clearly visible.
- For Thinner, Party-Size Bars: Use a 9×13-inch (23×33 cm) rectangular pan. This will yield 15 to 20 thinner bars, perfect for large crowds or potlucks.
- How to Double the Recipe: Want to make a massive batch? Simply double all the ingredients. Use a 9×13-inch pan, but melt the marshmallows in two separate batches (or use a very large 7-8 quart Dutch oven). Trying to melt 20 oz of marshmallows in a small pot will result in uneven melting and scorched sugar.
Step-by-Step Instructions
1. Prep the Pan & Tools
Line an 8×8-inch or 9×9-inch (20×20 cm or 23×23 cm) baking pan with parchment paper, leaving an overhang on the sides for easy removal. Lightly spray the parchment with cooking spray. Pro-Tip: Also spray your rubber spatula and set aside a small bowl of melted butter to grease your hands later.
2. Melt the Butter & MOST of the Marshmallows
Place a large pot over LOW heat. Add the unsalted butter and 10 oz (280g) of the mini marshmallows. Stir gently and continuously until completely melted and smooth. ⚠️ Crucial: Do not let the mixture boil or brown. Keep it on low! (Note: If the mixture feels unusually dry, add 1 extra tablespoon of butter, as humidity can affect absorption).
3. Flavor & The “Gooey Pocket” Trick
Remove the pot from the heat. Stir in the vanilla extract. Immediately add the reserved 1/2 cup (70g) of mini marshmallows and stir for just 10 seconds. You want them to soften and get sticky, but not completely melt.
4. Divide & Color (The Anti-Purple Method)
Divide the warm marshmallow-cereal mixture evenly into three separate heat-proof bowls before adding the cereal, OR divide the plain melted marshmallow mixture into 3 bowls first, color them, and then add 2 cups of cereal to each.
- Bowl 1 (Blue): Add blue gel food coloring a drop at a time, stirring until vibrant.
- Bowl 2 (White): Leave as is (the natural marshmallow color).
- Bowl 3 (Red): Add red gel food coloring a drop at a time, stirring until vibrant. Fold 2 cups (50g) of Rice Krispies cereal into each colored bowl until fully coated. Do not overmix or crush the cereal.
5. Layer Gently
Transfer the Blue mixture to the prepared pan. Using your buttered hands or a piece of parchment paper laid over the top, gently press it into an even layer. Remember: Do not compress! Repeat with the White mixture in the middle, and the Red mixture on top, pressing very lightly to adhere each layer.
6. Decorate & Set
While the top red layer is still warm and tacky, sprinkle generously with the red, white, and blue sprinkles and a pinch of edible glitter. Gently press the sprinkles into the surface so they stick. Let the bars cool and set at room temperature for 1 to 2 hours.
7. The Perfect Slice
Once completely set, lift the slab out of the pan using the parchment overhang. Chef’s Trick: Run a large, sharp knife under hot water, dry it completely, and lightly rub the blade with a dab of butter. Cut into squares, rectangles, or use festive star-shaped cookie cutters. The warm, greased blade will glide through without sticking or cracking the sprinkles!

Pro-Tips for Next-Level Treats
- The Parchment Press: Hate sticky hands? Lay a sheet of wax paper or parchment paper over the mixture in the pan and press down with the flat bottom of a measuring cup or your palms. It creates a perfectly smooth layer with zero mess.
- Fresh Marshmallows Only: Always use fresh marshmallows. Old, stale marshmallows lose moisture and become gelatinous blobs that refuse to melt properly, leading to tough treats.
- Summer Party Hack: If serving these at an outdoor summer BBQ, chill them in the fridge for 1-2 hours just before serving so they hold their shape in the heat. (But do not store them long-term in the fridge, see below).
Troubleshooting Table
| Problem | Cause & Solution |
|---|---|
| Bars are hard and stale | Cause: Heat was too high when melting, or they were packed too tightly. Solution: Next time, strictly use LOW heat and press gently. For now, place a slice of plain sandwich bread in the airtight container with the bars overnight; the bars will absorb the moisture and soften up! |
| Colors look muddy or purple | Cause: Red and blue coloring were mixed in the same bowl, or liquid food coloring was used. Solution: Always use Gel food coloring and keep the colors in strictly separate bowls. |
| Mixture is sticking to everything | Cause: Lack of lubrication. Solution: Keep a small bowl of melted butter or cooking spray nearby. Re-grease your hands, spatula, or parchment paper every time you press a new layer. |
| Treats are falling apart/crumbly | Cause: Not enough butter or marshmallow to coat the cereal. Solution: Ensure you measure accurately. If the mix looks dry in the pot, add 1 extra tablespoon of butter before adding the cereal. |
Nutrition Information (Per Serving)
Based on 12 servings (using standard ingredients). This is an estimate and may vary based on specific brands used.
- Calories: ~140 kcal
- Total Fat: 3g (Saturated Fat: 2g)
- Carbohydrates: 28g
- Sugars: 15g
- Protein: 1g
- Sodium: 85mg
- Dietary Fiber: 0g
Disclaimer: This recipe is naturally Nut-Free and Vegetarian. To make it Gluten-Free, ensure you use a certified Gluten-Free crispy rice cereal (like Malt-O-Meal or Nature’s Path).
Storage & Freezing
- Room Temperature (Best Method): Store in an airtight container at room temperature for up to 3 to5 days. Place a piece of parchment paper between layers if you stack them. Pro-Tip: Toss a slice of plain sandwich bread into the container. The bread will dry out first, keeping your treats perfectly soft and chewy!
- Do NOT Refrigerate for Storage: Storing Rice Krispie Treats in the fridge long-term introduces cold and humidity, which crystallizes the sugar and makes them hard, stale, and brittle.
- Freezer: Yes, you can freeze them! Wrap individual bars tightly in plastic wrap, then place them in a freezer-safe ziplock bag. They will keep for up to 6 weeks. Thaw at room temperature for 30-60 minutes before eating.
Frequently Asked Questions
Can I prepare these July Rice Krispie Treats in advance?
Yes! You can make these treats 1 to 2 days ahead of time. Store them in an airtight container at room temperature. For best results, place a slice of plain sandwich bread in the container to keep them perfectly soft and chewy.
What are the best substitutes for unsalted butter?
You can use an equal amount of coconut oil or vegan margarine (in stick form, not tub margarine) for a dairy-free version. Avoid “light” or diet margarines, as their high water content will prevent the treats from setting properly.
Is it okay to use regular marshmallows instead of mini?
Absolutely! Just make sure to cut regular jumbo marshmallows into smaller pieces with kitchen shears before melting. This ensures they melt evenly and quickly without burning.
Can I use a different type of cereal?
Yes! Any puffed cereal, like generic crispy rice cereal, gluten-free puffed rice, or even chocolate-flavored rice cereal, can work in this recipe. The key is using a dry, puffed grain that won’t immediately turn to mush.
“Are there ways to make this recipe healthier?”While this is a classic sugary dessert, you can add a handful of chopped nuts (like pecans or almonds) for added protein and crunch, or use a certified gluten-free and whole-grain puffed cereal to add a bit more fiber.
Do these treats need to be refrigerated?
No. Storing Rice Krispie Treats in the fridge long-term will cause the sugar to crystallize, making them hard, stale, and brittle. Always store them in an airtight container at room temperature. (The only exception is chilling them for 1-2 hours right before serving at a hot outdoor summer party to help them hold their shape).
How do I make them festive for other occasions?
The beauty of this recipe is its adaptability! Simply change the gel food coloring and sprinkles to match any holiday or event theme—think pastel pinks and greens for Easter, orange and black for Halloween, or red and green for Christmas.
Chocolate-Covered Frozen Bananas: A Delightful Treat for All Ages
Print
July Rice Krispie Treats: A Fun and Festive Treat for Summer Gatherings
- Total Time: 1 hr 20 mins (includes cooling)
- Yield: 16 squares 1x
- Diet: Vegetarian
Description
Patriotic Rice Krispie Treats with vibrant red, white, and blue layers, topped with festive sprinkles. A no-bake, kid-friendly treat that’s perfect for summer holidays!
Ingredients
- Base Ingredients:
- 6 cups Rice Krispies cereal
- 10 oz mini marshmallows
- 3 tbsp unsalted butter
- Color Layers:
- Red and blue gel food coloring
- 1/4 cup red, white, and blue sprinkles (divided)
- Optional:
- 1 tsp vanilla extract
- 1/2 cup mini marshmallows (for topping)
- Edible glitter (for extra sparkle)
Instructions
- Prep pan: Line a 9×13-inch baking dish with parchment paper and grease lightly.
- Make base: Melt butter over low heat. Add 8 oz marshmallows and stir until fully melted. Remove from heat.
- Color layers: Divide melted mixture into 3 bowls. Tint one red, one blue, and leave one white. Fold 2 cups cereal into each batch.
- Layer: Press red mixture into pan. Top with white, then blue layers, pressing gently between layers.
- Decorate: While warm, press remaining sprinkles and mini marshmallows on top.
- Set: Let cool completely (about 1 hour) before cutting into squares or star shapes.
Notes
- For brighter colors: Use gel food coloring (liquid may make treats soggy)
- Gluten-free option: Use certified GF Rice Krispies
- Make ahead: Stores in airtight container for 3 days
- For extra stability: Chill 15 mins before cutting
- Kid tip: Let children help press sprinkles
- Prep Time: 15 mins
- Cook Time: 5 mins
- Category: Dessert/Snack
- Method: No-Bake
- Cuisine: American
Nutrition
- Serving Size: 1 square
- Calories: 120
- Sugar: 12g
- Sodium: 85mg
- Fat: 3g
- Saturated Fat: 2g
- Unsaturated Fat: 0.5g
- Trans Fat: 0g
- Carbohydrates: 23g
- Fiber: 0g
- Protein: 1g
- Cholesterol: 5mg
🥗 Free Custom Keto Meal Plan?
Do you want to lose weight while still enjoying delicious Asian & Thai Fusion meals? Take this quick quiz to get your personalized Keto plan based on your favorite foods!
- ✅ No more guessing what to eat
- ✅ Delicious & easy-to-make recipes
- ✅ Tailored to your body type
Get My Custom Plan Now! →
*Over 100,000+ people have transformed their lives with this quiz.
Similar Posts
Honey Peach Cream Cheese Cupcakes
Sweet Summer Delight: Honey Peach Cream Cheese Cupcakes There’s something magical about summer—the warmth, the sun, and, of…
Healthy Pumpkin Mug Cake
Wholesome & Delicious Healthy Pumpkin Mug Cake: Your New Go-To Comfort Dessert There’s something inherently cozy about a…
Beautiful Pink Angel Food Cake – Alrightwithme
Captivating Beautiful Pink Angel Food Cake Recipe: A Sweet Delight You’ll Adore You know that feeling when you…
Pumpkin Pie Greek Yogurt
Delightful Pumpkin Pie Greek Yogurt: A Creamy, Cozy Dessert Treat Whenever the leaves start to change and a…
Mascarpone Limoncello Crepe Cake
Have you ever had one of those desserts that feels like a warm embrace on a plate? For…
Cinnamon Toast Crunch Protein Ice Cream
Irresistibly Creamy Cinnamon Toast Crunch Protein Ice Cream: The Perfect Nostalgic Treat Remember those childhood mornings, when you’d…