Table of Contents
Table of Contents
Gather ’round, food lovers! I have a heartwarming memory that I must share. It was a brisk Sunday afternoon when my grandmother taught me the art of making Salmon Caviar. The gleaming orange pearls shimmering in their glass jar were just as mesmerizing as the stories she spun over whipping up this delicacy. Each time I lift the lid and inhale the briny aroma, I’m transported back to those cozy family gatherings where laughter filled the air and salmon caviar was the crown jewel of our spread.
What makes my Salmon Caviar Recipe truly special is that it transcends mere taste; it’s steeped in tradition and nostalgia. Unlike store-bought versions, this homemade delight lets you control the ingredients, ensuring a burst of flavor that’s both fresh and vibrant. And, believe me, nothing compares to the taste of your own creation.
In this easy-to-follow recipe, I’ll share not just the how, but also the ‘why’ behind each step, ensuring that you, too, can whip up this exquisite treat to impress family and friends. Are you ready to embark on this delicious journey with me?
What is Salmon Caviar?
Salmon caviar, often the star of luxurious appetizers, is the gleaming roe harvested from female salmon. Traditionally enjoyed in various cultures, particularly in Asia and Eastern Europe, these distinct little pearls come from several species of salmon, with sockeye and king salmon being the most celebrated for their rich taste and texture.
The taste of salmon caviar is a delightful dance between briny and subtly sweet, with a satisfying pop when you bite into each glossy bead. Texturally, they are smooth yet plump, making them an excellent addition to a myriad of dishes.
You might be wondering when to whip up a batch of this decadent recipe. Any occasion that calls for a bit of elegance, from holiday dinners to summer barbecues, is the perfect time to bring out your own homemade Salmon Caviar.
Why You’ll Love This Recipe
1. Freshness You Can Taste
There’s nothing quite like fresh, homemade salmon caviar. You’ll marvel at the difference in flavor when compared to the jarred varieties. Your taste buds will do a happy dance!
2. Cost-Effective
While caviar may come with a luxurious reputation, making it yourself can save you a pretty penny. Store-bought salmon caviar often carries a hefty price tag, while homemade is not only cheaper but can be made in larger batches.
3. Customization Options
This recipe offers ample room for creativity. Want it a tad saltier? Just adjust the saltiness to your liking! You can even experiment with infused oils or flavoring agents for unique twists.
4. Easy to Make
Don’t let the term “caviar” scare you off. This easy recipe is straightforward! With a bit of patience and attention to detail, even a novice can achieve remarkable results.
5. Meal Prep Wonder
This caviar can be made ahead of time and stored in your fridge for up to two weeks. It makes it an ideal addition for parties where you want to dazzle your guests without the last-minute scramble.
Ingredients Section
- 1/2 cup Salt: Use kosher salt for the best brine. Sea salt can work as well. Avoid iodized salt as it can impact flavor.
- 2 cups Water: Opt for filtered water to keep things fresh.
- 1 tbsp Oil: Extra virgin olive oil provides a rich flavor, though you can use any neutral oil you prefer.
- 1/2 lb Salmon Fish Eggs: Fresh is best! Look for high-quality roe from a reliable source, or if you’re fishing, ensure the salmon is freshly caught.
Prep Notes:
- Let your butter and oil come to room temperature before starting to enhance blendability.
- Brand recommendations for salmon eggs: Look for reputable brands like “Copper River” or “Bristol Bay” when shopping.
Step-by-Step Instructions
- Rinse the Salmon Caviar: Gently rinse your fresh caviar under hot water. Let it sit for a moment to separate the fish eggs from the membranes. Chef’s Tip: This step helps in achieving the signature look and ensures the brine penetrates perfectly!
- Color Check: You may notice that the eggs change color while submerged. Don’t worry; they will revert to their vibrant hue when dry.
- Continue Rinsing: Keep rinsing until all eggs have been thoroughly cleaned. Aim for clear water runoff, which indicates the eggs are ready.
- Prepare the Brine: In a small pot, combine 2 cups of hot water with 1/2 cup of salt. Stir until fully dissolved. Common Mistake to Avoid: Ensure the water is hot, but not boiling, to preserve the quality of the eggs.
- Soak the Caviar: Add the cleaned caviar to the saltwater, allowing it to soak for precisely 70 seconds. Set a timer—this brining time is crucial!
- Strain and Store: Carefully strain the salted eggs, transferring them to a glass jar. Add 1 tbsp of oil and gently stir until coated.
- Refrigerate: Your homemade salmon caviar is now ready to enjoy! Store it in the refrigerator for up to two weeks.
Chef’s Tip: For optimal flavor, consume within the first week for the freshest experience!
Expert Tips & Tricks
- Quality Counts: Always invest in the freshest salmon eggs; they make all the difference, both in flavor and texture.
- Experiment with Flavors: Want to add a twist? Infuse your oil with herbs like dill or chives for an extra layer of flavor.
- Storage Secrets: Keep your caviar in an airtight container to maintain its freshness and prevent it from drying out.
- Make-ahead Magic: Prepare your caviar a few days before a special occasion, allowing the flavors to meld beautifully.
- Troubleshooting: If you find the caviar too salty, a quick rinse in fresh water can help. For texture issues, ensure you rinse carefully to avoid bursting the eggs.
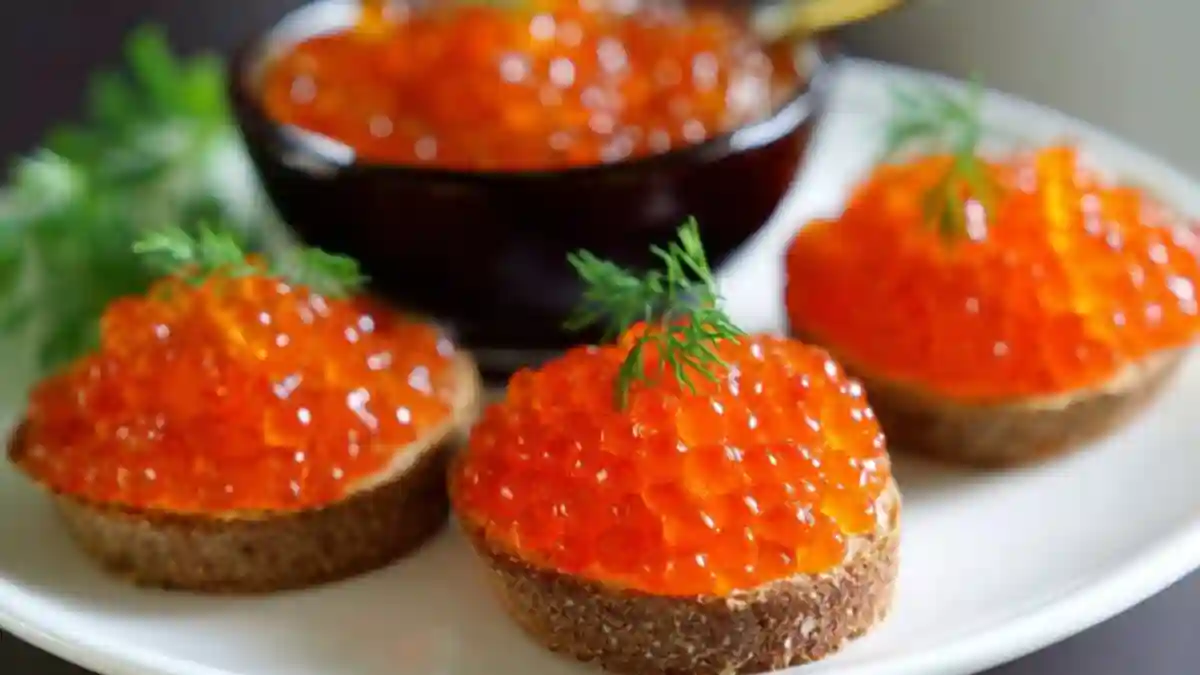
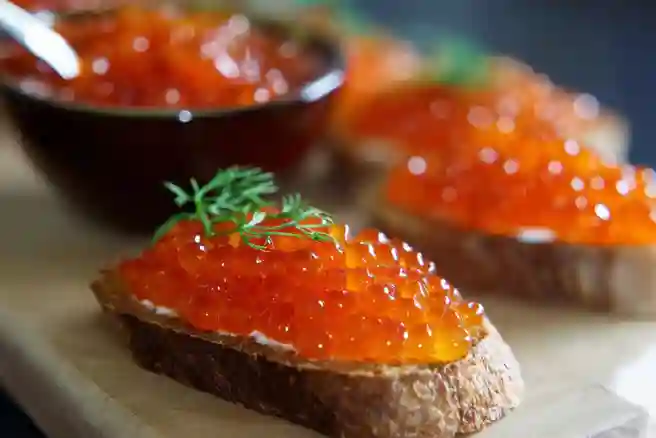
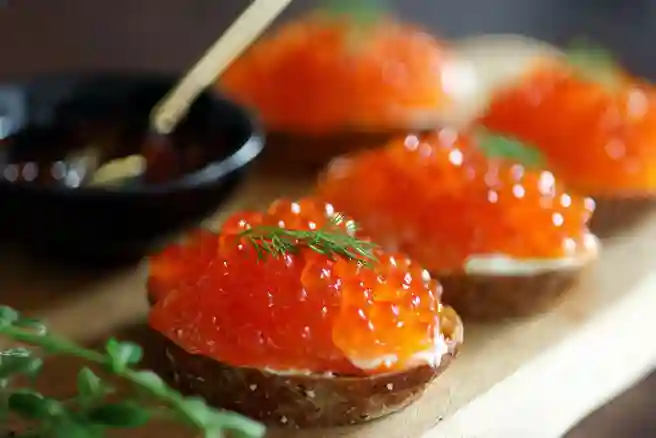
Serving Suggestions
Serve your stunning salmon caviar atop blinis, toast points, or even just a simple cracker to let its pure flavor shine. To impress, arrange a platter with lemon wedges, sour cream, finely chopped red onion, and capers. It’s a crowd-pleaser perfect for elegant gatherings, holiday festivities, or simply as a luxurious treat for yourself!
Variations & Substitutions
- Flavored Options: Consider adding a dash of lemon zest, a splash of soy sauce, or a hint of wasabi for unique flavor profiles.
- Dietary Adaptations: For a vegan twist, try using seaweed caviar alternatives that mimic the texture and look without using fish.
- Seasonal Variations: During the holidays, incorporate festive flavors like cranberry or infused vinegar.
Nutrition & Storage Info
- Prep Time: 20 mins
- Cook Time: 10 mins
- Total Time: 30 mins
- Yield: Approximately 2 cups of salmon caviar
- Calories: Roughly 30 calories per tablespoon
- Storage: Keep in an airtight container in the fridge, lasts for up to 2 weeks. Avoid freezing as it alters texture.
FAQ Section
- Can I use frozen salmon fish eggs?
- While fresh is ideal, properly thawed frozen fish eggs can work. Just ensure they are cleaned thoroughly.
- How do I know if my caviar has gone bad?
- If there’s a sour smell or if the eggs have changed in color significantly or are mushy, it’s best to discard them.
- Can I adjust the salt level?
- Absolutely! Feel free to manipulate the salt in the brine to fit your personal taste preferences.
- What’s the best way to serve caviar?
- Caviar shines bright on a blini or with crème fraîche, but feel free to get creative!
- Will making my own caviar take a lot of time?
- Definitely not! This easy recipe will take you about 30 minutes, and most of that is hands-off brining time.
- What’s the best oil to use?
- Extra virgin olive oil or a neutral oil like avocado oil works wonderfully.
- Can I make caviar from other types of fish?
- Yes! Try making caviar from trout or steelhead salmon for a delightful alternative.
- What’s the best way to store leftovers?
- An airtight container in the fridge is key—make sure to consume it within 2 weeks for the best taste!
- Can I add other flavors to this recipe?
- Absolutely! Consider adding different oils, herbs, or a splash of vinegar to personalize it.
- Is salmon caviar healthy?
- It’s rich in omega-3 fatty acids and protein, but should be enjoyed in moderation due to its sodium content.
Conclusion
This Salmon Caviar Recipe is not just a dish; it’s an experience laden with memories, flavors, and creativity! I hope this recipe becomes a culinary cornerstone in your home, just like it is in mine.
Give it a try and enjoy the cheers of delight from family and friends as they taste your labor of love. I would love to hear your thoughts and any adaptations you’ve tried—leave me a comment below! Looking for more delicious recipes? Check out my blog for more sensational seafood delights and seasonal treats that are sure to impress!
Parmesan Crusted Salmon Caesar Salad
Happy cooking!
Print
Homemade Salmon Caviar: Elevate Your Appetizer Game!
- Total Time: 45 minutes (plus draining)
- Yield: 6 oz (170g) finished caviar
Description
Learn to make luxurious salmon caviar (ikura) at home with this authentic Japanese method. Perfectly cured salmon roe with a glossy appearance and delicate briny-sweet flavor, ideal for sushi, canapés, or elegant garnishes.
Ingredients
- 1/2 cup Salt
- 2 cups Water
- 1 tbsp Oil
- 1/2 lb Salmon Fish Eggs
Instructions
- Gently rinse roe sac under cold running water to remove blood and membrane.
- Prepare brine: Dissolve salt in warm water, then add sake and mirin. Cool to room temperature.
- Place roe sac in bowl. Using clean hands, massage sac over strainer to separate eggs from membrane.
- Discard membrane and transfer loose eggs to cheesecloth-lined strainer.
- Rinse eggs gently with cold water to remove any remaining membrane.
- Submerge eggs in prepared brine for 8-10 minutes (no longer).
- Immediately transfer to ice water bath for 5 minutes to stop curing process.
- Drain thoroughly in cheesecloth-lined strainer for 15 minutes.
- Transfer to clean jar and refrigerate. Consume within 3 days.
Notes
- For sushi-grade quality, use only very fresh, odorless roe sacs.
- Adjust salt quantity to taste – traditional Japanese ikura uses 4-5% salinity.
- Add 1/2 tsp kombu powder to brine for umami enhancement.
- For longer storage (up to 1 week), add 1 tbsp vodka to finished caviar.
- Prep Time: 20 minutes
- Cook Time: 0 minutes
- Category: Preserved Food
- Method: Curing
- Cuisine: Japanese
Nutrition
- Serving Size: 1 tbsp (15g)
- Calories: 25
- Sugar: 0g
- Sodium: 240mg
- Fat: 1.5g
- Saturated Fat: 0.3g
- Unsaturated Fat: undefined
- Trans Fat: undefined
- Carbohydrates: undefined
- Fiber: undefined
- Protein: 3g
- Cholesterol: 45mg
Ask the Community
🥗 Free Custom Keto Meal Plan?
Do you want to lose weight while still enjoying delicious Asian & Thai Fusion meals? Take this quick quiz to get your personalized Keto plan based on your favorite foods!
- ✅ No more guessing what to eat
- ✅ Delicious & easy-to-make recipes
- ✅ Tailored to your body type
Get My Custom Plan Now! →
*Over 100,000+ people have transformed their lives with this quiz.