Grilled Cheeseburger Wraps: A Delectable Twist on a Classic Favorite
There’s something undeniably heartwarming about a classic cheeseburger. The aroma of sizzling beef, the gooey cheese melting into the savory patty—all nestled between soft buns. Growing up, Sunday afternoons were reserved for family cookouts, where my dad would throw burgers on the grill while I sat on the patio, my mouth watering in anticipation. With each bite, it wasn’t just about the flavors but the laughter and conversation that accompanied those meals. Now, as an adult, I often crave that nostalgic comfort food, but there’s only so many times I want the usual burger-on-a-bun routine.
That’s where my Grilled Cheeseburger Wraps come into play—a flavor-packed twist on a classic that marries familiarity with a fresh take! These wraps bring all the joys of a cheeseburger into a portable, crispy delight. Not only do they satisfy my cravings, but they also spark joy at family gatherings or movie nights.
What makes these wraps special? Well, they’re incredibly easy to whip up, and you get a lovely crunch thanks to the grilling process, giving you that luscious contrast of textures. Plus, each wrap is entirely customizable, ensuring everyone at your table will find their perfect flavor combination!
In this post, I’m excited to share with you not just the recipe, but also the little secrets I’ve learned along the way that elevate this dish into a family favorite. Let’s dive into how you can recreate these delightful Grilled Cheeseburger Wraps yourself!
What Are Grilled Cheeseburger Wraps: A Flavor-Packed Twist on a Classic?
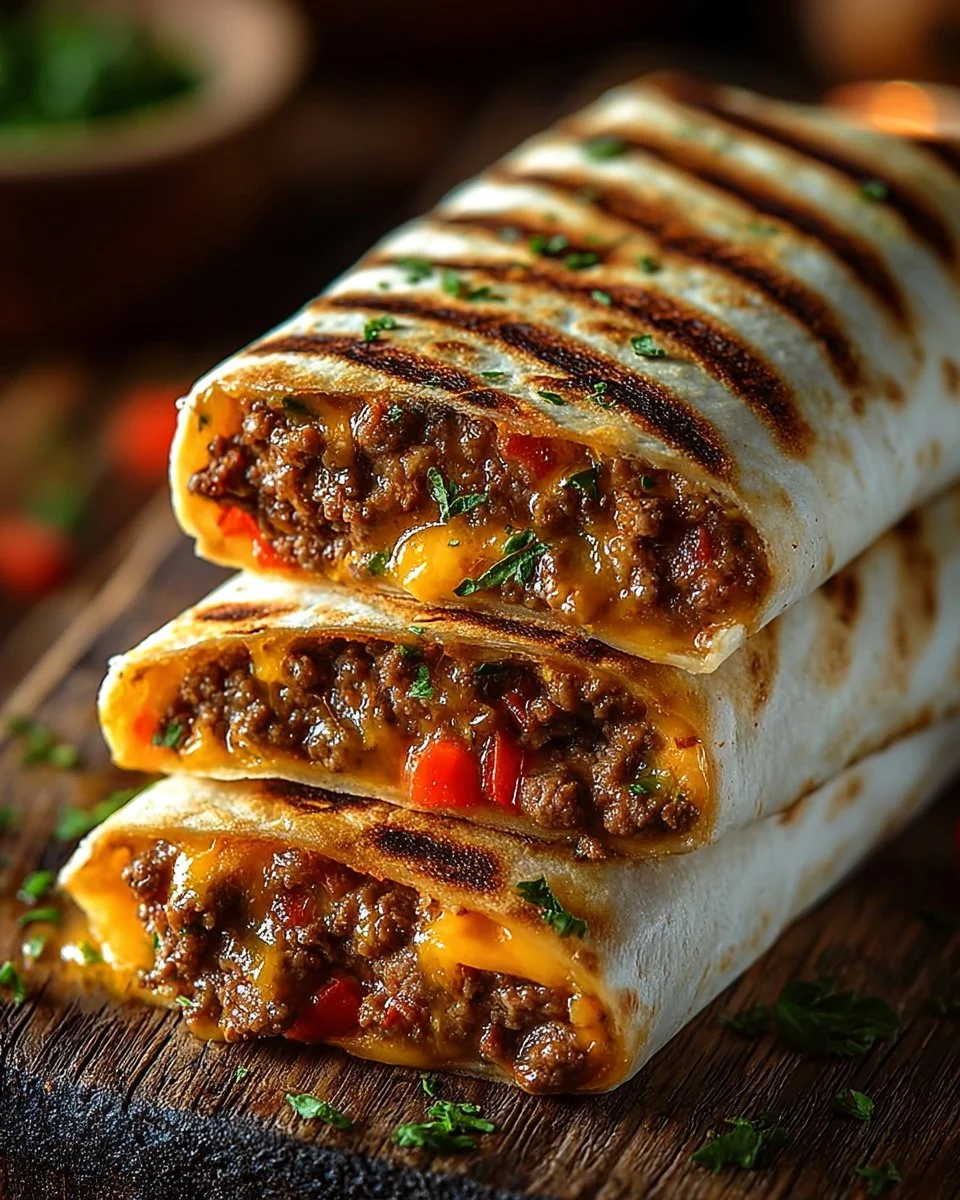
Grilled Cheeseburger Wraps are essentially a clever hybrid of a cheeseburger and a traditional wrap. Imagine biting into a warm, crispy tortilla enveloping a generous serving of seasoned ground beef, gooey cheese, and your favorite burger toppings! The beauty of these wraps lies not only in their flavor but also in their versatility.
Originating from that age-old craving for a cheeseburger, these wraps began simply as a solution for convenient eating. They offer an exciting taste and texture profile, combining the savory beef’s umami flavor with the creamy notes of cheese and the freshness of diced tomatoes and onions. Instead of biting through a thick bun, you experience a delightful crunch paired with the rich flavors of a classic cheeseburger.
You’ll want to make these wraps for game days, picnics, or even as a quick weeknight dinner. The beauty of this dish is that it combines ease and taste, making it a go-to recipe when you’re craving something hearty yet fun!
Why You’ll Love This Recipe
Here’s why you’ll rave about these Grilled Cheeseburger Wraps:
1. Flavor-Fusion Fun!
Each bite captures the essence of a classic cheeseburger—savory beef, melty cheese, and tangy toppings—all wrapped in a warm tortilla. It’s the flavor explosion you didn’t know you were missing!
2. Fast and Cost-Effective
Skip the drive-through! Making these wraps at home is not only budget-friendly, but they also come together in under 30 minutes. With 1 lb of ground beef and simple ingredients, you can feed a family without breaking the bank!
3. Customizable Creations
Whether you love spicy jalapeños or prefer barbecue sauce over ketchup, this recipe invites you to make it your own. Try swapping ground beef for turkey or grilled veggies for a vegetarian twist!
4. No-Fuss Easy Clean-Up
The straightforward cooking method means less mess and fewer dishes, ideal for busy weekdays. Plus, grilling the wraps adds a whole new flavor dimension, without any extra pans!
5. Perfect for Meal Prep
These wraps can be made ahead of time, stored in the fridge, and grilled just when you need them! They’re also easy to freeze, making them a convenient dinner solution for busy nights.
So whether you’re a culinary novice or a seasoned pro, this recipe strikes the perfect balance of simplicity and sophistication!
Ingredients for Grilled Cheeseburger Wraps
- 1 lb ground beef (80/20 for the best flavor): Higher fat content means juicy beef! Feel free to substitute with ground turkey or chicken for a leaner option.
- 1 tsp salt
- 1/2 tsp black pepper
- 1 tsp garlic powder
- 1 tsp onion powder
- 1 tbsp Worcestershire sauce: This adds a robust flavor reminiscent of classic burgers.
- 1 tbsp ketchup: A sweet tang that balances the savory flavors.
- 4 large flour tortillas (burrito-size): Choose your favorite brand; I often prefer Mission or Trader Joe’s for their softness!
- 1 cup shredded cheddar cheese (or a mix of cheddar and mozzarella): Freshly shredded cheese melts better than prepackaged.
- 1/2 cup diced tomatoes
- 1/4 cup diced red onions
- 1/4 cup chopped pickles (optional): These add a delicious crunch and tang.
- 2 tbsp mayonnaise or burger sauce
- 1 tbsp butter or cooking spray: For that irresistible golden-brown finish.
Prep Notes:
- Make sure the butter is at room temperature for easy spreading.
- If opting for cheese alternatives, be mindful of melting properties—some melt better than others!
Step-by-Step Instructions
Cook the Ground Beef:
Brown the Beef: Heat a skillet over medium heat and add the 1 lb of ground beef. Use a spatula to break it apart as it cooks for about 5-7 minutes until it’s browned and fully cooked.
Season and Simmer: Drain excess grease and stir in 1 tsp salt, 1/2 tsp black pepper, 1 tsp garlic powder, 1 tsp onion powder, 1 tbsp Worcestershire sauce, and 1 tbsp ketchup. Let it simmer for an extra 1-2 minutes to meld the flavors, then remove from heat.
Prepare the Tortillas:
- Spread the Sauce: Take each tortilla and lay it flat on a clean surface. Spread a thin layer of 2 tbsp mayonnaise or burger sauce on each.
Assemble the Wraps:
Layer the Goodies: Sprinkle 1/4 cup of shredded cheese in the center of each tortilla. Spoon a generous portion of the seasoned beef over the cheese, followed by diced tomatoes, diced red onions, and optional pickles.
Fold and Roll: Fold in the sides of the tortilla tightly, then roll it up, ensuring all the fillings are secured inside.
Grill the Wraps:
Heat the Skillet: Preheat a skillet or grill pan over medium-low heat. Add 1 tbsp butter or cooking spray for a crispy finish.
Grill to Perfection: Place the wraps seam-side down and cook for 2-3 minutes on each side until they turn golden brown and crispy. Keep an eye on them, as you want that lovely crunch without burning!
Serve and Enjoy:
- Slice & Serve: Remove from heat and let them cool for a minute. Slice each wrap in half and serve warm with your favorite dipping sauces like ketchup or ranch.
Expert Tips & Tricks
Get Creative with Toppings: Feel free to add other favorite toppings like jalapeños for some heat, avocado for creaminess, or even coleslaw for added crunch!
Storing Leftovers: Uncooked wraps can be stored in the fridge for 2 days, or freeze them separated by parchment paper for up to 3 months. Just grill them straight from the freezer when ready to eat!
Make-ahead for Ease: Assemble wraps ahead of time and keep them in the fridge. Grill them after getting home from work for a quick dinner option.
Avoid Soggy Wraps: If you’re stacking them, place parchment paper between wraps to avoid sogginess.
Troubleshooting: If wraps burn quickly, lower the heat. If undercooked, flip them sooner. Keep an eye on them, cooking times can vary!
Serving Suggestions
These Grilled Cheeseburger Wraps pair wonderfully with:
- Crunchy Side Salads: Try a simple green salad with a vinaigrette for a refreshing contrast.
- Fries or Sweet Potato Fries: Because let’s face it, fries and burgers go together like peanut butter and jelly!
- Dipping Sauces: Serve with ketchup, ranch, or homemade barbecue sauce for an extra flavor kick.
Looking for presentation ideas? Serve on a colorful platter with garnished sides, like a sprinkle of chopped parsley or a side of pickles for that extra pop!
Variations & Substitutions
- Low-Carb Option: Substitute flour tortillas with lettuce wraps for a healthier version.
- Cheesy Garlic Bread Wrap: Use garlic-infused tortillas or sprinkle with garlic powder in the cheese layer for extra flavor.
- Seasonal Variations: Add grilled peppers or zucchini during summertime, or swap in pumpkin for a cozy fall version.
Nutrition & Storage Info
- Prep Time: 10 minutes
- Cook Time: 15 minutes
- Total Time: 25 minutes
- Yield: 4 servings
- Estimated Calories per Serving: ~380 calories
- Storage Instructions: Keep any leftovers at room temperature for 2 hours, or refrigerate them for up to 3 days. Freezing is also an option—best used within 3 months.
FAQ Section
Can I use different meats?
Absolutely! Ground turkey or chicken works well for a leaner option.Can I make these vegetarian?
Yes! Substitute beef with black beans or grilled vegetables.What’s the best way to reheat leftovers?
Grilling them again in a skillet will keep their crispy texture.Can I use cheese alternatives?
Yes, just be mindful of the melting properties of different cheeses.What dipping sauces do you recommend?
Ketchup, ranch, or a spicy aioli are great choices!Can I bake these wraps instead?
Yes, you can bake them in a preheated oven at 375°F for about 10-15 mins until crispy.Can I prepare the filling ahead?
Definitely! You can make the beef mixture a day in advance and store it in the fridge.How do I know if the beef is cooked?
Ground beef should reach an internal temperature of 160°F.Are there gluten-free tortilla options?
Yes! Many grocery stores offer gluten-free tortilla options that work wonderfully.What other vegetables can I include?
Spinach, arugula, or sliced avocados would be fantastic additions!
Conclusion
These Grilled Cheeseburger Wraps are not just a meal; they transform an ordinary Wednesday night into something special, reminiscent of joyful family gatherings. The vibrant, mouthwatering flavors and comforting texture make these wraps a sure-fire hit for anyone at the table. You’ll find that even your pickiest eaters will be reaching for seconds!
So why not grab your ingredients and give this beloved recipe a try? I’d love to hear your thoughts—leave a comment below with your experiences or any fun tweaks you made. Also, if you enjoyed this, check out my other recipes like Cheesy Pizza Quesadillas and BBQ Chicken Wraps! Happy cooking!
Grilled Cheeseburger Wraps
Ingredients
For the Beef
- 1 lb ground beef (80/20) Higher fat content means juicy beef! Feel free to substitute with ground turkey or chicken for a leaner option.
- 1 tsp salt
- 0.5 tsp black pepper
- 1 tsp garlic powder
- 1 tsp onion powder
- 1 tbsp Worcestershire sauce This adds a robust flavor reminiscent of classic burgers.
- 1 tbsp ketchup A sweet tang that balances the savory flavors.
For the Wraps
- 4 large flour tortillas (burrito-size) Choose your favorite brand; I often prefer Mission or Trader Joe’s for their softness!
- 1 cup shredded cheddar cheese Or a mix of cheddar and mozzarella. Freshly shredded cheese melts better than pre-packaged.
- 0.5 cup diced tomatoes
- 0.25 cup diced red onions
- 0.25 cup chopped pickles Optional, these add a delicious crunch and tang.
- 2 tbsp mayonnaise or burger sauce
- 1 tbsp butter or cooking spray For that irresistible golden-brown finish.
Instructions
Cook the Ground Beef
- Heat a skillet over medium heat and add the ground beef. Use a spatula to break it apart as it cooks for about 5-7 minutes until it's browned and fully cooked.
- Drain excess grease and stir in salt, black pepper, garlic powder, onion powder, Worcestershire sauce, and ketchup. Let it simmer for an extra 1-2 minutes to meld the flavors, then remove from heat.
Prepare the Tortillas
- Take each tortilla and lay it flat on a clean surface. Spread a thin layer of mayonnaise or burger sauce on each.
Assemble the Wraps
- Sprinkle shredded cheese in the center of each tortilla. Spoon a generous portion of the seasoned beef over the cheese, followed by diced tomatoes, diced red onions, and optional pickles.
- Fold in the sides of the tortilla tightly, then roll it up, ensuring all the fillings are secured inside.
Grill the Wraps
- Preheat a skillet or grill pan over medium-low heat. Add butter or cooking spray for a crispy finish.
- Place the wraps seam-side down and cook for 2-3 minutes on each side until they turn golden brown and crispy. Keep an eye on them to avoid burning!
Serve and Enjoy
- Remove from heat and let them cool for a minute. Slice each wrap in half and serve warm with your favorite dipping sauces like ketchup or ranch.
Notes
🥗 Free Custom Keto Meal Plan?
Do you want to lose weight while still enjoying delicious Asian & Thai Fusion meals? Take this quick quiz to get your personalized Keto plan based on your favorite foods!
- ✅ No more guessing what to eat
- ✅ Delicious & easy-to-make recipes
- ✅ Tailored to your body type
Get My Custom Plan Now! →
*Over 100,000+ people have transformed their lives with this quiz.