Irresistible Dream Cake with Peppermint Frosting: A Perfect Holiday Indulgence
Picture this: it’s a cold December evening, and the sweet scent of something baking wafts through the air, wrapping around you like a cozy blanket. That was the scene one holiday season when my family and I gathered around the kitchen, our laughter mixing with the nostalgic aroma of chocolate cake. That magical moment first introduced me to the wondrous Dream Cake with Peppermint Frosting, a creation that has since become our family’s favorite seasonal indulgence.
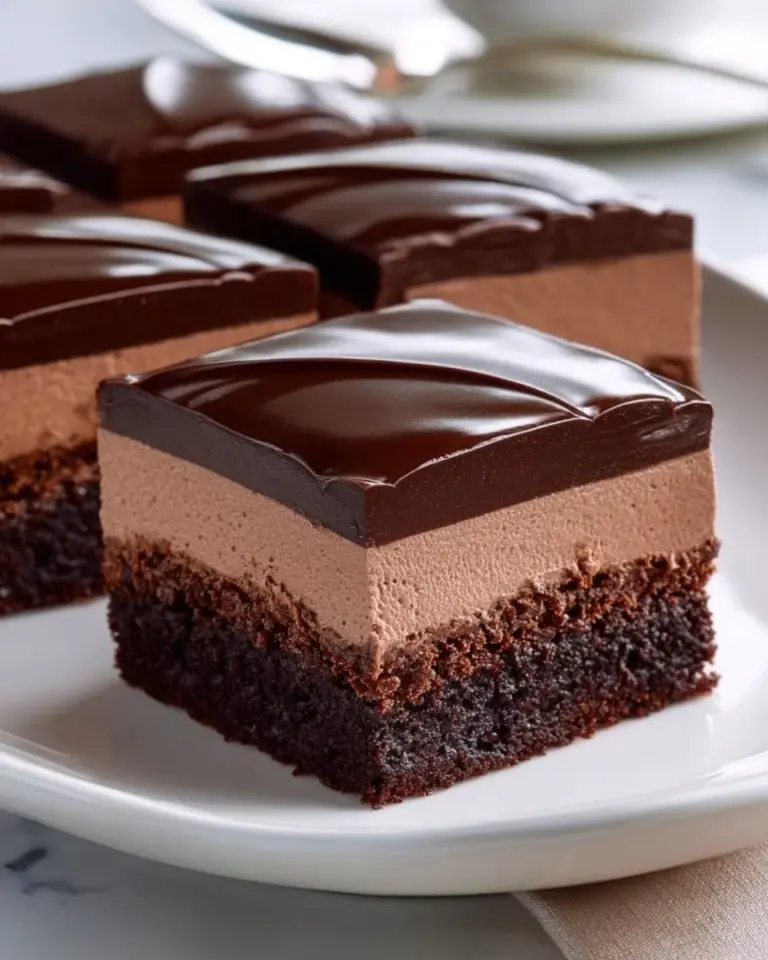
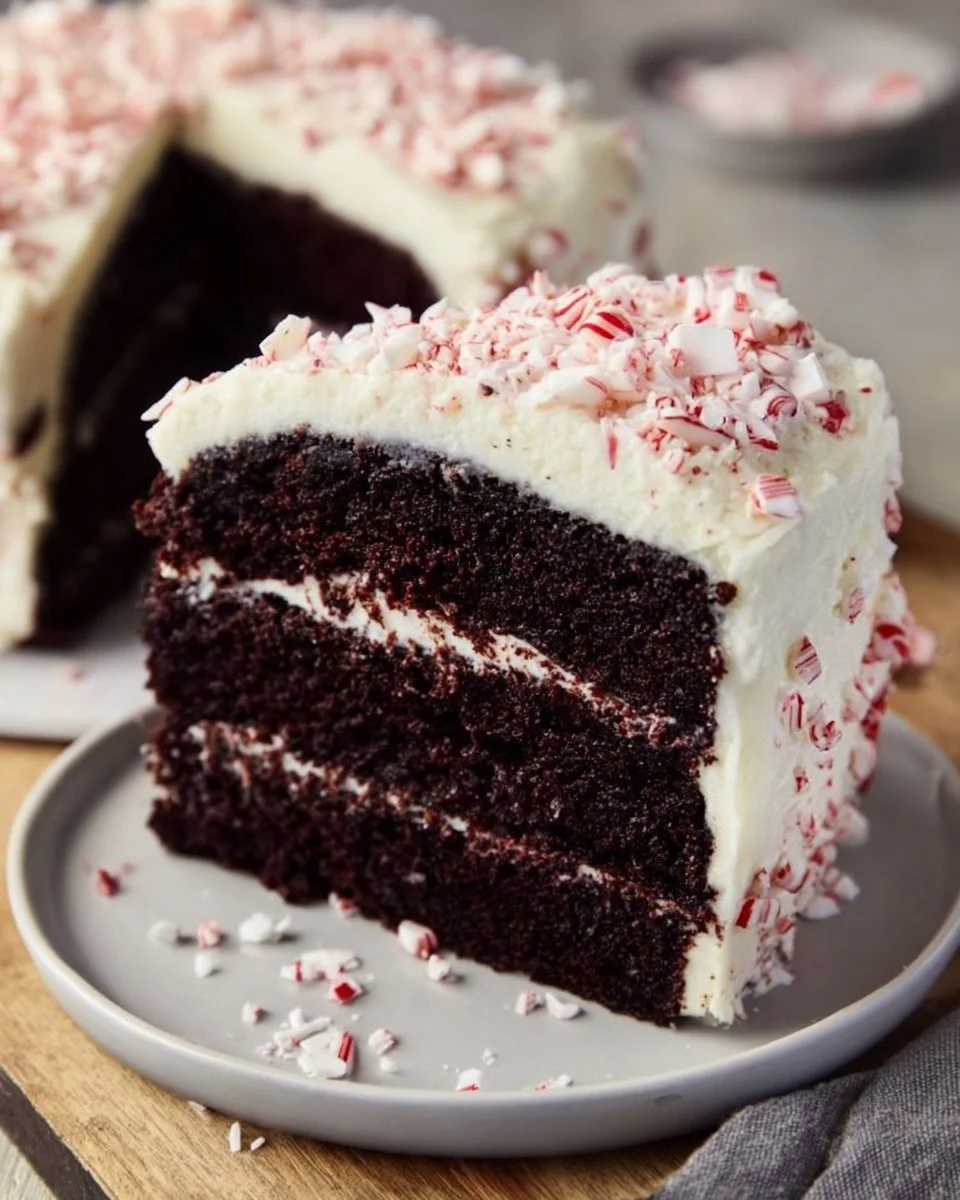
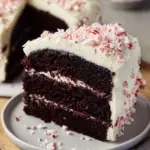
What makes this Dream Cake so special? It’s a rich, velvety chocolate treat topped with a refreshing peppermint frosting that’s just heavenly. Unlike any pre-packaged cake you’d find at the store, this recipe brings warmth, nostalgia, and a sprinkle of holiday magic to the table. Each slice evokes cherished memories and a sense of comfort, reminding us of family gatherings and laughter-filled evenings.
In this post, I promise to share my treasured recipe for Dream Cake with Peppermint Frosting, complete with tips and tricks I’ve learned over years of baking. So, grab your apron and let’s create a masterpiece that will capture hearts and taste buds alike!
What Are Dream Cake with Peppermint Frosting?
Dream Cake with Peppermint Frosting isn’t just another cake; it’s a chocolaty delight enveloped in a creamy, minty embrace. Originating from home bakers’ creativity, this cake perfectly marries deep chocolate flavor with a refreshing twist, making it ideal not just for the holidays but for any celebration.
The taste is an adventure, with a dense yet fluffy cake that melts in your mouth, complemented by the light and airy peppermint frosting. As if that weren’t enough, the crushed peppermint candy on top adds a delightful crunch and festive flair.
You’ll want to bake this cake whenever you need a touch of joy, be it a holiday feast, a cozy gathering, or even just to brighten a regular weekday. The fragrance alone will transport you back to simpler days, making this cake a timeless classic.
Why You’ll Love This Recipe
Irresistible Taste in Every Bite: This Dream Cake is rich in chocolate flavor, perfectly balanced by the lightness of the peppermint frosting. Your taste buds will dance with joy!
Cost-Effective Indulgence: Why settle for overpriced store-bought cakes when you can make this dreamy creation at home? All the ingredients together cost less than a fancy café cake, and you’ll have enough to share!
Customizable Goodness: While the peppermint and chocolate pairing is a winner, feel free to swap out flavors—the idea of a vanilla bean frosting is simply divine!
Beginner-Friendly: Whether you’re a seasoned baker or a novice, this recipe is straightforward. With just under 10 steps, you’ll find it easy to bring this dream to life.
Heartwarming Connections: Every slice serves a dose of nostalgia, rekindling memories of family gatherings. This cake isn’t just food; it’s a cherished moment.
In comparison to those mass-produced, store-bought options, this cake’s homemade charm shines through. Spend a little time making it, and your efforts will be met with smiles and compliments. The joy of baking is not just in the outcome, but also in the process.
Ingredients
Cake
- 2 cups all-purpose flour (Use high-quality for better texture; King Arthur is my go-to)
- 2 cups granulated sugar
- 3/4 cup unsweetened cocoa powder (I love Ghirardelli for its richness)
- 1 1/2 teaspoons baking powder
- 1 1/2 teaspoons baking soda
- 1 teaspoon salt
- 2 large eggs (room temperature for a better mix)
- 1 cup whole milk (use organic for the best flavor)
- 1/2 cup vegetable oil (or melted coconut oil for a twist)
- 2 teaspoons vanilla extract
- 1 cup boiling water (this helps keep the cake moist)
Frosting
- 1 cup unsalted butter (room temperature; Kerrygold adds a lovely flavor)
- 4 cups powdered sugar
- 1 teaspoon peppermint extract (for that fresh taste)
- 2-3 tablespoons milk (add until you reach desired consistency)
- Crushed peppermint candy for garnish (optional, but so fun!)
Prep Notes:
- Make sure your butter is at room temperature for perfect creaming.
- Gather all your ingredients beforehand to streamline the baking process.
Step-by-Step Instructions
Preheat the Oven: Set your oven to 350°F (175°C). While it heats, grease and flour two 9-inch round cake pans.
Combine the Dry Ingredients: In a large bowl, mix together the flour, sugar, cocoa powder, baking powder, baking soda, and salt until well blended.
Add the Wet Ingredients: Crack in the eggs, pour in the milk, vegetable oil, and vanilla, then beat on medium speed for 2 minutes.
Incorporate Boiling Water: Stir in the boiling water next—don’t worry if the batter seems thin, it’s just right. Carefully pour the batter evenly into your prepared pans.
Bake the Cakes: Slide the pans into the oven and bake for 30-35 minutes. A toothpick inserted into the center should come out clean—this is always an exciting moment!
Cool the Cakes: Let the cakes cool in the pans for 10 minutes, then gently remove them to cool completely on a wire rack.
Prepare the Frosting: In a large bowl, begin by beating the butter until creamy. Gradually add the powdered sugar and peppermint extract, mixing well. Add milk until you achieve a smooth, spreadable consistency.
Assemble the Cake: Frost the top of one cake layer, carefully stack the second layer on top, and frost the entire cake.
Garnish with Peppermint: For a festive touch, sprinkle the top with crushed peppermint candy if desired. It adds both crunch and a pop of color!
Enjoy!: Slice, serve, and bask in the compliments you’re sure to receive!
Expert Tips & Tricks
Quality Matters: Using high-quality cocoa powder and butter can elevate your cake to café-level status.
Storage Recommendations: If you have leftover cake (unlikely!), store it in an airtight container at room temperature for up to 3 days, or refrigerate for a week.
Make Ahead: You can bake the cake layers a day in advance and frost just before serving to maintain their moistness.
Common Mistakes: Don’t skip the boiling water step! It’s essential for moisture. Also, be cautious not to overmix once the flour is added, which can toughen the cake.
Troubleshooting: If your cake domes excessively while baking, ensure that your oven temperature is accurate. A too-hot oven can be a culprit!
Serving Suggestions
Pair your Dream Cake with a dollop of whipped cream or a scoop of vanilla ice cream for a delightful dessert experience. A hot cup of cocoa or a glass of cold milk is the perfect accompaniment—creating a cozy, comforting contrast to its richness. This cake shines during holiday gatherings, birthdays, or while cozied up on a chilly evening with loved ones!
Variations & Substitutions
- Flavor Combinations: Try almond extract instead of peppermint for a lovely twist! Or how about orange zest in the frosting for a citrusy flair?
- Dietary Restrictions: For a gluten-free version, substitute the all-purpose flour with a gluten-free blend. Vegans can use flax eggs instead of regular eggs and coconut cream for the frosting.
- Seasonal Variations: In summer, overshadow the peppermint with fresh strawberries or raspberries for a fruity version. In fall, consider adding a hint of cinnamon for added warmth.
Nutrition & Storage Info
- Prep Time: 20 minutes
- Cook Time: 35 minutes
- Total Time: 55 minutes
- Yield: 12 servings
- Estimated Calories: Approximately 350 calories per slice
- Storage Instructions: Best kept at room temperature for up to 3 days, in the fridge for a week, or in the freezer for up to 3 months.
FAQ Section
Can I use dark chocolate cocoa powder?
Absolutely! It will result in a richer chocolate flavor.What if I don’t have boiling water?
You can substitute it with warm water, but the boiling water makes the cake more moist.How can I make the frosting thicker?
Add more powdered sugar until you reach your desired thickness.Can I make this as cupcakes?
Yes! Bake for about 18-20 minutes in cupcake liners.What if I don’t have peppermint extract?
You can use vanilla or even almond extract for a different flavor profile!How do I make this cake ahead of time?
Bake and cool the cake layers, then wrap tightly in plastic wrap. Frost just before serving.What’s the best way to crush peppermint candies?
Place candies in a zip-top bag and gently crush with a rolling pin.Can I use a different frosting?
For sure! A buttery vanilla frosting or a cream cheese frosting can work beautifully.Why did my cake sink in the middle?
This may happen due to underbaking or opening the oven too early. Ensure your oven temperature is accurate.How can I prevent my cake from sticking to the pan?
Greasing and flouring your pans well is key, or you can use parchment paper for easy removal.
Conclusion
With its rich chocolate layers and refreshing peppermint frosting, this Dream Cake is not just a dessert but a heartfelt experience intertwined with memories and joy. I encourage you to give this recipe a try—bake it, share it, and see the smiles it brings to your loved ones’ faces. Don’t forget to leave feedback or share your own variations!
For more delightful recipes, check out my other favorites on the blog, like the delectable Chocolate Ganache Tart and festive Gingerbread Cookies. Happy baking!
Irresistible Dream Cake with Peppermint Frosting
- Total Time: 55 minutes
- Yield: 12 servings 1x
- Diet: Vegetarian
Description
A rich chocolate cake topped with a refreshing peppermint frosting, perfect for holiday gatherings.
Ingredients
- 2 cups all-purpose flour
- 2 cups granulated sugar
- 3/4 cup unsweetened cocoa powder
- 1 1/2 teaspoons baking powder
- 1 1/2 teaspoons baking soda
- 1 teaspoon salt
- 2 large eggs
- 1 cup whole milk
- 1/2 cup vegetable oil
- 2 teaspoons vanilla extract
- 1 cup boiling water
- 1 cup unsalted butter
- 4 cups powdered sugar
- 1 teaspoon peppermint extract
- 2–3 tablespoons milk
- Crushed peppermint candy for garnish
Instructions
- Preheat the oven to 350°F (175°C) and prepare two 9-inch round cake pans.
- In a large bowl, mix together flour, sugar, cocoa powder, baking powder, baking soda, and salt.
- Add eggs, milk, vegetable oil, and vanilla, then beat on medium speed for 2 minutes.
- Carefully stir in boiling water into the batter.
- Pour the batter evenly into the prepared pans.
- Bake for 30-35 minutes until a toothpick inserted comes out clean.
- Cool the cakes for 10 minutes in the pans, then transfer to a wire rack to cool completely.
- For the frosting, beat the butter until creamy, then gradually add powdered sugar and peppermint extract, mixing well and adjusting with milk for consistency.
- Frost one cake layer, stack the other on top, and frost the entire cake.
- Garnish with crushed peppermint candy.
- Slice, serve, and enjoy!
Notes
Ensure butter is at room temperature for perfect creaming. This cake can be made ahead of time and stored properly.
- Prep Time: 20 minutes
- Cook Time: 35 minutes
- Category: Dessert
- Method: Baking
- Cuisine: American
Nutrition
- Serving Size: 1 slice
- Calories: 350
- Sugar: 28g
- Sodium: 400mg
- Fat: 15g
- Saturated Fat: 9g
- Unsaturated Fat: 5g
- Trans Fat: 0g
- Carbohydrates: 50g
- Fiber: 3g
- Protein: 5g
- Cholesterol: 70mg
🥗 Free Custom Keto Meal Plan?
Do you want to lose weight while still enjoying delicious Asian & Thai Fusion meals? Take this quick quiz to get your personalized Keto plan based on your favorite foods!
- ✅ No more guessing what to eat
- ✅ Delicious & easy-to-make recipes
- ✅ Tailored to your body type
Get My Custom Plan Now! →
*Over 100,000+ people have transformed their lives with this quiz.