Table of Contents
Growing up, ice cream cakes were the ultimate birthday party treat in our house. I can still smell the sweet aroma of chocolate and vanilla mingling with the vibrant sounds of laughter and celebration. One cake, in particular, always held a special place in my heart: the iconic Dairy Queen Ice Cream Cake. There’s something magical about layers of rich chocolate ice cream, creamy vanilla goodness, and that unforgettable fudge centre. As an adult, I craved that nostalgic flavour but found myself searching for something more profound, fresher, and customizable.
That’s when I decided to create my version, and trust me, it’s a game-changer! This homemade Dairy Queen Ice Cream Cake offers all the classic taste but allows for your personal touch, whether it’s adding your favourite candy or swapping out flavours. It’s a recipe that you can whip up for birthdays, celebrations, or just a cosy night in—who needs an occasion, right?
In this post, I’ll take you through every delectable step of crafting this delightful dessert that’s perfect for any gathering. So grab your apron, and let’s create some sweet memories together!
What Are Dairy Queen Ice Cream Cakes?
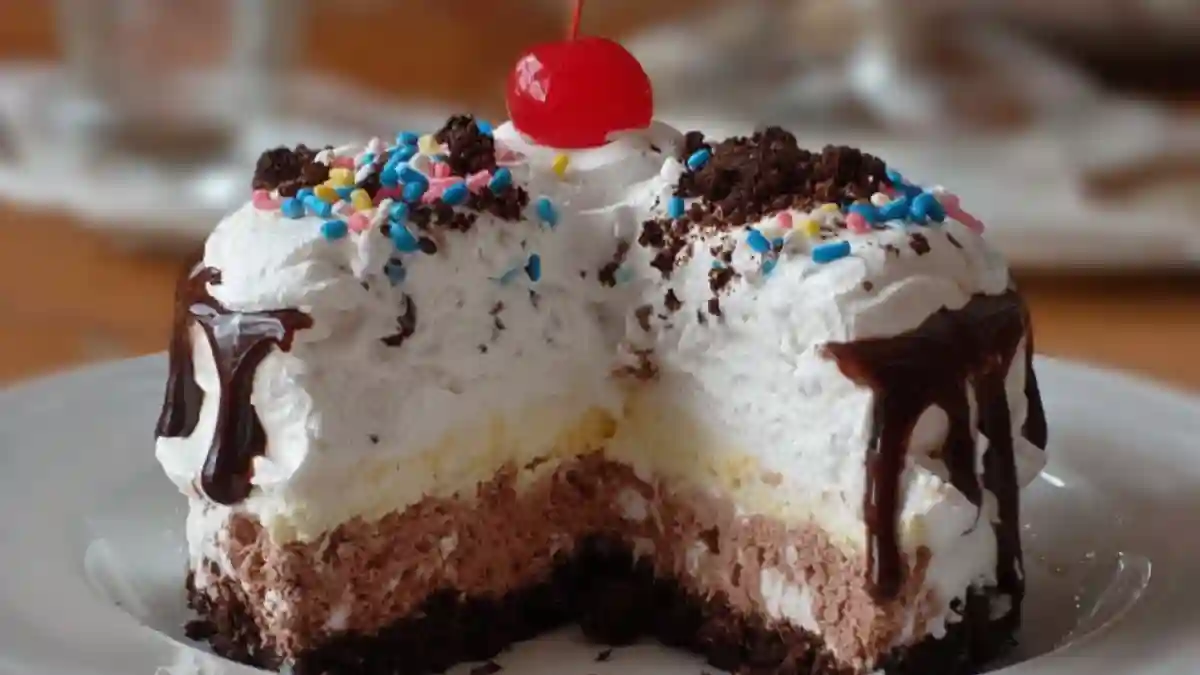
The beloved Dairy Queen Ice Cream Cake has been making birthdays and special occasions sweeter for decades. Originating as a cold confection beloved by both kids and adults, these cakes feature delicate layers of soft-serve ice cream sandwiched between a rich chocolate cookie crust and a gooey fudge core.
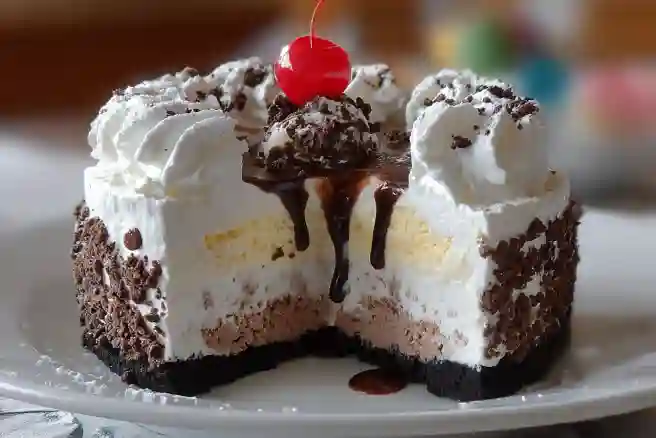
The magic lies in the combination of textures: the crunchiness of the crust, the creaminess of the ice cream, and the smooth richness of the fudge. Each bite is an adventure of flavours and sensations that evoke nostalgia and pure joy.
Whether it’s served at a summer barbecue or during a winter holiday gathering, the Dairy Queen Ice Cream Cake is always a crowd-pleaser. So why not recreate this classic at home? It makes for the perfect centrepiece at your gatherings or just a midnight snack when you’re feeling indulgent!
Why You’ll Love This Recipe
- Cost-Effective: Why spend a fortune on store-bought cakes when you can enjoy the same deliciousness at home? Making this version saves you money while allowing you to whip up as many as you want!
- Customisation Galore: This recipe gives you the freedom to choose your favourite ice cream, toppings, and add-ins. Feeling adventurous? Try caramel sauce instead of hot fudge!
- Satisfies Everyone: Allergies? Preferences? No problem! With simple swaps, you can make a dairy-free or gluten-free version that suits all your guests.
- Easy Steps: You don’t need to be a pro baker to pull this off! As long as you can follow some basic steps, you’ll impress everyone with your baking skills.
- Perfect for Any Occasion: Birthdays, anniversaries, or a Tuesday night dessert—you name it! This cake will elevate your celebrations, making them even sweeter.
Ingredients Section
- 20 pieces of Chocolate sandwich cookies, crushed (try using Oreos for that classic flavour!)
- 4 tablespoons Salted sweet cream butter, melted (room temperature is best)
- 1 quart of Chocolate ice cream (use high-quality for a better taste)
- 1 quart Vanilla ice cream (Vanilla bean flavour works best for a gourmet touch!)
- 11.75 ounces Hot fudge topping (homemade or store-bought, your choice)
- 2 cups Cold heavy cream (make sure it’s fresh!)
- 1 cup Powdered sugar (for sweetened whipped cream goodness)
- 1 teaspoon Clear vanilla flavouring (makes a big difference; I recommend Nielsen-Massey)
- Colourful sprinkles (optional garnish, but who can resist sprinkles?)
Prep Notes: Be sure to let the butter melt thoroughly, and let your ice cream soften slightly before spreading for more effortless layering.
Step-by-Step Instructions
- Prepare the Crust: Combine the crushed chocolate sandwich cookies and melted butter in a bowl. Stir until the mixture resembles wet sand. Press firmly into the bottom of a 9-inch springform pan. Freeze for 10–15 minutes to set.
- Layering Ice Creams: Allow the chocolate and vanilla ice creams to soften at room temperature for about 10 minutes. Spread the chocolate ice cream evenly over the chilled crust. Then, spoon and spread hot fudge topping over the chocolate layer, letting it drip down a bit—because, why not?
- Add Vanilla Layer: Gently spread vanilla ice cream on top of the fudge layer, smoothing it out as much as possible.
- Freeze It: Cover the cake tightly with plastic wrap or foil and freeze for at least 4 hours or overnight, until it is substantial. Trust me, patience is key here!
- Whip the Cream: In a chilled mixing bowl, beat the heavy cream on high until soft peaks form. Gradually add the powdered sugar and vanilla, whipping until the mixture is fluffy and stiff.
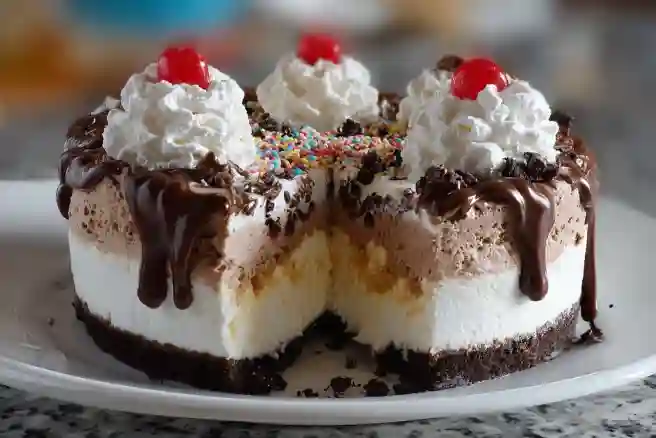
- Frost Your Cake: Remove the frozen cake from the springform pan, and frost the top and sides with your prepared whipped cream.
- Decorate: Sprinkle with colourful garnishes, if desired.
- Slice and Serve: Use a sharp knife dipped in warm water for clean slices. Serve immediately and enjoy the creamy, crunchy, chocolaty layers!
Chef’s Tip: If you notice ice crystals form during storage, try covering it tightly with plastic wrap next time.
Expert Tips & Tricks
- Ingredient Quality Matters: Always choose the best-quality ice creams and toppings for a richer flavour.
- Make-Ahead & Storage: This cake keeps well in the freezer for up to 1-2 weeks. Cover tightly to prevent freezer burn.
- Troubleshooting: If your crust becomes too soft, ensure you pressed it firmly and froze it for a long enough time.
- Flavour Variations: Feel free to use cookie dough chunks or mix in pieces of your favourite candy bars for a unique twist.
- Storage Tips: If you have leftovers, slide individual slices into airtight containers before freezing to enjoy the cake for longer.
Serving Suggestions
This Dairy Queen Ice Cream Cake is best enjoyed on its own, but pairing it with a drizzle of chocolate or caramel sauce takes the experience to the next level. Set the table with colourful plates and napkins for a festive look. Ideal for birthdays, summer BBQs, or even family movie nights, this cake will be the star attraction!
Variations & Substitutions
- Flavour Combinations: Swap out chocolate for strawberry or mint chocolate chip ice cream to create unique flavour profiles.
- Dietary Adaptations: Offer dairy-free ice cream and gluten-free cookie options to accommodate dietary restrictions.
- Seasonal Inspirations: In winter, try adding peppermint flavour or crushed candy canes for a festive twist, or layer in fresh fruit during summer months for a refreshing change.
Nutrition & Storage Info
- Prep Time: 15 minutes
- Cook Time: N/A
- Total Time: 4 hours (plus 10-15 minutes for crust)
- Yield: 8-10 servings
- Estimated Calories per Serving: Approx. 300-350 calories
Storage Instructions:
- Room Temp: Not recommended.
- Fridge: Can be stored for up to 2 days (wrap tightly in plastic).
- Freezer: Lasts up to 2 weeks, though best enjoyed fresh within the first week.
FAQ Section
- Can I use different flavours of ice cream?
- Absolutely! You can mix and match flavours to suit your preferences.
- How long does it take to freeze completely?
- For the best results, recommend freezing for at least 4 hours or overnight.
- Can I use a different pan?
- Yes! A regular cake pan will work, but ensure you can remove the cake carefully.
- What if I don’t have heavy cream?
- You can substitute whipped topping, but the texture may differ.
- Does this cake need to be stored in the freezer?
- Yes, to maintain its creamy texture and avoid melting.
- Can I use homemade whipped cream?
- Definitely! Just ensure it’s stabilised well to maintain its shape.
- What if I want to make it smaller?
- Halve the recipe, and use a smaller springform pan!
- Can I add fruit?
- Absolutely! Fresh strawberries or bananas would be a delicious addition to your ice cream layers.
- Can I decorate it with fondant?
- While not traditional, decorating with fondant can give an elaborate look, but be cautious, as it may not freeze as well.
- How do I make this ahead of time?
- Feel free to make it up to a week in advance and keep it tightly wrapped in the freezer.
Conclusion
This Dairy Queen ice cream cake recipe is more than just a dessert; it’s a slice of nostalgia, a gathering centrepiece, and a vehicle for customisation that caters to everyone’s preferences. It’s a special treat you can enjoy with family and friends, creating memories that will linger long after the last bite. I encourage you to try this recipe and share your thoughts in the comments below. Have you made any unique variations? Let me know, and don’t forget to check out my other dessert recipes on the blog!
For more delicious recipes, check out our other articles:
Cardamom Plum Sorbet
Delicious Kiwi Sorbet
Happy baking and enjoy your sweet adventures! 🍰✨
Print
Dairy Queen Ice Cream Cake
- Total Time: 6+ hours (mostly freezing)
- Yield: 12 servings
- Diet: Vegetarian
Description
A homemade version of the classic Dairy Queen ice cream cake with layers of chocolate cookie crunch, vanilla ice cream, and a signature fudge center, all topped with whipped topping and chocolate curls.
Ingredients
20 pieces of Chocolate sandwich cookies
4 tablespoons Salted sweet cream butter
1 quart of Chocolate ice cream
1 quart Vanilla ice cream
11.75 ounces Hot fudge topping
2 cups Cold heavy cream
1 cup Powdered sugar
1 teaspoon Clear vanilla flavouring
Colourful sprinkles
Instructions
- Line 9-inch springform pan with plastic wrap, leaving overhang.
- Crush cookies into fine crumbs in food processor. Mix with melted butter and press firmly into pan bottom. Freeze 15 mins.
- Spread half the softened ice cream over crust. Freeze 1 hour.
- Warm fudge sauce slightly and pour over ice cream layer, spreading evenly. Freeze 30 mins.
- Spread remaining ice cream over fudge layer. Cover with plastic and freeze 4+ hours.
- Remove from pan using plastic overhang. Frost with whipped topping and decorate with chocolate curls.
- Freeze 1 more hour before serving. For clean slices, dip knife in hot water between cuts.
Notes
- For authentic DQ texture, use their vanilla ice cream
- Add 1/4 tsp peppermint extract to fudge layer for mint variation
- Cake keeps frozen up to 2 weeks – wrap tightly
- For neater slices, freeze cake 15 mins after adding whipped topping
- Prep Time: 30 mins (plus freezing)
- Cook Time: 0 mins
- Category: Dessert
- Method: No-Bake Freezing
- Cuisine: American
Nutrition
- Serving Size: 1 slice
- Calories: 420
- Sugar: 38g
- Sodium: 210mg
- Fat: 22g
- Saturated Fat: 13g
- Unsaturated Fat: 7g
- Trans Fat: 0.5g
- Carbohydrates: 52g
- Fiber: 2g
- Protein: 5g
- Cholesterol: 45mg
Ask the Community
🥗 Free Custom Keto Meal Plan?
Do you want to lose weight while still enjoying delicious Asian & Thai Fusion meals? Take this quick quiz to get your personalized Keto plan based on your favorite foods!
- ✅ No more guessing what to eat
- ✅ Delicious & easy-to-make recipes
- ✅ Tailored to your body type
Get My Custom Plan Now! →
*Over 100,000+ people have transformed their lives with this quiz.