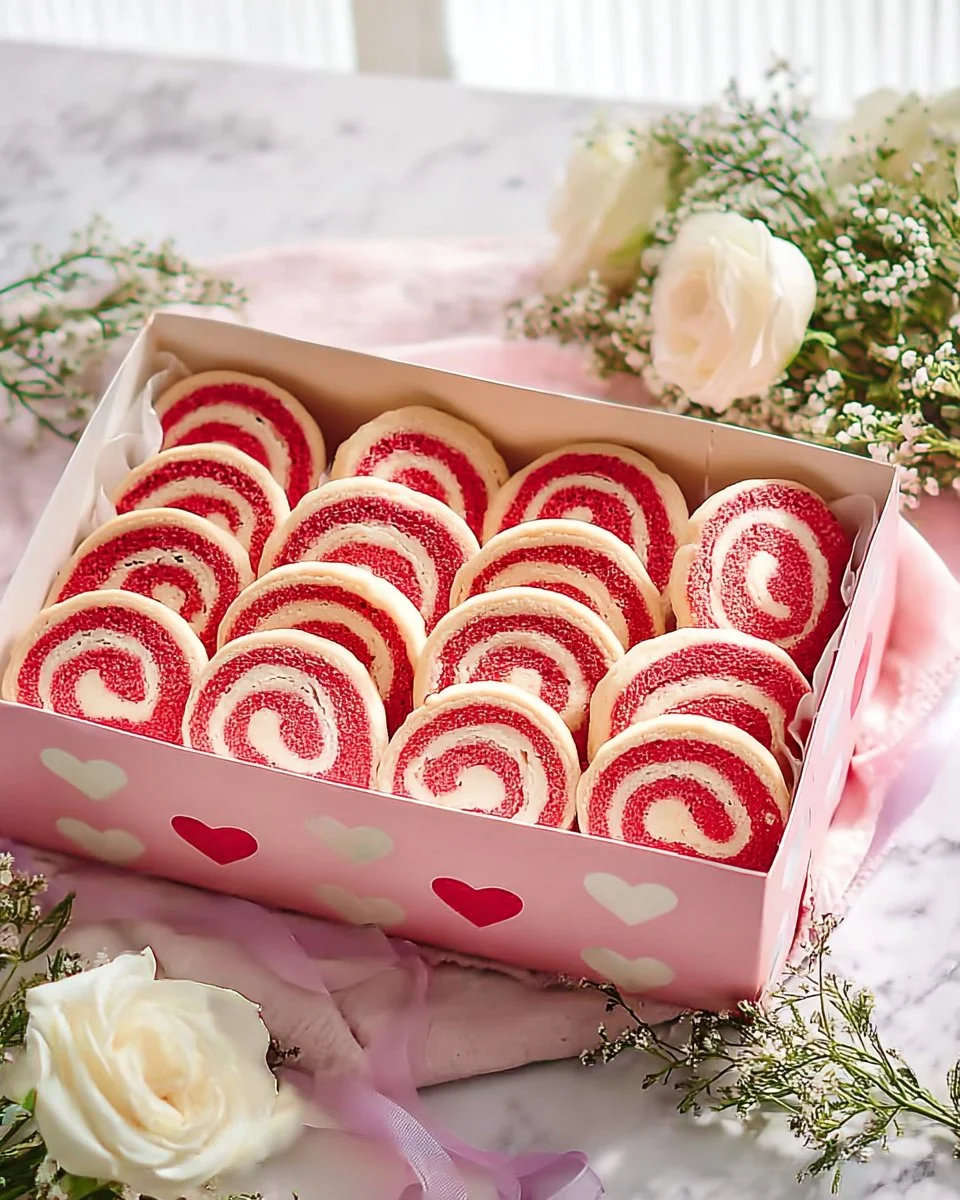
Sweet & Colorful Festive Valentine’s Day Pinwheel Cookies: A Perfect Treat for Your Loved Ones
INTRODUCTION
Nothing says "I love you" quite like a plate of homemade cookies, and this Valentine’s Day, I’m excited to share my family’s beloved recipe for Festive Valentine’s Day Pinwheel Cookies. I still remember the smell of buttery dough wafting through our home as a child, as my mom would roll and layer the cookie dough, her hands covered in flour and sprinkles. Those vibrant pinwheels became a symbol of love and togetherness, enhancing our celebrations and filling our hearts (and tummies) with joy.
What sets these beautiful cookies apart from other Valentine’s treats is their playful colors and delightful flavor. Unlike store-bought options that can taste artificial and dry, my pinwheel cookies are soft, buttery, and bursting with a delicate sweetness—no mystery ingredients here! Plus, the visual appeal of those lovely swirls makes for perfect gifts for friends, family, or even a sweet surprise for your crush.
In today’s post, I promise to guide you step-by-step through making these enchanting cookies, sharing tips I’ve gathered over years, and even a few secrets that will make your baking experience both enjoyable and rewarding. Get ready to fall in love with baking again!
WHAT ARE Festive Valentine’s Day Pinwheel Cookies?
The journey of pinwheel cookies traces back to the heart of American baking, where creativity and tradition dance together in the kitchen. Known for their charming swirls of color, these cookies offer a delightful combination of flavors and textures. With a soft and buttery exterior that melts in your mouth, each bite reveals layers of beautifully colored dough that create a feast for the eyes as well as the palate.
What makes these cookies unique is not only their vibrant appearance but also the endless possibilities for customization. You can switch up the colors and sprinkles to match any festive occasion—be it Christmas, Halloween, or birthdays! They’re perfect for baking alongside loved ones, creating memories that will last far beyond the cookie season. Bake them to express your love on Valentine’s Day, or simply to indulge yourself on a cozy afternoon.
WHY YOU’LL LOVE THIS RECIPE
Customizable Colors and Flavors: The beauty of these Festive Valentine’s Day Pinwheel Cookies is the ability to personalize them to your liking. You can play around with food coloring, or even sprinkle in different flavored extracts for a unique twist. Try creating pastels for spring, or bold colors for a summer barbecue!
Impress Without Stress: Although they look intricate, these cookies are surprisingly simple to make. You can bring out your inner pastry chef without a high skill level. With just a few basic techniques, you’ll wow your family and friends!
Cost-Effective Delight: Making cookies at home is not only more affordable than store-bought options, but you can take pride in using quality ingredients. Who needs overpriced cookie boxes when you can create an impressive treat right in your kitchen for a fraction of the cost?
Perfect for Sharing: These cookies not only taste good, but they also look stunning on a platter. They make an excellent gift for loved ones, neighbors, or party guests, coming out as a thoughtful gesture that showcases your effort and affection.
Quick Prep Time: With a bit of planning, you can have these fresh cookies ready in no time! From start to finish, the total time spent is under a couple of hours, including chilling time. Trust me, the delight of sharing them will outweigh the prep work!
Let’s not waste any more time! Now that you’re bursting with excitement, let’s dive into making these Festive Valentine’s Day Pinwheel Cookies.

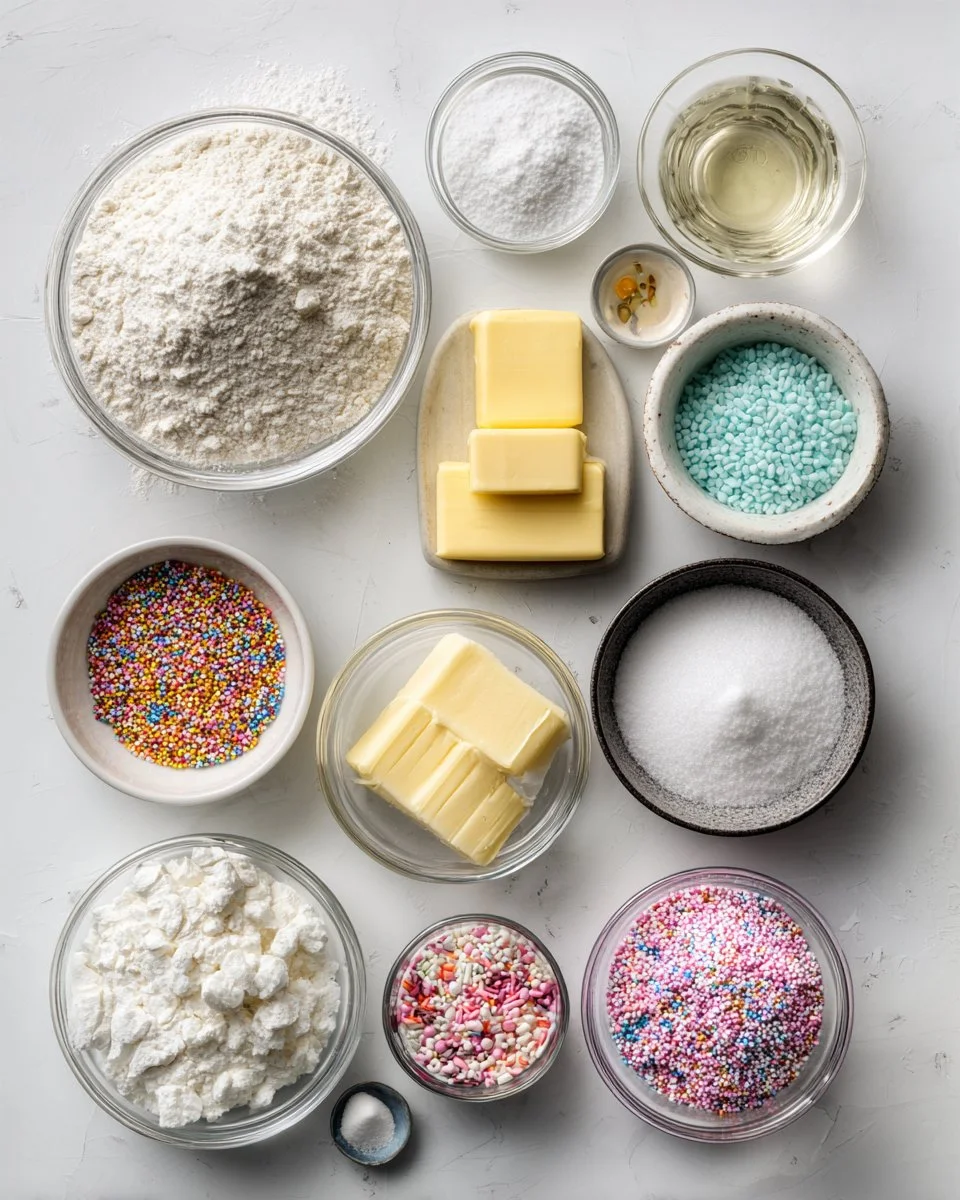
INGREDIENTS
- 2 1/4 cups all-purpose flour: Use a high-quality brand like King Arthur Flour for the best results.
- 1/2 tsp baking powder: Fresh baking powder is essential for fluffiness.
- 1/2 tsp salt: Balance out the sweetness with a pinch of salt.
- 2/3 cup powdered sugar: This gives the cookies that melt-in-your-mouth texture.
- 1/4 cup granulated sugar: Adds just the right amount of sweetness to the dough.
- 10 oz unsalted butter: Make sure it’s at room temperature for easy creaming; I often use Kerrygold for extra richness.
- 1 1/4 tsp vanilla extract: Use pure vanilla extract for an authentic flavor.
- 1/4 tsp almond extract: This gives a lovely depth of flavor; a little goes a long way!
- 1/2 tsp food coloring: You can choose red, pink, or any color that suits your festive spirit.
- 1.5 cups sprinkles: Feel free to go for traditional jimmies, nonpareils, or any festive sprinkle mix that tickles your fancy.
Notes:
- For a dairy-free option, swap out the butter with a vegan buttery spread.
- You can also use coconut oil in place of butter, but adjust the quantity as needed to prevent excess greasiness.
STEP-BY-STEP INSTRUCTIONS
Step 1: Prepare the Base Cookie Dough
Cream the unsalted butter, powdered sugar, and granulated sugar together in a mixing bowl until the mixture is light and fluffy (about 3-4 minutes). You’ll know it’s ready when it looks pale and fluffy. Add in the vanilla extract and almond extract, mixing until well combined.
Step 2: Divide and Color the Dough
Divide the dough in half. Knead in your selected food coloring to one half until the color is even. You can go bold with colors or keep it pastel—totally your call!
Step 3: Roll and Chill Both Dough Sheets
Roll each portion of dough between sheets of wax paper to about 1/4 inch thick. Wrap them carefully and chill in the refrigerator for at least 1 hour. Make sure to keep an eye on them; if they start to soften too much, this might affect the pinwheel shapes.
Step 4: Stack and Roll the Doughs Into a Log
Once chilled, lay the plain dough on top of the colored dough. Carefully roll everything into a tight log, starting from one end. Don’t rush this part—the tighter the roll, the better your swirls will be! Chill the log for another 30 minutes.
Step 5: Coat and Chill the Log
Take your chilled log and roll it in sprinkles, pressing gently to ensure they stick. Wrap it in plastic wrap and refrigerate for about 2 hours or until thoroughly set.
Step 6: Slice and Bake the Cookies
Preheat your oven to 350°F (175°C). Slice the dough log into 1/4-inch thick rounds, placing them on a parchment-lined baking sheet. Bake for 15-17 minutes, or until the edges begin to turn golden. Watch carefully, as overbaking can lead to dry cookies!
Step 7: Cool and Enjoy
Once out of the oven, allow the cookies to cool on the baking sheet for about 5 minutes before transferring them to a wire rack. Let them cool completely, and then prepare to share the love!
Chef’s Tips:
- To avoid cracking while rolling, make sure your dough is cold but pliable.
- If you find the dough sticky, lightly dust your work surface with flour.
EXPERT TIPS & TRICKS
- Storage: Keep your cookies in an airtight container at room temperature for up to a week. You can also freeze them for up to 3 months—just make sure to separate layers with wax paper.
- Make-Ahead: Prepare the dough log in advance; it can be refrigerated for up to three days before slicing and baking. This is a lifesaver for busy days leading up to a celebration!
- Troubleshooting: If your dough seems too soft or sticky, consider adding a touch more flour—just a tablespoon at a time—until it’s easier to handle. If it crumbles too much, a splash of milk can help bring it back together.
SERVING SUGGESTIONS
Consider serving your Festive Valentine’s Day Pinwheel Cookies alongside a rich hot chocolate or a steaming cup of coffee. For presentation, layer them on a colorful platter and garnish with fresh berries or edible flowers for an extra touch of love. These cookies are perfect for a Valentine’s Day gathering, anniversaries, or even just for a cozy night in!
VARIATIONS & SUBSTITUTIONS
- Flavor Combinations: Switch up the extracts by using lemon or peppermint for a different flavor profile. You could even fold in chocolate chips for an extra treat!
- Dietary Restrictions: For gluten-free dough, substitute regular flour with gluten-free all-purpose flour. Make sure to read the packaging to adjust any additional ingredients.
- Seasonal Variations: Change up the colors and sprinkles according to the holiday—maybe red, white, and blue for Independence Day, or green and gold for St. Patrick’s Day!
NUTRITION & STORAGE INFO
- Prep Time: 20 mins
- Cook Time: 15-17 mins
- Total Time: Approximately 2.5 hours (includes chilling time)
- Yield: About 24 cookies
- Estimated Calories: Approximately 90 calories per cookie
Storage: These cookies can be stored at room temperature for up to a week, or in the fridge for 2 weeks. They freeze beautifully for up to 3 months; just make sure they are well-wrapped to prevent freezer burn.
FAQ SECTION
Can I use margarine instead of butter?
Absolutely! Just make sure to opt for a high-quality margarine if you want to maintain a rich taste.Why do I need to chill the dough?
Chilling helps the butter solidify, which keeps cookies from spreading too much while baking.Can I use cookie cutters instead of slicing?
Yes, if you prefer shapes! Just roll out the dough a little thicker before cutting.What if my dough is too crumbly?
Add a teaspoon of milk at a time until the dough comes together.How do I know when the cookies are done?
Watch for golden edges; they might look slightly underbaked in the center but will firm up as they cool.Can I add chocolate chips to the dough?
Yes, chocolate chips can elevate these cookies to a whole new level of deliciousness—just fold about 1 cup in before chilling.What if I don’t have food coloring?
No problem! Just leave the dough plain for a classic look or use cocoa powder to make chocolate pinwheels.How can I make them festive for other occasions?
Change the colors and sprinkles to match any holiday theme—think green for St. Patrick’s Day, spooky colors for Halloween, etc.What’s the best way to store leftovers?
Place in an airtight container—layer with parchment paper to prevent sticking.Why are my cookies flat?
This can happen if the dough was too warm when placed in the oven. Ensure your dough is well-chilled before baking!

CONCLUSION
The Festive Valentine’s Day Pinwheel Cookies are not just a treat; they’re a heartfelt way to connect with loved ones through delicious flavors and stunning visuals. I hope this recipe brings joy and comfort to your gatherings and encourages you to create beautiful memories in your kitchen. I’d love to hear how yours turn out—feel free to leave your comments, questions, or variations below! Don’t forget to explore related recipes on the blog that will sweeten up your tables even further. Happy baking!
Print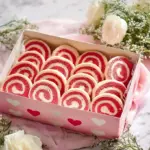
Festive Valentine’s Day Pinwheel Cookies
- Total Time: 150 minutes
- Yield: 24 cookies 1x
- Diet: Vegetarian
Description
Bright and colorful pinwheel cookies that are soft, buttery, and perfect for sharing on Valentine’s Day.
Ingredients
- 2 1/4 cups all-purpose flour
- 1/2 tsp baking powder
- 1/2 tsp salt
- 2/3 cup powdered sugar
- 1/4 cup granulated sugar
- 10 oz unsalted butter, at room temperature
- 1 1/4 tsp vanilla extract
- 1/4 tsp almond extract
- 1/2 tsp food coloring
- 1.5 cups sprinkles
Instructions
- Cream the unsalted butter, powdered sugar, and granulated sugar together in a mixing bowl until light and fluffy (3-4 minutes).
- Add the vanilla extract and almond extract, mixing until well combined.
- Divide the dough in half and knead in your selected food coloring to one half until evenly colored.
- Roll each portion of dough between sheets of wax paper to about 1/4 inch thick, then chill in the refrigerator for at least 1 hour.
- Lay the plain dough on top of the colored dough and roll into a tight log. Chill for another 30 minutes.
- Roll the chilled log in sprinkles, wrap in plastic wrap, and refrigerate for about 2 hours.
- Preheat oven to 350°F (175°C). Slice the log into 1/4-inch thick rounds and place on a parchment-lined baking sheet.
- Bake for 15-17 minutes, or until the edges are golden.
- Cool on the baking sheet for 5 minutes before transferring to a wire rack to cool completely.
Notes
For a dairy-free option, swap butter with a vegan buttery spread. Adjust flour amount if using coconut oil to prevent greasiness.
- Prep Time: 20 minutes
- Cook Time: 17 minutes
- Category: Dessert
- Method: Baking
- Cuisine: American
Nutrition
- Serving Size: 1 cookie
- Calories: 90
- Sugar: 5g
- Sodium: 100mg
- Fat: 6g
- Saturated Fat: 4g
- Unsaturated Fat: 1g
- Trans Fat: 0g
- Carbohydrates: 10g
- Fiber: 0g
- Protein: 1g
- Cholesterol: 20mg
🥗 Free Custom Keto Meal Plan?
Do you want to lose weight while still enjoying delicious Asian & Thai Fusion meals? Take this quick quiz to get your personalized Keto plan based on your favorite foods!
- ✅ No more guessing what to eat
- ✅ Delicious & easy-to-make recipes
- ✅ Tailored to your body type
Get My Custom Plan Now! →
*Over 100,000+ people have transformed their lives with this quiz.