Irresistibly Decadent Chocolate Mousse Filling for Cakes: Elevate Your Baking Game!
Is there anything more luxurious than a rich, velvety chocolate mousse? I still remember the first time I whipped up my very own Chocolate Mousse Filling for Cakes – it was a rainy afternoon, and I found myself in the kitchen, nostalgia washing over me as I recalled my grandmother’s legendary dessert parties. She always said the secret to happiness lay in a good chocolate recipe, and let me tell you, she was right!
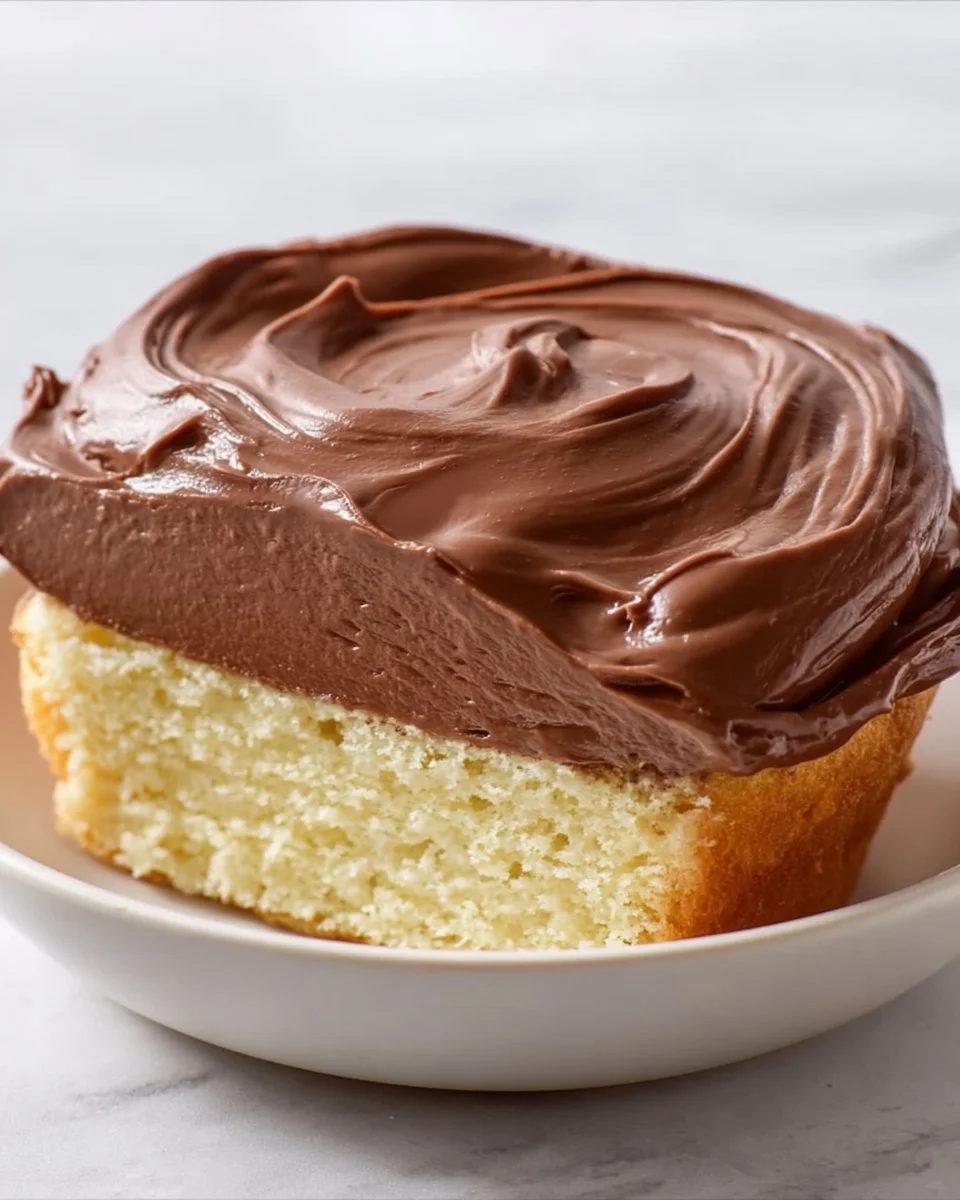
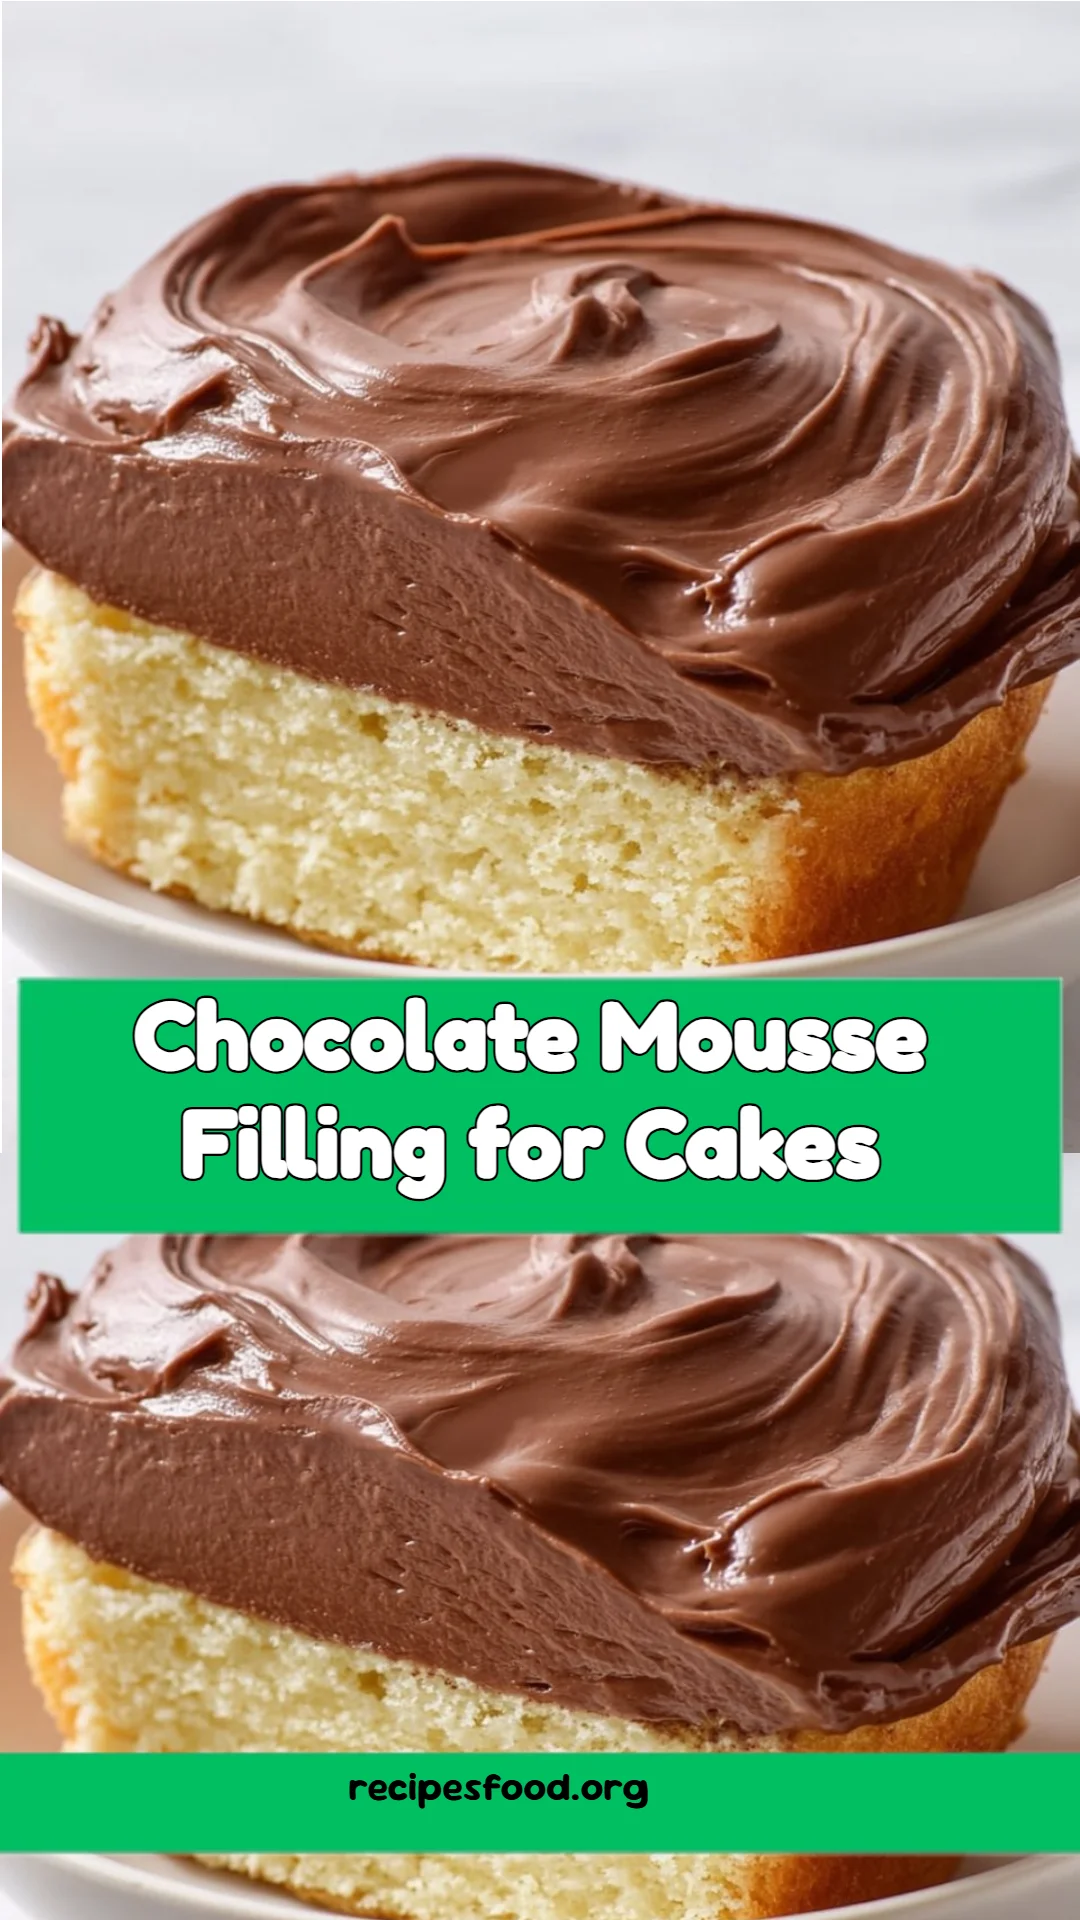
This chocolate mousse filling is not just any sauce; it’s a dreamy, airy concoction that hugs your cake layers and gives them life. Whether you’re celebrating a special occasion or simply indulging in a slice (or three) on a quiet evening, this mousse will make you feel like a superstar baker.
What makes this recipe stand out from the countless others out there? It’s all in the quality of the ingredients and the careful technique. While store-bought versions can sometimes feel heavy and overly sweet, this mousse offers just the right balance of deep chocolate flavor and lightness. Today, I’m thrilled to share the secrets behind crafting this delectable Chocolate Mousse Filling for Cakes so you can bring a taste of joy to your own kitchen!
What Are Chocolate Mousse Fillings for Cakes?
Originating in France, chocolate mousse has become a beloved dessert around the world. The name itself suggests a delightful creaminess, but what’s really enchanting is its texture – incredibly light and fluffy, yet rich and decadent. This filling embodies the perfect contrast; it combines the silky smoothness of melted chocolate with the airy whip of cream, creating a confection that feels almost ethereal.
When should you whip up a batch of this incredible mousse filling? The answer is simple: anytime! Whether you’re layering it in a birthday cake, serving it as a filling for your favorite pastries, or even just savoring it by the spoonful, this mousse elevates any dessert. Plus, its adaptability to various flavors and occasions means you can always have fun experimenting as you create your own tradition.
Why You’ll Love This Recipe
There are countless reasons to fall head over heels for this Chocolate Mousse Filling for Cakes:
Decadent Flavor: This mousse is made with high-quality semi-sweet chocolate, resulting in a depth of flavor that more commercial versions just can’t compete with. Each bite is an experience, bursting with that classic chocolate richness.
Light as Air: Unlike some heavy fillings, this mousse is as light as a cloud, making it perfect for layering without weighing down your cake. You can indulge without the guilt of overly rich desserts.
Cost-Effective: Making your mousse at home is not only more delicious but also saves you money compared to buying premium bakery products. You can make a generous batch for the cost of a single slice from a fancy store!
Customization Galore: Wondering about flavors? Consider infusing espresso, orange zest, or even a hint of mint for a unique twist. The base recipe is an open canvas for you to get creative with.
Easy to Master: As complicated as it sounds, this mousse is surprisingly simple to prepare. With just a few steps—melt, whip, and fold—you’ll have a winning recipe under your belt, and trust me, your friends and family will be so impressed!
Ingredients
Here’s what you’ll need to recreate this heavenly Chocolate Mousse Filling:
200g (7 oz) semi-sweet chocolate (55–65% cocoa), chopped: Choose high-quality chocolate, such as Ghirardelli or Callebaut, for a more intense flavor. You can also use dark chocolate for a richer taste.
1 cup (240ml) heavy whipping cream, cold: Using fresh, cold cream is crucial for achieving those fluffy peaks.
2 tablespoons powdered sugar (adjust to taste): This adds just a touch of sweetness; feel free to use less or more based on your palate.
1 teaspoon pure vanilla extract: Always opt for pure vanilla extract over artificial to enhance the flavor profile. Brands like Nielsen-Massey deliver beautifully.
Pinch of salt (optional, only if using unsalted chocolate): This balances the sweetness and enhances the chocolate’s depth.
Prep Notes: Make sure your heavy cream is well chilled and your chocolate is at room temperature before combining for the best results.
Step-by-Step Instructions
I want you to succeed with this filling, so let’s break it down step-by-step:
Melt the chocolate:
- Place the chopped chocolate in a heatproof bowl. Using a double boiler method is ideal: fill a pot with water, bring it to a simmer, and place the bowl on top, ensuring it doesn’t touch the water. Stir gently until smooth.
- If you prefer a faster route, microwave in 20-second bursts, stirring between each, until fully melted. Allow it to cool to room temperature.
Time Check: This should take about 5-10 minutes, including cooling.
Whip the cream:
- In a large, CHILLED bowl (you can chill it in the freezer for 5 minutes before use), add your cold heavy cream. Begin whipping with a hand mixer or stand mixer fitted with the whisk attachment at medium speed.
- When soft peaks form, add in the powdered sugar and vanilla extract. Continue whipping until stiff peaks form without overmixing.
Visual Cue: You’ll know it’s ready when the cream holds its shape and doesn’t droop.
Combine chocolate and cream:
- Gently take a spoonful of whipped cream and mix it into the cooled chocolate to lighten the mixture. Then, carefully fold in the rest of the whipped cream in 2-3 additions, being mindful to maintain that airy texture.
Chef’s Tip: Avoid stirring too vigorously, or you’ll deflate the mousse.
Expert Tips & Tricks
To really nail this recipe, here are a few expert tips:
Quality Counts: Always use high-quality chocolate for the best results. A chocolate with a cocoa content between 55-65% provides a balanced flavor.
Keep It Cold: Ensuring your mixing equipment and cream are cold helps achieve those fluffy peaks faster.
Storage: If you have any leftover mousse, store it in an airtight container in the fridge for up to 3 days. Just give it a gentle stir before using, as it may deflate slightly.
Make-Ahead Magic: Feel free to make this mousse a day in advance. Just cover tightly and chill to develop even richer flavors.
Common Mistakes: Watch out for over-whipping the cream! It can turn grainy if you whisk too long. Go for a little less than stiff peaks if you’re unsure—it’s easier to adjust.
Serving Suggestions
What’s better than serving this Chocolate Mousse Filling for Cakes? Here are some ideas to elevate your presentation:
Layered Cakes: Sandwich this filling between layers of your favorite chocolate or vanilla cake for a show-stopping dessert.
Dessert Parfaits: Construct individual cups layered with mousse, berries, and crushed cookies for an appealing treat.
Tarts & Pies: Spread it into a pre-baked tart shell for a rich dessert with a crispy base.
Occasion Suggestions: Perfect for birthdays, anniversaries, or just a relaxed Sunday at home. You could also prepare it as part of a festive holiday spread!
Variations & Substitutions
Feel free to play around with flavors in your Chocolate Mousse Filling for Cakes:
Flavored Mousse: Infuse with coffee, raspberry puree, or a splash of liqueur like Baileys or Kahlua for a playful twist.
Dietary Adaptations: If you’re looking for a dairy-free version, substitute the whipped cream for coconut whipped cream and ensure your chocolate is dairy-free.
Seasonal Variations: In fall, consider adding pumpkin spice; during summer, pair it with fresh berries for a refreshing change.
Nutrition & Storage Info
- Prep Time: 15 minutes
- Cook Time: 5 minutes
- Total Time: 20 minutes
- Yield: About 2 cups (enough for a 9-inch cake)
- Estimated Calories: Approximately 220 calories per serving (1/3 cup)
Storage Instructions:
- Room Temperature: Not recommended
- Fridge: Store for up to 3 days
- Freezer: Not recommended for this mousse, as it affects texture.
FAQ Section
Can I use dark chocolate?
- Absolutely! Dark chocolate will provide a richer, less sweet flavor, perfect for true chocoholics.
Can I replace heavy cream with a dairy-free alternative?
- Yes! Coconut cream is an excellent substitute for a vegan option with a hint of tropical flavor.
What can I do if my mousse isn’t fluffy?
- If your mousse doesn’t seem light enough, check that your cream was whipped to soft peaks. Slowly folding the chocolate in can also help retain air.
How do I prevent the chocolate from seizing?
- Make sure no water gets into your melted chocolate, and avoid overheating. If it does seize, adding a teaspoon of warm water while stirring might help.
Can I make this filling a day ahead?
- Yes! It’s often better when made ahead, allowing flavors to meld beautifully.
Do I have to use powdered sugar?
- You can use granulated sugar if desired, but powdered sugar dissolves easily and integrates well for a smoother texture.
How long can I store the mousse?
- It’s best consumed within 3 days when stored in the fridge.
What should I do with leftover mousse?
- Use it as a dip for fruits or spread it on toast for a decadent breakfast treat!
Can I freeze leftovers?
- Freezing isn’t recommended, as it changes the mousse’s texture significantly.
Any tips for a successful fold?
- Be gentle! Use a spatula and lift the mixture from the bottom, turning it over to combine without losing volume.

Conclusion
In summary, this Chocolate Mousse Filling for Cakes is a true game-changer when it comes to baking. Its smooth, fluffy texture and deep chocolate flavor can elevate even the simplest of desserts into something extraordinary. I encourage you to give this recipe a try – you won’t regret it!
Please drop a comment below to share your experience or any questions you might have; I love hearing from fellow baking enthusiasts. And don’t forget to check out my other chocolate-driven recipes right here on the blog – your taste buds will thank you!
Happy baking!

Irresistibly Decadent Chocolate Mousse Filling for Cakes
- Total Time: 20 minutes
- Yield: About 2 cups (enough for a 9-inch cake) 1x
- Diet: Vegetarian
Description
A rich and airy chocolate mousse filling perfect for cakes and desserts, combining smooth melted chocolate and whipped cream for a delightful and indulgent flavor.
Ingredients
- 200g (7 oz) semi-sweet chocolate (55–65% cocoa), chopped
- 1 cup (240ml) heavy whipping cream, cold
- 2 tablespoons powdered sugar (adjust to taste)
- 1 teaspoon pure vanilla extract
- Pinch of salt (optional, only if using unsalted chocolate)
Instructions
- Melt the chocolate: Place the chopped chocolate in a heatproof bowl and use a double boiler or microwave to melt it, stirring until smooth. Allow cooling to room temperature.
- Whip the cream: In a chilled bowl, whip the cold heavy cream until soft peaks form. Add powdered sugar and vanilla extract, continue whipping until stiff peaks form.
- Combine chocolate and cream: Mix a spoonful of whipped cream into the cooled chocolate to lighten it, then carefully fold in the remaining whipped cream to maintain airiness.
Notes
Ensure heavy cream is well chilled and chocolate is at room temperature for best results. Store leftover mousse in an airtight container in the fridge for up to 3 days.
- Prep Time: 15 minutes
- Cook Time: 5 minutes
- Category: Dessert
- Method: Whipping & Melting
- Cuisine: French
Nutrition
- Serving Size: 1/3 cup
- Calories: 220
- Sugar: 5g
- Sodium: 50mg
- Fat: 18g
- Saturated Fat: 11g
- Unsaturated Fat: 7g
- Trans Fat: 0g
- Carbohydrates: 22g
- Fiber: 1g
- Protein: 3g
- Cholesterol: 40mg
🥗 Free Custom Keto Meal Plan?
Do you want to lose weight while still enjoying delicious Asian & Thai Fusion meals? Take this quick quiz to get your personalized Keto plan based on your favorite foods!
- ✅ No more guessing what to eat
- ✅ Delicious & easy-to-make recipes
- ✅ Tailored to your body type
Get My Custom Plan Now! →
*Over 100,000+ people have transformed their lives with this quiz.