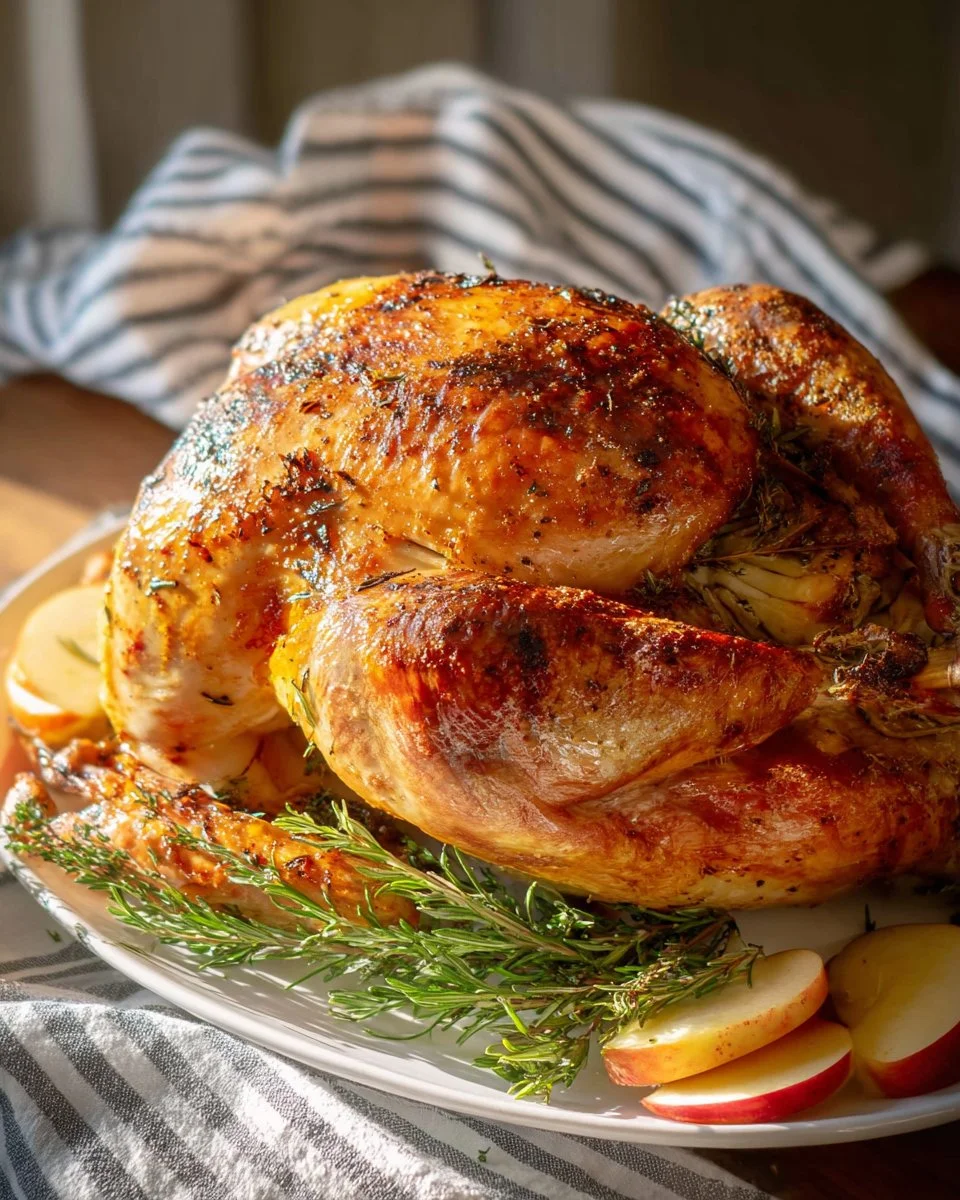
Unlock the Juicy Secrets of Dry Brine Turkey: A Flavor Journey
Introduction
Growing up, Thanksgiving was always a highlight in our household. My mom had a knack for turning our modest kitchen into a bustling culinary haven, filled with the tantalizing aroma of roasting turkey. The centerpiece of our feast? A succulent Dry Brine Turkey that left family and friends raving long after the last slice was served. If you’ve never tried dry brining, let me tell you, it’s a game changer! This technique upgrades your holiday roast from ordinary to extraordinary, creating a juicy and flavorful turkey that will have everyone clamoring for seconds.
What makes dry brining truly special is its ability to penetrate deep into the meat, resulting in a turkey that’s perfectly seasoned inside and out, with a beautifully crisp skin. While traditional wet brining methods often require extra time and equipment, dry brining is simple, effective, and stress-free. I promise: once you discover the wonders of this method, it’ll become your go-to way to prepare turkey for any occasion, not just Thanksgiving. In this blog, you’ll learn how to create your own Dry Brine Turkey, packed with flavor and memories—one bite at a time.
What Are Dry Brined Turkeys?
Dry brined turkeys are a flavorful twist on the traditional method of brining. Instead of submerging the turkey in a salty solution, dry brining involves rubbing the bird with a mix of salt and herbs, which helps to lock in moisture and infuse flavor. This technique dates back generations, with chefs and home cooks alike recognizing its profound impact on taste and texture.
When prepared correctly, a dry brined turkey boasts a rich, savory flavor and a juicy, tender texture, thanks to the salt drawing moisture in and helping it to distribute evenly. The natural juices combine with the seasonings to create a bird that’s bursting with flavor and beautifully golden on the outside. This method is perfect for Thanksgiving, holiday feasts, or any time of year when you want to impress your guests with minimal fuss.
Why You’ll Love This Recipe
Incredible Flavor: Dry brining allows the flavors of herbs and spices to penetrate deep into the meat, giving you a perfectly seasoned turkey throughout—no bland bites here!
Crispy Skin: The salt in the brine draws out moisture, giving you that coveted, crispy outer layer that’s golden and crunchy. Trust me, you’ll want to show it off!
Easy & Hassle-Free: Unlike wet brining that requires a large container and lots of liquid, dry brining just needs a little time in the fridge—less mess and more deliciousness!
Cost-Effective: You can create a gourmet turkey without breaking the bank. With simple ingredients found in your pantry, you can elevate your holiday spread affordably.
Customizable: Feel free to experiment with various herbs and spices—add citrus zest, or even a hint of heat with chili powder—to make it uniquely yours.
Dry brining usually requires a bit of planning, but with just a few days’ notice, you can have a turkey that rivals the fancy restaurants. This recipe is easy enough for beginners but impressive enough to wow your culinary-savvy guests. You’ll have it on the table in about 24 to 48 hours!
Ingredients
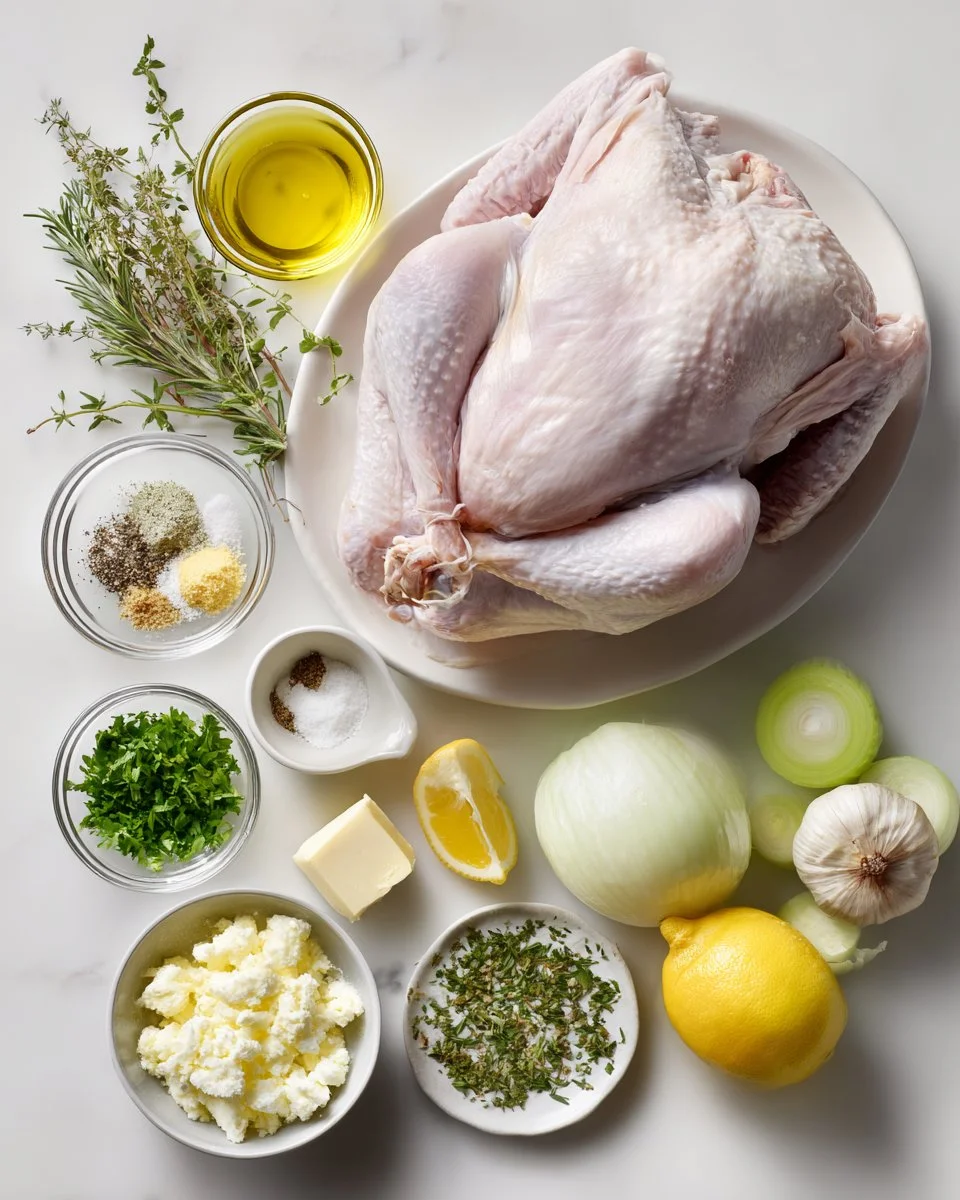
To achieve the best Dry Brine Turkey, here’s what you’ll need:
- 1 (12-15 pound) turkey, thawed (see notes, neck and giblets removed)
- 3 tablespoons Kosher salt
- 2 teaspoons fresh minced herbs (I love using rosemary, thyme, and sage; or 1 ½ teaspoons dried)
- 2 teaspoons garlic powder
- 1 teaspoon ground black pepper
- 8 tablespoons unsalted butter (fully softened, remember, skip the salted)
- 3 teaspoons fresh minced herbs (same choice: rosemary, thyme, sage, or 1 teaspoon dried)
- 2 tablespoons freshly chopped Italian parsley
- 6 cloves fresh garlic, minced
- Zest of 1 lemon
- Olive oil (for rubbing the outside skin)
- Onions and celery (chopped for stuffing the cavity)
- 6 to 8 cups chicken broth (for the pan, plus more as needed)
Notes for This Recipe:
- Use higher-quality salt, such as kosher or sea salt, for better flavor absorption.
- Fresh herbs make a significant difference, but dried can work in a pinch.
- Remember to bring the butter to room temperature before mixing for easier spreading.
Step-by-Step Instructions
Dry Brine Turkey 24-48 Hours Ahead:
Make the Dry Brine:
- In a bowl, combine the Kosher salt, minced herbs, garlic powder, and black pepper. This blend creates the flavorful crust.
- Rub the mixture evenly all over the turkey, taking care to get it under the skin wherever possible for extra flavor.
Rest in the Fridge:
- Place the turkey onto a rack in a large roasting pan and refrigerate uncovered for 24 to 48 hours. The longer, the better! This allows the salt to penetrate the meat, resulting in moisture retention.
Before Roasting:
Preheat Your Oven:
- Bring your oven up to 325°F (163°C) before you start the roasting process. A well-preheated oven ensures even cooking.
Prepare the Turkey:
- After brining, take the turkey out of the fridge and pat it dry with paper towels. This step is essential for achieving maximum crispiness on the skin.
- Mix your softened butter with minced herbs, garlic, and lemon zest. Rub this mixture all over the turkey, including under the skin where you applied the brine earlier.
Stuffing the Cavity:
- Stuff the turkey with chopped onions, celery, and lemon. This adds freshness and aroma.
Roast:
Place in the Oven:
- Pour chicken broth into the bottom of the roasting pan to keep the turkey moist and add flavor.
- Roast the turkey for about 13-15 minutes per pound, basting occasionally with its juices. Use a meat thermometer to check for doneness—165°F (74°C) in the thickest parts of the breast is your target.
Rest Before Carving:
- Once cooked, let your turkey rest for at least 20 to 30 minutes before slicing. This locks in the juices and makes for a tender carving experience.
Chef’s Tips:
- Avoid opening the oven door too often to maintain an even cooking temperature.
- Use a roasting pan with a rack to allow heat circulation.
Common Mistakes to Avoid:
- Skipping the resting period can lead to dry turkey.
- Don’t forget to remove the neck and giblets beforehand!
Expert Tips & Tricks
- Monitor Temperature: Invest in a meat thermometer to ensure perfect doneness without overcooking.
- Flavor Variations: Feel free to experiment with spices—think smoked paprika or even a bit of cumin for a twist.
- Brine Duration: If you’re short on time, a minimum of 12 hours is manageable, but 24 hours brings out the best results.
- Work Ahead: You can prepare the herb butter a day in advance and store it in the refrigerator. Bring it to room temperature before using it.
- Storage Recommendations: If you have leftovers, store them in an airtight container in the refrigerator for up to four days.
Serving Suggestions
Pair your impressive Dry Brine Turkey with traditional sides like creamy mashed potatoes, garlicky green beans, and cranberry sauce for a classic holiday meal. Consider using a vibrant salad to add some color, and don’t forget about a glass of rich red wine to elevate the experience. For presentation, carve the turkey on a beautiful platter, garnished with fresh herbs for that Instagram-worthy touch.
Holiday gatherings, family dinners, or even just a cozy Sunday feast are all perfect occasions for showcasing this turkey.
Variations & Substitutions
- Flavor Combinations: Try adding orange zest and fresh dill or cajun spice for an unexpected kick.
- Dietary Restrictions: If gluten-free, ensure your broth is gluten-free, and skip the stuffing for a flavorful, safe option.
- Seasonal Variations: In the winter, consider using rosemary and sage, while in summer, fresh herbs like basil and parsley could brighten up the dish.
Nutrition & Storage Info
- Prep Time: 30 minutes
- Cook Time: 3-4 hours
- Total Time: Approximately 24 hours (including brining)
- Yield: 10-12 servings
- Estimated Calories: Around 350 calories per serving (varies with sizing)
- Storage Instructions:
- Room Temp: Keep cooked turkey no longer than 2 hours at room temperature.
- Refrigerator: Store leftovers in an airtight container for up to 4 days.
- Freezer: Freeze carved turkey in portions for up to 4 months.
FAQ Section
What is dry brining?
Dry brining is the process of rubbing salt and spices onto meat and letting it sit to absorb moisture and flavor without using liquid.Can I dry brine frozen turkey?
Ideally, thaw the turkey in the fridge first to allow the brine to penetrate properly.How long do I need to brine my turkey?
You can dry brine turkey for 12 to 48 hours depending on your schedule—24 hours is usually best.What type of salt should I use?
Use kosher salt for the best results; its texture allows for easy mixing and even brining.How can I tell when my turkey is done?
A meat thermometer should read 165°F in the thickest part of the breast and 175°F in the thigh.What can I do with leftover turkey?
Use it in soups, sandwiches, or salads—it’s incredibly versatile!Do I need to rinse the turkey after brining?
No, rinsing will lead to a loss of flavor. Just pat dry and proceed with seasoning.How do I store leftovers?
Store in an airtight container in the fridge for up to 4 days or freeze for up to 4 months.Can I use dry brining for other meats?
Absolutely! Chicken, pork, and even beef benefit from dry brining.What sides pair best with dry brined turkey?
Mashed potatoes, stuffing, and roasted vegetables are classic accompaniments.
Conclusion
There you have it! This Dry Brine Turkey recipe not only transforms your holiday bird into a culinary masterpiece but creates lasting memories for your family and friends. I hope you dive in and give it a try—your taste buds will thank you! I’d love to hear your thoughts and any tweaks you make to make it your own. Don’t miss out on my other seasonal recipes on the blog, each crafted to bring love and comfort to your table. Happy cooking!
Print
Dry Brine Turkey
- Total Time: 1440 minutes
- Yield: 10-12 servings 1x
- Diet: None
Description
Unlock the secrets of dry brining to create a juicy, flavorful turkey that’s perfect for Thanksgiving or any occasion.
Ingredients
- 1 (12-15 pound) turkey, thawed (neck and giblets removed)
- 3 tablespoons Kosher salt
- 2 teaspoons fresh minced herbs (rosemary, thyme, sage; or 1 ½ teaspoons dried)
- 2 teaspoons garlic powder
- 1 teaspoon ground black pepper
- 8 tablespoons unsalted butter, fully softened
- 3 teaspoons fresh minced herbs (same choice: rosemary, thyme, sage; or 1 teaspoon dried)
- 2 tablespoons freshly chopped Italian parsley
- 6 cloves fresh garlic, minced
- Zest of 1 lemon
- Olive oil (for rubbing the outside skin)
- Onions and celery (chopped for stuffing the cavity)
- 6 to 8 cups chicken broth (for the pan, plus more as needed)
Instructions
- Make the Dry Brine: In a bowl, combine Kosher salt, minced herbs, garlic powder, and black pepper. Rub the mixture evenly over the turkey, including under the skin.
- Rest in the Fridge: Place the turkey on a rack in a large roasting pan and refrigerate uncovered for 24 to 48 hours.
- Preheat Your Oven: Bring your oven up to 325°F (163°C).
- Prepare the Turkey: After brining, pat the turkey dry with paper towels. Mix softened butter with minced herbs, garlic, and lemon zest. Rub all over the turkey, including under the skin.
- Stuffing the Cavity: Stuff with chopped onions, celery, and lemon.
- Place in the Oven: Pour chicken broth into the roasting pan and roast the turkey for about 13-15 minutes per pound, basting occasionally. Check for doneness at 165°F in the thickest part of the breast.
- Rest Before Carving: Let the turkey rest for 20 to 30 minutes before slicing.
Notes
Use kosher or sea salt for better flavor absorption. Fresh herbs make a significant difference, but dried can work in a pinch.
- Prep Time: 30 minutes
- Cook Time: 210 minutes
- Category: Main Course
- Method: Roasting
- Cuisine: American
Nutrition
- Serving Size: 1 serving
- Calories: 350
- Sugar: 0g
- Sodium: 400mg
- Fat: 24g
- Saturated Fat: 10g
- Unsaturated Fat: 14g
- Trans Fat: 0g
- Carbohydrates: 0g
- Fiber: 0g
- Protein: 15g
- Cholesterol: 70mg
🥗 Free Custom Keto Meal Plan?
Do you want to lose weight while still enjoying delicious Asian & Thai Fusion meals? Take this quick quiz to get your personalized Keto plan based on your favorite foods!
- ✅ No more guessing what to eat
- ✅ Delicious & easy-to-make recipes
- ✅ Tailored to your body type
Get My Custom Plan Now! →
*Over 100,000+ people have transformed their lives with this quiz.