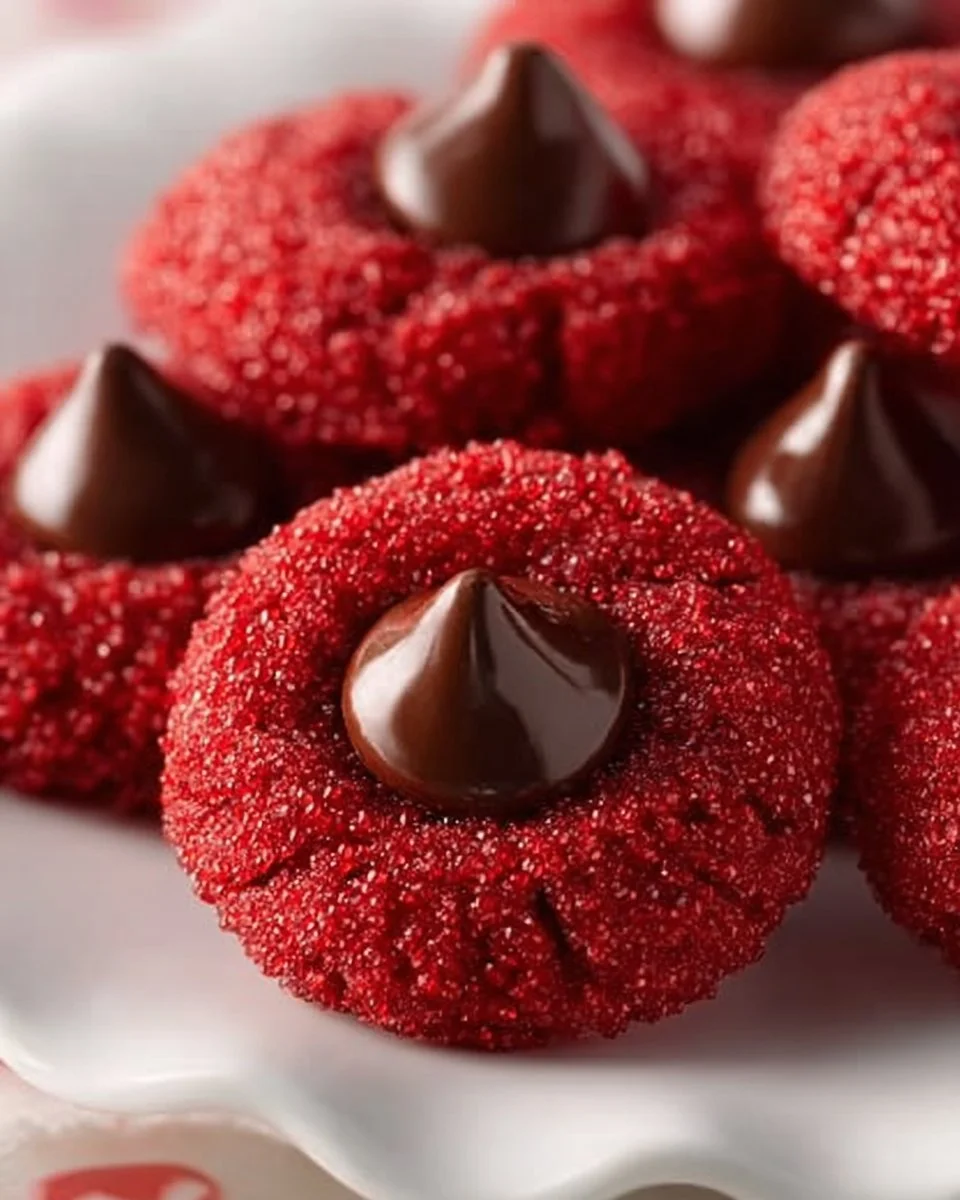
Irresistible Hershey’s Red Velvet Blossoms: The Ultimate Comfort Cookie Recipe
Picture this: a chilly winter afternoon where your home is filled with the comforting aroma of baked goods, sweet memories swirling in the air. As I pull a tray of vibrant red cookies out of the oven, I can’t help but think of the countless family gatherings where these delectable treats were the star. Enter Hershey’s Red Velvet Blossoms—the perfect blend of moist red velvet flavor and rich chocolatey goodness, topped with a delicious Hershey’s chocolate kiss, of course.
What makes these cookies stand out from the crowd of cookie recipes? It’s their whimsical color, their melt-in-your-mouth texture, and that burst of sweetness from the kiss in the center. Unlike many cookie recipes that leave you feeling heavy, these little gems are light yet indulgent, eliciting smiles from loved ones with just one bite. Whenever I bake them, I see my family’s eyes light up like Christmas morning—and trust me, this recipe will have the same effect on yours.
In this post, I promise to guide you through making these stunning cookies, highlighting every step and sharing my personal tips to ensure you create a batch that will become a cherished family tradition. Let’s get baking!
What Are Hershey’s Red Velvet Blossoms?
Hershey’s Red Velvet Blossoms originate from the desire to bring a classic dessert into the spotlight with a twist on traditional red velvet cake. These cookies offer the signature flavor we all adore, combining a hint of sweetness with a subtle cocoa note, and finished with a creamy chocolate kiss nestled right in the center. The cookies are soft, pillowy, and melt in your mouth, providing delightful layers of texture that set them apart from typical chocolate chip cookies.
These vibrant treats are perfect for a wide array of occasions—Valentine’s Day, holiday gatherings, or even casual get-togethers. Whether you’re bringing them to a friend’s house or enjoying them while snuggled on the couch with a warm cup of coffee, they’re sure to evoke feelings of warmth and joy.
Why You’ll Love This Recipe
Flavorful Happiness: Let’s talk flavor! The combination of soft red velvet cake and chocolate kisses is a match made in dessert heaven. Each bite is rich and comforting, turning an ordinary day into a celebration.
Cost-Effective Delight: Rather than splurging on overpriced cookies from the bakery, you can whip up a batch of these beauties at home for a fraction of the cost. Plus, you can make more cookies than you’d ever get from a store!
Customization Options: Want to add nuts? Go for it! Prefer a spicier touch? Toss in some cinnamon! This recipe is incredibly versatile, allowing you to make it your own.
Easy to Make: Even if you consider yourself a novice baker, you’ll find this recipe easy to follow. With just a few steps and simple ingredients, your kitchen will smell divine in no time.
Perfect for Sharing: Baking is all about love, and you’d be hard-pressed to find someone who doesn’t appreciate a homemade cookie. These are perfect for parties, gifting, or simply sharing with family while creating memories.
Ingredients
- 7 tbsp butter (salted or unsalted, softened to room temperature) – Use high-quality butter for a richer flavor; I love using Kerrygold.
- 1/2 cup packed brown sugar – Provides moisture and depth to the cookie.
- 2 tbsp granulated sugar – For that sweet crunch!
- 1 tsp vanilla extract – Always opt for pure vanilla for exquisite flavor.
- 1 large egg yolk – This adds richness and helps bind the dough.
- 1/4 tsp red food coloring gel – Make your cookies pop with a beautiful red hue!
- 1 cup all-purpose flour – Essential for structure.
- 1 tbsp cocoa powder – Use unsweetened cocoa for depth.
- 1/2 tsp baking powder – Aiding in fluffiness.
- 1/4 tsp salt – Balances sweetness.
- 1/4 cup red sanding sugar – For rolling before baking; adds texture and flair.
- 18 Hershey’s chocolate kisses – The cherry on top!
Notes on Substitutions:
- You can use vegan butter as a substitute for a dairy-free version.
- For gluten-free cookies, swap the all-purpose flour with a gluten-free blend.
- If you want a slight zest, turn to lemon extract instead of vanilla.
Step-by-Step Instructions
Preheat your oven to 350°F (175°C) and line a large baking sheet with parchment paper. This step is crucial to ensure that your cookies don’t stick and bake evenly.
In your stand mixer, cream 7 tablespoons of softened butter, brown sugar, and granulated sugar together until the mixture is light and fluffy—about 2 minutes. This is where the magic begins, and your kitchen will start to smell incredible!
Add the egg yolk, vanilla extract, and red food coloring gel. Mix until the ingredients are well combined. You’ll see the batter transform into a beautiful red hue!
Mix together the flour, cocoa powder, baking powder, and salt in a separate bowl. Gradually incorporate this dry mixture into the wet ingredients. Mix just until the flour disappears; avoid over-mixing to keep the cookies tender.
Using a tablespoon, scoop out 18 equally sized cookie dough balls. Roll them in your hands to form smooth balls, then roll each ball in red sanding sugar until fully coated. They should look festive and inviting!
Place the cookie balls on the prepared baking sheet, leaving about 2 inches between each one to allow for spreading. Bake for about 10 minutes or until the edges appear set.
As soon as you take them out of the oven, gently press a Hershey’s chocolate kiss into the center of each cookie. This step is essential for that gorgeous melty center! Let them cool for about 10 minutes on the baking sheet before transferring them to a cooling rack to fully cool down.
Chef’s Tips:
- For the perfect chewy texture, don’t overbake! They should look slightly underbaked in the center.
- If using homemade cookie dough, refrigerate for at least 30 minutes for better flavors.
Expert Tips & Tricks
Storage Recommendations: These cookies will keep perfectly in an airtight container for about 5 days at room temperature. For extended freshness, you can refrigerate them for up to 2 weeks.
Make-Ahead Instructions: Prepare the dough a day in advance, cover it tightly, and freeze. When ready to bake, simply stop and let it sit at room temperature for 30 minutes.
Troubleshooting Common Problems: If your cookies spread too much, it could be due to warm dough; chill the balls for 10-15 minutes before baking. If they puff up too much, check your baking powder; old leavening agents can lead to unexpected results.
Double the Batch: These cookies disappear fast! If you have a crowd to please, feel free to double the recipe.
Experiment with Flavors: Add a pinch of cinnamon to the dough for a warm twist or sprinkle some flaked sea salt over the top before serving for a delightful contrast.
Serving Suggestions
These delightful Hershey’s Red Velvet Blossoms shine as the star of any dessert table! Pair them with a hot cup of cocoa or a creamy vanilla latte for the perfect afternoon treat. For an enchanting presentation, arrange the cookies on a festive platter, dust lightly with powdered sugar, or surround them with festive decorations if serving at a holiday gathering.
Variations & Substitutions
- Chocolate Lovers Delight: Replace half of the all-purpose flour with cocoa powder to create a deeper chocolate flavor.
- Nutty Twists: Add chopped pecans or walnuts to the dough for a crunchy texture and an extra layer of flavor.
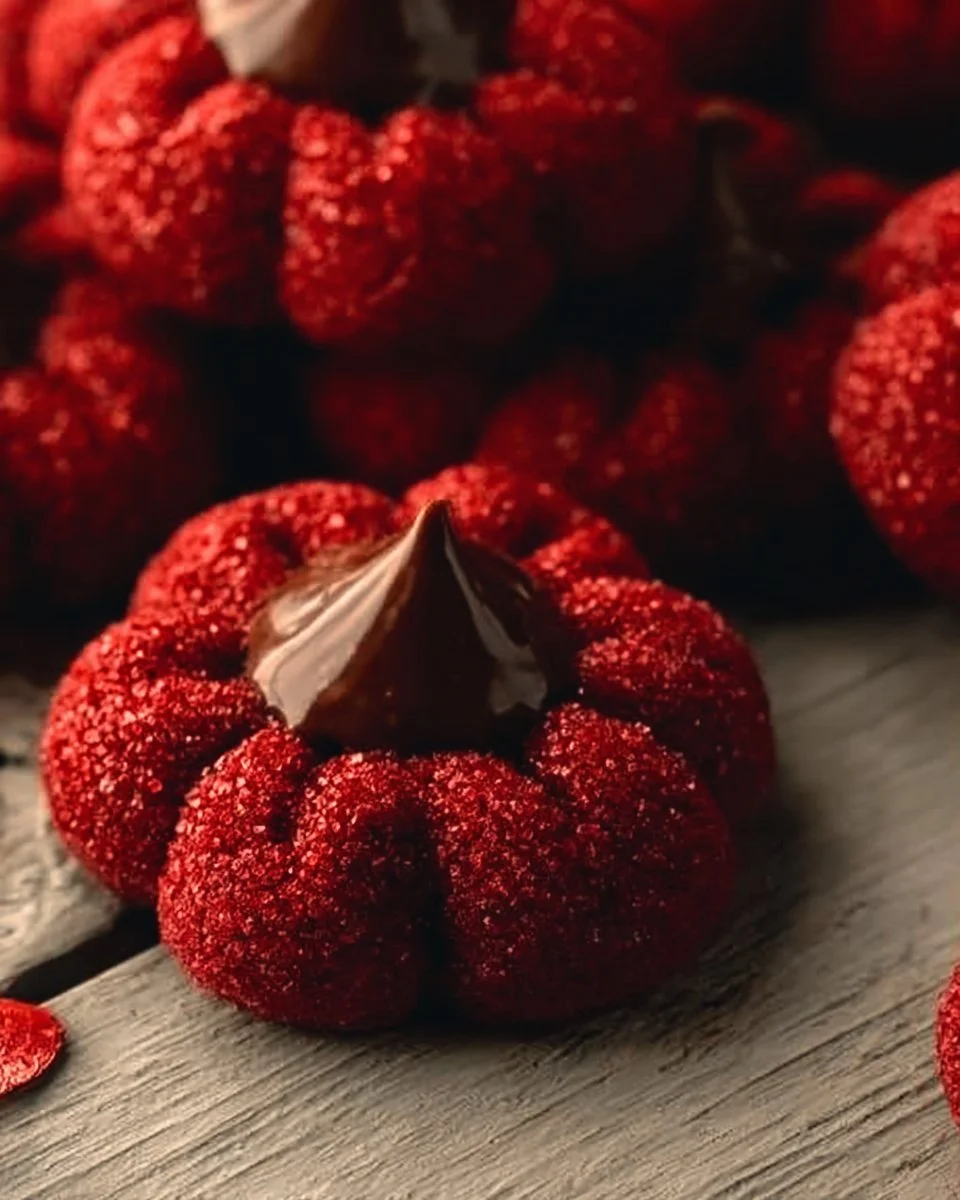
- Seasonal Fun: Around Halloween, consider using orange food coloring for a spooky treat, or add peppermint extract and crushed candy canes in the winter for a festive vibe!
Nutrition & Storage Info
- Prep Time: 15 minutes
- Cook Time: 10 minutes
- Total Time: 25 minutes
- Yield: Approximately 18 cookies
- Estimated Calories per serving: About 120
- Storage Instructions: Store at room temperature in an airtight container for up to 5 days; refrigerate for up to 2 weeks, and freeze for 2-3 months.
FAQ Section
Can I freeze these cookies?
Yes! They freeze beautifully. Simply place them in an airtight container or freezer bag, separating layers with parchment paper.What can I use instead of red gel food coloring?
You can use liquid food coloring, but gel gives a more vibrant color without altering the consistency of the dough.How do I know when they’re done baking?
Look for the edges to be set and the centers to look slightly underbaked. They will continue to firm up as they cool.What other toppings can I use?
Feel free to replace the chocolate kiss with caramel candies, peanut butter cups, or even a dollop of frosting on top!Can I use whole wheat flour instead of all-purpose flour?
Yes, but note that the texture may be denser, so it might require a slight adjustment in liquid ingredients.How can I make these cookies gluten-free?
Use a gluten-free baking blend that matches the weight of all-purpose flour.Is there a vegan version of this recipe?
Absolutely! Substitute the butter with plant-based butter, the egg yolk with a flax egg, and use a plant-based milk instead of the dairy.What is the best way to store these cookies?
Store them in an airtight container at room temperature to keep them from drying out.Can I make these cookies smaller or larger?
Yes! Adjust baking time accordingly; smaller cookies will need less time, and larger cookies may require a bit longer.What’s the secret to getting the perfect texture?
Make sure your butter is at room temperature and don’t overmix the dough after adding the flour.
Conclusion
These Hershey’s Red Velvet Blossoms aren’t just cookies—they’re a deliciously nostalgic treat that brings warmth and joy to the heart. Whether you’re baking for yourself or sharing with loved ones, each bite will remind you of happy moments spent together. I hope you feel inspired to try this recipe in your own kitchen and experience the love that goes into every crumb. I’d love to hear your feedback and any variations you come up with, so drop a comment below! And don’t forget to check out other delightful recipes on the blog to keep the sweetness coming! Happy baking!
Print
Hershey’s Red Velvet Blossoms
- Total Time: 25 minutes
- Yield: 18 cookies 1x
- Diet: Vegetarian
Description
Vibrant red velvet cookies topped with a delicious Hershey’s chocolate kiss, combining moist texture and rich chocolate flavor for a comforting treat.
Ingredients
- 7 tbsp butter (salted or unsalted, softened to room temperature)
- 1/2 cup packed brown sugar
- 2 tbsp granulated sugar
- 1 tsp vanilla extract
- 1 large egg yolk
- 1/4 tsp red food coloring gel
- 1 cup all-purpose flour
- 1 tbsp cocoa powder
- 1/2 tsp baking powder
- 1/4 tsp salt
- 1/4 cup red sanding sugar
- 18 Hershey’s chocolate kisses
Instructions
- Preheat your oven to 350°F (175°C) and line a large baking sheet with parchment paper.
- Cream butter, brown sugar, and granulated sugar together until light and fluffy, about 2 minutes.
- Add the egg yolk, vanilla extract, and red food coloring gel, mixing until well combined.
- In a separate bowl, mix together flour, cocoa powder, baking powder, and salt, then gradually add to the wet ingredients.
- Scoop out 18 cookie dough balls, roll them in red sanding sugar, and place them on the baking sheet.
- Bake for about 10 minutes, then press a Hershey’s chocolate kiss into the center of each cookie after baking.
- Let cool for about 10 minutes before transferring to a cooling rack.
Notes
For a dairy-free version, use vegan butter. For gluten-free cookies, swap with a gluten-free flour blend.
- Prep Time: 15 minutes
- Cook Time: 10 minutes
- Category: Dessert
- Method: Baking
- Cuisine: American
Nutrition
- Serving Size: 1 cookie
- Calories: 120
- Sugar: 10g
- Sodium: 50mg
- Fat: 6g
- Saturated Fat: 4g
- Unsaturated Fat: 2g
- Trans Fat: 0g
- Carbohydrates: 15g
- Fiber: 0g
- Protein: 1g
- Cholesterol: 10mg
🥗 Free Custom Keto Meal Plan?
Do you want to lose weight while still enjoying delicious Asian & Thai Fusion meals? Take this quick quiz to get your personalized Keto plan based on your favorite foods!
- ✅ No more guessing what to eat
- ✅ Delicious & easy-to-make recipes
- ✅ Tailored to your body type
Get My Custom Plan Now! →
*Over 100,000+ people have transformed their lives with this quiz.