Delightfully Sweet and Easy Cherry Pie Bars: Your New Favorite Dessert Recipe!
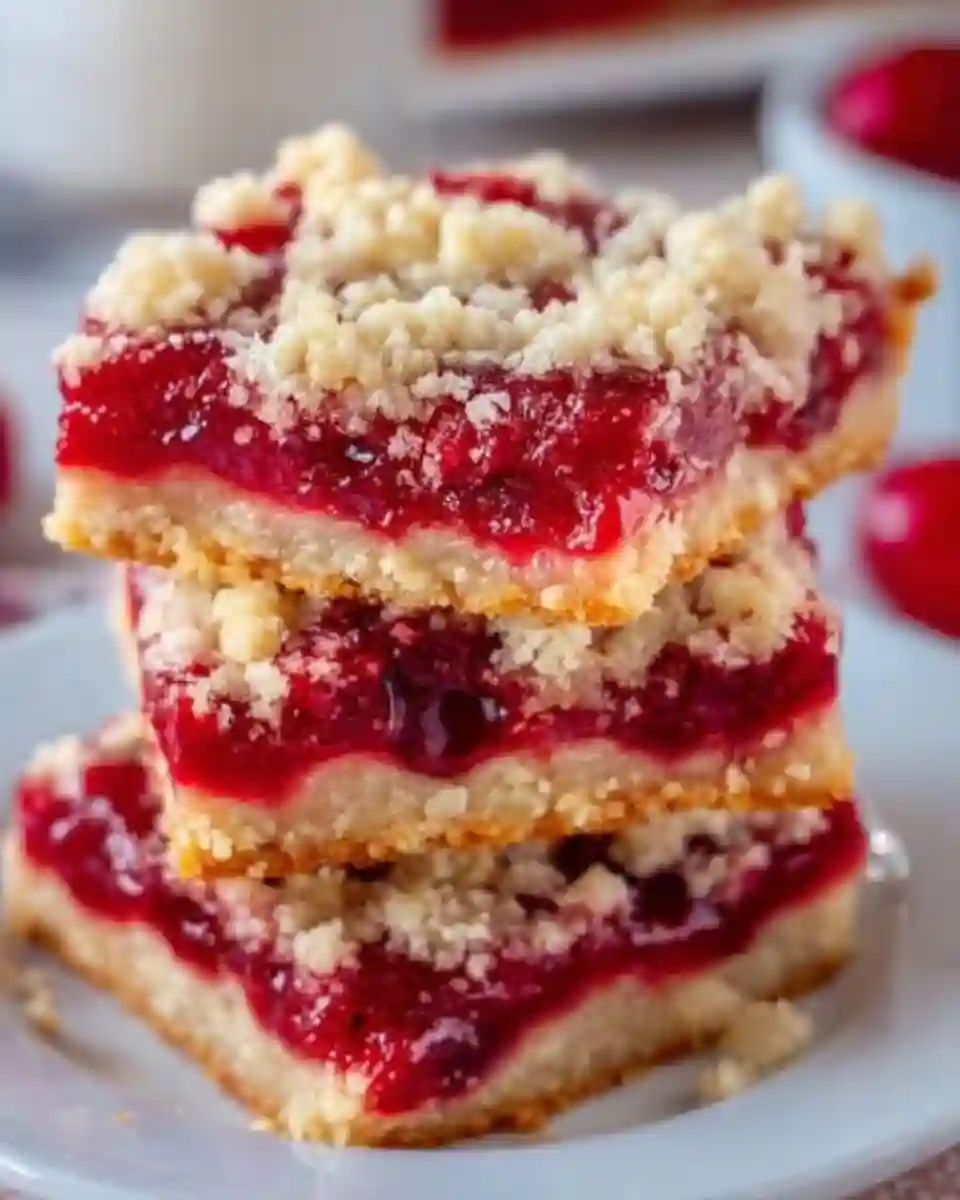
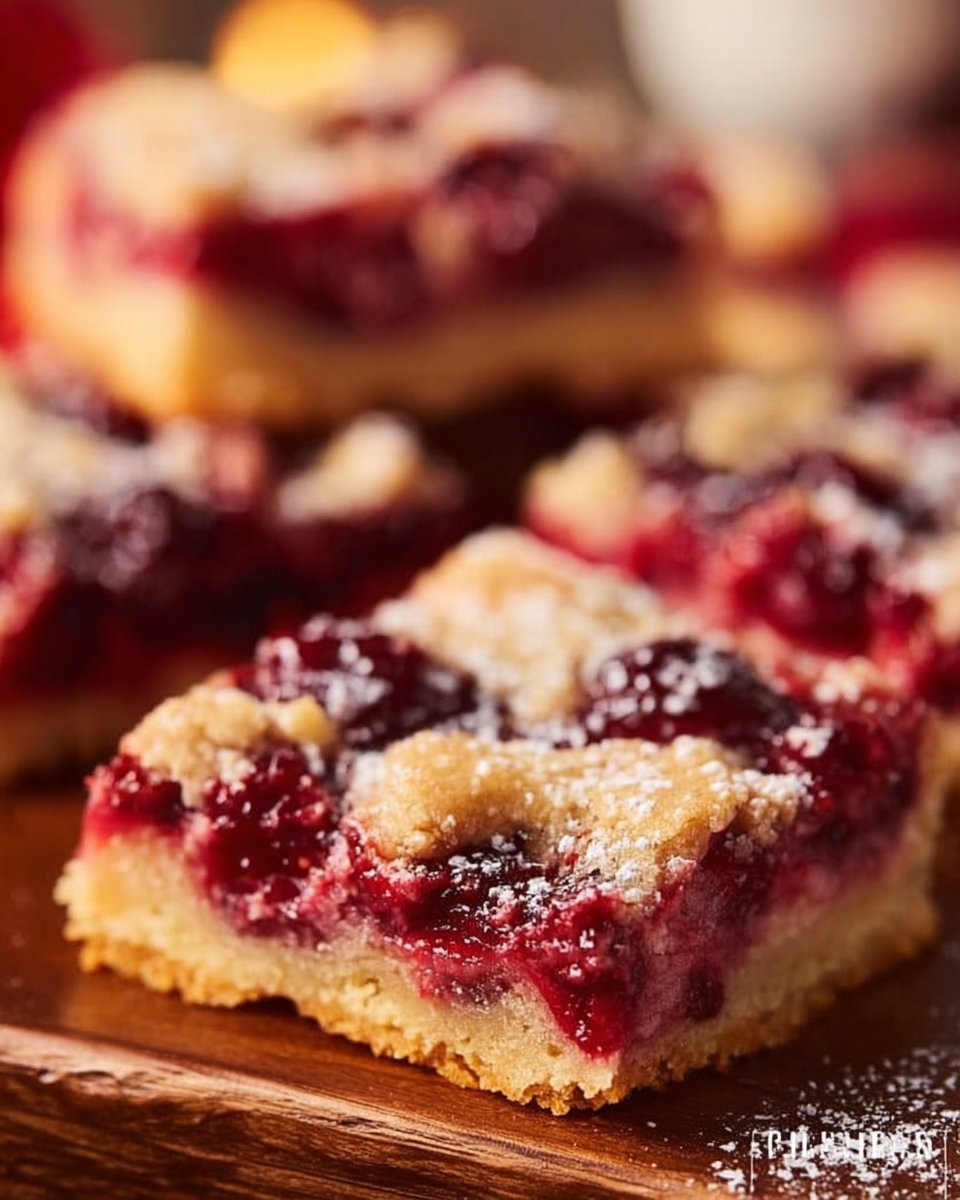
When I think about the best days of summer, my mind often drifts to my grandmother’s kitchen, filled with the comforting aroma of baked desserts. One treat that always stood out was her gooey, sweet cherry pie bars—bright red cherries nestled in a buttery, crumbly crust, dusted with powdered sugar. These Cherry Pie Bars remind me of long family gatherings and warm evenings filled with laughter, served up fresh from the oven as we all fought to snag the first piece.
What makes these cherry pie bars so special is their balance of textures and flavors: the nutty crumble topping, the tart cherry filling, and that buttery crust that crumbles beautifully with every bite. Plus, creating these bars is infinitely easier than baking a traditional pie, and this recipe guides you every step of the way. You won’t need grandma’s secret ingredient to make these; just simple pantry staples combined with a dash of love.
So, if you’re ready to bring a bit of nostalgia to your kitchen, stick around! This recipe will have you whipping up a batch of irresistible Cherry Pie Bars that will be the star of your next family get-together or evening treat.
What Are Cherry Pie Bars?
Cherry Pie Bars, as the name suggests, are a luscious twist on the classic cherry pie, combining all the deliciousness we adore into a portable, shareable bar form. These scrumptious treats originated as a way to simplify pie-making, allowing more people to enjoy the flavors without the fuss of crusts and lattice work.
The first bite reveals a soft and crumbly crust, followed by a luscious cherry filling that bursts with sweetness. The topping is a delightful crunchy crumb made from oats and brown sugar—think of it as a cherry pie meets crumble dessert. They’re perfect for any occasion—from summer picnics to cozy winter nights with a cup of tea—and they are especially beloved for their ability to evoke warm memories and cheerful gatherings.
Why You’ll Love This Recipe
Simple Preparation: Unlike traditional pies that can be intimidating, these Cherry Pie Bars are incredibly easy to make. Anyone, from the novice baker to the experienced home chef, can handle them with confidence!
Flavor Overload: With a perfect balance of sweet and tart flavors, these bars offer a delicious taste of summer all year round. Personalize the cherry filling with spices like cinnamon or vanilla for added depth.
Cost-Effective: Forget expensive store-bought desserts! These bars are made with budget-friendly ingredients that you probably already have at home.
Customization Galore: You can easily adjust the recipe to suit your taste. Swap cherries for your favorite fruits or add a sprinkle of chocolate chips for a decadent twist!
Freezer Friendly: These Cherry Pie Bars freeze beautifully. Make a big batch and keep some stashed away for those last-minute cravings or unexpected guests.
With minimal time investment required to prepare, you’ll be delighting friends and family with these easy Cherry Pie Bars before you know it!
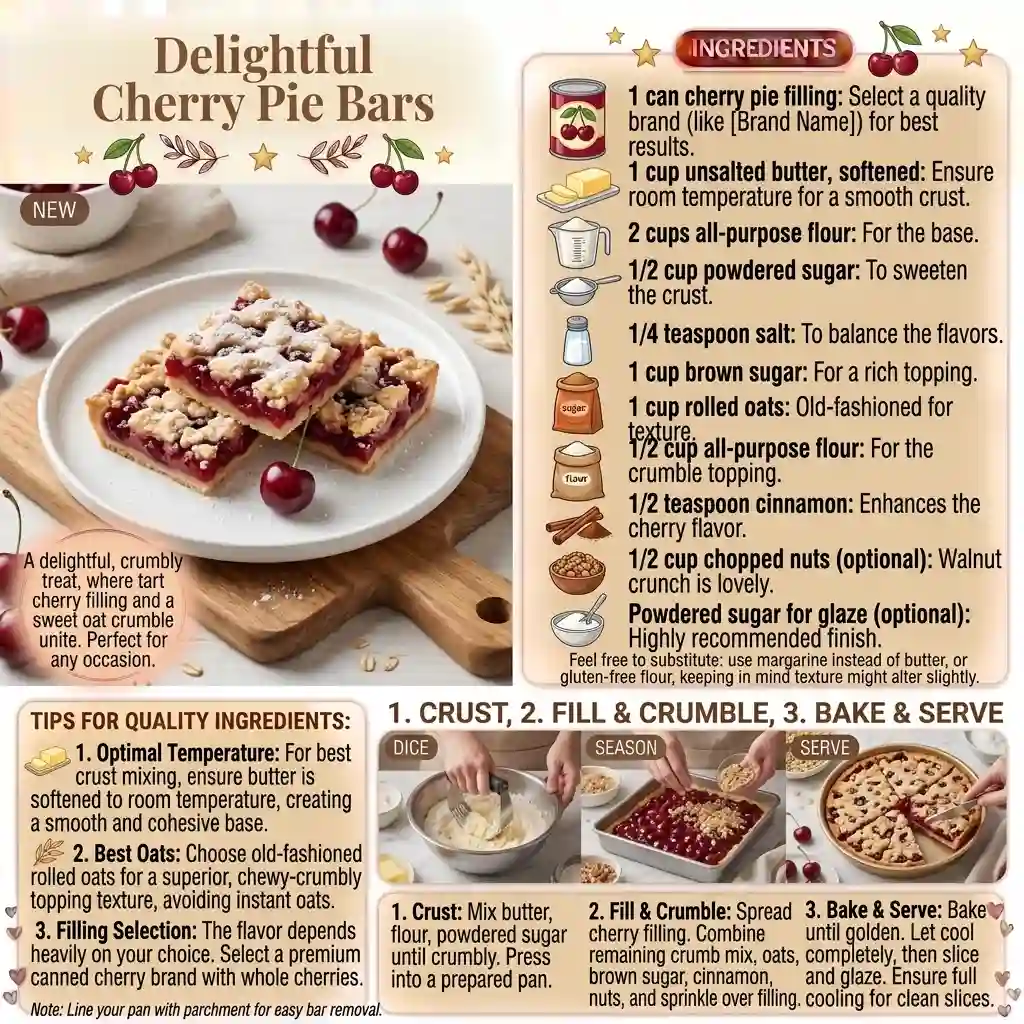
Ingredients
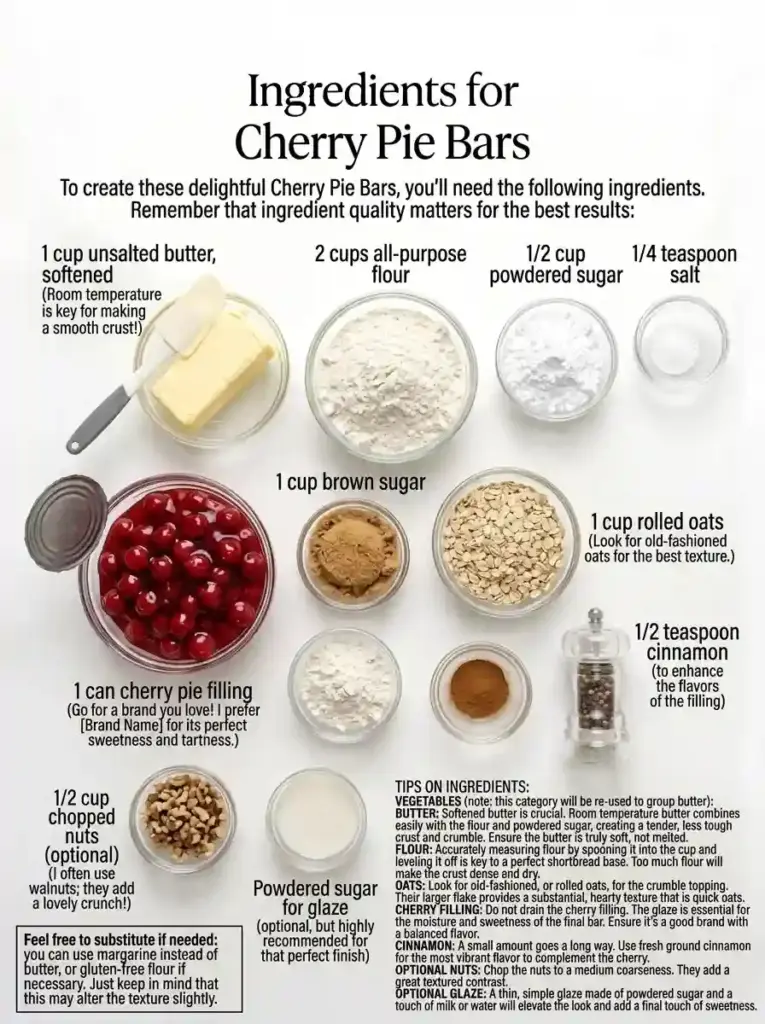
To create these delightful Cherry Pie Bars, you’ll need the following ingredients. Remember that ingredient quality matters for the best results:
- 1 cup unsalted butter, softened (Room temperature is key for making a smooth crust!)
- 2 cups all-purpose flour
- 1/2 cup powdered sugar
- 1/4 teaspoon salt
- 1 can cherry pie filling (Go for a brand you love! I prefer [Brand Name] for its perfect sweetness and tartness.)
- 1 cup brown sugar
- 1 cup rolled oats (Look for old-fashioned oats for the best texture.)
- 1/2 cup all-purpose flour (for the crumble topping – you’ll see!)
- 1/2 teaspoon cinnamon (to enhance the flavors of the filling)
- 1/2 cup chopped nuts (optional) (I often use walnuts; they add a lovely crunch!)
- Powdered sugar for glaze (optional, but highly recommended for that perfect finish)
Feel free to substitute if needed: you can use margarine instead of butter, or gluten-free flour if necessary. Just keep in mind that this may alter the texture slightly.
Step-by-Step Instructions
Now that we’re all set, let’s dive into making these fabulous Cherry Pie Bars!
Preheat the oven to 350°F (175°C). This ensures a consistent baking temperature for even cooking.
In a mixing bowl, cream together butter, flour, powdered sugar, and salt until crumbly. Use a hand mixer or wooden spoon—your choice! The goal is a mixture that resembles wet sand.
Press the mixture into the bottom of a greased baking pan (an 8×8-inch pan works perfectly) to form the crust. This layer should be even and packed down nicely.
Bake the crust for 15-20 minutes until lightly golden. Keep an eye on it to avoid overbaking, which can make the crust too hard.
In another bowl, mix brown sugar, oats, flour, cinnamon, and nuts (if using) to create the crumble topping. The mixture should be somewhat crumbly but hold together when pressed slightly.
Spread the cherry pie filling evenly over the baked crust. Don’t forget to poke some holes in the filling with a fork to help the crust absorb some of that cherry goodness!
Sprinkle the crumble mixture over the cherry filling. Make sure it’s evenly distributed for that yummy crunch.
Bake for an additional 25-30 minutes until the topping is golden brown. You’ll know they’re done when your kitchen is filled with that mouthwatering aroma!
Allow to cool before cutting into bars. If you’re feeling fancy, drizzle a glaze made of powdered sugar mixed with a little water or milk over the top for an added touch of sweetness.
Chef’s Tips:
- Use room temperature butter for the best consistency.
- Be careful not to overmix the crust; a little crumble is perfect!
- Always let your bars cool completely before slicing for cleaner edges.
Expert Tips & Tricks
- Storage Recommendations: Keep your Cherry Pie Bars in an airtight container at room temperature for up to 3 days, or refrigerate for a week.
- Make-Ahead Instructions: You can prepare the bars ahead of time and store them in the fridge before baking. Just be sure to let them come to room temperature before popping them in the oven.
- Troubleshooting Common Problems: If your crumble topping isn’t holding together, try adding a bit more melted butter. If it’s too dry after baking, a tiny drizzle of cherry juice can add moisture.
- Freezing: These bars freeze really well! Wrap them tightly and store in the freezer for up to 3 months. Thaw overnight in the fridge before serving.
Serving Suggestions
For the ultimate dessert experience, serve your Cherry Pie Bars warm with a scoop of vanilla ice cream or freshly whipped cream on the side! They also pair beautifully with a piping hot cup of tea or coffee.
For presentation, you can cut them into colorful shapes using cookie cutters or serve them on a pretty platter dusted with powdered sugar. These bars are excellent for potlucks, picnics, or just for that evening when you need a little extra sweetness!
Variations & Substitutions
- Different Flavor Combinations: Feel free to mix it up! Blueberries, peaches, or apples pair perfectly for a fruity alternative. Try adding lemon zest to the filling for a refreshing twist!
- Dietary Restrictions: Gluten-free flour can replace all-purpose flour, and you can use coconut oil instead of butter for a dairy-free version.
- Seasonal Variations: In the fall, consider adding pumpkin spice to the crumble and swap cherries for pumpkin puree for a seasonal treat!
Nutrition & Storage Info
- Prep Time: 20 minutes
- Cook Time: 45 minutes
- Total Time: 1 hour 5 minutes
- Yield: 12 servings
- Estimated Calories per Serving: About 220 calories
- Storage Instructions:
- Room Temperature: 3 days
- Fridge: 1 week
- Freezer: Up to 3 months
FAQ Section
Can I use fresh cherries instead of canned?
Yes! Just make sure to pit and halve them, then cook with a little sugar and cornstarch to thicken.Can I omit the nuts?
Absolutely! The bars will still be delicious without them.What’s the best way to cut these bars?
Use a sharp knife and cut when they’re fully cooled for clean edges.Can I double the recipe?
Sure! Just use a 9×13-inch baking dish, and you might need to add a few extra minutes to the baking time.How can I make these gluten-free?
Substitute all-purpose flour with a 1:1 gluten-free baking flour.Can I use an alternative sweetener?
Yes, you can replace sugar with maple syrup or agave nectar, adjusting the texture accordingly.What’s a good glaze option?
A simple powdered sugar and almond milk glaze is delightful!How do I avoid a soggy crust?
Ensure the crust is fully baked before adding the filling and allow it to cool slightly before cutting.Can I make these bars vegan?
Substitute butter with vegan margarine and use a vegan egg replacement if required.What if there are leftovers?
Store them airtight in the fridge—we all know cherry desserts are even better the next day!
Conclusion
These Cherry Pie Bars are more than just a dessert; they’re a nostalgic treat that brings back cherished memories and sweet moments shared with loved ones. With their simple preparation and delicious flavor, they are sure to become a staple in your kitchen. So go ahead, give this recipe a try, and I promise you won’t be disappointed! I’d love to hear your feedback and see how your treats turned out. Feel free to share your thoughts or any tweaks you made in the comments!
If you enjoyed this recipe, don’t miss out on my other delightful treats, such as Quick and Delicious Glazed Peach Hand Pies, all waiting to bring sweetness to your table. Happy baking!
Print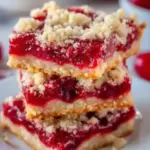
Cherry Pie Bars
- Total Time: 65 minutes
- Yield: 12 servings 1x
- Diet: Vegetarian
Description
Delightfully sweet and easy Cherry Pie Bars with a buttery crumbly crust and gooey cherry filling.
Ingredients
- 1 cup unsalted butter, softened
- 2 cups all-purpose flour
- 1/2 cup powdered sugar
- 1/4 teaspoon salt
- 1 can cherry pie filling
- 1 cup brown sugar
- 1 cup rolled oats
- 1/2 cup all-purpose flour (for the crumble topping)
- 1/2 teaspoon cinnamon
- 1/2 cup chopped nuts (optional)
- Powdered sugar for glaze (optional)
Instructions
- Preheat the oven to 350°F (175°C).
- Cream together butter, 2 cups flour, powdered sugar, and salt until crumbly.
- Press the mixture into the bottom of a greased 8×8-inch baking pan to form the crust.
- Bake the crust for 15-20 minutes until lightly golden.
- In another bowl, mix brown sugar, oats, 1/2 cup flour, cinnamon, and nuts to create the crumble topping.
- Spread the cherry pie filling evenly over the baked crust.
- Sprinkle the crumble mixture over the cherry filling.
- Bake for an additional 25-30 minutes until the topping is golden brown.
- Allow to cool before cutting into bars and optionally glaze with powdered sugar and a little water or milk.
Notes
Keep the bars in an airtight container. They can also be frozen for up to 3 months.
- Prep Time: 20 minutes
- Cook Time: 45 minutes
- Category: Dessert
- Method: Baking
- Cuisine: American
Nutrition
- Serving Size: 1 serving
- Calories: 220
- Sugar: 15g
- Sodium: 60mg
- Fat: 10g
- Saturated Fat: 6g
- Unsaturated Fat: 4g
- Trans Fat: 0g
- Carbohydrates: 30g
- Fiber: 2g
- Protein: 2g
- Cholesterol: 30mg
🥗 Free Custom Keto Meal Plan?
Do you want to lose weight while still enjoying delicious Asian & Thai Fusion meals? Take this quick quiz to get your personalized Keto plan based on your favorite foods!
- ✅ No more guessing what to eat
- ✅ Delicious & easy-to-make recipes
- ✅ Tailored to your body type
Get My Custom Plan Now! →
*Over 100,000+ people have transformed their lives with this quiz.