Table of Contents
Table of Contents
As the leaves turn shades of orange and the nights grow longer, the anticipation of Halloween fills the air. For me, it’s not just about the spooky decorations or costume planning; it’s about the magical time spent in the kitchen, crafting delicious treats that evoke comfort and joy. One of my absolute favorites? Halloween Whoopie Pies! When I first baked these delightful treats with my family a few years back, I had no idea that their combination of soft, delicious chocolate cakes and irresistible cream filling would become a cherished tradition.
These Halloween Whoopie Pies are unlike any you’ll find at your local bakery—or even at a Halloween party, for that matter. With their tender texture, rich flavor, and just the right amount of sweetness, they are perfect for celebrating the season of spookiness. Sharing these pies brings back memories of laughter and the smell of fresh pastries, making them the epitome of comfort food in my eyes.
In this post, you’ll learn how to recreate these scrumptious pies from scratch, and I’ll share tips and tricks that elevate them beyond the ordinary. Let’s dive into making these hauntingly delicious treats that are sure to win hearts and tickle taste buds!
What Are Halloween Whoopie Pies?
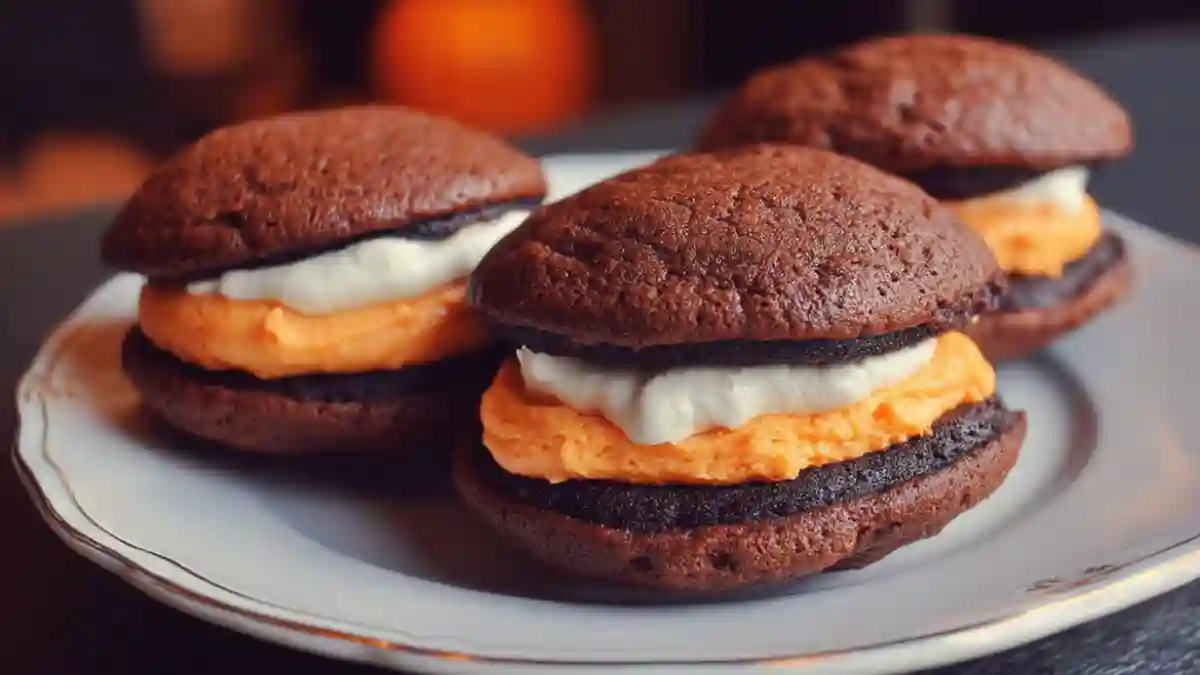
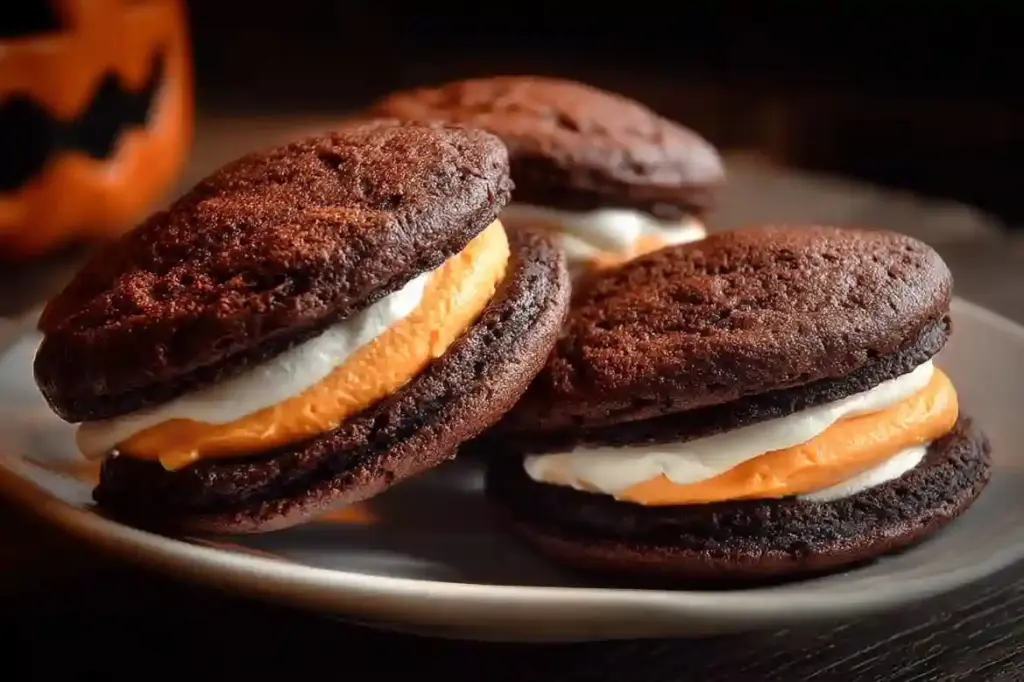
Halloween Whoopie Pies are delightful sandwich cookies made up of two soft, cake-like rounds filled with creamy goodness. Originating from the Northeastern United States, these treats have a history steeped in tradition, often referred to as “gobs.” Their combination of rich chocolate flavor and fluffy cream makes them perfect for autumn evenings and Halloween gatherings.
These pies feature a unique texture that’s soft and cake-like, creating an ideal balance with the sweet, creamy filling. The addition of orange gel food coloring in the filling adds a cheerful Halloween twist, making them not just tasty but visually appealing too. Whether you’re hosting a spooky soiree, treating your little monsters, or simply indulging in a guilty pleasure, these Halloween Whoopie Pies are a must!
Why You’ll Love This Recipe
Homemade Goodness: There’s something special about whipping up a batch of cookies from scratch. Unlike store-bought options that can taste overly sweet or artificial, these whoopie pies boast a comforting homemade flavor that will leave your guests begging for the recipe.
Cost-Effective Treat: With just a handful of ingredients, you can create a delightful dessert that’s both impressive and budget-friendly. Most of the ingredients are pantry staples, meaning you probably won’t need to make a special trip to the store.
Customization Galore: Want to cater to dietary restrictions? You can easily swap out ingredients like dairy or gluten. Feel free to get creative with the filling—consider adding a hint of peppermint or even pumpkin spice for that seasonal flair!
Easy Bake and Assemble: Don’t be intimidated by the layers! This recipe is straightforward and doesn’t require advanced baking skills. With a little practice, you’ll master the art of whoopie pie-making in no time.
Time-Saver: The entire process takes less than an hour plus chilling time, making it perfect for last-minute gatherings. You’ll be thrilled to have these delicious treats ready to impress your friends and family!
Ingredients
To make these festive Halloween Whoopie Pies, you’ll need the following ingredients:
For the Chocolate Cakes:
- 2 cups All-Purpose Flour (Use unbleached for a better flavor profile)
- 3/4 cup Dutch Processed Unsweetened Cocoa Powder (This gives a rich flavor; I like brands like Guittard for their deep cocoa notes)
- 1 1/2 teaspoons Baking Soda
- 1/2 teaspoon Salt (Don’t skip this; it enhances all the flavors)
- 1/2 cup Unsalted Butter (Bring to room temperature for smooth mixing)
- 1 cup Granulated Sugar
- 1 large Egg (Farm-fresh eggs work wonders!)
- 1 teaspoon Vanilla Extract (Use pure vanilla for the best flavor)
- 1 cup Buttermilk (You can substitute with a milk-lemon juice mixture if needed)
For the Cream Filling:
- 8 ounces Cream Cheese (Commercial brands work here, but look for blocks instead of spread)
- 1/4 cup Unsalted Butter (Also at room temperature)
- 3 to 4 cups Powdered Sugar (Adjust for sweetness as you mix)
- 1 teaspoon Vanilla Extract
- Orange Gel Food Coloring (I recommend Wilton for vibrant color)
Prep Notes:
- Make sure your butter and egg are at room temperature for the best mixing.
- Pre-sift dry ingredients if you want a smoother batter.
Step-by-Step Instructions
Preheat Your Oven: Begin by preheating your oven to 375°F (190°C). Line two baking sheets with parchment paper to prevent sticking.
Whisk Dry Ingredients: In a medium bowl, whisk together 2 cups of all-purpose flour, 3/4 cup of Dutch processed cocoa powder, 1 1/2 teaspoons of baking soda, and 1/2 teaspoon of salt. Set this mixture aside.
Cream Butter and Sugar: In a large mixing bowl, cream together 1/2 cup of unsalted butter and 1 cup of granulated sugar until light and fluffy—about 3 minutes. This is key for a light texture!
Add Egg and Vanilla: Incorporate 1 large egg and 1 teaspoon of vanilla extract into the mixture, mixing until fully combined.
Alternately Mix in Dry Ingredients and Buttermilk: Gradually add the dry ingredients and 1 cup of buttermilk, alternating between the two. Begin and end with the dry mix—this prevents lumps. Mix until just combined; avoid over-mixing.
Scoop Batter: Using a cookie scoop or spoon, drop mounds of batter (about 1.5 tablespoons each) onto the prepared baking sheets, leaving space between each for spreading.
Bake: Bake for 10-12 minutes, or until the tops spring back when gently pressed.
Cool on a Wire Rack: Allow to cool on the pan for 5 minutes before transferring the cookies to a wire rack to cool completely.
Make the Filling: In another bowl, beat together 8 ounces of cream cheese and 1/4 cup of softened butter until smooth. Gradually add 3 to 4 cups of powdered sugar and 1 teaspoon of vanilla, mixing until fluffy.
Add Food Coloring: Mix in orange gel food coloring until you achieve your desired shade.
Assemble the Pies: Once cooled, pair the whoopie pie cakes, using a piping bag or spoon to fill one side with the cream filling. Place another cake on top.
Chill: Refrigerate the assembled whoopie pies for at least 30 minutes before serving. This helps the filling set nicely.
Chef’s Tips:
- Ensure the cakes are completely cooled to prevent melting the filling.
- You can also dust the tops with powdered sugar for an extra touch of sweetness!
Expert Tips & Tricks
Storage Recommendations: Keep your Halloween Whoopie Pies in an airtight container at room temperature for up to 3 days or in the fridge for up to a week.
Make-Ahead Instructions: The whoopie pies can be made ahead of time, frozen, and then assembled with filling closer to the date of serving. They’ll keep well in the freezer for up to a month.
Troubleshooting Common Problems: If your whoopie pies spread too much, consider chilling the batter for about 15 minutes before scooping it onto the baking sheet.
Perfecting the Filling: If your cream filling is too runny, add more powdered sugar until you reach your desired consistency.
Flavor Boost: For a touch of nostalgia, try adding a pinch of cinnamon to your cocoa mixture for warmth.
Serving Suggestions
These Halloween Whoopie Pies can be enjoyed on their own, but consider pairing them with a glass of chilled milk or a warm cup of spiced apple cider for an unbeatable autumn treat. For presentation, serve them on a festive platter decorated with cobwebs (edible, of course!), or place them in Halloween-themed cupcake liners for an extra seasonal touch.
They’re perfect for Halloween parties, book club gatherings, or cozy movie nights with family.
Variations & Substitutions
Different Flavors: Don’t limit yourself to chocolate! Experiment with pumpkin or even vanilla whoopie pies to cater to different tastes.
Dietary Restrictions: For a gluten-free version, substitute the all-purpose flour with a gluten-free blend. You can also use dairy-free cream cheese and butter alternatives for a vegan treat.
Seasonal Options: Add festive elements like crushed candy corn for decoration or a dash of peppermint extract for a refreshing twist during winter holidays!
Nutrition & Storage Info
- Prep Time: 20 minutes
- Cook Time: 12 minutes
- Total Time: 1 hour 15 minutes (including chilling)
- Yield: Approximately 12 whoopie pies (24 individual cakes)
- Estimated Calories: 300 calories per pie (filling included)
- Storage Instructions: Keep in an airtight container at room temperature for up to 3 days, or in the fridge for up to a week. They also freeze well for about 1 month.

FAQ Section
Can I use regular cocoa powder instead of Dutch processed?
Yes, but it will slightly alter the flavor and texture. Dutch cocoa gives a richer taste.How thick should the filling be?
The filling should be thick enough to hold its shape when piped but still spreadable.Can I make these gluten-free?
Yes, simply swap the all-purpose flour for a gluten-free blend.What’s the best way to store whoopie pies?
Store them in an airtight container at room temperature for short periods or in the fridge for longer freshness.How long do they last?
Up to 3 days at room temperature and 1 week in the fridge.Can I freeze the whoopie pies?
Absolutely! Freeze them for up to a month, and assemble before serving.What can I use instead of buttermilk?
You can make a substitute by adding 1 tablespoon of lemon juice or vinegar to 1 cup of milk and letting it sit for 5 minutes.What variations can I try?
Consider adding spices or substituting flavors to match the season!How do I know when they are fully baked?
The tops should spring back when lightly pressed, and they should have a slight shine.Can I add chocolate chips to the batter?
Yes, feel free to stir in some chocolate chips for an extra chocolatey treat!
Conclusion
These Halloween Whoopie Pies aren’t just a sweet treat; they carry with them the warmth of family gatherings and the joy of sharing smiles around the table. With their delightful taste and easy preparation, I truly believe this recipe will become a part of your family traditions, just as it has in mine!
I can’t wait for you to try it! Don’t forget to share your experience—did the kids love them? Did you customize the filling? Drop your thoughts in the comments below, and explore other festive recipes on my blog to keep the spooky celebrations alive.
Peanut Butter Chocolate Rice Krispies
Cheesecake Rice Krispies Treats
Happy baking! 🎃
Print
Halloween Whoopie Pies
- Total Time: 32 minutes (plus cooling time)
- Yield: 12 whoopie pies
- Diet: Vegetarian
Description
Halloween Whoopie Pies are a festive and fun treat featuring soft, cake-like chocolate cookies sandwiched with a creamy orange-colored filling. These spooky delights are perfect for Halloween parties and are sure to be a hit with both kids and adults.
Ingredients
– 2 cups All-purpose Flour
– 3/4 cup Dutch processed Unsweetened Cocoa Powder
– 1 1/2 teaspoons Baking Soda
– 1/2 teaspoon Salt
– 1/2 cup Unsalted Butter
– 1 cup Granulated Sugar
– 1 large Egg
– 1 teaspoon Vanilla Extract
– 1 cup Buttermilk
– 8 ounces Cream Cheese
– 1/4 cup Unsalted Butter (for filling)
– 3 to 4 cups Powdered Sugar
– 1 teaspoon Vanilla Extract (for filling)
– Orange Gel Food Coloring
Instructions
- Preheat oven to 350°F (175°C). Line baking sheets with parchment paper.
- In a medium bowl, whisk together flour, cocoa powder, baking soda, and salt.
- In a large bowl, cream together 1/2 cup butter and granulated sugar until light and fluffy. Beat in egg and vanilla.
- Alternately add the dry ingredients and buttermilk to the butter mixture, beginning and ending with the dry ingredients. Mix until just combined.
- Drop tablespoon-sized portions of dough onto the prepared baking sheets, spacing them about 2 inches apart.
- Bake for 10-12 minutes, or until the cookies spring back when touched. Cool completely on a wire rack.
- For the filling, beat 1/2 cup butter until smooth. Gradually add powdered sugar, vanilla, and milk, beating until light and fluffy. Add orange food coloring until desired color is achieved.
- Pair cookies of similar size. Spread or pipe filling onto the flat side of one cookie and top with another cookie.
- Optional: Use black decorating gel to draw spider webs or other Halloween designs on the cookies.
- Store in an airtight container at room temperature.
Notes
- For a softer cookie, do not overbake. They should be cake-like and tender.
- Gel food coloring works best for vibrant colors without thinning the filling.
- These can be made a day ahead; the flavors meld and they become even softer.
- For a Halloween twist, add black sprinkles or use different colored fillings like purple or green.
- Prep Time: 20 minutes
- Cook Time: 12 minutes
- Category: Dessert
- Method: Baking
- Cuisine: American
Nutrition
- Serving Size: 1 whoopie pie
- Calories: 320
- Sugar: 25g
- Sodium: 180mg
- Fat: 14g
- Saturated Fat: 8g
- Unsaturated Fat: 4g
- Trans Fat: 0g
- Carbohydrates: 48g
- Fiber: 2g
- Protein: 3g
- Cholesterol: 45mg
Ask the Community
🥗 Free Custom Keto Meal Plan?
Do you want to lose weight while still enjoying delicious Asian & Thai Fusion meals? Take this quick quiz to get your personalized Keto plan based on your favorite foods!
- ✅ No more guessing what to eat
- ✅ Delicious & easy-to-make recipes
- ✅ Tailored to your body type
Get My Custom Plan Now! →
*Over 100,000+ people have transformed their lives with this quiz.