Table of Contents
Table of Contents
Hey there, fellow food lovers! Picture this: it’s a chilly afternoon, the smell of something sweet wafts through the air, and suddenly, you’re whisked away to a childhood kitchen filled with laughter and the sound of a rice cereal crunch. That’s exactly where my love for Peanut Butter Chocolate Rice Krispies began. My mom used to whip these up as a special treat during family gatherings, and the happy memories of devouring those gooey squares still bring a smile to my face.
What makes this recipe so special? Well, for starters, these delightful treats combine the rich, nutty flavor of creamy peanut butter with the sweet, chocolatey goodness of butterscotch and semi-sweet chips. The crispy texture of the rice cereal takes it all to a whole new level. Trust me; you won’t find another recipe like this one! It’s far superior to the store-bought versions – no preservatives or artificial flavors here!
In this post, I’ll share how to create these mouthwatering Peanut Butter Chocolate Rice Krispies that promise to become your go-to comfort food. So, let’s dive in and bring a little nostalgia back to your kitchen!
What Are Peanut Butter Chocolate Rice Krispies?
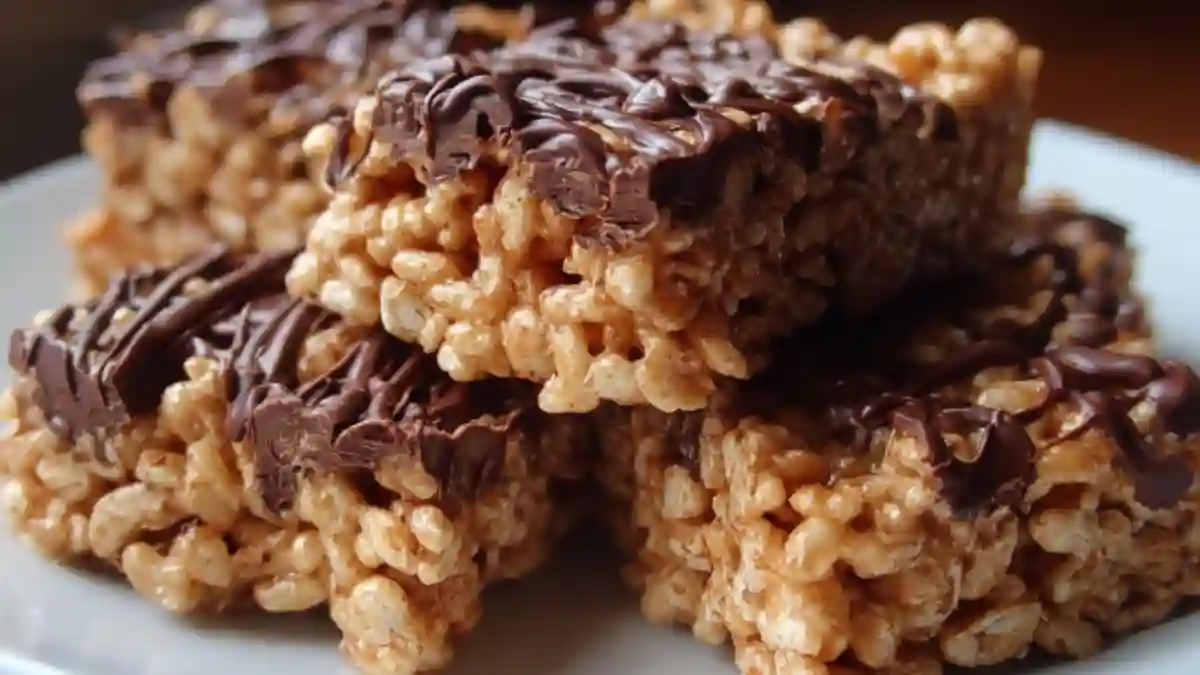
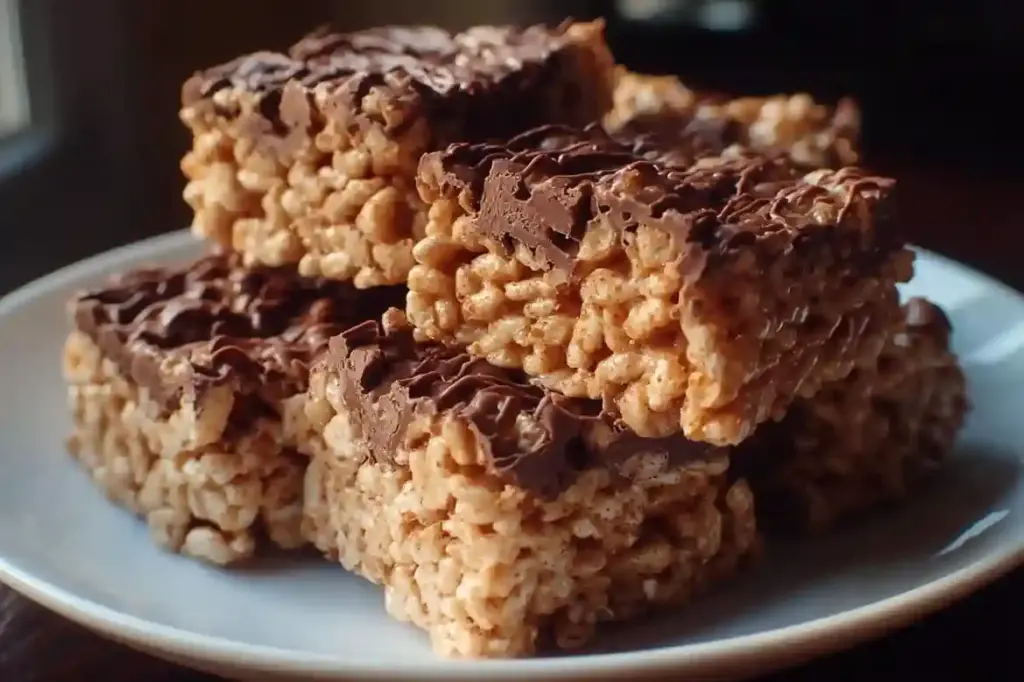
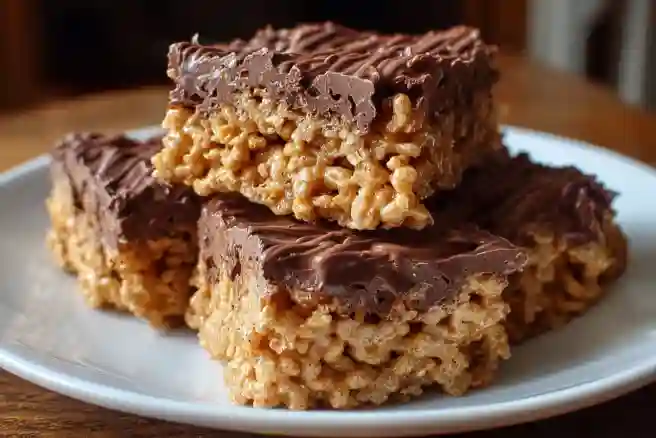
Peanut Butter Chocolate Rice Krispies are a playful, no-bake dessert that has taken many of us back to our childhood snacking days. This delightful concoction was originally inspired by the classic cereal bar but gets a luscious upgrade with creamy peanut butter and a double layer of chocolate magic. Imagine biting into a crispy, chewy square that’s both satisfying and uplifting!
The taste is an irresistible combination of sweet and salty, while the texture is the ultimate harmony of crunch and chew. Each bite delivers frothy, velvety layers of peanut butter, complemented by the melting richness of chocolate and butterscotch chips, making this treat utterly unique.
These bars are perfect for birthday parties, holiday gatherings, or just because you deserve a sweet pick-me-up after a long day. Trust me, once you sink your teeth into a batch of these Peanut Butter Chocolate Rice Krispies, you’ll want to make them for every occasion!
Why You’ll Love This Recipe
Let me share a few reasons why this Peanut Butter Chocolate Rice Krispies recipe is the one you absolutely need in your life:
Easier Than You Think: This no-bake recipe is incredibly easy to follow – perfect for beginner bakers or those looking to whip up a quick treat without turning on the oven!
Cost-Effective: Making these treats at home is far more budget-friendly than buying a pre-packaged version from the store. You likely already have most of the ingredients on hand, making it a wallet-friendly option.
So Many Customization Options: Want to mix things up? You can easily swap out the peanut butter for almond butter or ditch the chocolate for a more fruity twist with dried cranberries. The possibilities are endless!
A Fun Family Activity: Involve your kids or loved ones in the process. They can help with measuring and mixing, which will create delightful memories in the kitchen together.
A Treat with a Long Shelf Life: These bars can last for weeks if stored correctly, making them a great option for snacks and desserts throughout the month.
So, are you ready to roll up your sleeves and dive into making this delightful Peanut Butter Chocolate Rice Krispies recipe?
Ingredients
To make these scrumptious Peanut Butter Chocolate Rice Krispies, here’s what you’ll need:
For the Base:
6 cups Crispy Rice Cereal
- Tip: Use a good brand like Rice Bubbles or generic store brands for the best crunch.
1 cup Creamy Peanut Butter
- Tip: Choose a natural peanut butter with no added sugar for a more wholesome treat!
1 cup Light Corn Syrup
- Note: This adds sweetness and helps bind the mixture.
1 cup Granulated Sugar
- Tip: For a deeper flavor, consider using brown sugar instead.
1 teaspoon Vanilla Extract
- Tip: Always opt for pure vanilla extract for the richest flavor!
1/2 teaspoon Salt
- Tip: Enhances flavors, bringing out the sweetness in the bars.
For the Topping:
1 cup Semi-Sweet Chocolate Chips
- Recommendation: Enjoy Life or Ghirardelli brands are my personal favorites!
1 cup Butterscotch Chips
- Tip: If you’re feeling adventurous, try swapping for white chocolate chips!
Preparation Notes:
- Ensure your peanut butter is at room temperature to make mixing easier.
- Have your ingredients measured and ready to go before you start for a seamless baking experience.
Step-by-Step Instructions
Ready to make your own homemade Peanut Butter Chocolate Rice Krispies? Let’s get started with these detailed instructions!
Prepare: Start by greasing or lining a 9×13-inch baking pan with parchment paper. This will make removing the bars easier once they’re set.
Measure: In a large mixing bowl, measure out the crispy rice cereal so you’re ready to go!
Combine Syrup & Sugar: In a medium saucepan, combine the granulated sugar and light corn syrup over medium heat. Stir gently until the mixture is dissolved and just starts to bubble – about 3-4 minutes.
Add Peanut Butter: Remove the saucepan from the heat and stir in the creamy peanut butter, vanilla extract, and salt. You want a smooth, creamy consistency – about 1-2 minutes of stirring should do the trick.
Mix with Cereal: Pour this hot peanut butter mixture over the rice cereal. Be careful, it’s hot! Use a spatula to gently fold the cereal until it’s fully coated.
Press into the Pan: Transfer this mixture into your prepared baking pan. Use a greased spatula or your hands (dampened with water) to firmly press it down into an even layer.
Melt Chips: In a microwave-safe bowl, combine the semi-sweet chocolate chips and butterscotch chips. Heat in the microwave in 30-second increments, stirring in between, until melted and smooth (usually about 1-2 minutes in total).
Spread the Topping: Pour the luscious melted chocolate-butterscotch mixture over the cereal layer in the pan. Use a spatula to spread it evenly over the top.
Cool & Set: Allow the Peanut Butter Chocolate Rice Krispies to cool completely at room temperature, which will take about 2-3 hours. Once set, they’ll be much easier to cut into squares.
Chef’s Tips:
- Avoid overcooking the syrup mixture, as it can lead to hard bars.
- If you want to experiment, you can add a sprinkle of sea salt on top of the chocolate layer for an added flavor kick!
Expert Tips & Tricks
Here are some professional baking tips to elevate your Peanut Butter Chocolate Rice Krispies experience:
Storage: Store these treats in an airtight container at room temperature for up to two weeks. You can refrigerate them for an extra crunch but let them come to room temp before serving.
Make-Ahead: This recipe is great for prepping ahead of time. You can make a batch and store them for parties or lazy weekends!
Troubleshooting: If the mixture seems too crumbly, you may need to add a touch more corn syrup to help bind everything together.
Change Up the Chocolate: If you’re a dark chocolate fan, you can substitute the semi-sweet chocolate chips for dark chocolate and really enhance the flavor profile.
Freezing: These Peanut Butter Chocolate Rice Krispies freeze well! Just wrap individual squares in plastic wrap and store them in an airtight container.
Serving Suggestions
These Peanut Butter Chocolate Rice Krispies are already a fantastic treat on their own, but why not elevate your snack game? Here are some ideas on how to serve them:
- Pair these delicious bars with a big glass of cold milk for a classic combo!
- Crumble pieces over a scoop of vanilla ice cream for a delectable dessert sundae.
- Arrange the squares on a decorative platter and serve at birthday parties or potlucks for a delightful treat everyone will love.
Variations & Substitutions
Get creative! Here are some tasty variations and substitutions to suit your preferences:
- Nut-Free: Swap the peanut butter for sunflower seed butter or tahini for a nut-free alternative perfect for school lunches.
- Flavor Explosion: Try incorporating mini marshmallows or dried fruit for extra flavor and texture.
- Holiday Magic: During the holidays, you can add seasonal spices like cinnamon or nutmeg to your mixture for a cozy twist.
- Gluten-Free: Ensure your crispy rice cereal is gluten-free, and you’ll have a treat perfect for any gluten-sensitive friends.
Nutrition & Storage Info
- Prep Time: 15 minutes
- Cook Time: 10 minutes
- Total Time: 25 minutes + 2-3 hours to cool
- Yield: About 24 squares (depending on how big you cut them)
- Estimated Calories: Approximately 200 calories per square (exact numbers may vary based on brands used)
Storage Instructions:
- Room Temperature: Store in an airtight container for up to 2 weeks.
- Fridge: Keep in the fridge for an extra crunch, but allow to come to room temperature before serving.
- Freezer: Wrap individually and store in an airtight container for up to 3 months.
FAQ Section
Can I use crunchy peanut butter instead of creamy?
Absolutely! Crunchy peanut butter will give your bars an added texture.What’s the best way to cut these bars?
Use a sharp, non-serrated knife and a gentle sawing motion to get clean cuts.Can I make these bars vegan?
Yes! Use maple syrup instead of corn syrup and opt for dairy-free chocolate chips.How do I prevent the chocolate layer from cracking?
Let the chocolate cool slightly before spreading it on, and avoid refrigerating the bars immediately after to prevent temperature shock.Can I add protein powder?
Yes, you can mix in a scoop of your favorite protein powder into the peanut butter mixture for a more nutritious snack.How long do these last in the freezer?
They can last for up to 3 months in the freezer when stored properly.What’s the best way to store them?
Store in an airtight container to maintain freshness.Can I add nuts to the recipe?
Definitely! Chopped peanuts or other nuts can add a delightful crunch.What other types of cereal can I use?
You can try using Cocoa Krispies or Cornflakes for a different twist!What’s your favorite way to enjoy them?
Personally, I love them paired with a warm cup of coffee while curled up with a good book!
Conclusion
In conclusion, these Peanut Butter Chocolate Rice Krispies are not only delicious but also a wonderful nostalgic treat that brings joy to every age. With easy preparation and a unique flavor profile, this recipe is destined to become a family favorite. I encourage you to give this a try – you won’t be disappointed!
I’d love to hear how your batch turns out, so make sure to leave feedback in the comments! If you’re looking for more tasty treats, check out my other recipes for no-bake desserts that will surely satisfy your sweet tooth.
Happy baking!
Print
Peanut Butter Chocolate Rice Krispies
- Total Time: 15 minutes (plus cooling time)
- Yield: 24 squares
- Diet: Vegetarian
Description
A delicious twist on classic rice crispy treats, combining creamy peanut butter and rich chocolate for a no-bake, easy-to-make snack that’s perfect for any occasion.
Ingredients
– 6 cups Crispy Rice Cereal
– 1 cup Creamy Peanut Butter
– 1 cup Light Corn Syrup
– 1 cup Granulated Sugar
– 1 teaspoon Vanilla Extract
– 1/2 teaspoon Salt
– 1 cup Semi-Sweet Chocolate Chips
– 1 cup Butterscotch Chips
Instructions
- Grease a 9×13 inch baking pan and set aside.
- In a large saucepan, combine peanut butter, corn syrup, and sugar over medium heat. Stir constantly until the mixture comes to a boil and the sugar is dissolved.
- Remove from heat and quickly stir in vanilla extract and chocolate chips until the chocolate is melted and the mixture is smooth.
- Immediately add Rice Krispies cereal and stir until well coated.
- Press the mixture firmly into the prepared pan using a greased spatula or wax paper.
- Sprinkle with chopped peanuts if desired.
- Allow to cool completely at room temperature before cutting into squares.
Notes
- For a firmer set, refrigerate for 30 minutes before cutting.
- Use natural peanut butter for a healthier option, but note the texture may vary.
- Store in an airtight container at room temperature for up to 5 days.
- For easier cutting, use a plastic knife or greased sharp knife.
- Prep Time: 10 minutes
- Cook Time: 5 minutes
- Category: Dessert
- Method: No-Bake
- Cuisine: American
Nutrition
- Serving Size: 1 square
- Calories: 180
- Sugar: 15g
- Sodium: 85mg
- Fat: 7g
- Saturated Fat: 2g
- Unsaturated Fat: 3g
- Trans Fat: 0g
- Carbohydrates: 28g
- Fiber: 1g
- Protein: 3g
- Cholesterol: 0mg
Ask the Community
🥗 Free Custom Keto Meal Plan?
Do you want to lose weight while still enjoying delicious Asian & Thai Fusion meals? Take this quick quiz to get your personalized Keto plan based on your favorite foods!
- ✅ No more guessing what to eat
- ✅ Delicious & easy-to-make recipes
- ✅ Tailored to your body type
Get My Custom Plan Now! →
*Over 100,000+ people have transformed their lives with this quiz.