Table of Contents
Table of Contents
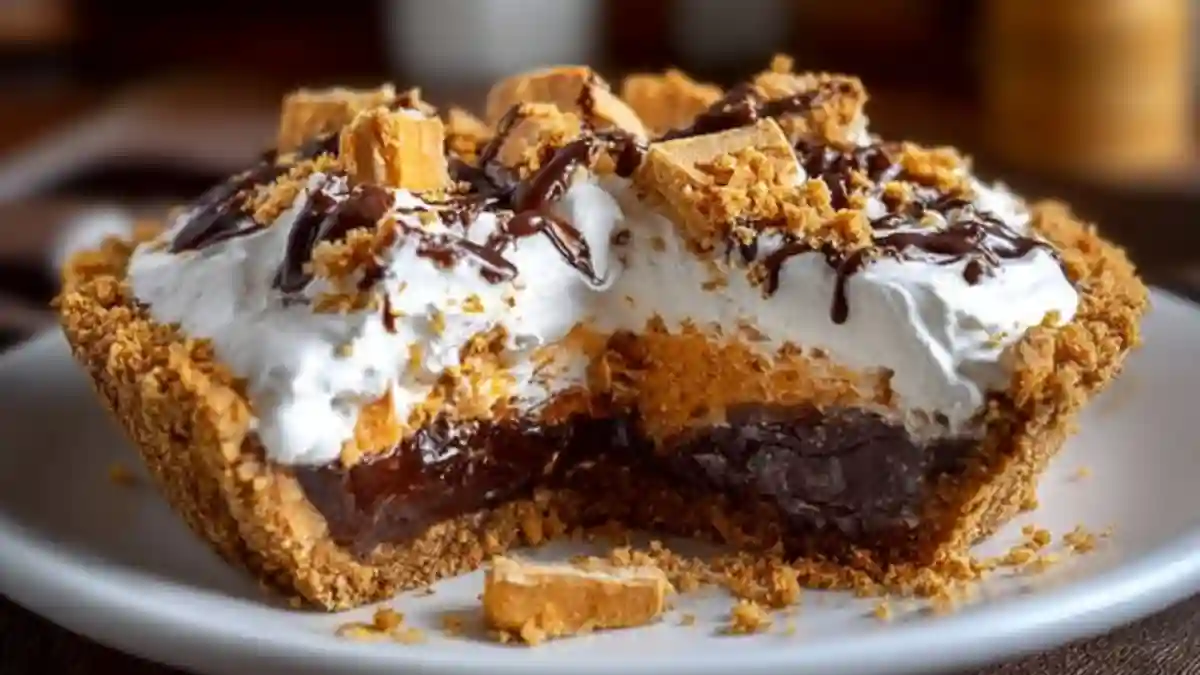
I’ll never forget the first time I tasted Butterfinger Pie. I was at my grandmother’s house, surrounded by the warmth of family and the mouthwatering aroma of a freshly baked dessert. Everyone gathered around, eagerly latching onto forks as they dove into the creamy, chocolatey goodness of that pie. That unforgettable experience sparked a deep love for this treat, turning it into my go-to recipe for special occasions and cosy family gatherings.
What makes Butterfinger Pie truly special is its delightful balance of textures—rich creaminess from the peanut butter filling, the airy delight of whipped topping, and, of course, the chocolatey, crunchy bliss from the Butterfinger bars. Unlike other recipes that can feel overly complicated or just plain boring, this easy Butterfinger Pie captures childhood nostalgia and offers a comfort that elevates any gathering.
In this post, I promise to share my secrets behind the perfect Butterfinger Pie, so whether you’re a seasoned baker or a kitchen novice, you’ll find joy in creating this masterpiece. Just imagine it – a pie that sparks smiles and invokes cherished memories, all while making a delicious statement at your table!
What Are a Butterfinger Pie?
Butterfinger Pie is a no-bake dessert that has enamoured dessert lovers for decades. The classic American treat combines the iconic Butterfinger candy bars with a creamy, dreamy filling that’s both light and decadent. Originating from home kitchens where creativity meets nostalgia, this dessert has found its way into countless hearts and tables over the years.
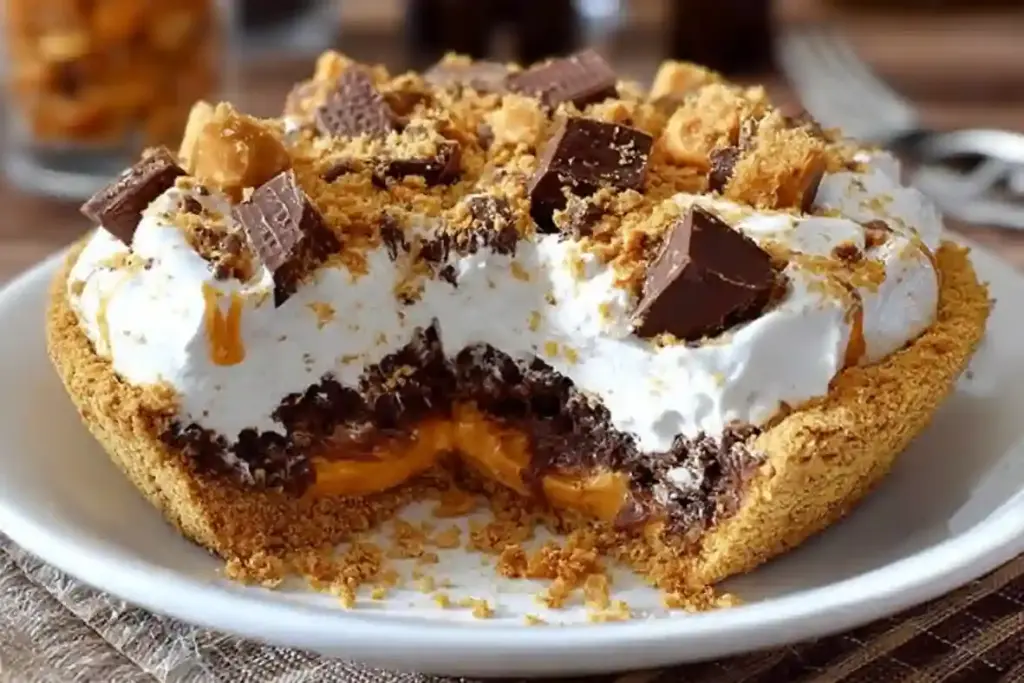
In terms of taste, imagine biting into a fluffy peanut butter filling that dances on your taste buds, only to be complemented by the crunchy texture of crushed Butterfinger pieces layered throughout and on top of the pie. It’s an intriguing interplay of creamy and crunchy, sweet and salty, which is what truly makes this pie stand out. You can whip it up for birthdays, holiday gatherings, or even just a lazy weekend treat. Anytime is a great time for this delightful dessert!
Why You’ll Love This Recipe
- Easier Than You Think: With just a few simple steps, you can create a stunning dessert that will have your family and friends raving. No baking required means it’s perfect for all skill levels.
- Better Than Store-Bought: While you can certainly find Butterfinger desserts at the store, nothing compares to the homemade version. This pie has a fresh taste that supermarket products simply can’t replicate, plus it’s packed with love!
- Cost-Effective: For the price of a few ingredients (likely less than a store-bought treat), you can make a pie that serves 8-10, making it a budget-friendly indulgence.
- Customise to Your Heart’s Content: Like a certain flavour more? Want a chocolate graham cracker crust? Feel free to switch out the candy or tweak the filling to make it your own. There’s a level of personalisation that homemade desserts offer, and Butterfinger Pie is no exception.
- Make Ahead: If you’re short on time, this pie can easily be prepared a day in advance and will taste even better after the flavours meld in the fridge overnight. Trust me, a little patience goes a long way!
Ingredients
To create your Butterfinger Pie, you’ll need the following ingredients. Quality matters, so I’ve included helpful notes and suggestions throughout.
- 1 package Cream Cheese, softened (8 oz package): Full-fat brands like Philadelphia work best for a rich texture.
- 1 container Whipped Topping (8 oz container, like Cool Whip): You can also use homemade whipped cream, just ensure it’s slightly sweetened.
- 1 cup Powdered Sugar: Sift to eliminate lumps for a smoother filling.
- 1/2 cup Creamy Peanut Butter: Brands like Jif or Skippy work beautifully here; avoid natural peanut butter for a more consistent texture.
- 3 bars Butterfinger Candy Bars, crushed (divided use): Feel free to use mini Butterfinger bars for a different presentation.
- 1 pre-made Graham Cracker Crust: I recommend the Keebler brand for its buttery flavour, but feel free to make your own if you’re feeling ambitious.
- 1/2 teaspoon Vanilla Extract: Opt for pure vanilla extract for the most authentic flavour.
Prep Notes
- Make sure to soften your cream cheese at room temperature for at least an hour before starting; it should be spreadable.
- Keep your whipped topping chilled until ready to use to maintain its airy texture.
Step-By-Step Instructions
- Mix the Base: In a large mixing bowl, beat the softened cream cheese and powdered sugar together until the mixture is completely smooth and creamy. This usually takes about 2-3 minutes on medium speed. You’ll know it’s ready when it looks fluffy and pale.
- Add Peanut Butter and Vanilla: Add in the creamy peanut butter and vanilla extract, mixing until the filling is well-combined and silky; this should take about another minute of mixing.
- Fold in the Whipped Topping: Gently fold in the whipped topping with a spatula, taking care not to deflate it. The mixture should look light and fluffy; aim for a consistency where it holds peaks but is still easily spreadable.
- Incorporate Butterfinger Pieces: Stir in two of the crushed Butterfinger candy bars, reserving one for the topping. Mix just until the candy is evenly distributed throughout the filling, which should take less than a minute.
- Fill the Crust: Spoon the creamy mixture into your pre-made graham cracker crust. Use a spatula to smooth the top for a tidy finish.
- Add Topping: Sprinkle the remaining crushed Butterfinger pieces generously over the top, pressing down lightly so they stay put.
- Chill: Cover the pie and refrigerate for at least 4 hours or, for best results, overnight. This helps the flavours meld and the filling to set.
- Serve: Slice, serve cold, and watch everyone fall in love with this creamy, crunchy treat!
Chef’s Tips
- Timing is Key: Always allow adequate chilling time for the pie to set. If you’re short on time, aim for at least four hours, but overnight is ideal.
- Avoid It From Seeping: Make sure each layer is wholly incorporated and soft enough to avoid any separation.
- Make It Fancy: Feel free to garnish with chocolate syrup or a drizzle of caramel for extra flair before serving!
Common Mistakes to Avoid
- Don’t forget to soften the cream cheese fully; chunks will seriously affect the texture!
- Avoid overmixing the whipped topping; it should remain airy.
Expert Tips & Tricks
- Storage Recommendations: Store any leftovers in the refrigerator in an airtight container for up to 5 days. Good luck with that—this pie rarely lasts long!
- Make-Ahead Magic: Making the pie a day ahead allows the flavours to mingle, enhancing the taste.
- Troubleshooting: If your pie doesn’t set properly, it may need more chilling time. Be patient; it’s worth it!
- Flavour Twist: Consider adding a pinch of sea salt to the filling to retrieve that salty-sweet balance we all love.
- Experiment with Toppings: Besides crushed Butterfingers, consider drizzling with melted chocolate or layering on crushed pretzels for a sweet-savoury combo.
Serving Suggestions
Butterfinger Pie pairs wonderfully with a dollop of whipped cream on top for aesthetic appeal. Serve it alongside a cup of coffee for a cosy dessert experience or present it as a showstopper at parties and potlucks. It is a fantastic addition for birthdays, holiday gatherings, or as a centrepiece for a casual family dinner.
Variations & Substitutions
- Flavour Combinations: Swap out Butterfingers for your favourite candy bar, such as Snickers or Reese’s, to create different flavour profiles.
- Dietary Adaptations: For a healthier twist, use a low-fat cream cheese and sugar substitute to cut down on calories without sacrificing flavour.
- Seasonal Variations: Consider adding pumpkin or peppermint extracts in the fall or winter holidays, infusing the pie with seasonal flair.
Nutrition & Storage Info
- Prep Time: 15 minutes
- Chill Time: 4 hours (or overnight)
- Total Time: 4 hours 15 minutes
- Yield: 8-10 servings
- Estimated Calories: Approximately 250 calories per slice
- Storage Instructions: Best stored in the refrigerator for up to 5 days; it does not freeze well.

FAQ Section
- Can I use a different crust?
- Absolutely! A chocolate cookie crust would add an extra layer of chocolatey goodness.
- What if I can’t find Butterfinger candy bars?
- If Butterfingers are unavailable, you can try other chocolate-covered peanut butter candies or even chocolate-covered toffee for a unique spin.
- Can I make this pie vegan?
- For a vegan version, look for plant-based cream cheese substitutes, whipped topping alternatives, and a vegan graham cracker crust.
- Can I make my own whipped topping?
- Yes! Just whip heavy cream with powdered sugar until soft peaks form.
- How can I make Clean-Up Easier?
- Line your mixing bowl with plastic wrap or parchment paper for easy cleanup when making the pie filling.
- How long does the pie stay good?
- It lasts in the fridge for about 5 days. Cover it tightly to maintain freshness.
- What if my pie filling is too thick?
- You can thin it out by adding a touch of milk (1 tablespoon at a time), mixing until you reach the desired consistency.
- Can I freeze Butterfinger Pie?
- It’s not recommended, as the whipped topping can separate upon thawing, but you can freeze the pie crust for later use.
- What if I want a firmer filling?
- Adding a tablespoon of gelatin or a thickener can help achieve a firmer texture if desired.
- Can I use crunchy peanut butter instead?
- Yes, but be aware that it will change the overall texture and may make the filling less smooth.
Conclusion
This easy Butterfinger Pie recipe holds a special place in my heart and has undoubtedly become a family favourite. It captures the essence of nostalgia while providing a delightful treat that can elevate any occasion. I encourage you to try this at home and witness the joy it brings to your loved ones—I’ll bet you’ll be just as hooked as I am!
Please share your feedback and any twists you made to the recipe; I’d love to hear about your experiences! If you’re interested, check out my other delectable dessert recipes on the blog—there’s always something new to inspire your kitchen adventures!
Print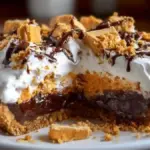
Butterfinger Pie
- Total Time: 4 hrs 15 mins (includes chilling)
- Yield: 8 servings
- Diet: Vegetarian
Description
A creamy, no-bake peanut butter pie loaded with crushed Butterfinger candy bars in every bite, topped with whipped cream and more candy pieces – a candy lover’s dream dessert!
Ingredients
1 package Cream Cheese, softened (8 oz package)
1 container Whipped Topping (8 oz container, like Cool Whip)
1 cup Powdered Sugar.
1/2 cup Creamy Peanut Butter
3 bars Butterfinger Candy Bars, crushed (divided use)
1 pre-made Graham Cracker Crust
1/2 teaspoon Vanilla Extract
Instructions
- Crush 4 Butterfinger bars into small pieces (some fine crumbs, some chunks). Reserve remaining bars for topping.
- In large bowl, beat cream cheese and peanut butter until smooth. Gradually mix in powdered sugar.
- Fold in whipped topping until fully incorporated. Gently stir in crushed Butterfingers.
- Pour mixture into prepared crust. Smooth top and chill at least 4 hours (preferably overnight).
- Before serving, crush remaining Butterfingers and sprinkle over pie. Drizzle with chocolate syrup if desired.
Notes
- For extra crunch, add 1/4 cup chopped peanuts
- Can use chocolate graham cracker crust instead of cookie crust
- Freezes well for up to 1 month – thaw in refrigerator before serving
- Garnish with whipped cream rosettes for special occasions
- Prep Time: 15 mins
- Cook Time: 0 mins
- Category: Dessert
- Method: No-Bake
- Cuisine: American
Nutrition
- Serving Size: 1 slice
- Calories: 580
- Sugar: 48g
- Sodium: 380mg
- Fat: 36g
- Saturated Fat: 15g
- Unsaturated Fat: 16g
- Trans Fat: 0g
- Carbohydrates: 56g
- Fiber: 3g
- Protein: 10g
- Cholesterol: 35mg
Ask the Community
🥗 Free Custom Keto Meal Plan?
Do you want to lose weight while still enjoying delicious Asian & Thai Fusion meals? Take this quick quiz to get your personalized Keto plan based on your favorite foods!
- ✅ No more guessing what to eat
- ✅ Delicious & easy-to-make recipes
- ✅ Tailored to your body type
Get My Custom Plan Now! →
*Over 100,000+ people have transformed their lives with this quiz.