Table of Contents
Growing up, my kitchen was always filled with the warm, inviting aromas of baked goods. One cherished memory is of my grandmother carefully shaping dough into delicate crescents, her laughter mixing with the sound of clattering baking sheets. These moments always revolved around Italian Wedding Cookies, a delightful treat that signifies celebration and togetherness in every bite.
What makes these Italian Wedding Cookies so special isn’t just their buttery flavor or the way they melt in your mouth; it’s the love and tradition that are lovingly folded into each batch. My recipe stands out from the rest because I’ve crafted it with a touch of nostalgia and a hint of modern sensibility. Each cookie carries not only a unique flavor but also my family’s stories, connecting generations with one simple treat.
In this post, I promise to share not only the foolproof recipe for these beloved cookies, but also tips, tricks, and personal anecdotes that will make you feel like you’re baking right alongside me. Once you try these cookies, you’ll find them a go-to for weddings, family gatherings, or simply a cozy evening at home.
What Are Italian Wedding Cookies?
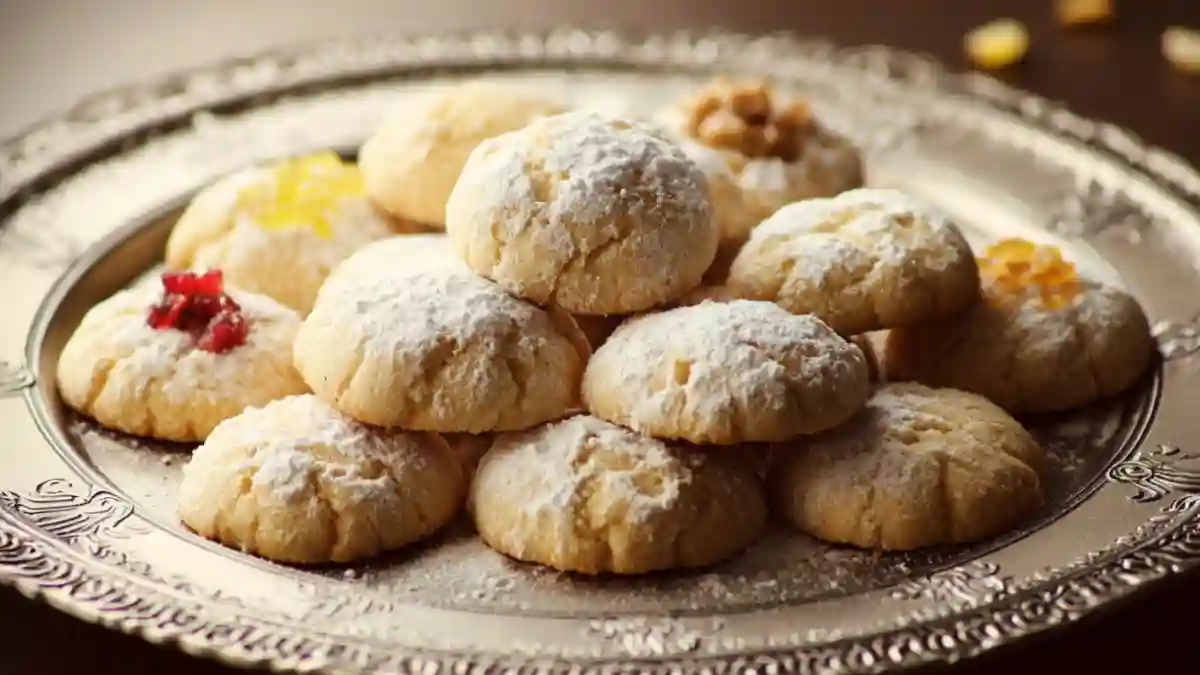
Italian Wedding Cookies, often known as Pignoli, Italian Butter Balls, or Anise Cookies depending on regional variations, are little bites of bliss that date back to Italian heritage celebrations and, as their name suggests, weddings. Originating from various regions across Italy (and indeed, similar variations exist in Spanish and other Mediterranean cultures), these cookies have graced tables for decades, each version cherished more than the last.
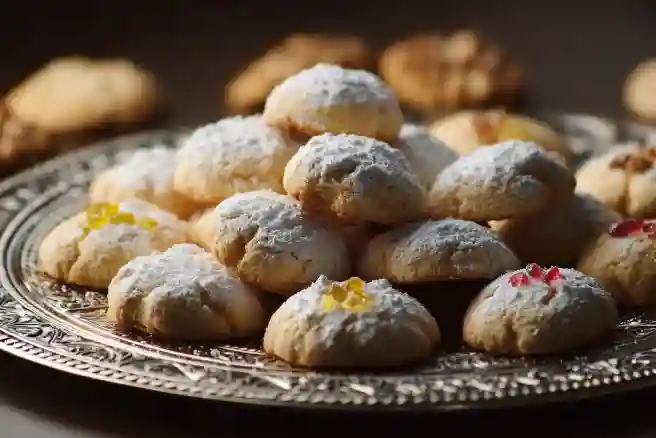
Most distinctively, these cookies boast a crumbly and tender, melt-in-your-mouth texture that contrasts beautifully with their sweet, often nutty flavor. The delightful combination of fine ingredients like ground almonds, powdered sugar, and rich butter creates a truly luxurious experience. Their elegantly understated sweetness is often elevated by a generous dusting of powdered sugar, which adds a playful and iconic touch to their presentation.
You might find yourself reaching for these cookies not just for weddings but for any gathering or special occasion, as their rustic charm and simple elegance make them a beloved treat worthy of any celebration, big or small.
Why You’ll Love This Recipe
- Unmatched Flavor: The classic combination of pure vanilla extract and essential almond extract infuses these cookies with a delightful, aromatic flavor that far exceeds anything you’d find in the store. Say goodbye to bland, pre-packaged treats!
- Cost-Effective: With just a few basic, readily available ingredients—many of which you likely have on hand in your pantry—you can whip up a fresh batch of these delightful cookies for a fraction of the price of buying them from a high-end bakery.
- Customization Options: This recipe is highly adaptable! While ground almonds are traditional, you can easily swap them for pecans or walnuts for a different nutty profile. Add a dash of cinnamon or a hint of citrus zest for warmth, or even dip them in melted chocolate for a scrumptious twist.
- Easy to Make: Even if you’re a beginner baker, this recipe is straightforward and forgiving. With just a few key steps and simple mixing, you’ll be on your way to creating delicious, impressive cookies that taste like they came from a professional bakery.
- Time Investment: You’ll only need about 15 minutes of active hands-on time for mixing and shaping the dough. The rest is just them baking away in the oven while your kitchen fills with irresistible, comforting scents. Minimal effort for maximum reward!
Ingredients
Here’s what you’ll need to create your own batch of these delightful Italian Wedding Cookies:
- 2 cups All-purpose flour: Use a high-quality brand like King Arthur or Bob’s Red Mill for consistent results—your cookies deserve the best!
- 1 cup Powdered sugar (also known as confectioners’ sugar): This fine sugar contributes to the melt-in-your-mouth quality and is also used for dusting.
- 1 cup Ground almonds: Make sure they are finely ground for the proper delicate texture. Blanched almonds (skin removed) work wonderfully if grinding your own. Almond flour can be used as a convenient substitute.
- 1 cup Unsalted butter (Softened): Let your butter sit at room temperature for at least 30-60 minutes prior to baking for the best creaming results. It should be pliable but still hold its shape.
- 1 teaspoon Pure vanilla extract: Always opt for pure vanilla for the richest, most authentic flavor.
- 1 teaspoon Almond extract: This boost of distinct nutty flavor is essential to the classic taste—don’t skip it!
Chef’s Tips:
- Always use room-temperature ingredients for a smooth, cohesive dough that creams beautifully. Cold butter will result in a lumpy dough.
- If you’re out of ground almonds or almond flour, you can use extra all-purpose flour in a pinch, but the flavor and texture of the cookies will be different (less nutty, more crumbly).
Step-by-Step Instructions
- Preheat the oven to 350°F (175°C). This ensures your cookies bake evenly and nicely from the moment they enter the oven. Line a baking sheet with parchment paper to prevent sticking and for easy cleanup.
- Cream together the butter and powdered sugar: In a large mixing bowl (or the bowl of a stand mixer fitted with the paddle attachment), cream together 1 cup of softened unsalted butter and 1 cup of powdered sugar until the mixture is light, fluffy, and pale in color. This should take about 3-4 minutes on medium speed.
- Note: Visual cues like a pale, almost white color and a fluffy, airy texture indicate you’re on the right track! This step incorporates air for a tender cookie.
- Incorporate your extracts: Add 1 teaspoon of pure vanilla extract and 1 teaspoon of almond extract to the creamed mixture. Mix on low speed just until combined, scraping down the sides of the bowl as needed.
- Mix in the dry ingredients: Gradually add 2 cups of all-purpose flour and 1 cup of ground almonds to the wet ingredients. Mix on low speed until a soft, uniform dough forms. Do not overmix! Mix just until no streaks of flour remain; overmixing can lead to tough cookies.
- Shape the dough: Take small portions of dough (about 1 tablespoon each, roughly 1 inch in diameter) and roll them into smooth balls or delicate crescent shapes between your palms. Place them on the prepared baking sheet lined with parchment paper, spacing them about an inch apart.
- Bake!: Place the baking sheet in the preheated oven and bake for 10-15 minutes, or until the edges are lightly golden and the cookies are set. The bottoms might be a bit more golden than the tops. Keep a close eye on them to avoid overbaking—nobody likes a dry cookie!
- Finish with sugar: Allow the cookies to cool on the baking sheet for just 5 minutes after removing them from the oven. While still slightly warm (this helps the sugar adhere), gently roll each cookie in extra powdered sugar. For a double coating, let them cool completely and then roll them in powdered sugar again.
- Chef’s Tip: Make sure to gently roll for an even, delicate coat of sugar—too heavy or too hot, and the sugar might melt or form a thick crust, losing that delightful almond flavor!
Common Mistakes to Avoid:
- Don’t skip the chilling step if your dough is too sticky or soft (though this recipe often doesn’t require it if butter is just softened). A cool, slightly firm dough is much easier to handle and helps prevent excessive spreading.
- If the cookies spread too much during baking, it may be due to overly warm dough, butter that was too soft (partially melted), or an inaccurate oven temperature. Ensure your butter is softened, not melted, and consider chilling the dough for 15-30 minutes before shaping if your kitchen is warm.
Expert Tips & Tricks
- Storage: Store your baked and cooled cookies in an airtight container at room temperature for up to 1 week. They’ll stay fresh and delightful, and their flavor often deepens slightly over time.
- Make-ahead: The cookie dough can be prepared in advance. After step 4, wrap the dough tightly in plastic wrap and refrigerate for up to 3 days before shaping and baking. Just remember to let it sit at room temperature for about 15-20 minutes to soften slightly before attempting to shape.
- Troubleshooting:
- If the cookies are too crumbly, your butter might not have been soft enough, or the dough is too dry. Try adding a touch more softened butter (½ teaspoon at a time) to fix the consistency.
- If they are too soft or spread too much, the dough might be too warm. Chill the dough for 15-30 minutes before shaping.
- Adaptation for flavor: Don’t hesitate to experiment with additional flavors—try a teaspoon of lemon or orange zest for a delightful citrus zing, or substitute a tablespoon of flour with a tablespoon of cocoa powder for a subtle chocolatey twist.
- Freezing: These cookies freeze beautifully! Once completely cooled, arrange them in a single layer in an airtight, freezer-safe container, layering with parchment paper between layers to prevent sticking. They’ll last for up to 3 months. Thaw at room temperature before serving.
- Serving Temperature: For an extra touch that truly highlights their melt-in-your-mouth quality, serve these at room temperature or slightly warm. This allows their full buttery, nutty flavors to shine.
Serving Suggestions
These Italian Wedding Cookies are incredibly versatile and pair perfectly with a variety of beverages and occasions. Enjoy them with:
- A rich cup of espresso or a classic cappuccino.
- A comforting mug of hot tea or hot chocolate.
- A sweet dessert wine like Vin Santo or a light sparkling wine.
- A cold glass of milk for a comforting treat.
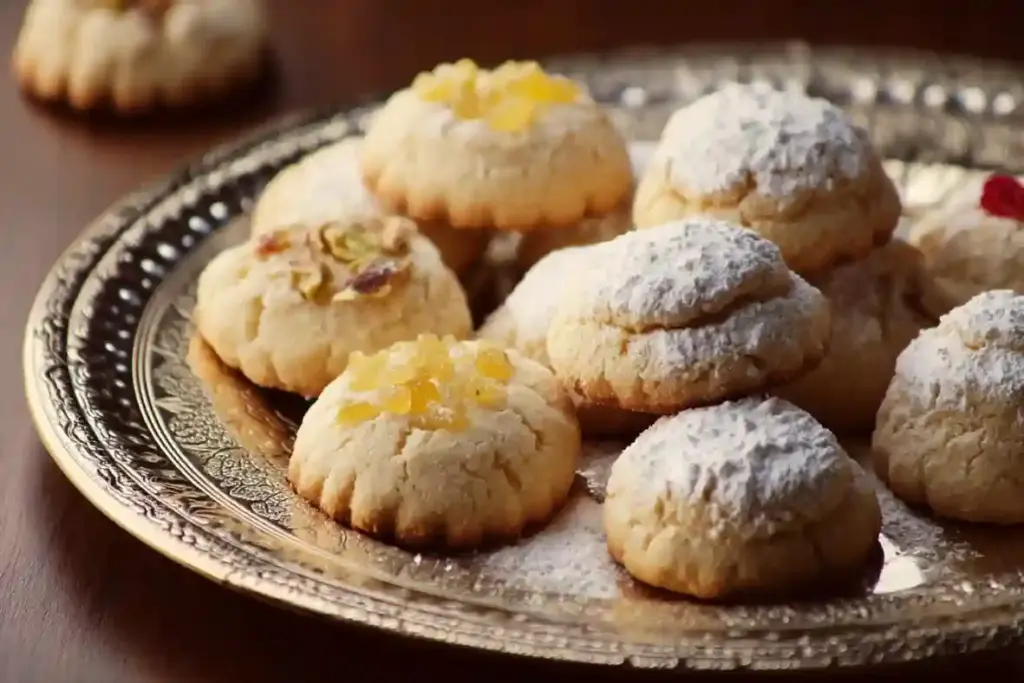
For presentation, serve them simply on a decorative platter dusted with extra powdered sugar, or place them in a lovely cookie jar for a rustic, inviting touch. They’re ideal for holiday gatherings, weddings, baby showers, tea parties, or simply a cozy night in with loved ones.
Variations & Substitutions
- Nut Variations: Swap the ground almonds for finely ground pistachios, pecans, or walnuts for a unique spin on flavor and texture. Ensure the nuts are unsalted.
- Flavor Boosts: Feeling adventurous? Add a touch of orange or lemon zest to the dough, or substitute a portion of the almond extract for hazelnut extract or a hint of anise extract for a different, traditional Italian flavor.
- Chocolate Dipped: Once cooled and dusted with powdered sugar, dip half of each cookie in melted dark or white chocolate for an extra layer of decadence.
- Dietary Needs: For gluten-free options, you can use a high-quality gluten-free all-purpose flour blend that measures 1:1 with regular flour. For a dairy-free option, you could try using a solid, plant-based butter substitute, though the texture might vary slightly.
Nutrition & Storage Info
- Prep Time: 15 minutes
- Cook Time: 10-15 minutes
- Total Time: Approximately 30 minutes (active time) + cooling
- Yield: Approximately 24-30 cookies (depending on size)
- Estimated Calories: Around 120 calories per cookie (This is an estimate and will vary based on exact ingredient brands, portion size, and any additions.)
Storage Instructions:
- Room Temperature: Store in an airtight container for up to 1 week.
- Refrigerator: Can be stored in the fridge for up to 2 weeks (though not strictly necessary).
- Freezer: Freeze baked cookies for up to 3 months in an airtight, freezer-safe container, layered with parchment paper.
FAQ Section
- Can I use almond flour instead of ground almonds? Yes, almond flour works perfectly well and is a convenient substitute for ground almonds. The texture may be slightly more uniform, and you might need to adjust baking time by a minute or two as it can absorb moisture differently.
- Are these cookies gluten-free? The base recipe uses all-purpose flour, so it is not gluten-free. However, you can make them gluten-free by substituting the all-purpose flour with a high-quality 1:1 gluten-free all-purpose flour blend.
- What can I use instead of unsalted butter? For a dairy-free option, you could try a plant-based butter substitute that is specifically designed for baking. However, using regular butter is key to the classic flavor and melt-in-your-mouth texture, and results may vary with substitutes.
- Can I add chocolate to the recipe? Absolutely! You can fold in mini chocolate chips into the dough, or for a more elegant touch, drizzle melted chocolate (dark, milk, or white) over the cooled and powdered sugar-dusted cookies.
- What if my dough is too crumbly and won’t come together? If your dough is too crumbly, it might be too dry. Add a very tiny amount (½ teaspoon at a time) of additional softened butter or even a drop of milk/water until the dough comes together and is pliable.
- Do these cookies need to be refrigerated? No, they do not need to be refrigerated. They are best stored in an airtight container at room temperature to maintain their delicate texture.
- Can I double the recipe? Yes, you can absolutely double or even triple the recipe to make a larger batch for parties or gifting. Just make sure your mixing bowl is large enough to accommodate the increased volume of ingredients.
- My cookies spread too much; what did I do wrong? This is a common issue! It usually happens if the butter was too soft (partially melted) when you creamed it, or if your kitchen is very warm causing the dough to soften too quickly. Ensure your butter is just room temperature (pliable but not greasy) and, if needed, chill the shaped cookies for 15-20 minutes before baking.
- How long can I freeze these cookies? Baked Italian Wedding Cookies can be frozen for up to 3 months when properly stored. Layer them between sheets of parchment paper in an airtight, freezer-safe container or bag.
- What’s the best way to shape the cookies? The easiest way to shape them is with your hands! Roll small portions of dough into smooth 1-inch balls or delicate crescents. Ensure they are uniform in size for even baking.
Conclusion
These Italian Wedding Cookies are not just a recipe; they’re a warm embrace from the past, bringing families and friends together with every bite. With their delicate taste and the promise of love infused in every cookie, you won’t be able to resist making them time and again. I encourage you to give this recipe a try and experience the joy it brings!
For more delicious recipes, check out our other articles:
Don’t forget to share your thoughts and any exciting variations you come up with in the comments below. And if you’re hungry for more delicious recipes, check out my blog for delightful ideas that will enchant your palate!
Print
Italian Wedding Cookies
- Total Time: 37 mins
- Yield: 36 cookies
- Diet: Vegetarian
Description
Delicate, melt-in-your-mouth butter cookies loaded with finely chopped nuts, dusted in powdered sugar, and traditionally served at Italian weddings and holidays.
Ingredients
2 cups All-purpose flour
1 cup Powdered sugar
1 cup Ground almonds
1 cup Unsalted butter (Softened)
1 teaspoon Pure vanilla extract
1 teaspoon Almond extract
Instructions
- Preheat oven to 325°F (165°C). Line baking sheets with parchment paper.
- Cream butter and 1/2 cup powdered sugar until light and fluffy (3 mins).
- Beat in vanilla and almond extracts.
- Whisk flour and salt together, then gradually add to butter mixture.
- Fold in ground nuts and chocolate chips (if using) until dough comes together.
- Roll into 1-inch balls and place 1 inch apart on baking sheets.
- Bake 15-18 minutes until bottoms are lightly golden (tops should stay pale).
- Cool 5 minutes, then roll warm cookies in powdered sugar. Cool completely and re-roll.
Notes
- For finest texture, pulse nuts in food processor until powdery
- Dough can be refrigerated 30 minutes if too soft to shape
- Store layered between parchment paper to prevent sticking
- Freeze unbaked dough balls for up to 3 months
- Prep Time: 20 mins
- Cook Time: 17 mins
- Category: Dessert
- Method: Baking
- Cuisine: Italian
Nutrition
- Serving Size: 1 cookie
- Calories: 90
- Sugar: 4g
- Sodium: 15mg
- Fat: 6g
- Saturated Fat: 3g
- Unsaturated Fat: 2.5g
- Trans Fat: 0g
- Carbohydrates: 8g
- Fiber: 0.5g
- Protein: 1g
- Cholesterol: 10mg
Ask the Community
🥗 Free Custom Keto Meal Plan?
Do you want to lose weight while still enjoying delicious Asian & Thai Fusion meals? Take this quick quiz to get your personalized Keto plan based on your favorite foods!
- ✅ No more guessing what to eat
- ✅ Delicious & easy-to-make recipes
- ✅ Tailored to your body type
Get My Custom Plan Now! →
*Over 100,000+ people have transformed their lives with this quiz.