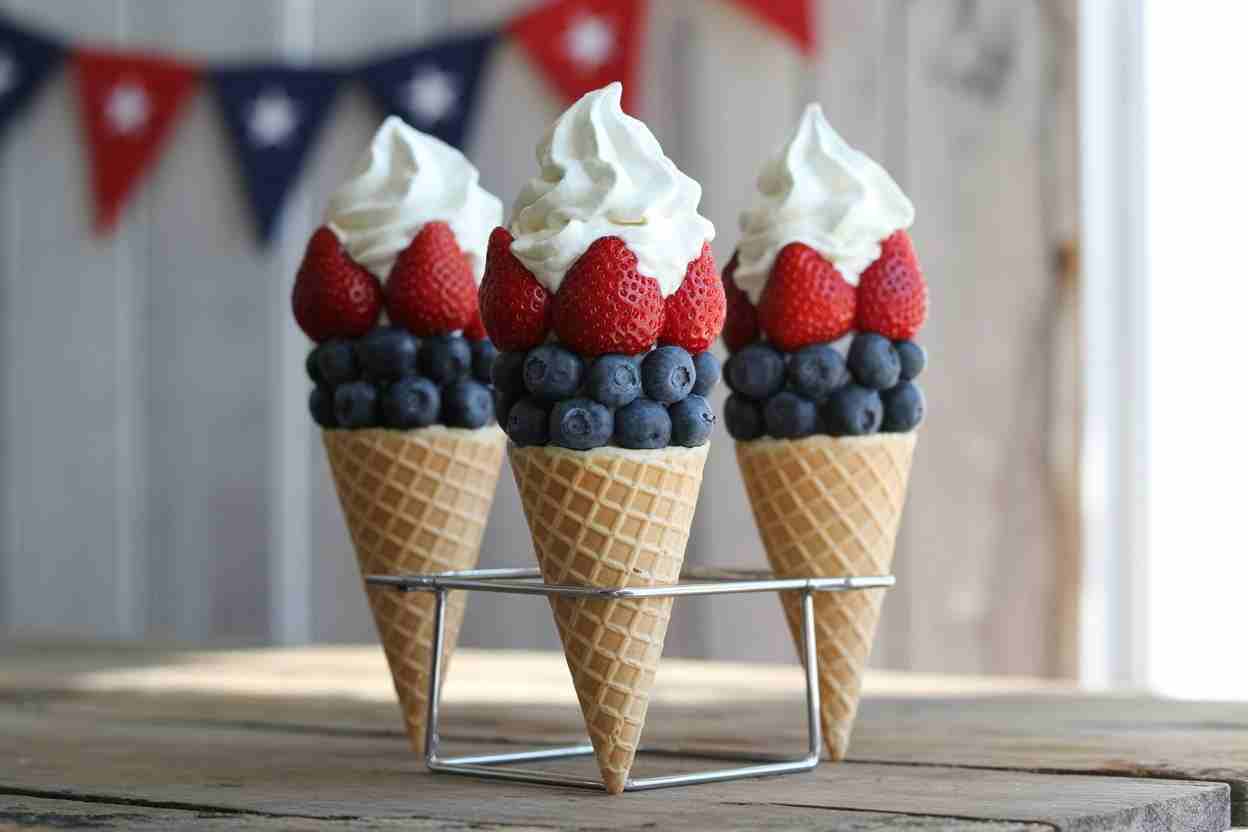
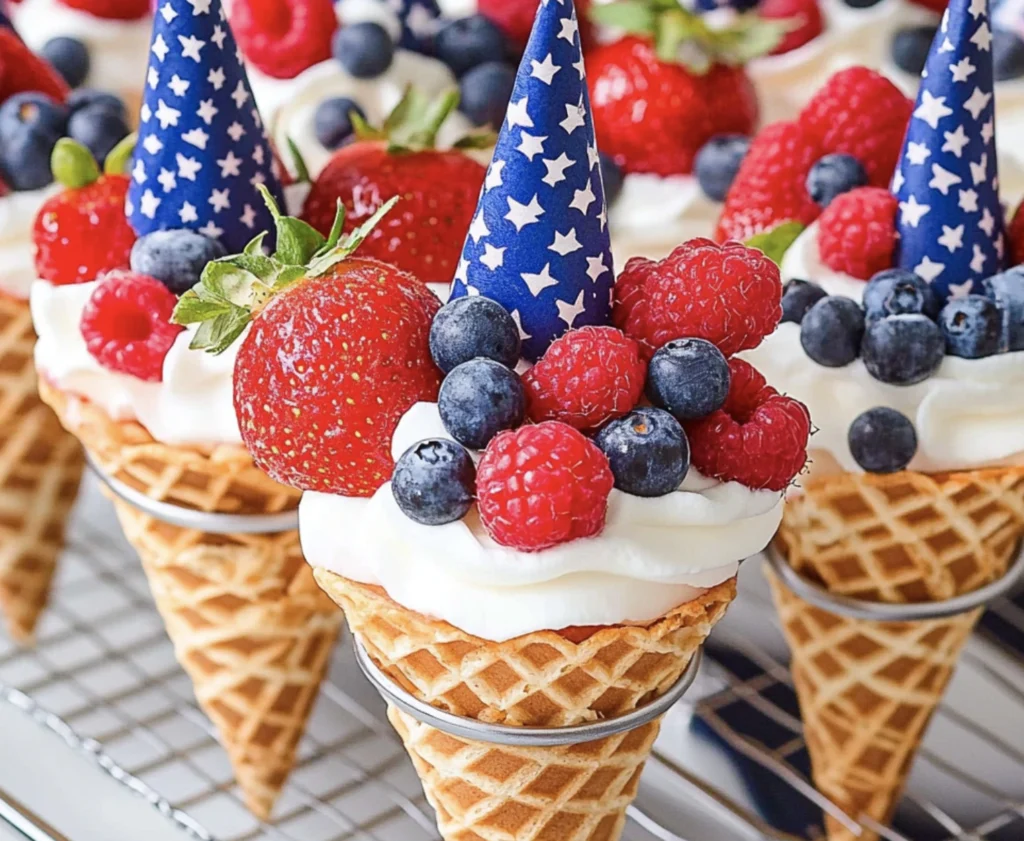
These Patriotic Fruit Cones are the perfect healthy, no-bake dessert for Independence Day, Memorial Day, or any summer celebration. By layering fresh red strawberries, white mini marshmallows (or banana slices), and blue blueberries into crispy waffle cones, you get a visually stunning, portable treat that kids and adults alike will love.
Note: Total time is just 15 minutes of active prep. No oven required!
Dietary Badges
- No-Bake (Oven-Free & Summer-Friendly)
- Nut-Free
- Vegetarian
- Naturally Colored (No artificial food dyes!)
- Gluten-Free Option (Use GF waffle cones)
The 3 Biggest Mistakes People Make with Fruit Cones
Even the simplest no-bake desserts can turn into a soggy, messy disaster if you fall into these common traps. Avoid these to guarantee perfect, crunchy cones every time:
- Skipping the “Moisture Barrier” (The Soggy Cone Disaster): Waffle cones are porous and will absorb moisture from fresh fruit and yogurt within minutes, turning soft and chewy (in a bad way). The Fix: Create a moisture barrier (see Pro-Tips below) to keep your cones crispy until the last bite.
- Using Wet, Un-dried Fruit (The Slippery Slide): Fresh strawberries and blueberries hold water on their surface. If you don’t pat them completely dry after washing, that extra moisture will pool at the bottom of your cone and accelerate sogginess. Always pat fruit dry with paper towels before assembling.
- Overfilling and Top-Heavy Cones (The Spill Hazard): It’s tempting to pile fruit high for a dramatic look, but an overfilled cone is unstable and will tip over or spill at the first wobble. Fill cones just to the rim for a neat, portable treat that stays intact.
Why This Works: The Science of the Perfect Fruit Cone
- Natural Color Layering: Instead of using artificial food coloring, we rely on the natural anthocyanins in blueberries (deep blue/purple) and the vibrant red of fresh strawberries. This creates a stunning, Instagram-worthy red, white, and blue palette that is naturally healthy and kid-friendly.
- The “Structural Layering” Method: By alternating layers of fruit with a binding agent (like mini marshmallows, banana slices, or a light yogurt drizzle), you create internal friction that holds the contents in place. This prevents the “avalanche effect” where all the fruit slides out when someone takes a bite.
- Temperature Contrast: Serving chilled fruit in a room-temperature waffle cone creates a delightful textural contrast: the crisp snap of the cone against the juicy, cool burst of fresh berries.
Ingredients
Measurements are provided in both US Customary and Metric for precision.

The Base & Layers:
- 6-8 Waffle cones (flat-bottomed cones are most stable)
- 2 cups (300g) fresh strawberries, hulled and halved
- 2 cups (290g) fresh blueberries
- 1 cup (60g) mini marshmallows OR 1 large banana, sliced into rounds (for the “white” layer)
Optional Enhancements:
- 1/2 cup (75g) raspberries or blackberries (for extra color variation)
- 1/2 cup (120ml) vanilla yogurt (for a creamy drizzle or layer)
- 2 tbsp (15g) chocolate chips (white or dark, for garnish)
- 1/2 cup (120ml) whipped topping (for a fluffy finish)
- Red, white, and blue sprinkles (optional, for extra festive flair)
Step-by-Step Instructions
1. Prep the Fruits (Crucial Step)
Wash the strawberries and blueberries thoroughly under cool running water. Hull and halve the strawberries. Critical: Pat all fruit completely dry with paper towels. Any surface moisture will make the cones soggy faster.
2. Prep Your “White” Layer
If using mini marshmallows, measure them into a small bowl. If using banana slices, slice the banana into thin rounds just before assembling (to prevent browning). Pro-Tip: If using banana, toss slices with a tiny squeeze of lemon juice to keep them bright white.
3. Set Up Your Assembly Station
Place your waffle cones upright in a muffin tin or sturdy cups. This holds them steady while you layer, preventing spills and frustration. Have all your ingredients prepped and within arm’s reach.
4. Layer the Cones
Work quickly and assemble in this order for the best structure:
- Layer 1 (Base): Place a few strawberry halves (cut-side down) at the bottom of the cone.
- Layer 2 (White): Add a spoonful of mini marshmallows or banana slices.
- Layer 3 (Blue): Add a generous handful of blueberries.
- Repeat: Continue layering (Strawberries → Marshmallows/Banana → Blueberries) until the cone is filled just to the rim.
5. Add Optional Enhancements
If using yogurt, drizzle a small amount over the top layer of fruit or pipe it decoratively with a small piping bag. Sprinkle with chocolate chips, whipped topping, or festive sprinkles for extra flair.
6. Serve Immediately
Patriotic Fruit Cones are best enjoyed immediately after assembly for maximum crunch. If you must prepare them ahead, see the Storage section below for the “Chocolate Barrier” trick.

Scaling & Serving Notes
- Standard Recipe: Yields 6-8 cones, perfect for a small family gathering.
- Party Size (Double Batch): Double all ingredients to make 12-16 cones. Use two muffin tins to hold cones steady during assembly.
- Mini Cones: Use “petit four” or mini waffle cones for bite-sized appetizers. You’ll get about 20-24 mini cones. Reduce fruit quantities by half.
- Cone Alternatives: If you can’t find flat-bottomed waffle cones, sugar cones (pointed) work too, but they are less stable. Use a muffin tin to hold them upright.
Pro-Tips for Next-Level Cones
- The “Chocolate Barrier” Secret (Anti-Soggy Hack): 🍫 Want to make these up to 2 hours ahead? Melt 1/2 cup of white chocolate chips or candy melts. Dip the top 1 inch of the inside rim of each waffle cone into the melted chocolate, then let it harden in the fridge for 10 minutes. This creates an invisible, edible seal that blocks moisture from the fruit, keeping your cone crispy for hours!
- Prevent Banana Browning: If using banana slices, toss them with 1 teaspoon of fresh lemon or lime juice right before assembling. The acid prevents oxidation (browning) without affecting the flavor.
- The “Yogurt Glue” Technique: For extra stability, pipe a small rosette of thick Greek yogurt between layers of fruit. This acts as an edible “glue” that holds everything in place and adds a protein boost.
- Kid-Friendly Assembly Line: Set up a “Cone Bar” with bowls of prepped fruit, marshmallows, and toppings. Let kids build their own cones—it’s a fun, interactive activity that encourages them to eat more fruit!
Troubleshooting Table
| Problem | Cause & Solution |
|---|---|
| Cone is soggy before serving | Cause: Fruit wasn’t dried, or no moisture barrier was used. Solution: Always pat fruit dry. For make-ahead, use the “Chocolate Barrier” trick (dip rim in melted white chocolate). |
| Fruit slides out when biting | Cause: Layers weren’t compacted, or cone was overfilled. Solution: Press each layer down gently with the back of a spoon as you assemble. Fill only to the rim. |
| Banana slices turned brown | Cause: Oxidation from exposure to air. Solution: Toss banana slices with a tiny bit of lemon juice right before assembling, or use mini marshmallows instead for the “white” layer. |
| Cones won’t stand upright | Cause: Using pointed sugar cones without support. Solution: Always use a muffin tin or sturdy cups to hold cones steady during assembly and serving. |
Storage & Make-Ahead
- Best Served: Immediately after assembly for maximum cone crunch.
- Make-Ahead (Up to 2 Hours): Use the “Chocolate Barrier” trick (dip cone rims in melted white chocolate and let harden). Assemble cones up to 2 hours ahead and store uncovered in the fridge. Add any yogurt or whipped toppings right before serving.
- Prep Components Ahead: You can wash, dry, and prep all fruits up to 24 hours in advance. Store in separate airtight containers in the fridge. Assemble cones just before serving.
- Do Not Freeze: Waffle cones become unpleasantly chewy when frozen and thawed. Fresh fruit also loses texture. This is a fresh, no-freeze dessert.
Nutrition Information (Per Serving)
Based on 8 servings (using standard ingredients, no optional yogurt/whipped topping). This is an estimate and may vary based on specific brands and portion sizes.
- Calories: ~150 kcal
- Total Fat: 2g
- Carbohydrates: 32g
- Sugars: 18g (naturally occurring from fruit)
- Protein: 2g
- Sodium: 45mg
- Dietary Fiber: 3g
- Vitamin C: ~40% DV (from strawberries and blueberries)
Disclaimer: This recipe is naturally Nut-Free and Vegetarian. To make it Vegan, use vegan waffle cones and substitute mini marshmallows with vegan marshmallows or extra banana slices.

Frequently Asked Questions
Can I make these Patriotic Fruit Cones ahead of time?
Yes, but with a key trick! You can prep all the fruits (wash, dry, slice) up to 24 hours in advance and store them in separate airtight containers in the fridge. However, assemble the cones just before serving (within 30 minutes) for the crispiest waffle cones. For a make-ahead option, use the “Chocolate Barrier” trick: dip the inside rim of each cone in melted white chocolate and let it harden. This creates a moisture-proof seal that keeps cones crispy for up to 2 hours after assembly.
How do I keep the waffle cones from getting soggy?
Sogginess is caused by moisture from fresh fruit seeping into the porous waffle cone. To prevent this: 1) Pat all fruit completely dry with paper towels after washing. 2) Use the “Chocolate Barrier” trick: melt white chocolate chips and dip the top 1 inch of the inside rim of each cone, then chill for 10 minutes to harden. This creates an edible, waterproof seal. 3) Assemble cones as close to serving time as possible.
Can I use frozen fruit instead of fresh?
It is not recommended. Frozen fruit releases a significant amount of water as it thaws, which will quickly turn your waffle cones soggy and create a messy, runny dessert. For the best texture and presentation, always use fresh, firm berries. If fresh fruit is unavailable, consider serving the fruit mixture in cups or bowls instead of cones.
What can I use instead of mini marshmallows for the “white” layer?
Great question! If you prefer not to use marshmallows, excellent substitutes for the white layer include: banana slices (toss with a little lemon juice to prevent browning), diced white grapes, chunks of fresh pineapple, vanilla yogurt dollops, or even white chocolate chips. Each option adds a different flavor and texture while maintaining the red, white, and blue theme.
Can I make these dairy-free or vegan?
Absolutely! To make these Patriotic Fruit Cones vegan or dairy-free: 1) Ensure your waffle cones are vegan (many contain honey or dairy; look for brands labeled vegan). 2) Substitute mini marshmallows with vegan marshmallows (made without gelatin) or use banana slices. 3) Skip any yogurt or whipped topping, or use a plant-based alternative like coconut whipped cream or dairy-free yogurt.
How do I keep banana slices from turning brown?
Bananas brown due to oxidation when exposed to air. To keep them bright white: 1) Slice the banana just before assembling the cones. 2) Toss the slices with 1 teaspoon of fresh lemon or lime juice. The citric acid slows oxidation without affecting the flavor. 3) For the best results, use the “Chocolate Barrier” trick on the cone rim to create a slight buffer between the banana and the cone.
Can I use sugar cones (pointed) instead of flat-bottomed waffle cones?
Yes, sugar cones work perfectly fine! The main difference is stability: flat-bottomed waffle cones stand upright on their own, while pointed sugar cones need support. If using sugar cones, place them in a muffin tin or sturdy cups during assembly and serving to keep them from tipping over. Sugar cones also have a slightly sweeter, crunchier texture that pairs beautifully with fresh fruit.
How do I transport these to a party without them falling over?
Transport is easy with the right setup! 1) Assemble the cones as close to departure time as possible. 2) Place each filled cone upright in a muffin tin or egg carton—this is the most secure method. 3) If you don’t have a muffin tin, nestle cones in a shallow box lined with crumpled parchment paper to hold them steady. 4) Keep the transport container cool with an ice pack if traveling more than 30 minutes, especially if using yogurt or whipped toppings.
Can I add yogurt or whipped cream without making the cones soggy?
Yes, but technique matters! To add creamy elements without sogginess: 1) Use the “Chocolate Barrier” on the cone rim first. 2) Add yogurt or whipped cream as a final topping or drizzle right before serving, not as a bottom layer. 3) For extra stability, use thick Greek yogurt or stabilized whipped cream (add 1 tsp cornstarch to heavy cream before whipping). 4) Serve immediately after adding creamy toppings.
What do I do with leftover assembled cones?
Patriotic Fruit Cones are best enjoyed fresh, but if you have leftovers: 1) Do not store assembled cones—the fruit moisture will make the cone unpleasantly soggy. 2) Instead, carefully remove the fruit filling and store it in an airtight container in the fridge for up to 2 days. 3) Store any unused, empty cones in an airtight container at room temperature. 4) Enjoy the leftover fruit over yogurt, in smoothies, or as a topping for oatmeal the next day.
Red, White, and Blue Layer Cake: A Festive Delight for Every Celebration
Print
Patriotic Fruit Cones: A Fun and Healthy Treat for All
- Total Time: 15 mins
- Yield: 12 cones 1x
Description
A fun and healthy patriotic dessert featuring red, white, and blue fruits layered in ice cream cones. Perfect for kids and summer parties!
Ingredients
- 12 flat-bottom ice cream cones (cake cones work best)
- 2 cups strawberries, diced
- 2 cups blueberries
- 2 cups bananas, sliced
- 2 cups vanilla yogurt or whipped cream
- 1 tbsp honey (optional, for drizzling)
- Star-shaped sprinkles (optional, for garnish)
Instructions
- Prepare fruits: Wash and dry all berries. Slice strawberries and bananas into small, uniform pieces.
- Layer fruits: In each cone, alternate layers of strawberries (red), yogurt/whipped cream (white), and blueberries (blue). Repeat until cone is filled to the top.
- Top it off: Finish with a dollop of yogurt/whipped cream and a few extra berries on top for a festive look.
- Garnish: Drizzle lightly with honey and add star sprinkles if desired.
- Serve immediately or chill for up to 1 hour before serving (cones may soften over time).
Notes
- For a dairy-free version, use coconut whipped cream.
- Substitute raspberries or cherries for strawberries, and blackberries for blueberries.
- To prevent sogginess, assemble no more than 1 hour before serving.
- Use a small glass to hold cones upright while filling.
- Prep Time: 15 mins
- Cook Time: 0 mins
- Category: Dessert/Snack
- Method: No-Bake
- Cuisine: American
Nutrition
- Serving Size: 1 cone
- Calories: 90
- Sugar: 12g (natural)
- Sodium: 10mg
- Fat: 1g
- Saturated Fat: 0.5g
- Unsaturated Fat: 0g
- Trans Fat: 0g
- Carbohydrates: 20g
- Fiber: 2g
- Protein: 2g
- Cholesterol: 2mg
🥗 Free Custom Keto Meal Plan?
Do you want to lose weight while still enjoying delicious Asian & Thai Fusion meals? Take this quick quiz to get your personalized Keto plan based on your favorite foods!
- ✅ No more guessing what to eat
- ✅ Delicious & easy-to-make recipes
- ✅ Tailored to your body type
Get My Custom Plan Now! →
*Over 100,000+ people have transformed their lives with this quiz.