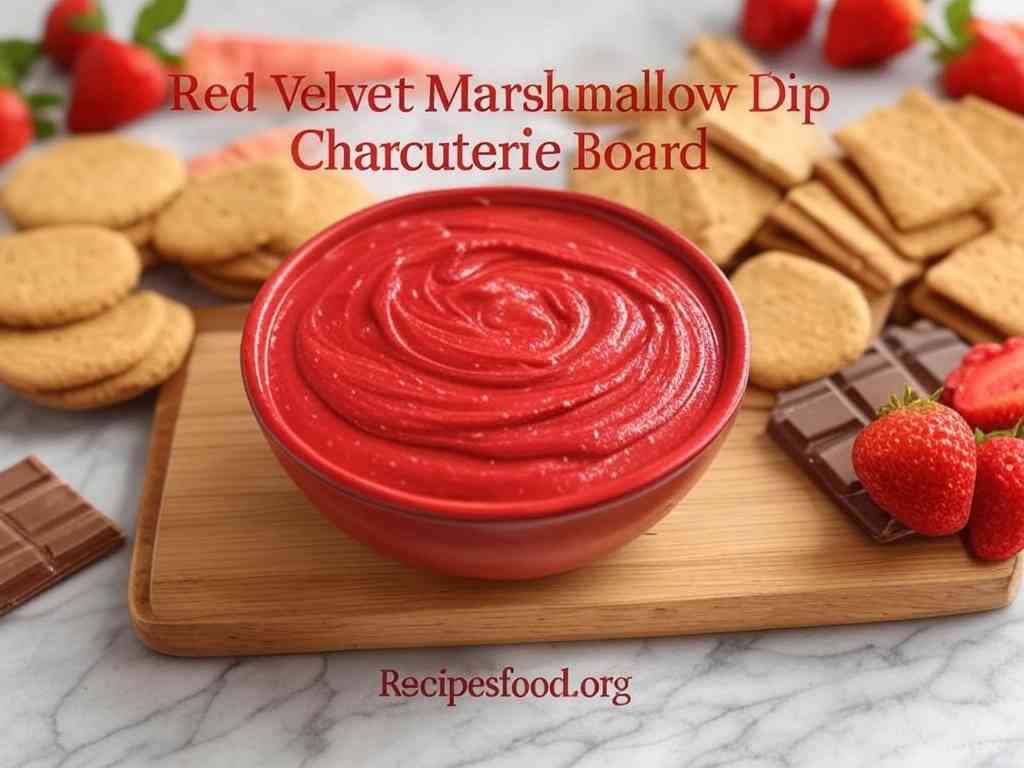
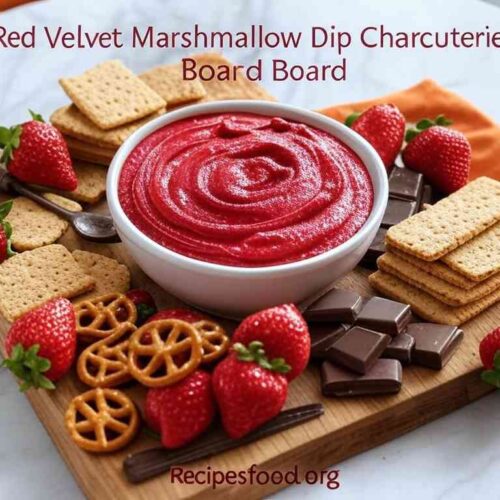
Imagine a dazzling spread of bite-sized delights where the rich, indulgent flavours of red velvet meet an assortment of sweet and savoury treats—all artfully arranged on a beautiful board. We designed our Red Velvet Dessert Charcuterie Board to impress at parties, holiday gatherings, or even as a fun family treat. This comprehensive guide will walk you through everything from why you’ll love this dessert board to the essential ingredients, step-by-step preparation, cooking tips, variations, serving ideas, storage advice, nutritional insights, common pitfalls to avoid, and FAQs. Whether a seasoned entertainer or a first-time host, this article is your ultimate resource for creating a show-stopping, festive dessert display.
Table of Contents
Why You’ll Love the Red Velvet Dessert Charcuterie Board
Perfect for Families—Quick and Delicious
Imagine gathering your family around a table adorned with colourful, decadent treats—each piece bursting with flavour. The Red Velvet Dessert Charcuterie Board is perfect for family celebrations, holiday parties, or a quick weekend treat. It’s designed to be visually stunning, simple to assemble, and utterly delicious. Every element, from mini red velvet cakes to assorted cheeses and fruits, creates an experience as fun to look at as it is to eat.
Nutritional Benefits and Simple, High-Quality Ingredients
While this dessert board is an indulgence, making it at home means you ultimately control the ingredients. Use high-quality red velvet cake made with real cocoa, natural sweeteners, fresh fruits, and artisanal cheeses to balance flavours and textures. Even though it’s a treat, you can adjust the recipe to include more nutritious elements—like fresh berries and whole grain crackers—to add a touch of health without sacrificing the festive spirit.
Flexibility, adaptability, and budget-friendliness
One of the best aspects of a Red Velvet Dessert Charcuterie Board is its incredible flexibility. Whether you’re hosting a Christmas party or a birthday celebration or want to create a fun dessert spread, you can quickly adapt the board to your theme. You can vary the toppings, add seasonal elements, or even create a vegan version. With many ingredients likely already in your pantry, this dessert board can be budget‑friendly while still looking luxurious and festive.
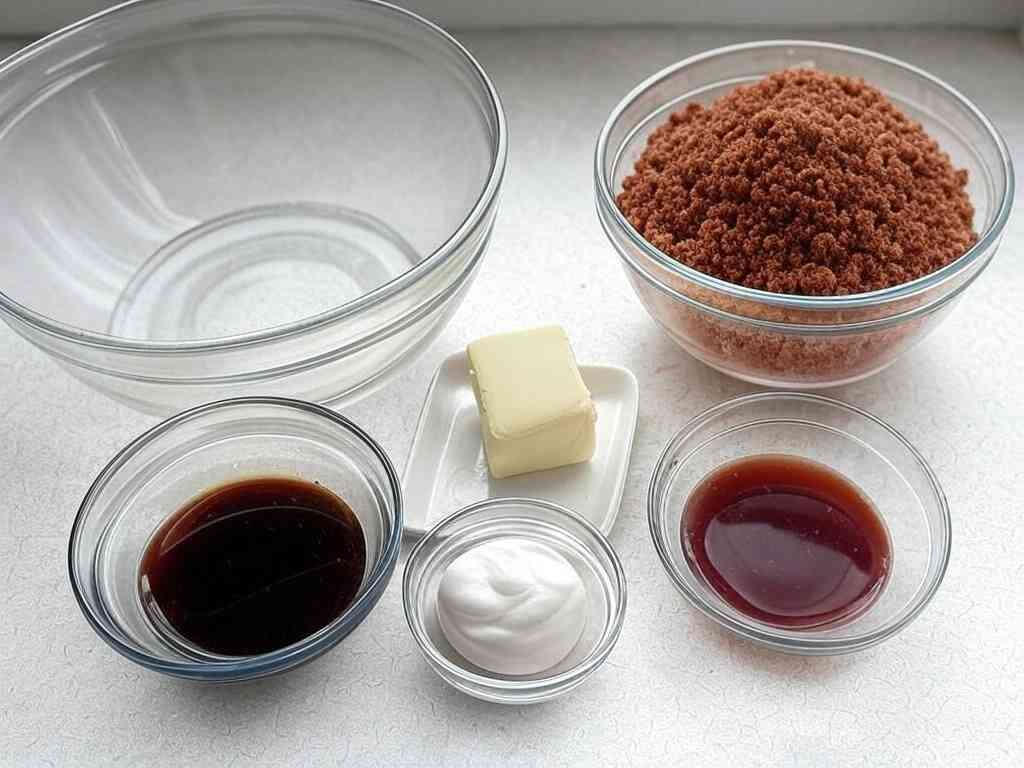
Essential ingredients for the recipe
Creating your perfect Red Velvet Dessert Charcuterie Board starts with gathering ingredients. Each component is key in delivering a visually appealing and delicious spread.
Ingredients:
- 1 red velvet cake (store-bought or homemade), cut into small slices or cubes
- 12 red velvet cupcakes
- 1 cup red velvet cookies
- 1 cup cream cheese frosting (for dipping)
- 1 cup fresh strawberries
- 1 cup raspberries
- 1 cup white chocolate-covered pretzels
- 1 cup red and pink M&Ms or chocolate candies
- 1 cup marshmallows (red and white)
- ½ cup crushed nuts (optional, for garnish)
Red velvet cakes or cupcakes
At the heart of this dessert board is the red velvet cake. Whether you bake a whole cake and cut it into mini squares or prepare individual cupcakes, the rich cocoa flavour, vibrant colour, and soft, moist texture are essential. For a more refined presentation, consider using a classic red velvet recipe that balances sweetness with a hint of tang from buttermilk.
Assorted Cheeses
Complement the cake with a selection of artisanal cheeses. Aged cheddar, brie, or even blue cheese can provide a savoury contrast to the sweetness of the red velvet. If you’re aiming for a traditional dessert board, focus on milder, creamier cheeses that enhance rather than overpower the cake’s flavour.
Fresh Fruits and Garnishes
Fresh fruits, such as strawberries, raspberries, or kiwi slices, add a burst of colour and a refreshing counterpoint to the decadent dessert elements. Other garnishes like edible flowers, mint leaves, or a chocolate or caramel sauce drizzle add visual appeal and extra flavour dimensions. These components create balance and make your board look as good as it tastes.
Ingredient Preparation
Before assembling your Red Velvet Dessert Charcuterie Board, you must prepare your ingredients meticulously. Follow these detailed steps to ensure every element is ready to shine.
Baking or assembling the red velvet cake
If you’re making the red velvet cake from scratch, prepare your batter according to your favourite recipe. Bake the cake in a rectangular pan and cut it into bite-sized squares once cooled. If you prefer cupcakes, bake mini red velvet cupcakes. Using a tried-and-true recipe will guarantee consistent results for novices.
Tip: Use a cake leveller or a sharp knife to ensure uniform sizes, which helps the board look neat and professional.
Prepare the cheeses.
Slice or cube the cheeses into small, bite-sized pieces that are easy to pick up with a fork or toothpick. Arrange them on a platter so they’re ready to be added to your board. If you have a cheese spread or flavoured cream cheese, consider placing a small bowl on the board as an additional dip.
Washing and slicing the fruits.
Rinse your fresh fruits thoroughly and pat them dry. Slice strawberries, kiwi, and other fruits into attractive, bite-sized pieces. If you’re using berries, leave them whole for a more rustic look. Prepare any additional garnishes—chopped fresh mint or edible flowers—and set them aside.
Tip: To prevent fruits like kiwi from browning, squeeze a little lemon juice over them after slicing.
Step-by-step cooking instructions.
After preparing your ingredients, it’s time to assemble and present your Red Velvet Dessert Charcuterie Board. Follow these detailed instructions to ensure a professional-looking, delicious result.
Step 1—Arranging the Cake Pieces
Start by placing your red velvet cake pieces or cupcakes as the centrepiece of the board. Arrange them evenly in one or more rows, leaving space around them for other items. The arrangement creates a focal point and allows the vibrant red velvet to stand out.
Step 2—Layering the Cheeses
Next, add the cheese around the cake pieces. Vary the shapes and sizes to create visual interest—small cubes, thin slices, or decorative wedges. Ensure that the cheeses are distributed evenly across the board, creating a balanced mix of flavours that contrasts with the red velvet’s sweetness.
Step 3—Filling in with Fruits and Garnishes
Finally, fill in the gaps with your prepared fresh fruits and garnishes: strategically place berries, sliced kiwi, and other colourful fruits around the cheeses and cake. Add small bowls of any spreads or dips you’re including, and sprinkle fresh mint or edible flowers over the entire board for a finishing touch. This layering technique enhances the visual appeal and ensures every bite offers a harmonious blend of flavours and textures.
Tips for an Even Tastier Version
Elevate your Red Velvet Dessert Charcuterie Board with these expert tips and creative ideas to enhance flavour and presentation.
Adding extra ingredients
For an extra layer of indulgence, consider incorporating additional elements such as:
- Nuts and Seeds: Toasted almonds, pistachios, or walnuts can add a satisfying crunch.
- Dried Fruits: Cranberries or apricots can introduce a chewy, sweet contrast.
- Infused Syrups: A raspberry or caramel sauce drizzle can add extra flavour depth. These additions allow you to customize your board and make it uniquely yours.
Techniques to Enhance Flavor
A key to an outstanding dessert board is balance. Ensure that fresh, tangy fruits and well-chosen garnishes complement the flavours of the red velvet and the cheeses. Consider lightly dusting the board with powdered sugar or cocoa for a subtle finish. Furthermore, pre-chill the board in the refrigerator before serving to keep the ingredients fresh and the flavours vibrant.
Adjustments to preferences
If you prefer a less sweet dessert, adjust the sugar content in the cake or choose a less sweet cheese. Opt for dairy-free cheeses and a vegan red velvet cake recipe for a vegan version. These tweaks allow you to enjoy your board in a way that fits your taste or dietary needs without compromising the festive, indulgent experience.
Recipe Variations and Adaptations
This versatile recipe can be tailored to different tastes, dietary requirements, and occasions. Here are some variations to explore:
Vegetarian and Vegan Options
The classic Red Velvet Dessert Charcuterie Board is already vegetarian. Substitute traditional cream cheese and dairy-based spreads with vegan alternatives to make it vegan. Vegan red velvet cake recipes are readily available, and plant-based cheeses now come in many delicious varieties. This adaptation allows you to cater to vegans without sacrificing the indulgent flavour of the dessert board.
Gluten-Free Adaptation
For those with gluten sensitivities, use a gluten-free red velvet cake recipe and gluten-free biscuits or crackers as part of your board. Many gluten-free flours work well in baking, so don’t be afraid to experiment. The concept of a dessert charcuterie board remains intact, offering a delightful, inclusive option for everyone.
Other Seasonal Variations
Tailor your board to the season by incorporating different flavours. For instance, in the winter holidays, add festive spices like cinnamon, nutmeg, or peppermint extract to your red velvet cake or toppings. In the summer, you could feature tropical fruits or a light citrus drizzle to create a refreshing, bright version. These seasonal twists keep your dessert board exciting and fresh all year round.
Serving Suggestions
A stunning Red Velvet Dessert Charcuterie Board deserves a beautiful presentation. Here are some ideas to serve it at your next gathering:
As a standalone dessert.
This dessert board is perfect as a centrepiece for any holiday or party. Arrange your red velvet treats, cheeses, fruits, and extras on a large serving platter, allowing guests to choose their favourites. It’s a fun, interactive dessert that encourages sharing and conversation.
With Accompanying Sides
Pair your board with complementary sides such as a light fruit salad, a rich hot chocolate, or coffee. The combination of flavours creates a harmonious, indulgent and balanced meal, ideal for festive brunches or holiday gatherings.
Drink Recommendations
Enhance your dessert board with the perfect beverage pairing. Consider serving a glass of sparkling wine or champagne for a touch of elegance. For non-alcoholic options, freshly squeezed juice, iced coffee, or a warm cup of cocoa can be delightful complements to the varied flavours of your board.
Storage and Reheating Tips
Although you should enjoy this dessert board fresh, you may occasionally have leftovers or wish to prepare parts beforehand. Here’s how to store and reheat your Mini Eggnog Cheesecakes (or, in this case, your assorted dessert board components) properly:
How to Store Leftovers
Store any leftover cakes, cheeses, or fruits in separate airtight containers in the refrigerator. Assemble the board fresh when ready to serve it to maintain the best texture and flavour. Wrap the red velvet cake components tightly in plastic wrap to prevent them from drying out.
Reheating Techniques
If you need to warm up any components (such as the red velvet cake), reheat them in a preheated oven at 300°F (ca. 149 °C) for 5-10 minutes. Avoid microwaving, as it can alter the texture. Always allow the components to come to room temperature before assembling the board for optimal flavour.
Portioning Tips
For party settings, pre-portion your dessert components into individual servings. This makes it easier for guests to grab various treats without the board becoming messy. Label each section if necessary to help guests navigate the different flavours and textures.
Nutritional Information and Benefits
While a dessert board is generally an indulgence, making it at home allows you to control the ingredients and enjoy a balanced and satisfying treat.
Nutritional values per serving
A serving of your Red Velvet Dessert Charcuterie Board might include the following:
- Calories: A moderate to indulgent amount, depending on the chosen components.
- Protein: Provided by cheeses and any nuts or seeds used.
- Fats: Sourced from the dairy in the cheesecake, cheeses, and any added nuts.
- Carbohydrates: Depending on the recipe, they can come from the red velvet cake, biscuits, and fruits.
- Fibre: Offered by fresh fruits and whole-grain bases if used. Note: Nutritional values vary based on ingredients and portion sizes.
Ingredient Benefits
- Red Velvet Cake: Provides a festive, rich flavour, especially when made with high-quality cocoa and natural sweeteners.
- Cheeses and Nuts: Offer essential proteins, healthy fats, and a burst of flavour.
- Fresh Fruits: Contribute vitamins, antioxidants, and a refreshing contrast to the more prosperous components. These ingredients combine to create a dessert board that, while indulgent, can be enjoyed as part of a balanced celebration.
Recommended Portions
Aim for a modest serving size for a dessert board—one or two small bites of each component—to allow guests to sample various flavours without overindulging. Portion sizes can be adjusted based on the overall spread and the occasion, ensuring a balanced experience.
Common Mistakes to Avoid
Even with a detailed guide, certain pitfalls can affect the outcome of your Homemade Tim Tams (or, in this case, your Red Velvet Dessert Charcuterie Board). Here are some common mistakes and how to avoid them:
Issue 1—Overloading the Board
One common mistake is overcrowding the board with too many items, which makes it look cluttered and confuses the flavour balance. Keep the layout simple, with a few key components complementing each other.
Issue 2—Inconsistent Sizing
Uniformity is key to an attractive presentation. Ensure that all slices of red velvet cake and portions of cheese or fruit are cut into consistent sizes. This procedure enhances the visual appeal and ensures the even distribution of flavours.
Issue 3—Poor Quality Ingredients
The quality of your dessert board is only as excellent as the ingredients you use. Avoid pre-packaged or processed components whenever possible. Fresh, high-quality ingredients yield the best flavours and textures, so invest extra time sourcing your items.
Inspiring Conclusion
In conclusion, a Red Velvet Dessert Charcuterie Board is more than just a collection of treats—it is a creative, festive expression of culinary artistry that can transform any occasion into a celebration. This dessert board combines the indulgent allure of red velvet cake with the sophistication of assorted cheeses, fresh fruits, and complementary garnishes to create a genuinely memorable spread. It’s perfect for holiday parties, intimate family gatherings, or a standout dessert display that captivates the eyes and the taste buds.
We hope this guide inspires you to experiment with your variations, explore new flavour combinations, and share the joy of your creation with loved ones. Whether aiming for a classic red velvet theme or a modern twist on a dessert board, let your creativity soar and have fun in the kitchen. Embrace the art of presentation, savour every bite, and celebrate the sweet moments that unite people.
Happy baking, and here’s to many festive, indulgent, and unforgettable experiences with your very own Red Velvet Dessert Charcuterie Board!
FAQ (Frequently Asked Questions)
- Can I prepare this dessert board in advance?
- You can bake the red velvet cake and prepare all the components beforehand. Assemble the board shortly before serving for the best visual appeal and freshness.
- What is the best type of red velvet cake to use?
- Use a classic, moist red velvet cake made from scratch. The high-quality store-bought cake can work if it is short on time, but homemade will give you the best flavour and control over ingredients.
- How do I ensure my cheese and fruits complement the cake?
- Choose mild and creamy cheeses, such as brie or mascarpone, and pair them with fresh, not overly sweet fruits. Balance is key—each component should enhance, not overpower, the others.
- Can I adapt this recipe for a vegan or gluten-free diet?
- Absolutely. Use a vegan red velvet cake recipe and substitute dairy cheeses with plant-based alternatives. Use gluten-free flour in your cake recipe for a gluten-free version, and ensure all other ingredients are gluten-free.
- How should I arrange the dessert board for maximum appeal?
- Start by placing the red velvet cake pieces as the centrepiece, then arrange the cheeses and fruits around them in an aesthetically pleasing pattern. Use small bowls for dips or spreads, and garnish with fresh herbs or edible flowers.
- What can I do if my red velvet cake turns out too dry?
- If your cake is dry, consider brushing the cake pieces lightly with a simple syrup (sugar dissolved in water) before assembling the board. The process adds moisture without altering the flavour significantly.
- How long will the assembled dessert board stay fresh?
- It’s best served immediately after assembling. If you must store it, separate the components and assemble them before serving to maintain the best texture and flavour.
- What are some creative garnishing ideas?
- Try dusting with powdered sugar, drizzling caramel or chocolate sauce, or adding crushed nuts for extra crunch. Edible gold dust or festive sprigs of mint can also elevate the presentation.
- Can I include additional desserts on the board?
- Feel free to add other mini desserts like macarons, mini cookies, or fruit tarts to create a diverse and visually appealing dessert spread.
- Is this dessert board suitable for large parties?
- Absolutely. Please consider increasing the recipe and selecting a large serving platter. Consider making several smaller boards for variety, ensuring guests can sample various flavours and textures.
This comprehensive guide to creating a Red Velvet Dessert Charcuterie Board has taken you through every step—from selecting high-quality red velvet cake, cheeses, and fruits to assembling an artful, festive display perfect for any special occasion. The careful attention to detail, from ingredient preparation and baking techniques to creative serving suggestions and storage tips, ensures that your dessert board looks stunning and tastes divine.
This recipe invites you to explore your creative side, experiment with variations, and enjoy the satisfaction of crafting a dessert spread that reflects your personal style. Whether hosting a holiday party, celebrating a special event, or simply indulging in a sweet treat at home, this dessert board is designed to impress and delight.
Happy baking, and may your kitchen be filled with the rich, vibrant flavours and joyful moments of creating your very own Red Velvet Dessert Charcuterie Board!
Modern Watergate Fruit Salad: A Nostalgic Yet Fresh Twist
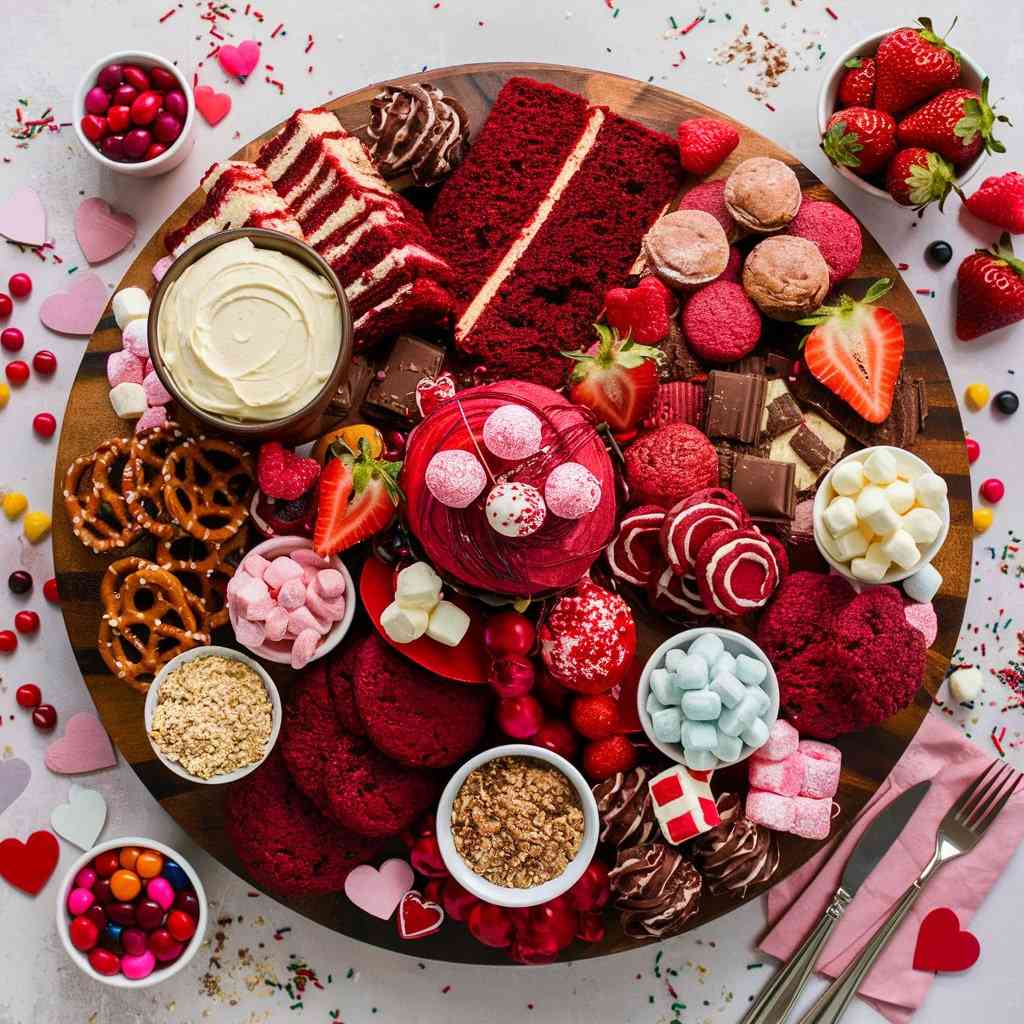
Red Velvet Dessert Charcuterie Board
Ingredients
- 1 red velvet cake (store-bought or homemade), cut into small slices or cubes
- 12 red velvet cupcakes
- 1 cup red velvet cookies
- 1 cup cream cheese frosting (for dipping)
- 1 cup fresh strawberries
- 1 cup raspberries
- 1 cup white chocolate-covered pretzels
- 1 cup red and pink M&Ms or chocolate candies
- 1 cup marshmallows (red and white)
- ½ cup crushed nuts (optional, for garnish)
Instructions
- Start with a large wooden board or platter as the base.Arrange the red velvet cake slices or cubes in one section of the board.Place the red velvet cupcakes in another section, spacing them evenly.Add small bowls or ramekins for the cream cheese frosting and crushed nuts (if using).Scatter the red velvet cookies, strawberries, raspberries, and marshmallows around the board.Fill in any gaps with white chocolate-covered pretzels and red/pink candies.Garnish with additional frosting drizzle or sprinkles for a festive touch.Serve immediately or cover and refrigerate until ready to serve.
Notes
- Use store-bought red velvet cake and cupcakes to save time.
- Customize the board with other red or pink treats, such as macarons or chocolate-dipped strawberries.
- Keep the board refrigerated if not serving immediately, especially if using fresh fruit or frosting.