

Have you ever wondered How To Make Sour Cream in your kitchen? If so, you’re in the right place! This guide covers everything you need—from the Homemade Sour Cream Recipe basics to a full breakdown of How to Make Sour Cream at Home. Whether you’re searching for an Easy Sour Cream Recipe, a DIY Sour Cream project, or even a Quick Sour Cream Recipe that saves time without sacrificing flavor, this article is packed with detailed instructions, handy tips, and creative variations that ensure your sour cream turns out perfectly every time.
Homemade sour cream is a versatile condiment that elevates salads, soups, and baked goods. It also offers control over ingredients and flavor—ideal for families who value taste and health. Let’s embark on this culinary journey and discover why making sour cream at home is as simple as rewarding!
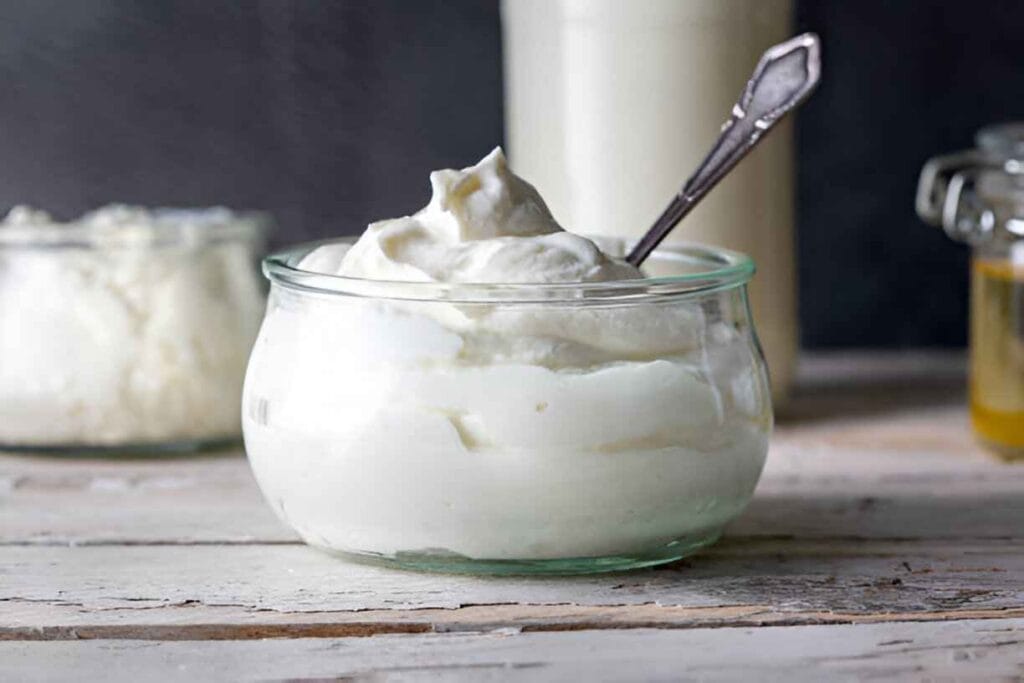
Table of Contents
Why You’ll Love Homemade Sour Cream
Making your sour cream is more than just a fun kitchen experiment—it’s a way to add a personalized touch to your cooking. Here are some compelling reasons to try our recipe:
Family-Friendly Delight
Imagine the joy on your family’s faces when you serve a homemade, creamy, and tangy condiment that perfectly complements everything from tacos to baked potatoes. This Homemade Sour Cream Recipe is ideal for busy households as it requires minimal ingredients and no preservatives. With a straightforward process, even novice cooks can enjoy the satisfaction of crafting a staple condiment that enhances every meal.
Nutritional Boost with Simple Ingredients
You know exactly what’s going into your mix when you create sour cream from scratch. Our recipe uses high-quality heavy cream and cultured buttermilk, ensuring you get a product free from unwanted additives. This translates into better flavor and provides essential nutrients such as calcium, vitamin A, and beneficial bacteria that promote digestive health. This Easy Sour Cream Recipe is a win-win for both taste and wellness.
Flexible, Budget-Friendly, and Adaptable
Its versatility is one of the best aspects of making sour cream at home. Whether you need a quick fix for a last-minute recipe or want to experiment with flavors by adding herbs or spices, our method allows plenty of customization. This DIY Sour Cream can be adapted to suit various dietary needs and budgets. With ingredients you likely already have in your pantry, it’s economical and highly flexible, fitting seamlessly into various culinary traditions.
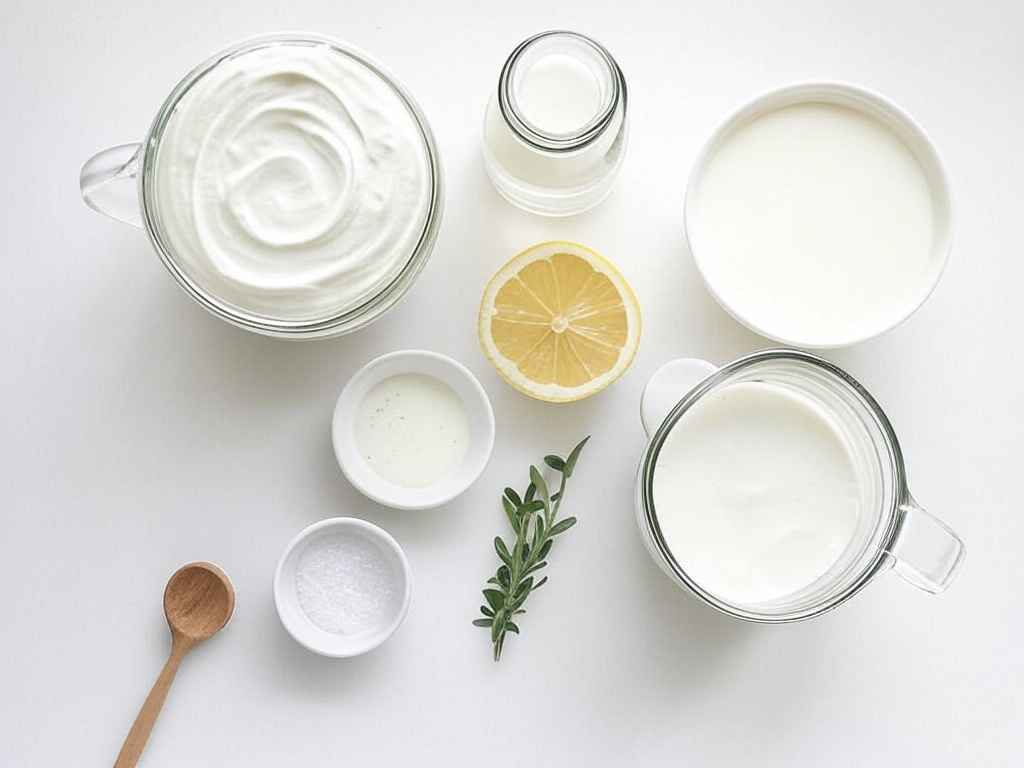
Essential Ingredients for the Recipe
Starting with quality ingredients is crucial to achieve that perfect tang and creamy texture. Here’s what you’ll need:
Ingredients:
- 1 cup heavy cream or whipping cream
- 1-2 tbsp buttermilk, lemon juice, or white vinegar
- A pinch of salt (optional)
Fresh Heavy Cream
The star of our recipe is high-quality heavy cream. This ingredient provides a rich, velvety base for your sour cream. Look for heavy cream with high butterfat content, as it will yield a thicker and creamier consistency. If you prefer a lighter version, you can experiment with reduced-fat cream, but remember that this may affect the final texture.
Cultured Buttermilk or Lactic Acid
You’ll need cultured buttermilk or a small amount of lactic acid for fermentation. Cultured buttermilk is the traditional choice and helps kickstart the fermentation process, giving sour cream its signature tang. Alternatively, a bit of lactic acid can achieve a similar effect, especially if buttermilk is hard to find in your area. This versatility is perfect for those exploring How to Make Sour Cream at Home with ingredients that suit their pantry.
Salt and Optional Flavorings
While essential sour cream is simply cream and acid, a pinch of salt can help to enhance the flavor. Consider optional flavorings such as a drizzle of lemon juice or even a touch of garlic powder for a unique twist. These additions can be tailored to your taste and dietary preferences, making your Quick Sour Cream Recipe an essential condiment and a customizable delight.
Ingredient Preparation
Preparing your ingredients correctly is the first step toward achieving a consistently great sour cream. Follow these simple instructions:
Sanitizing and Measuring Ingredients
Begin by ensuring all your utensils and containers are clean. Sanitation is crucial to prevent unwanted bacterial growth, especially when working with dairy products. Accurately measure the heavy cream and cultured buttermilk (or lactic acid) per your recipe requirements. Precision at this stage will help you achieve the desired texture and tang.
Combining the Cream and Buttermilk
Pour the measured heavy cream into a clean glass jar or bowl. Slowly add the cultured buttermilk to the cream, stirring gently to ensure even distribution. If using lactic acid, follow the same method, carefully mixing thoroughly. This step is essential for initiating the fermentation process that transforms cream into sour cream.
Allowing the Mixture to Rest
Cover your container with a clean cloth or loosely with a lid. Leave the mixture at room temperature in a dark, warm place for 12 to 24 hours. The length of time will depend on the ambient temperature and your taste preference. During this period, the natural bacteria work magic, thickening the cream and infusing it with that characteristic sour note.
Step-by-Step Cooking Instructions
Follow these detailed instructions to transform your ingredients into the perfect sour cream:
Step 1 – Initial Preparation
Before starting, ensure all your ingredients are at room temperature. Pre-warming the heavy cream helps the fermentation process kick in more quickly. This simple step is the foundation of an Easy Sour Cream Recipe that consistently delivers excellent results.
Step 2 – Ingredient Assembly
Combine your ingredients in your chosen container once they are at the right temperature. Stir gently until the cream and buttermilk are thoroughly blended. If you’re opting for additional flavorings, such as salt or lemon juice, now is the time to incorporate them. This critical step ensures the flavor develops evenly throughout the mixture.
Step 3 – Fermentation and Finishing Touches
Place your container in a warm spot (ideally around 70°F to 75°F) for 12 to 24 hours. Check the consistency after the first 12 hours—if it hasn’t thickened to your liking, let it rest for a few more hours. Once the mixture has reached the desired thickness and tang, stir it again before transferring it to the refrigerator. Chilling will not only halt the fermentation process but also further enhance the texture of your sour cream.
Tips for an Even Tastier Version
To elevate your sour cream even further, consider these creative tips and tricks:
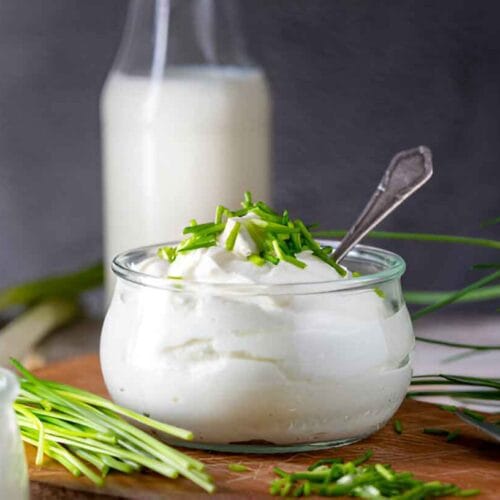
Adding Extra Ingredients
While the classic recipe is simple and delicious, you can experiment by adding finely chopped herbs like chives, parsley, or dill. A small amount of roasted garlic or a dash of paprika can also lend a unique twist. These additions are perfect if you’re looking for a flavored sour cream that can double as a dip or a garnish for baked potatoes.
Techniques to Enhance Flavor
For an extra burst of flavor, try “infusing” your sour cream by letting the additional ingredients steep in the mixture for a few extra hours before refrigeration. Alternatively, lightly toast some spices before adding them to your mix. These techniques add a depth of flavor that transforms your DIY Sour Cream into a gourmet condiment.
Adjustments for Preferences
If you prefer a milder tang or a thicker texture, experiment with the fermentation time and the ratio of cream to buttermilk. Some like to add a little more buttermilk for a pronounced tang, while others favor a creamier consistency with a higher cream-to-buttermilk ratio. Tailor these adjustments to suit your palate and dietary needs.
Recipe Variations and Adaptations
Not every kitchen is the same, and your sour cream recipe can be adapted in numerous ways to fit different tastes or dietary restrictions.
Vegetarian Option
Our homemade sour cream recipe is already vegetarian-friendly, using dairy products that are suitable for vegetarians. However, consider using coconut or cashew cream combined with a vegan culturing agent to make a vegan version. While this variant won’t taste exactly like traditional sour cream, it can be a delightful alternative for those following a plant-based diet.
Gluten-Free or Low-Carb Option
Since sour cream is naturally gluten-free and low in carbohydrates, it works well for specialized diets. To incorporate sour cream into a gluten-free or low-carb meal, ensure that any accompanying ingredients (like dips or sauces) are also compliant. For example, pair your sour cream with gluten-free crackers or use it as a topping on a low-carb vegetable medley.
Other Adaptations
Seasonal adaptations can also breathe new life into your sour cream. Try stirring in a bit of lime zest and fresh cilantro in the summer to create a refreshing dip for grilled vegetables. In the winter, a touch of smoked paprika or even a sprinkle of nutmeg can create a comforting twist. The beauty of a Quick Sour Cream Recipe lies in its adaptability to any season or occasion.
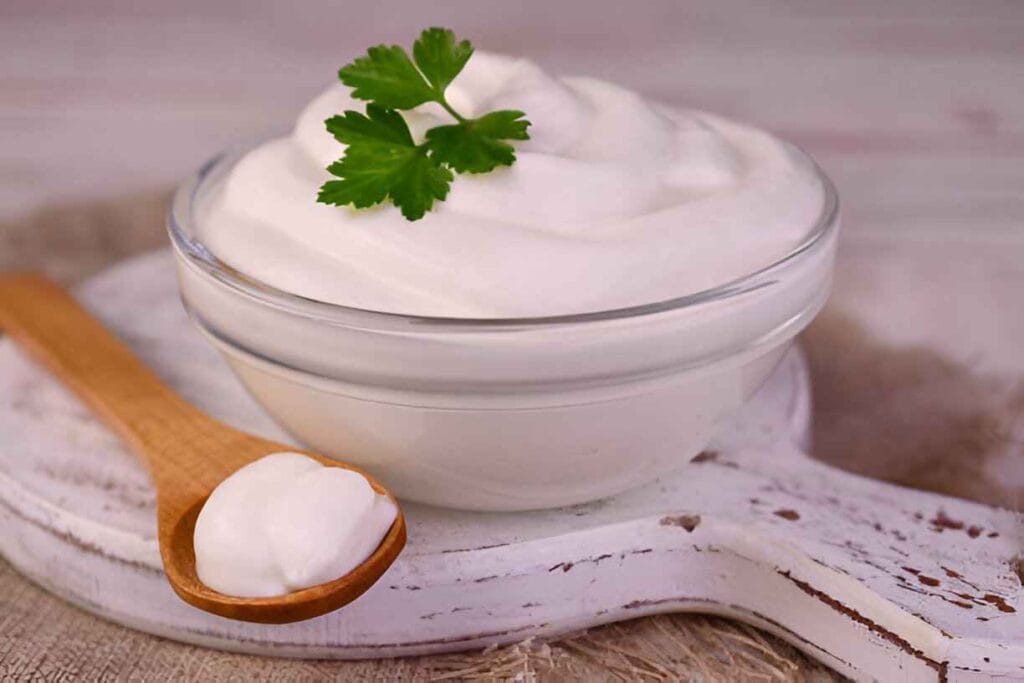
Serving Suggestions
Now that you’ve mastered the art of making sour cream, here are some creative ways to serve it:
Salad or Soup Ideas
Use your homemade sour cream as a topping for a vibrant mixed salad or a rich, tangy addition to chilled soups like gazpacho or borscht. It’s also fantastic when dolloped on top of a hearty bowl of chili, providing a cooling counterbalance to the spice.
Hearty Sides
Your sour cream pairs perfectly with classic comfort foods. Try it as a topping for baked potatoes, mixed into mashed potatoes for extra creaminess, or as a creamy dip alongside fresh vegetable sticks. A generous swirl of homemade sour cream can enhance a slice of bread or roasted root vegetables.
Drink Recommendations
Although sour cream is primarily a food accompaniment, it can inspire your beverage pairings! Enjoy your meal with a crisp glass of white wine or a light, refreshing iced tea. To create a themed dinner party, consider a sour cream-infused cocktail with a touch of creaminess balancing a tangy citrus mix.
Storage and Reheating Tips
To make sure your sour cream stays fresh and delicious, follow these storage and reheating guidelines:
How to Store Leftovers
After your sour cream has reached the perfect tang and thickness, transfer it to an airtight container. Keep refrigerated and use it within 7–10 days for optimum freshness. If preparing a large batch, consider portioning it into smaller containers for easier use and to reduce contamination risks.
Reheating Techniques
While sour cream is best enjoyed chilled or at room temperature, some recipes might require a brief warming. If you need to incorporate your sour cream into a hot dish, stir it at the end of cooking to prevent curdling. Avoid direct high heat to maintain the smooth texture and tangy flavor.
Portioning Tips
For meal prepping, consider dividing your sour cream into single-serving portions. This not only helps in controlling portions but also minimizes the risk of repeated exposure to room temperature. Use freezer-safe containers if you plan to store small amounts for extended periods, though freezing may slightly alter the texture.
Nutritional Information and Benefits
Understanding what goes into your sour cream and how it benefits your health is key to enjoying it as part of a balanced diet.
Nutritional Values per Serving
A typical serving of homemade sour cream provides essential nutrients such as calories from healthy fats, protein, and minimal carbohydrates. Although the exact nutritional values may vary depending on the ratio of cream to buttermilk, you can expect approximately 50–70 calories per tablespoon, along with a good dose of calcium and vitamin A. This makes it a wholesome addition to your meals when used in moderation.
Ingredient Benefits
- Heavy Cream: Provides a rich source of fat-soluble vitamins and adds a velvety texture.
- Cultured Buttermilk: Introduces beneficial bacteria that aid digestion and improve gut health.
- Salt and Optional Add-ins: Enhance flavor without the need for artificial preservatives.
- These benefits make sour cream a delicious condiment and a nutrient-rich addition to your diet.
Recommended Portions
A tablespoon or two of sour cream per serving is ideal for those mindful of their calorie intake. This allows you to enjoy the flavor and texture without overindulging. Pairing sour cream with fiber-rich foods such as vegetables or whole grains creates a balanced meal that satisfies both hunger and nutritional needs.
Common Mistakes to Avoid
Even the best cooks can run into pitfalls. Here are some common mistakes to watch out for when making sour cream—and how to avoid them:
Over-Fermenting
Leaving your sour cream to ferment excessively can result in an overly tangy or curdled product. To avoid this, keep a close eye on the fermentation time and taste test periodically. Immediately transfer the sour cream to the refrigerator if the flavor becomes too pronounced.
Using Poor-Quality Cream
High-quality cream is the foundation of great sour cream. Using old or previously opened cream may lead to off flavors or an inconsistent texture. Always choose fresh cream from a reputable source for the best results.
Inconsistent Temperature
Temperature fluctuations during fermentation can cause uneven thickening or unwanted bacterial growth. Ensure your sour cream is left in a consistently warm area (around 70°F–75°F) during fermentation, and avoid exposing it to drafts or sudden temperature changes.
Inspiring Conclusion
Mastering this Homemade Sour Cream Recipe is a rewarding culinary adventure and a great way to elevate your everyday meals. Whether preparing a simple dip, enhancing your soups, or adding a gourmet twist to baked dishes, this recipe offers flexibility, ease, and nutritional benefits that are hard to beat.
Creating your own sour cream invites creativity into your kitchen and ensures that every dollop is carefully crafted. Experiment with different flavors, share your successes with family and friends and remember that every great chef started with a single, well-crafted recipe. So go ahead, roll up your sleeves, and enjoy the process—your kitchen masterpiece awaits!
FAQ (Frequently Asked Questions)
Below are 10 frequently asked questions that readers often have about making sour cream at home, along with detailed answers:
- Can I prepare this recipe in advance?
- Yes, you can prepare your sour cream in advance. Once it reaches the desired thickness and flavor, store it in an airtight container in the refrigerator. It will typically keep for up to 7–10 days. Some enthusiasts even prepare larger batches and portion them for later use.
- What is the best substitute if I can’t find cultured buttermilk?
- If cultured buttermilk is unavailable, you can use a small amount of lactic acid or plain yogurt as a substitute. The resulting sour cream may vary slightly in taste and texture but will still provide that desired tanginess.
- How long does it take for the sour cream to ferment?
- The fermentation process usually takes 12 to 24 hours, depending on the room temperature. A warmer environment speeds up the process, while cooler conditions may require more time. Always taste test to decide when it’s just right.
- Is it necessary to add salt to the recipe?
- Salt is optional but recommended. A pinch of salt can enhance the flavor, though you can omit it if you prefer a purer cream taste or are watching your sodium intake.
- Can I make a vegan version of sour cream?
- Absolutely! Try using coconut cream, blended cashews, and a vegan probiotic culture for a vegan alternative. While the taste and texture will differ slightly from traditional sour cream, it can be a delightful alternative for those following plant-based diets.
- What are some creative ways to use homemade sour cream?
- Homemade sour cream is incredibly versatile. It can be used as a topping for baked potatoes, mixed into dips, drizzled over tacos, or even as a base for creamy salad dressings. It also pairs wonderfully with spicy dishes to cool the palate.
- How can I adjust the tanginess of my sour cream?
- The tanginess is influenced by the fermentation time and the ratio of cream to buttermilk. Shortening the fermentation period or increasing the cream proportion for a milder flavor. Conversely, for a sharper tang, let it ferment a little longer or use a higher ratio of buttermilk.
- Do I need to worry about food safety during fermentation?
- Clean utensils and containers are essential, as with any homemade dairy product. Ferment the sour cream in a controlled environment (ideally around 70°F–75°F) and always store it in the refrigerator once it’s finished fermenting to reduce the risk of unwanted bacterial growth.
- Can I incorporate additional flavors directly into the sour cream?
- After fermentation, you can experiment by stirring in herbs, spices, or even a bit of citrus zest. Just mix them evenly to maintain the texture and overall flavor balance.
- What should I do if my sour cream doesn’t thicken as expected?
- If your sour cream remains too thin, it might be due to insufficient fermentation time or a lower fat content in the cream. Allow it to rest a bit longer at room temperature (while keeping safety in mind), or consider using cream with a higher fat percentage next time.
Final Thoughts
Creating your sour cream is more than just following a recipe—it’s about embracing the art of fermentation, experimenting with flavors, and crafting something genuinely delicious from scratch. With clear instructions, adaptable methods, and a wealth of creative ideas, this guide ensures you’ll have all the tools necessary to succeed, whether making a Quick Sour Cream Recipe for a last-minute meal or a more traditional version to savor over time.
Remember, each batch you create is a new opportunity to experiment and tailor the flavor to your liking. Don’t be afraid to try different herbs, spices, or alternative bases if you’re venturing into vegan territory. Cooking is as much about creativity as it is about precision, and this sour cream recipe is designed to offer the perfect balance of both.
We hope you feel inspired to try this Homemade Sour Cream Recipe and discover how versatile and delicious sour cream can be. Enjoy the process, and don’t forget to share your creations with friends and family—because great food is meant to be enjoyed together.
Sauce Chimichurri: The Ultimate Guide to a Bold and Flavorful Chimichurri Sauce
How To Make Sour Cream
Ingredients
- 1 cup heavy cream or whipping cream
- 1-2 tbsp buttermilk, lemon juice, or white vinegar
- A pinch of salt (optional)
Instructions
- Combine Ingredients:In a clean glass jar or bowl, mix 1 cup of heavy cream with 1-2 tbsp of buttermilk, lemon juice, or white vinegar. Stir gently to combine.Let It Sit:Cover the jar or bowl with a clean cloth or lid. Let it sit at room temperature for 12-24 hours, or until thickened.Refrigerate:Once thickened, stir the sour cream and refrigerate for at least 1 hour before using.Serve:Use as a topping, in baking, or as a base for dips and sauces.
Notes
- For a thicker sour cream, use more buttermilk, lemon juice, or vinegar.
- Store in an airtight container in the refrigerator for up to 1 week.
- Use pasteurized cream for safety, but avoid ultra-pasteurized cream as it may not thicken well.