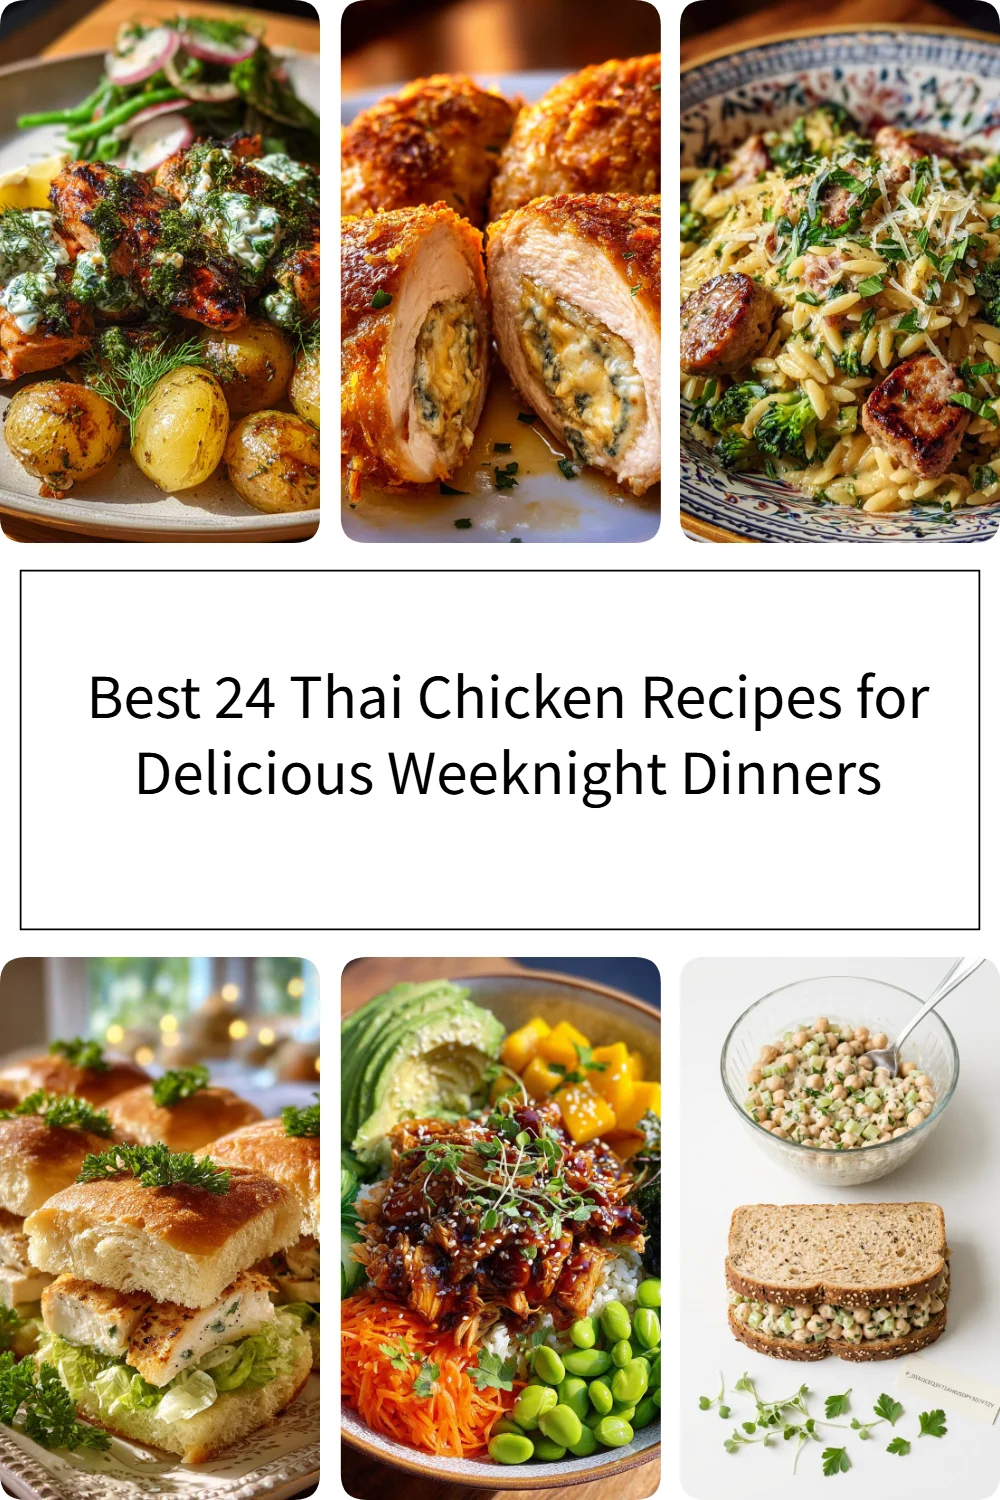
If you're anything like me, you know that weeknight dinners can often feel like a chore, but they don’t have to be! I’ve gathered some of my absolute favorite Thai chicken recipes that are not only delicious but also quick and easy to whip up after a long day. From the zesty Spicy Thai Chicken Salad to the comforting Thai Chicken Potato Soup, each dish is bursting with flavor and guaranteed to impress. Join me on this culinary adventure as we explore vibrant flavors and simple techniques, making every dinner a delightful experience that the whole family will love!
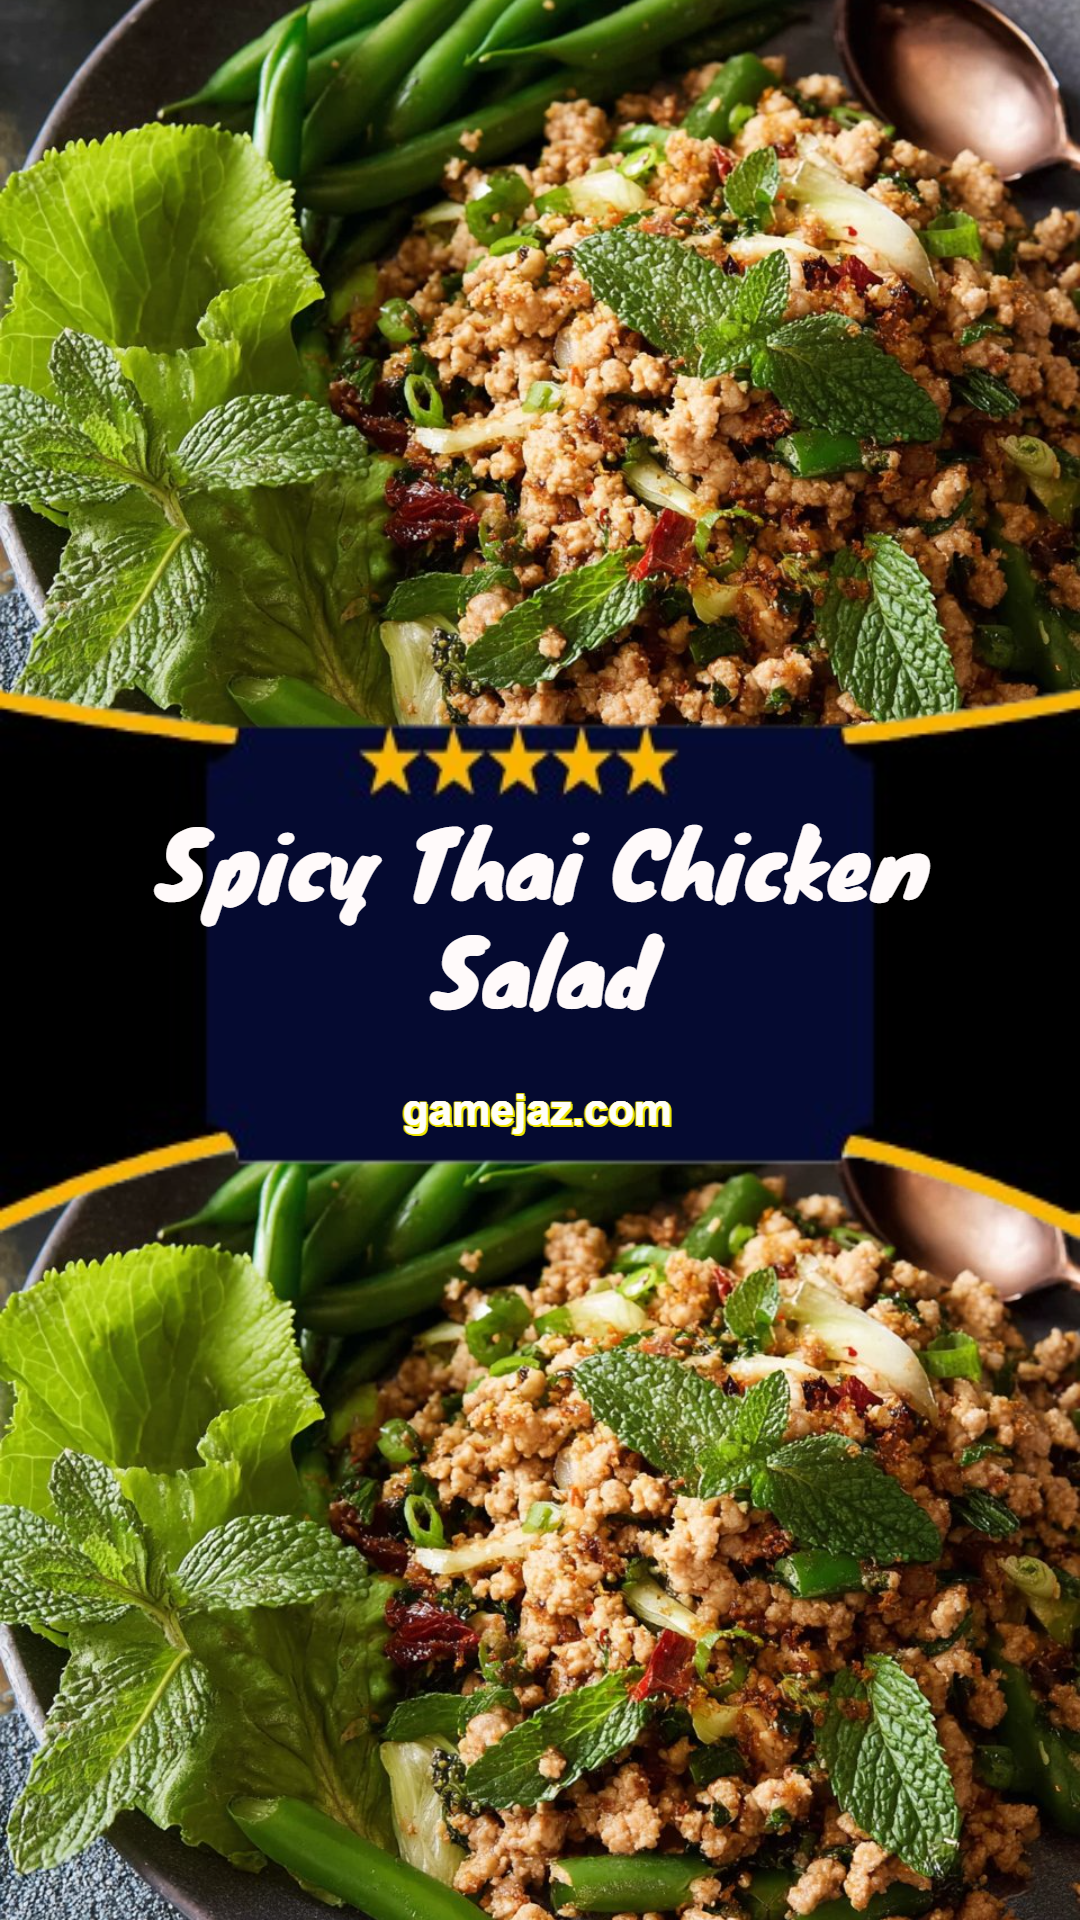
1. Spicy Thai Chicken Salad
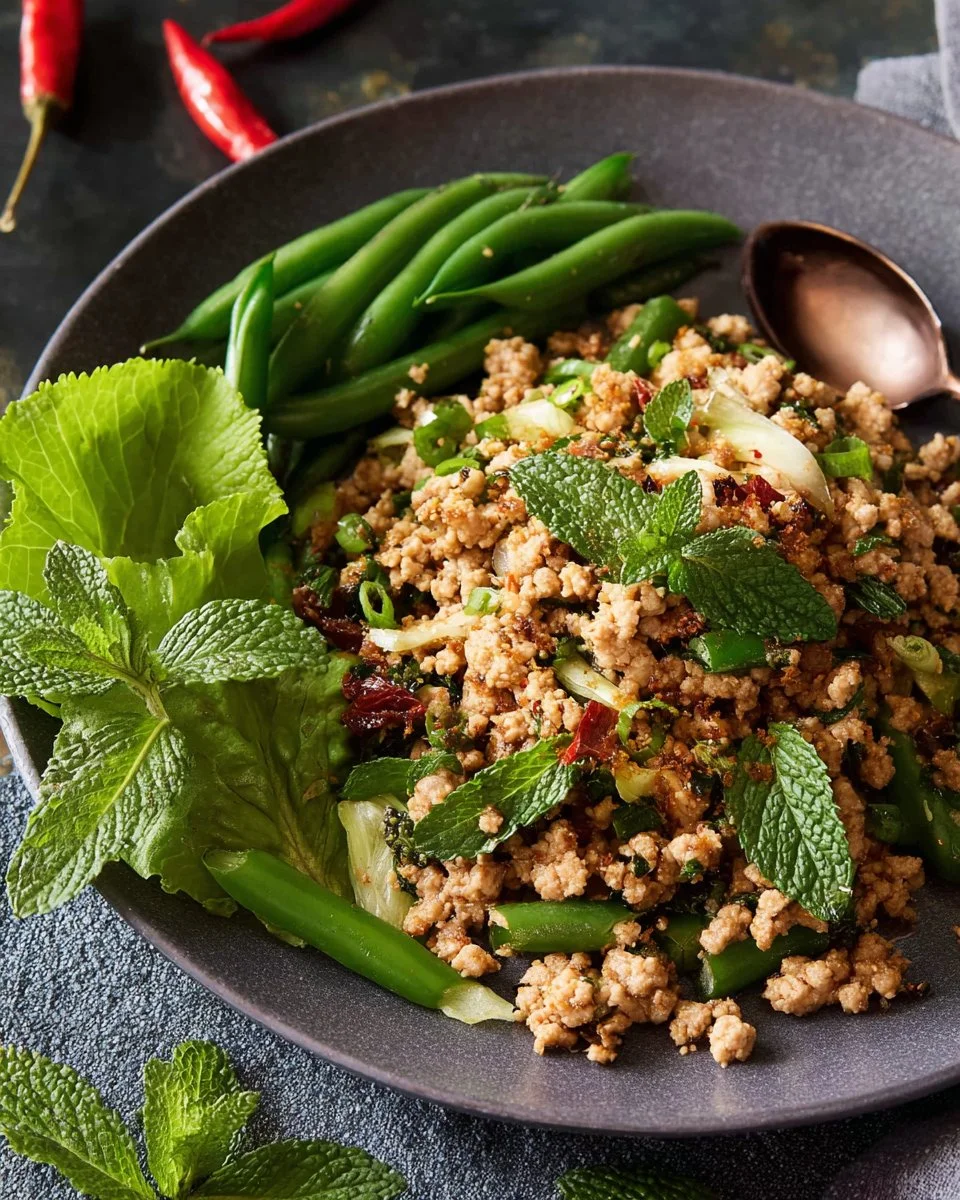
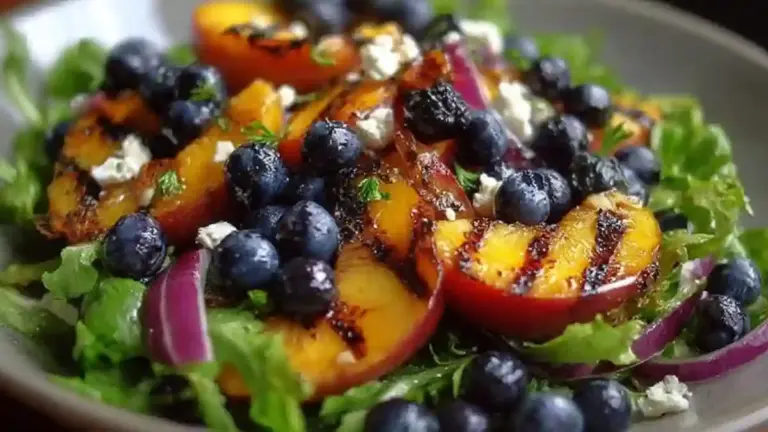
Savory & Spicy Thai Chicken Salad: The Ultimate Flavor Explosion
When I recall my first bite of a Spicy Thai Chicken Salad, I’m transported back to a bustling street market in Thailand. The air was thick with the scent of lemongrass and chilies, and I was captivated. The vibrant colors and textures of this salad danced on my plate, inviting me to indulge. I remember sharing it with my family, each crunch of fresh vegetables and tender chicken igniting joy and laughter amid our culinary adventure.
What makes Spicy Thai Chicken Salad so special? It’s not just a dish; it’s a celebration of fresh ingredients, bold flavors, and the warmth of family gatherings. With every bite, you’re met with the crunchy freshness of veggies, the richness of chicken paired with a tangy lime dressing, and a subtle kick of heat from roasted chili flakes. This recipe elevates the classic concept of salad into something spectacular and unforgettable.
Unlike some store-bought versions that can lack depth and authenticity, this homemade recipe allows you to tailor every ingredient to your taste and health needs. You’ll learn how to recreate this vibrant dish, bursting with comfort and adventure while turning an ordinary day into something extraordinary. Ready to bring a taste of Thailand into your kitchen? Let’s dive in!
What Are Spicy Thai Chicken Salads?
Spicy Thai Chicken Salad, also known as Laab Gai, is a traditional dish hailing from the northern regions of Thailand. It’s known for its unique blend of lean ground chicken, fresh herbs, and a refreshing spicy lime dressing. The dish’s zing comes from the careful balance of flavors created by fish sauce, lime juice, and roasted chili flakes, making it irresistible!
Each mouthful offers a delightful contradiction of textures: the juicy ground chicken melds perfectly with the crunch of fresh veggies and the aromatic herbs. What sets this salad apart is the addition of toasted rice powder, lending a nutty depth that takes the flavors to another level. It’s a perfect meal for any occasion, whether a summer picnic, a quick weeknight dinner, or a festive family gathering.
This dish is not just about filling your stomach; it’s about nourishing your spirit. It’s a versatile recipe, inviting modifications to suit any palate or dietary need, ensuring everyone can enjoy this spicy, savory delight.
Why You’ll Love This Recipe
There are numerous reasons why this Spicy Thai Chicken Salad deserves a spot on your dinner table:
Bursting with Flavor: Unlike store-bought salads that can taste bland, this dish is an explosion of fresh, vibrant flavors. The combination of lime juice, fresh herbs, and spices makes every bite an adventure.
Cost-effective: Making this salad at home is far more economical than ordering takeout or dining out. You’ll find that the ingredients are all affordable and easy to source.
Customizable: Want to swap chicken for tofu or add more heat? Go ahead! This recipe can easily be adapted to fit vegan, vegetarian, or gluten-free diets, ensuring everyone at your table can enjoy it.
Quick and Easy: With a prep time of about 30 minutes, this salad is perfect for busy weeknights. Even if you’re not confident in the kitchen, this dish is straightforward and forgiving.
Visually Stunning: The vibrant colors of fresh veggies and herbs make this salad as pleasing to the eye as it is to the palate. It’s perfect for gatherings, ensuring you impress guests without any fuss!
Ready to get cooking? Let’s gather the ingredients!
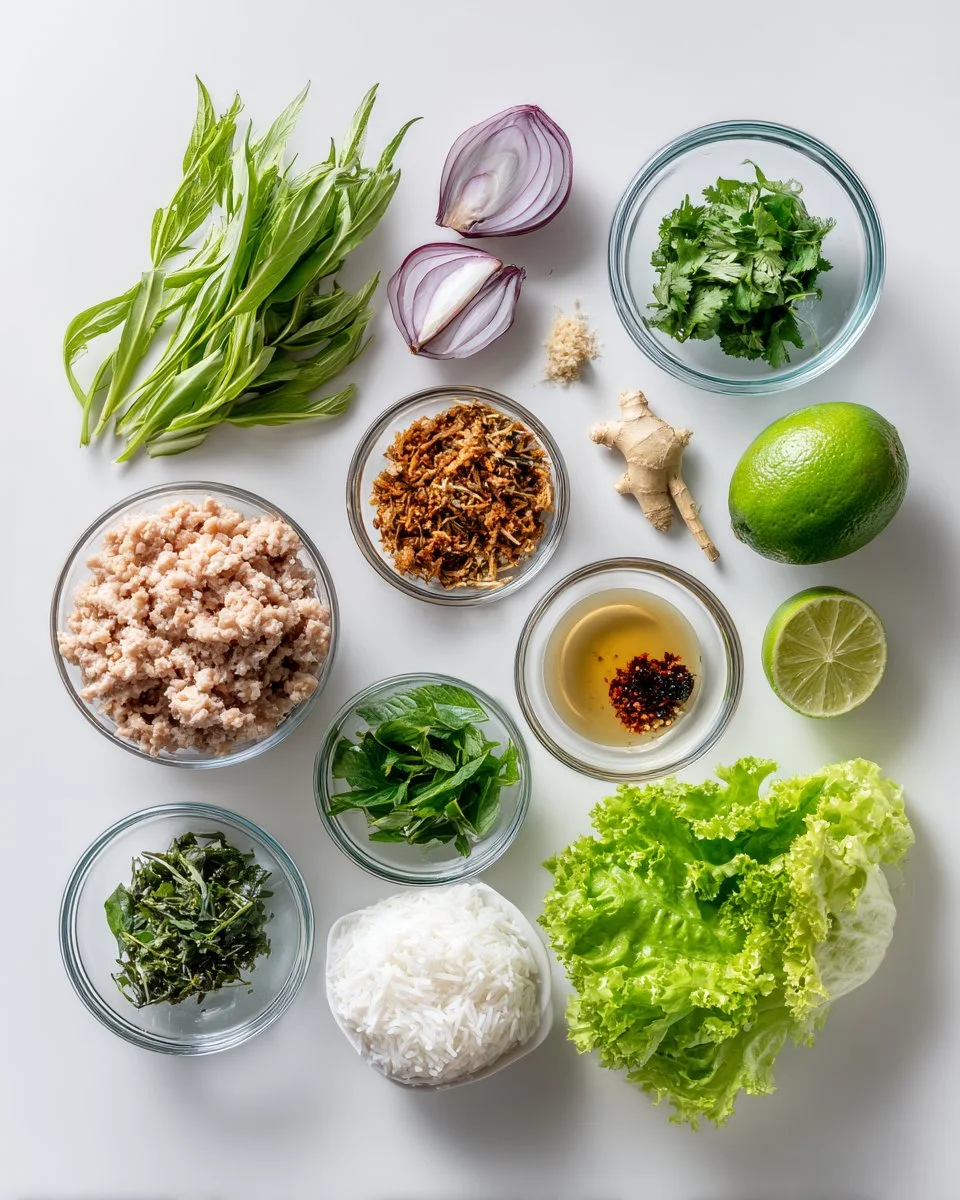
Ingredients Section
Here’s what you’ll need to make this mouthwatering Spicy Thai Chicken Salad:
- 300 g ground chicken (use a high-quality brand like Foster Farms for the best flavor)
- 2 Tbsp water or unsalted chicken stock (homemade stock is always a winner)
- 1 Tbsp + 2 tsp fish sauce (try Red Boat for its depth of flavor)
- 1 small shallot, thinly sliced
- 2 Tbsp fresh lime juice (nothing beats fresh!)
- 1-2 tsp roasted chili flakes (adjust based on your heat preference)
- 2-3 Tbsp toasted rice powder (see note below)
- 6-8 sprigs cilantro, roughly chopped
- 2-3 leaves sawtooth coriander (optional, but adds an authentic touch)
- 1 green onion, chopped
- 1/3 cup mint leaves, torn
- Sticky rice for serving
- Fresh veggies for serving: You can use cabbage, long beans, cucumber, romaine lettuce, and carrots for a stunning colorful platter.
- Crispy chicken skin for garnish (optional)
For Toasted Rice Powder:
- 3 Tbsp uncooked Thai sticky rice or jasmine rice
- 1 makrut lime leaf (optional, for extra aroma)
Notes on Ingredients:
- Quality Matters: Always opt for the freshest ingredients, especially herbs and lime.
- Substitutions: If fresh herbs aren’t available, dried herbs can work in a pinch, though the flavors won’t be as bright.
- Prep: Let the butter or any fats sit at room temperature if using in your side dishes.
Step-by-Step Instructions
Toasted Rice Powder
Toast Rice: In a dry sauté pan over high heat, add the uncooked rice and makrut lime leaf (if using). Toast until deep brown—about 3-4 minutes. Stir constantly to prevent burning. You want it to smell nutty!
Grind: Let it cool slightly, then grind the toasted rice until you achieve a coarse powder consistency. This step is crucial for the unique flavor of the dish.
Preparing the Salad
Cook the Chicken: In a saucepan, simmer the ground chicken with 2 Tbsp water or chicken stock and 1 tsp fish sauce over medium heat. Cook until the chicken is well-done and no longer pink, about 5-7 minutes.
Mix Ingredients: Remove the chicken from heat. In a large bowl, add the cooked chicken, shallots, remaining fish sauce, lime juice, chili flakes, and 2 Tbsp toasted rice powder. Mix until well combined. Taste and adjust seasoning as needed.
Add Fresh Greens: Fold in the green onions, cilantro, and mint. The herbs should be incorporated gently to keep their freshness!
Plate Beautifully: Serve your salad on a large platter, garnishing with additional mint and, if desired, crispy chicken skin. The fresh vegetables should be arrayed around or alongside for crunch and brightness.
Serve it Up: Accompany with warm sticky rice, presenting all the fresh vegetables and salad on the side. Enjoy!
Chef’s Tips:
- Common Mistakes: Avoid overcooking the chicken—it should be tender and juicy, not dry!
- Visual Cues: Look for browning on the rice during the toasting process; that’s where the flavor is!
Expert Tips & Tricks
Storage Secrets: If you have leftovers, store them in an airtight container in the fridge for up to 2 days. However, for the best flavor and texture, enjoy it fresh!
Make Ahead: You can prepare the toasted rice powder and chop the veggies ahead of time. Just mix everything just before serving to keep it fresh and crunchy.
Troubleshooting: If your salad is too salty, add a touch more lime juice and adjust with some sugar to balance the flavors.
Flavor Enhancement: Consider marinating the chicken for an hour in fish sauce, lime juice, and herbs before cooking for even more depth of flavor.
Presentation: For a stunning plate, arrange your veggies in a rainbow pattern around the salad, inviting your guests to dive in!
Serving Suggestions
This vibrant Spicy Thai Chicken Salad is perfect for spring and summer dining but can be enjoyed year-round. Serve it alongside:
- Sticky Rice: The perfect vehicle for soaking up flavors.
- Fresh Spring Rolls: Light and refreshing, they complement the salad beautifully.
- Thai Ice Tea or Coconut Water: These drinks balance the spiciness!
For presentations, use a large platter, showcasing the colorful veggies around the salad for an appealing table display.
Variations & Substitutions
Get creative with this versatile salad! Here are a few ideas to switch things up:
- Flavor Combinations: Add sweetness by including sliced mango or pineapple.
- Dietary Adaptations: For a vegan option, swap chicken for lentils or chickpeas and use soy sauce instead of fish sauce.
- Seasonal Variations: Toss in seasonal produce like bell peppers in the summer or roasted pumpkin in the fall for a unique take.
Nutrition & Storage Info
- Prep Time: 15 minutes
- Cook Time: 15 minutes
- Total Time: 30 minutes
- Yield: 4 servings
- Estimated Calories per Serving: 300 calories
- Storage: This salad is best enjoyed fresh but can be kept in the fridge for up to 2 days.
FAQ SECTION
Can I use chicken thighs instead of ground chicken?
Absolutely! Thighs will add more flavor and moisture. Just chop them finely.Can I omit the fish sauce?
Yes, you can substitute it with soy sauce or a vegan fish sauce alternative.How can I make this salad spicier?
Add more roasted chili flakes or even fresh slices of bird’s eye chili for that extra heat!Is it necessary to make toasted rice powder?
While it adds a unique flavor, you can skip it if you’re short on time. Plain ground rice or even breadcrumbs can work in a pinch.What can I use instead of sticky rice?
Jasmine rice or even quinoa can serve as a great alternative for this dish.Can I prepare this salad in advance?
It’s best to enjoy the salad immediately after mixing, but components can be prepared beforehand.What should I do if my salad tastes too sour?
You can add a teaspoon of sugar to balance out the acidity from the lime juice.Can I freeze leftovers?
Freezing isn’t recommended due to the texture changes in the chicken and veggies.Are there any gluten-free options?
Ensure your fish sauce is gluten-free, or choose a gluten-free soy sauce alternative.How do I serve this salad?
You can serve it as a standalone dish or as a side to grilled proteins or with rice.
Conclusion
This Spicy Thai Chicken Salad is a delightful blend of flavors, textures, and nutritious ingredients that will make your taste buds sing! By embracing fresh ingredients and bold spices, you’re bound to dazzle your friends and family with this culinary adventure right at home.
I encourage you to try this lively salad and sprinkle it with your creative touch. Don’t forget to share your thoughts and photos in the comments; I would love to hear how it turns out for you! And if you enjoy Thai-inspired dishes, be sure to check out my other recipes featuring traditional ingredients—you’ll find just what you need to transport your kitchen to the heart of Thailand!
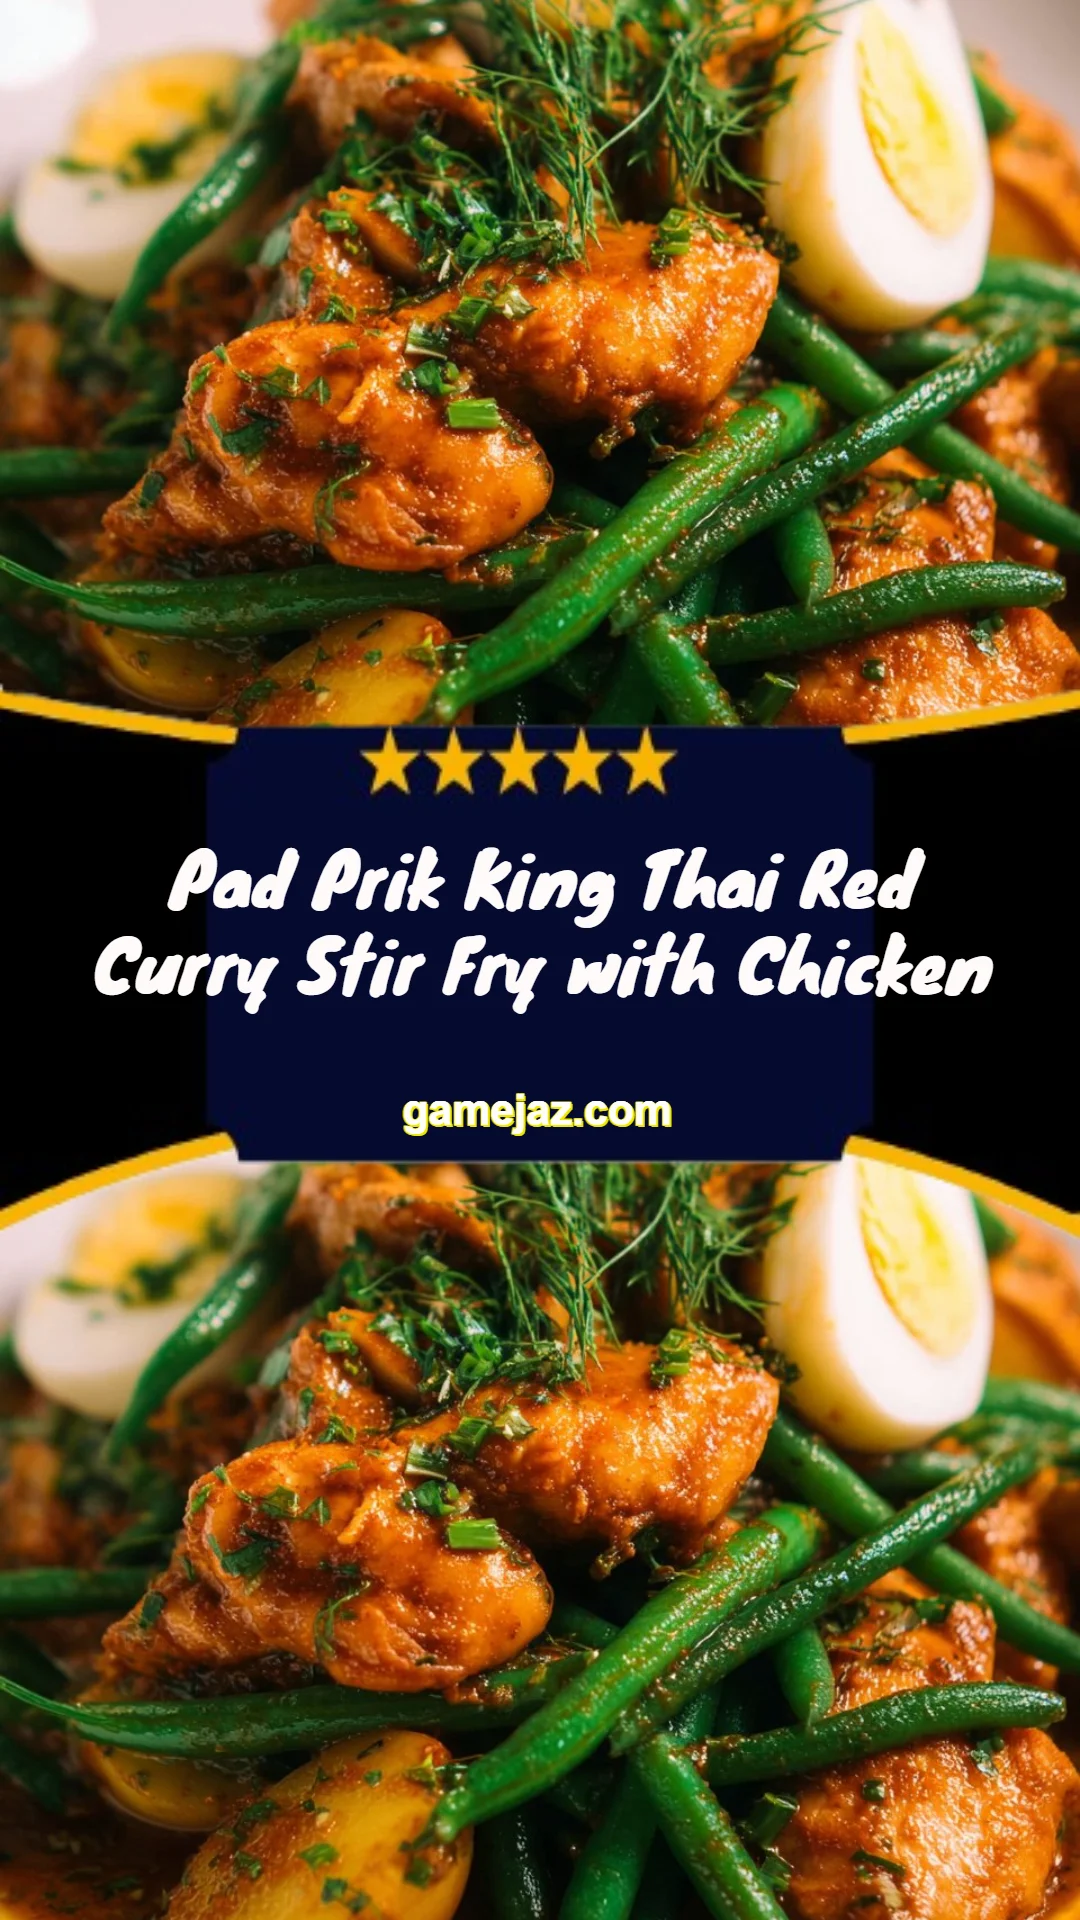
2. Pad Prik King Thai Red Curry Stir Fry with Chicken
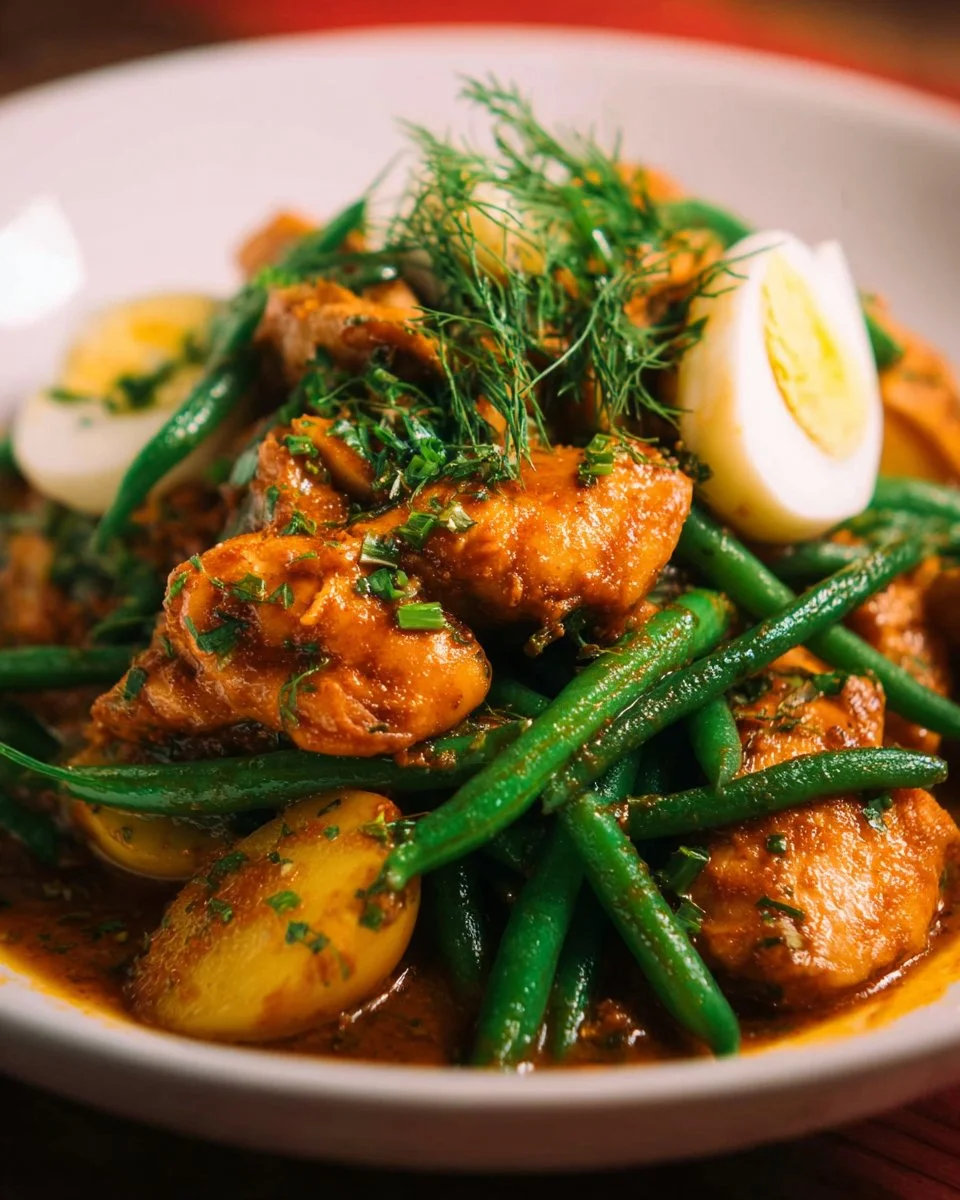
Unforgettable Pad Prik King Thai Red Curry Stir Fry with Chicken: A Flavorful Journey to Thailand
Have you ever been transported back to a cherished family gathering just by the aroma of a dish? For me, it happens every time I cook Pad Prik King Thai Red Curry Stir Fry with Chicken. This dish holds a special place in my family’s heart, not just because it’s undeniably delicious but because it embodies the essence of home and togetherness. I remember my mom expertly tossing the chicken in a vibrant red curry sauce, the air filled with the fragrant notes of lemongrass and makrut lime leaves—nostalgia on a plate, if you will.
What sets this Pad Prik King apart from others is its perfect harmony between spicy, savory, and sweet flavors, all coming together in a quick stir-fry that makes weeknight dinners feel like a special occasion. Plus, it’s incredibly easy to customize! You can tweak the spice levels and add veggies that are in season or that your family loves.
Join me on this culinary adventure as we explore how to make this incredible dish that’s bound to become a staple in your own home, filled with memories and love. Get ready to learn the secrets of achieving a Pad Prik King that will leave your family asking for seconds!
What Are Pad Prik King Thai Red Curry Stir Fry with Chicken?
Pad Prik King originates from Thailand, where it’s celebrated for its robust flavors and use of fresh ingredients. This dish is hearty yet light, with tender chicken sautéed in a vibrant red curry paste that’s often accompanied by crunchy long beans. The textures play a significant part, with the succulent chicken contrasting beautifully against the snap of fresh vegetables.
What makes Pad Prik King unique is its signature blend of red curry paste, which delivers an aromatic punch from ingredients like garlic, shallots, and dried red chilies. While similar to other Thai curries, the innovation of this stir fry ensures a satisfying and less soupy experience, making it ideal for those who prefer a drier dish.
You’ll want to whip it up when you’re in need of comfort food, a quick weeknight dinner, or even when impressing guests with minimal effort—this dish does it all!
Why You’ll Love This Recipe
Quick and Easy: In under 30 minutes, you can create a mouthwatering meal that rivals your favorite Thai restaurant! No long wait times; just delicious food in no time.
Customizable: The beauty of Pad Prik King is its flexibility! Want a little extra heat? Toss in some Thai bird’s eye chilies. Prefer it sweeter? Add more palm sugar! The possibilities are endless.
Cost-Effective: Making this dish at home can save you money compared to dining out. Plus, you’ll know exactly what’s in your food, which is a win-win for health-conscious readers.
Freshness: There’s something magical about cooking with fresh ingredients. The beautiful colors and invigorating aromas will awaken your senses, making cooking a joyous and fulfilling experience.
Feeding a Crowd: This recipe is easily scalable. Want to serve a dinner party? Simply double the ingredients! Your guests will be raving about it long after the plates are cleared.
Plus, you’ll never want to settle for store-bought versions again once you taste the authenticity of a homemade Pad Prik King Thai Red Curry Stir Fry with Chicken.
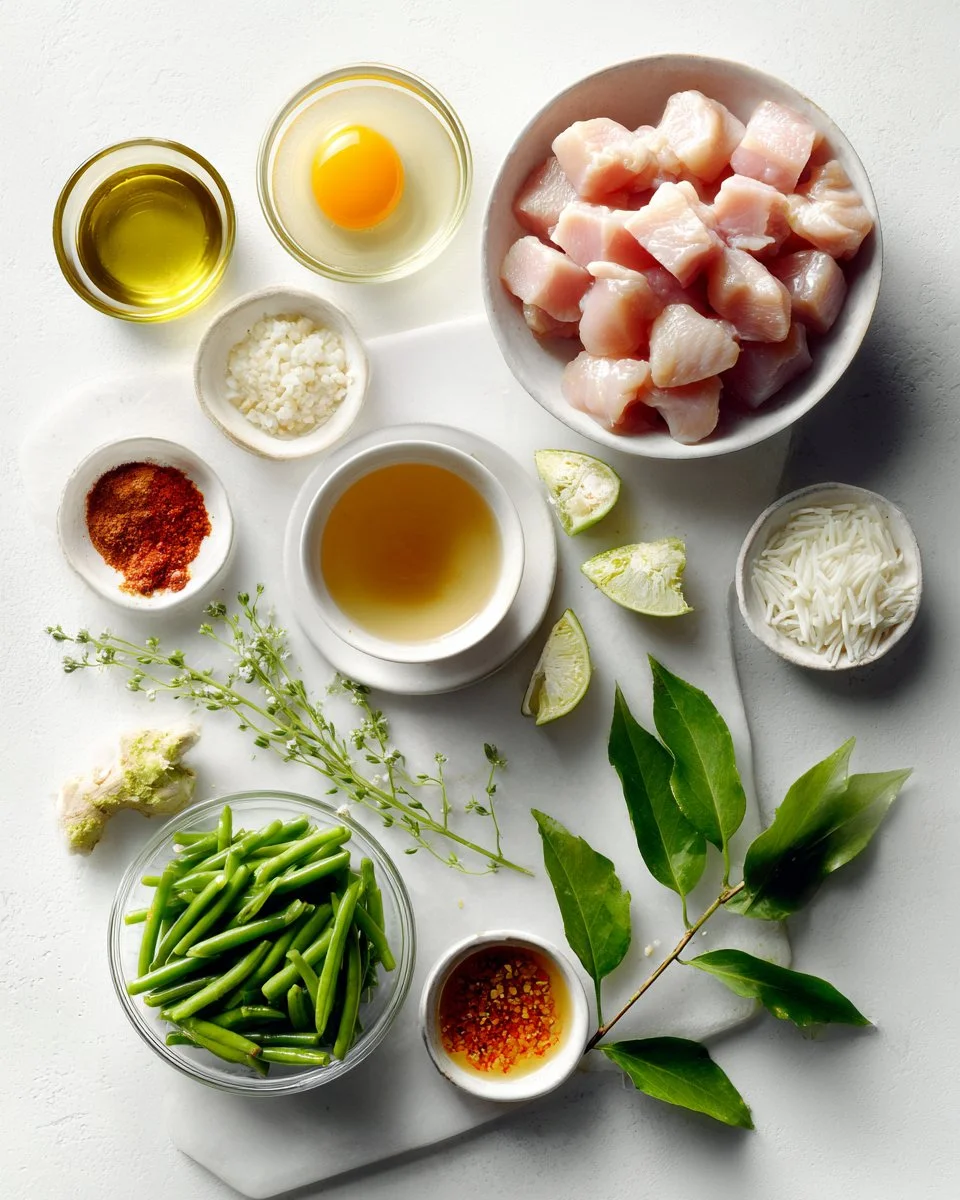
Ingredients
- 1 lb chicken breast or thigh, cut into bite-sized pieces (organic, hormone-free recommended for better flavor)
- 2 teaspoons fish sauce, for marinating chicken (Red Boat brand is a great choice for quality)
- 1 cooked salted duck egg, optional (adds a delightful creaminess)
- 3 tablespoons neutral-flavored oil, for stir-frying (canola or sunflower oil works well)
- 3 tablespoons red curry paste (Thai Kitchen for a standard option, or try homemade for a fresher flavor)
- 2 tablespoons palm sugar, finely chopped and packed (can substitute with brown sugar)
- 1 to 3 teaspoons fish sauce, for the stir-fry (adjust according to taste)
- 1/2 cup unsalted chicken stock or water (for a richer flavor, use homemade stock)
- 1 1/2 cups long beans, cut into 1.5-inch pieces (you can also use green beans)
- 7 makrut lime leaves (5 torn into chunks, 2 finely julienned for garnish)
- Jasmine rice, for serving (fluffy, fragrant rice is the perfect pairing)
Notes on Ingredient Quality
- Chicken: I love using thighs for their richer flavor, but breast meat works just fine if you prefer leaner cuts.
- Fish Sauce: Look for brands without added preservatives. The simplicity of the ingredient enhances the overall taste.
- Curry Paste: Authentic Thai red curry paste could make a world of difference in flavor. If making from scratch, include spices like coriander and cumin for extra kick.
Preparation Notes
- Make sure all ingredients are prepped and ready to go before you start cooking. Stir-frying is quick, and you won’t want to scramble to chop while the pan is sizzling!
Step-by-Step Instructions
Marinate the Chicken: Toss the chicken with 2 teaspoons of fish sauce and let it marinate for 15 minutes at room temperature. This step brings out the flavors beautifully!
Prep the Duck Egg: If you’re using the salted duck egg, cut it in half and prepare as desired. You can add it sliced or crumble the yolk for a garnish.
Sear the Chicken: Heat 3 tablespoons of oil in a wok or large skillet over high heat. Add half the chicken and sear without stirring for about 3-4 minutes until browned. Remove and repeat with the remaining chicken. This ensures a nice crust develops.
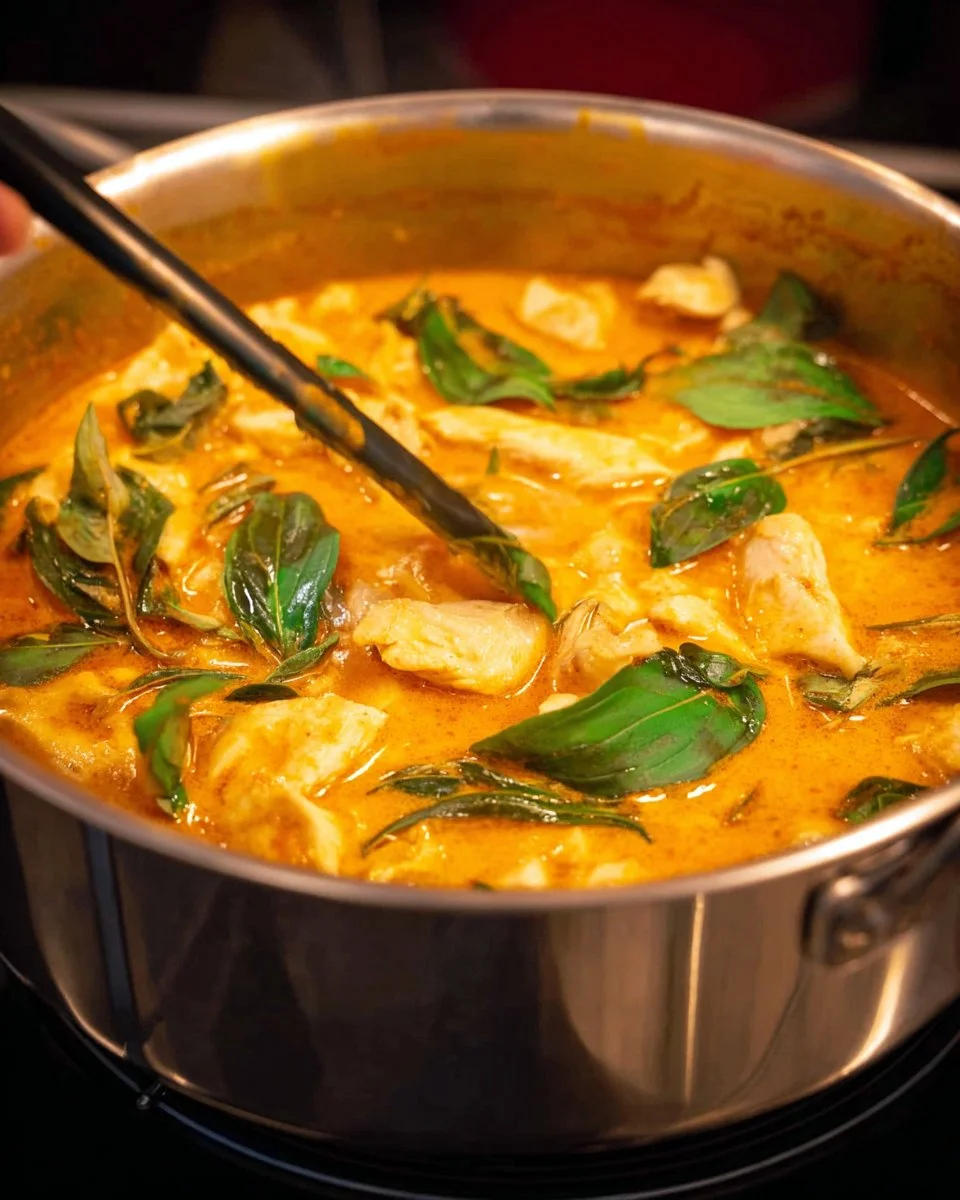
Stir in the Curry Paste: Let the pan cool slightly, then add more oil if needed. Stir in 3 tablespoons of red curry paste and cook for about 2 minutes until aromatic. Pay attention to the wonderful fragrance filling your kitchen!
Add Sugar and Stock: Add 2 tablespoons of palm sugar and 1/4 cup of chicken stock, deglazing the pan to scrape up any fond for added flavor.
Infuse with Lime: Stir in 5 torn makrut lime leaves and let it infuse for 30 seconds. The zing adds brightness to the dish.
Combine the Ingredients: Adjust the sauce’s consistency with more stock or water to your preference. Add the chicken back to the pan and toss to coat with the sauce.
Add the Beans: Toss in 1 1/2 cups of long beans and continue cooking until the chicken is fully cooked—around 4-5 minutes. If using a salted egg, toss it in now.
Final Touches: Remove from heat, garnish with the 2 finely julienned lime leaves, and serve with warm jasmine rice as the perfect base.
Chef’s Tips
- Temperature Matters: Make sure your wok is piping hot to achieve that perfect sear on the chicken. A hot pan equals better flavor!
- Don’t Overcook: Chicken cooks quickly; keep an eye on it to prevent dryness.
- Taste as You Go: Adjust the saltiness and sweetness based on personal preference as you cook.
Expert Tips & Tricks
Storage: Leftovers can be stored in an airtight container in the fridge for up to 3 days. I recommend reheating on the stovetop for the best results.
Make-Ahead: You can prep the chicken and marinate it a day in advance. Just allow it to come to room temperature before you cook it.
Troubleshooting: If the sauce is too thick, simply stir in a bit more chicken stock to reach your desired consistency. Conversely, if it’s too runny, let it simmer longer to thicken.
Flavors Intensify: This dish tastes even better the next day since the flavors have had time to meld; it’s perfect for meal prep!
Vegetarian Option: Replace chicken with your choice of tofu or jackfruit, and use vegetable stock for an equally delightful dish!
Serving Suggestions
Serve your glorious Pad Prik King Thai Red Curry Stir Fry with Chicken alongside aromatic jasmine rice. A fresh cucumber salad or Thai spring rolls would also complement the meal beautifully, adding a refreshing crunch. For special occasions, consider adding a few lime wedges and Thai basil for a pop of color and flavor.
Variations & Substitutions
- Seasonal Variations: Substitute long beans with sugar snap peas or bell peppers for a colorful twist.
- Flavor Combinations: Experiment with different proteins such as shrimp, beef, or even mushrooms for a satisfying vegetarian dish.
- Dietary Restrictions: Make it gluten-free by using tamari instead of regular soy sauce and ensure all sauces are gluten-free.
Nutrition & Storage Info
- Prep Time: 15 minutes
- Cook Time: 15 minutes
- Total Time: 30 minutes
- Yield: 4 servings
- Estimated Calories per Serving: Approx. 350 calories
Storage Instructions
- Room Temperature: Best enjoyed freshly cooked but can remain at room temperature for 2 hours maximum.
- Fridge: Store in an airtight container for up to 3 days.
- Freezer: Not recommended due to the texture of the chicken, but the stir-fry can be frozen for up to 1 month.
FAQ Section
Can I use store-bought curry paste?
- Absolutely! Just check the label to ensure quality. Homemade is simply hand-crafted for a fresher taste, but store-bought saves time.
Is there a vegetarian alternative?
- Yes! Substitute chicken with tofu or tempeh and use vegetable broth instead of chicken stock.
What is the best way to serve leftovers?
- Reheat gently on the stovetop. Pair it with fresh jasmine rice or a salad to brighten the meal.
Can I use any other vegetables in this dish?
- Certainly! Broccoli, bell peppers, or carrots can all work beautifully in this recipe.
How do I make it spicier?
- Add sliced Thai bird’s eye chilies or adjust the amount of red curry paste to increase the heat level.
What can I serve on the side?
- A cucumber salad or Thai spring rolls pair wonderfully with this dish to balance the richness.
What’s the difference between Pad Prik King and regular curry?
- Pad Prik King is more of a stir-fry with less sauce, focusing on a delightful, rich coating rather than a soupy dish.
Can I prepare the sauce in advance?
- Yes! The sauce can be made ahead and stored in the fridge for a day before use, just make sure to adjust seasoning before cooking.
What if I don’t have makrut lime leaves?
- Kaffir lime zest could work as a substitute, or simply leave them out; the dish will still be plenty flavorful!
Is this dish gluten-free?
- Yes! Just ensure that the fish sauce and any additional sauces used are gluten-free to accommodate dietary needs.
Conclusion
The Pad Prik King Thai Red Curry Stir Fry with Chicken is not just a recipe; it’s a warm embrace filled with love and flavor that evokes cherished memories. I hope you’ll give this recipe a try and create your own unforgettable moments around the dinner table. Don’t forget to share your thoughts and any variations you might come up with; I love connecting with you through food! Also, check out my other Thai recipes on the blog for more culinary adventures. Happy cooking!
3. Quick and Easy Thai Red Chicken Curry
Whip Up a Flavor Explosion: Quick and Easy Thai Red Chicken Curry
Picture this: It’s a rainy evening, and the comforting aroma of spices and coconut fills the kitchen. You’re cozied up on the couch, a warm bowl of Thai curry in hand, as memories cascade in like the rain outside. This delightful scene inspired my quest for the perfect Quick and Easy Thai Red Chicken Curry—a dish that not only warms your belly but also ignites cherished family memories.
I still remember the first time I made this recipe for my family. The smiles on their faces as they took their first bites were priceless. What sets this Thai red chicken curry apart is its simplicity and depth of flavor, all while staying true to authentic Thai cooking. You don’t need hours to create a culinary masterpiece. Whether you’re a busy parent or a novice cook, this recipe is your golden ticket to a spectacular meal that’ll impress and satisfy.
In this post, I’ll share with you what makes this dish so special and provide all the secrets to crafting the perfect curry at home. Get ready to roll up your sleeves because you’re about to create some delicious moments!
What Are Quick and Easy Thai Red Chicken Curry?
Thai red curry has its roots in Southeast Asia, reflecting a rich culinary history that balances sweet, spicy, and earthy flavors. At its heart, the Quick and Easy Thai Red Chicken Curry features tender chicken bathed in a vibrant, aromatic sauce made from red curry paste, coconut milk, and spice blends. The result? A tantalizing dish that boasts a creamy texture with an underlying heat that dances on your palate.
What makes this curry unique is its fusion of flavors—coconut creaminess mingling with the bold spices of red chili, and the aromatic freshness of Thai basil. This meal is perfect for a weeknight dinner or a cozy gathering with friends. When you want quick comfort and a burst of taste, there’s no better option.
Why You’ll Love This Recipe
Flavor Powerhouse: Imagine savoring the rich, creamy sauce that coats each tender piece of chicken—this recipe brings Thai restaurant flavors right to your kitchen.
Quick and Convenient: Ready in under 30 minutes, this dish is a lifesaver for busy weeknights and last-minute gatherings. You’ll impress family and friends without the fuss.
Budget-Friendly: Most of the ingredients are pantry staples and affordable, making it easy to savor restaurant-quality flavors without splurging on expensive takeout.
Customizable: Whether you prefer your curry spicier or milder, or if you want to toss in some veggies like bell peppers or carrots, this recipe adapts to your taste preferences!
Beginner-Friendly: With minimal steps and no complicated techniques, anyone can master this dish. I promise you’ll feel like a pro chef in no time!
Let’s take a deeper dive into the delicious components of this curry!

Ingredients
Before you dive in, let’s gather some high-quality ingredients for your Quick and Easy Thai Red Chicken Curry:
- ½ lb boneless skinless chicken breast or thighs, cut into 1 cm strips (chicken thighs give a richer taste—my personal favorite!)
- 2 teaspoons fish sauce (I recommend using a good-quality brand like Red Boat for depth of flavor)
- 2 tablespoons coconut oil or neutral oil (coconut oil adds to that tropical feel!)
- 2–3 tablespoons red curry paste (adjust based on your preference for heat)
- ¾ cup coconut milk (full-fat coconut milk for creaminess; I love the Aroy-D brand)
- ½ cup chicken stock, unsalted or low sodium (to keep things from getting overly salty)
- 1 tablespoon palm sugar or light brown sugar (balance the flavors beautifully)
- 4.5 oz bamboo shoots strips (about ½ can), rinsed well and drained
- 3 makrut lime leaves, optional (for an aromatic zing that elevates your curry)
- 1 teaspoon fish sauce, or to taste (adjust according to your taste preference)
- ½ cup Thai basil leaves (you can find these at most Asian markets)
- Jasmine rice, for serving (the fluffy, fragrant base that absorbs all that delicious sauce)
Note on Ingredients Quality and Substitutions
- Coconut Milk: Use full-fat for a richer texture; if you’re looking to lighten it up, go for light coconut milk.
- Bamboo Shoots: Fresh bamboo shoots can make a huge difference if you can find them!
- Fish Sauce: This is essential for umami; don’t omit it. However, for a vegetarian version, you can use soy sauce or mushroom soy sauce.
Prep Notes
- Keep your chicken at room temperature for about 15 minutes before cooking to ensure even cooking.
Step-by-Step Instructions
Marinate the Chicken: In a bowl, mix the chicken with 2 teaspoons of fish sauce. Set aside. This will infuse flavor right into the meat.
Heat the Pot: In a small pot over medium heat, add 2 tablespoons of coconut oil. As the oil heats, the kitchen will start smelling divine!
Create the Base: Add 2-3 tablespoons of red curry paste to the pot and sauté for about 2 minutes. If the paste begins to stick, deglaze with a tiny splash of water.
Mix in the Creaminess: Pour in ¾ cup of coconut milk and ½ cup chicken stock. Stir well to combine and see that gorgeous color come to life.
Sweeten the Deal: Add 1 tablespoon of palm sugar and 4.5 oz of bamboo shoots. Stir until everything is well mixed.
Add the Zing: Grab those makrut lime leaves! Twist them to bruise them and tear into chunks before adding them to the pot. Let the curry simmer for 5 minutes.
Cook the Chicken: Add the marinated chicken strips to the pot. Once the curry comes back to a gentle simmer, cook for another 1–2 minutes or until the chicken is cooked through.
Finish It Off: Turn off the heat and stir in the ½ cup of Thai basil leaves. Give it a taste and adjust the fish sauce as necessary.
Serve: Serve your curry over a fluffy bed of jasmine rice. The mixture of textures and bursting flavors will sweep you off your feet!
Chef’s Tips:
- Keep a close eye on the chicken while it cooks; overcooking will lead to tough meat.
Common Mistakes to Avoid:
- Don’t skip marinating the chicken—it’s crucial for flavor!
Expert Tips & Tricks
Creating the Quick and Easy Thai Red Chicken Curry is simple, but these tips will elevate it even further:
Quality Matters: Invest in good-quality fish sauce and curry paste—they’re the backbone of flavor in this dish.
Make Ahead: You can prepare the curry base (without the chicken) a day in advance and store it in the fridge; just add and cook the chicken when you’re ready.
Storage: Leftovers keep well in an airtight container in the fridge for up to 3 days. Reheat gently over low heat on the stove or in the microwave.
Freezing Instructions: You can freeze the curry (without rice) for up to 2 months. Just let it cool completely before transferring it to a freezer-safe container.
Troubleshooting: If your curry is too thick, add more stock or coconut milk to achieve your desired consistency.
Serving Suggestions
Pair your Quick and Easy Thai Red Chicken Curry with:
- Jasmine rice: This is a must, as it absorbs the rich sauce, making each bite better than the last.
- Fresh side salad: A light cucumber salad dressed in lime juice complements the rich flavors beautifully.
- Spring rolls or dumplings: For a more festive vibe, serve some appetizers alongside.
Presentation tip: Use a vibrant bowl to showcase that stunning red curry against the white rice. Fresh basil leaves on top elevate the look!
Variations & Substitutions
- Veggie Lovers’ Version: Add bell peppers, snap peas, or eggplant for a hearty veggie-packed dish.
- Meat-Free Delight: Substitute chicken with chickpeas or tofu for a delicious plant-based option.
- Seasonal Ingredients: Use pumpkin or butternut squash when they are in season for a seasonal twist.
Nutrition & Storage Info
- Prep Time: 10 minutes
- Cook Time: 20 minutes
- Total Time: 30 minutes
- Yield: 2-3 servings
- Estimated Calories: Approximately 400 calories per serving (varies by ingredient choice)
Storage Instructions
- Room Temperature: Best consumed fresh. If left out, consume within 2 hours for safety.
- Fridge: Store leftovers in an airtight container for up to 3 days.
- Freezer: Enjoy within 2 months for the best taste.
FAQ Section
Can I make it spicier?
Yes! Add more red curry paste or a fresh chili pepper to intensify the heat.Is there a substitution for fish sauce?
Yes! Soy sauce or mushroom sauce can work as a great alternative.Can this be made vegetarian or vegan?
Absolutely! Use tofu or chickpeas along with vegetable stock instead of chicken stock.What can I serve on the side?
Fresh cucumber salad or Thai spring rolls pair wonderfully.Can I use a different type of meat?
Of course! Substitute chicken with shrimp or beef for a different flavor profile.How do I store leftovers?
Keep them in an airtight container in the fridge for up to 3 days.Can I freeze curry?
Yes! Allow it to cool completely, then freeze in an airtight container for up to 2 months.Is there a way to make it healthier?
You can use light coconut milk and add more vegetables to increase the fiber.What type of rice should I use?
Jasmine rice is traditional, but brown rice works too if you prefer whole grains.How long does it take to cook chicken in the curry?
About 3-5 minutes, depending on the size of the chicken pieces.
Conclusion
The Quick and Easy Thai Red Chicken Curry is more than just a meal; it’s a comforting embrace, a connection to joyous memories and flavors that linger long after the last bite. I invite you to try this recipe and experience the harmony of taste and simplicity.
I’d love to hear how it turns out for you! Leave your thoughts and feedback in the comments below. And if you enjoyed this recipe, be sure to check out my other Thai-inspired dishes that’ll make your taste buds dance! Happy cooking!
4. Easy Thai Chicken Satay and Peanut Sauce
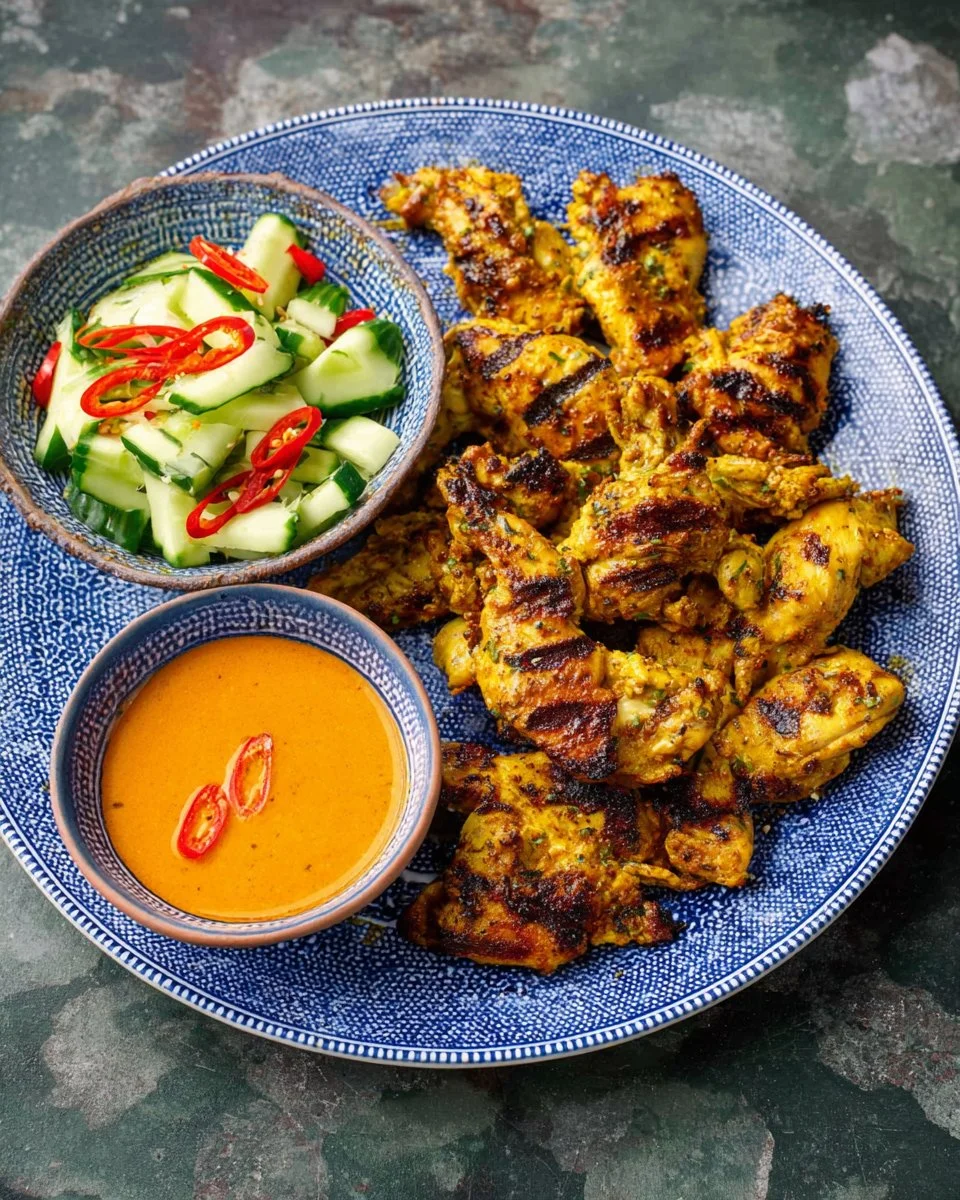
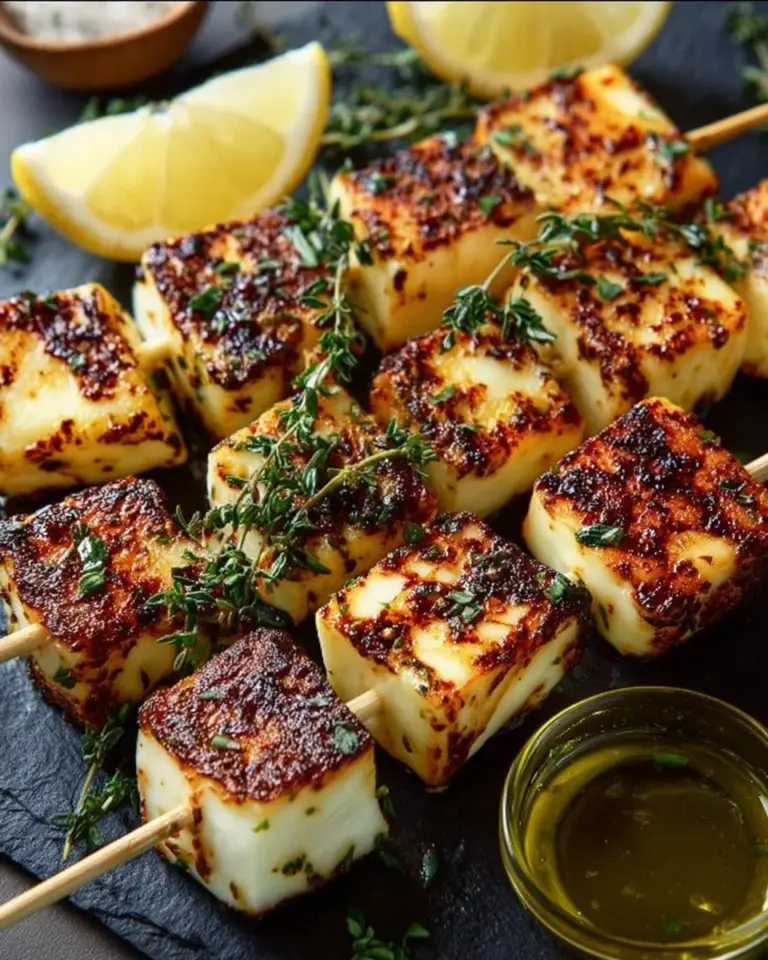
Easy Thai Chicken Satay and Creamy Peanut Sauce: A Flavor Journey You’ll Love
INTRODUCTION
Growing up, evenings were often filled with the aroma of grilled meats wafting from the kitchen. My family had a special recipes book where Thai flavors danced gracefully alongside our traditional dishes. One standout was the Easy Thai Chicken Satay, served with a quick, creamy peanut sauce. I remember the first time my mom taught me how to marinate the chicken, and how the spices transformed the humble ingredient into something extraordinary.
What makes this dish so special? It’s the perfect blend of savory, sweet, and nutty flavors that come together in delightful harmony—while also being deceptively simple to prepare. I’ve tried countless versions from restaurants, but nothing hits the spot quite like this homemade recipe. The joy of sharing these skewers with family, dipping them in that luscious peanut sauce, and adding a crunch from quick pickles made every bite a comfort-filled experience.
In today’s post, I’m excited to take you step-by-step through recreating this family favorite. You’ll learn not only how to whip up the satay and peanut sauce, but also how to personalize it and make it your own. Get ready to impress your family and friends at your next gathering with this delicious treat!
WHAT ARE Easy Thai Chicken Satay and Peanut Sauce?
Easy Thai Chicken Satay is a beloved street food originating from Southeast Asia, particularly Indonesia and Thailand. Traditionally made with marinated chicken skewers, grilled to perfection, the magic really happens when paired with a rich peanut sauce. The tender chicken soaks up a complex marinade of spices, creating a flavor profile you simply can’t resist.
The taste is a delightful medley of sweet and savory. The chicken is juicy with a slight char from the grill, while the peanut sauce is creamy with a touch of heat. What sets this dish apart are the layers of flavor that come from fresh ingredients like tamarind, coconut milk, and a hint of curry. Perfect for casual family dinners or lively get-togethers, Easy Thai Chicken Satay and Peanut Sauce is your ticket to a taste of Thailand right in your kitchen.
You’ll find that preparing this dish brings about an atmosphere of excitement, laughter, and treasured moments as you gather around the table, dipping and enjoying good food together.
WHY YOU’LL LOVE THIS RECIPE
If you’ve ever had a craving for Thai food, this Easy Thai Chicken Satay and Peanut Sauce satisfies that longing without the need to visit your local Thai restaurant. Here’s why this recipe stands out:
Authentic Flavor at Home: This recipe captures the genuine taste of Thai street food, with fresh ingredients and aromatic spices. Skip the takeout and enjoy an authentic meal straight from your kitchen.
Budget-Friendly: While a night out might cost you a pretty penny, making satay enables you to feed a family of four for just a fraction of that. Your wallet will thank you when you discover how economical this meal can be.
Customizable to Your Taste: Love it spicy? Add more chilies! Prefer it milder? Adjust the seasonings to suit your palate. This recipe allows room for creativity, making it a perfect base for your culinary experimentation!
Quick to Prepare: With just a bit of marinating time, most of the cooking is done on the grill or stovetop, giving you a meal that takes less than an hour from prep to plate.
Gather & Share: There’s something inherently communal about skewers—whether you’re at a party, a barbecue, or just a cozy night in, sharing these easy Thai chicken satays fosters connection and joy.
So grab your ingredients, and let’s dive into this sensational recipe that promises to add a burst of flavor to your dinner table!

INGREDIENTS SECTION
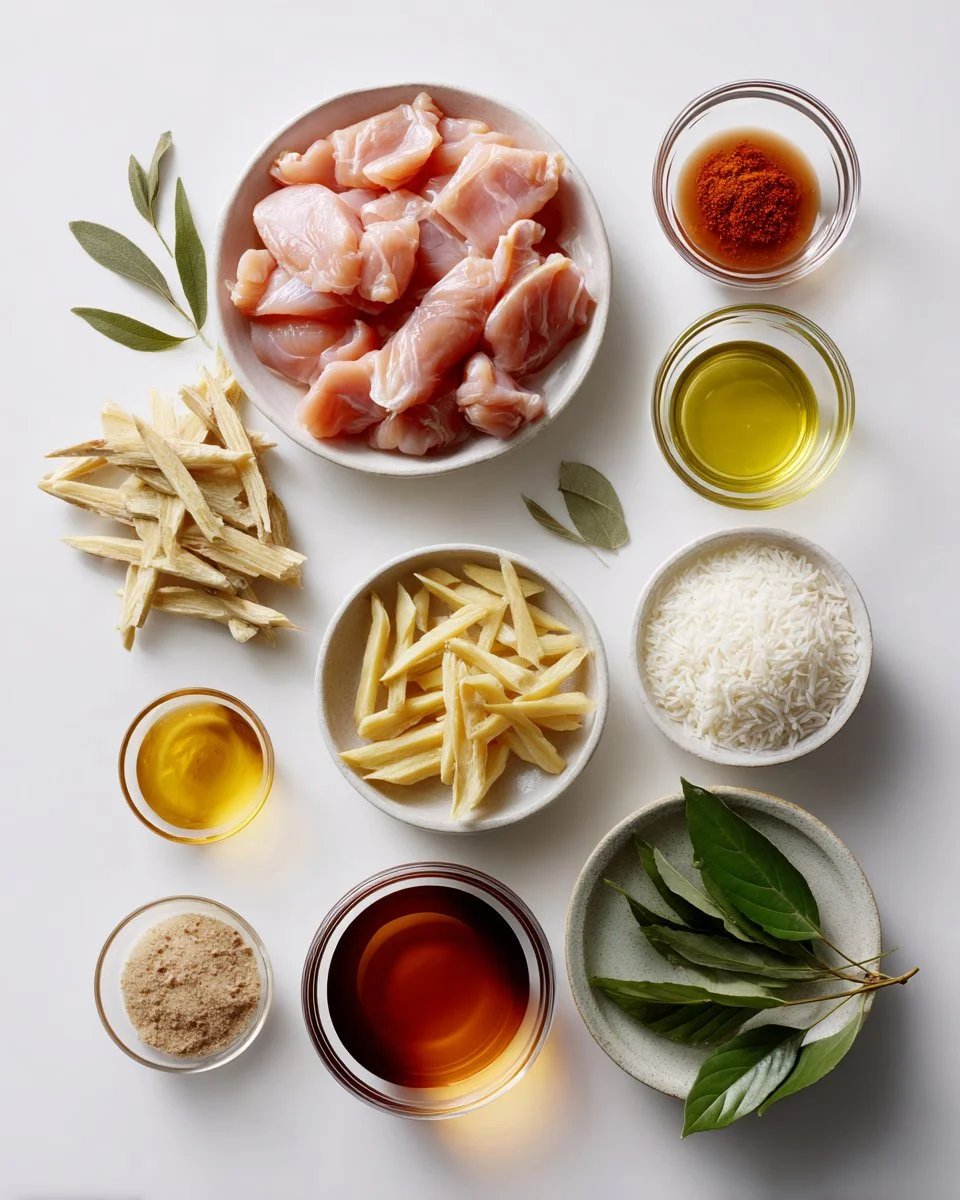
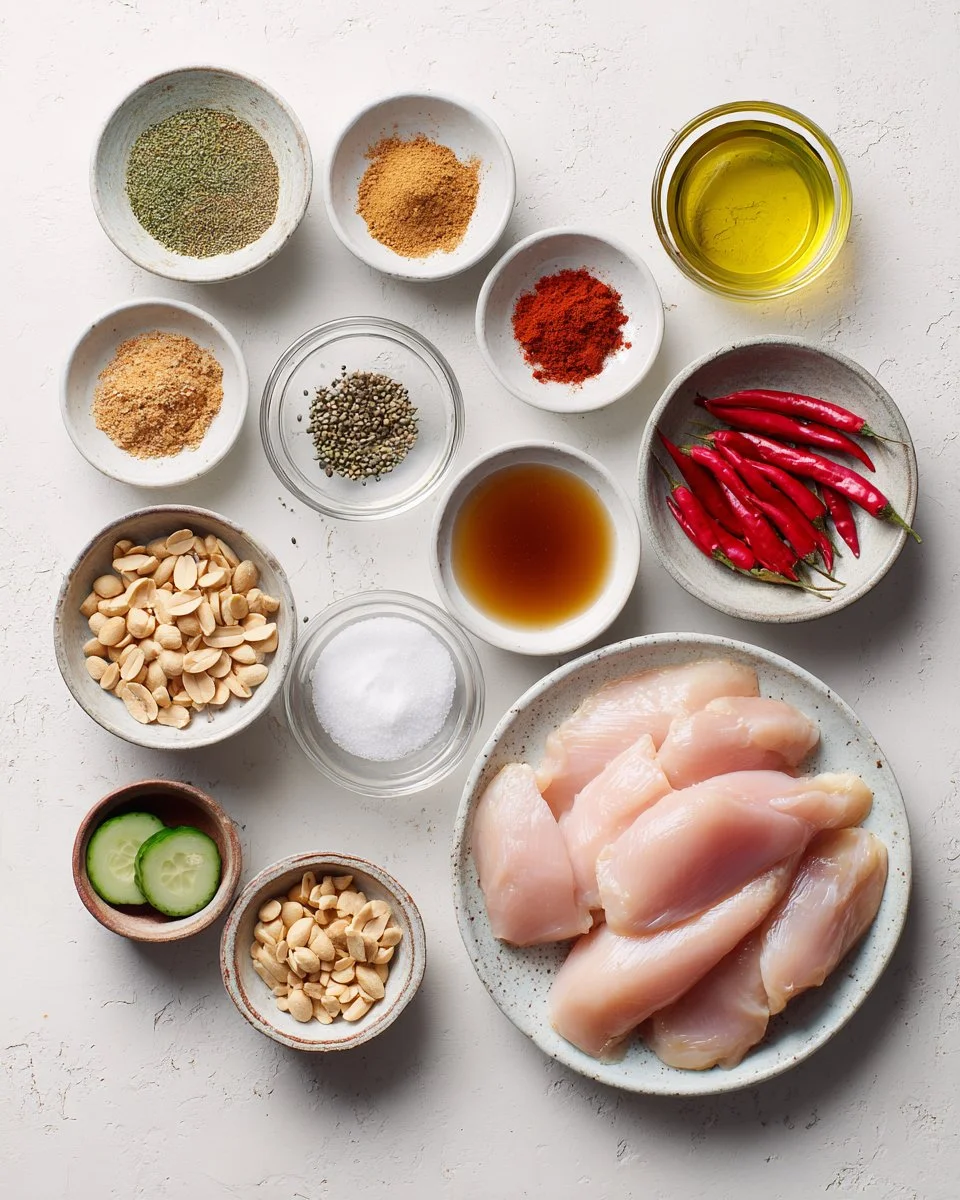
For this sensational Easy Thai Chicken Satay and Peanut Sauce, you’ll need the following ingredients:
For Chicken Satay:
- 1.5 teaspoons coriander seeds: Toasted for extra flavor
- 0.5 teaspoon cumin seeds: A warm, earthy note
- 0.5 teaspoon white peppercorns: For a mild heat
- 1 tablespoon brown sugar: Adds sweetness
- 0.75 teaspoon table salt: Balances the flavors
- 0.75 teaspoon ground turmeric: For a beautiful color and slight earthiness
- 0.5 teaspoon ground cinnamon: A warm spice that complements the marinade
- 1 tablespoon tamarind paste: Adds a unique tanginess
- 0.5 cup coconut milk: Creaminess for the marinade
- 1.2 lb boneless skinless chicken breasts, cut into strips: The main protein
For Peanut Sauce:
- 0.5 cup roasted unsalted peanuts: The heart of the sauce
- 1.25 cups coconut milk: For creaminess
- 2 tablespoons red curry paste: An infusion of flavor
- 2 tablespoons tamarind paste: For a zesty twist
- 2 tablespoons finely chopped palm sugar: Adds depth
- 12 teaspoons fish sauce: A necessary umami kick
- 0.5 cup white vinegar: Balances the sauce
- 0.25 cup granulated sugar: For a hint of sweetness
- Pinch of table salt: A finishing touch
- 5 ounces cucumber, sliced: To create a refreshing side
- 12 Thai chilies, chopped (optional): For those who like it spicy!
Ingredient Quality & Substitutions:
- Coconut Milk: Use full-fat coconut milk for a creamier texture. Light versions can be used but will result in a thinner sauce.
- Peanuts: Opt for high-quality roasted peanuts or even make your own by toasting raw peanuts in the oven.
- Tamarind Paste: If unavailable, replace with lemon juice for a different zing.
Prep Note: Ensure chicken is cut into even strips for uniform cooking. If using refrigerated coconut milk, let it come to room temperature for easier mixing.
STEP-BY-STEP INSTRUCTIONS
Follow this guide to prepare your Easy Thai Chicken Satay and Peanut Sauce:
Prepare the Marinade: In a bowl, grind the coriander seeds, cumin seeds, and white peppercorns until fine. Mix these with brown sugar, salt, turmeric, cinnamon, tamarind paste, and coconut milk until combined.
Chef’s Tip: Grinding spices fresh makes a world of difference. Use a mortar and pestle or spice grinder for the best results.
Marinate the Chicken: Add the chicken strips to the marinade and coat well. Let it marinate for at least 20 minutes (or overnight for deeper flavor if you have the time).
Make the Peanut Sauce: In a pot, grind the roasted peanuts until they’re mealy. Heat 1/3 cup of coconut milk over medium heat, then add red curry paste and cook for about 3 minutes. Once fragrant, mix in the remaining coconut milk, ground peanuts, tamarind paste, and palm sugar. Simmer for 5 minutes for flavors to meld while stirring.
Common Mistake to Avoid: Don’t skip the simmering! It’s crucial for melding those flavors and ensuring your sauce isn’t grainy.
Prepare Quick Pickles: In a separate pot, combine white vinegar, granulated sugar, and a pinch of salt. Stir until sugar dissolves, then cool it down. Pour over sliced cucumber and optional Thai chilies.
Cook the Chicken: Grill or pan-fry the marinated chicken over medium-high heat. Cook for about 6–8 minutes on each side until fully cooked and golden brown (internal temperature should reach 165°F).
Visual Cue: The chicken should be well-charred but not dry!
Serve: Arrange the chicken skewers on a plate with a bowl of peanut sauce for dipping. Pair with quick pickles and fluffy jasmine rice or toasted bread.
EXPERT TIPS & TRICKS
Make-Ahead Strategy: You can marinate the chicken a day in advance. Just ensure it’s covered well in the fridge to intensify the flavors.
Storage Recommendations: Leftovers can last in the fridge for about 3 days. For freezing, wrap chicken and sauce separately and use within 2 months.
Troubleshooting: If your peanut sauce is too thick, thin it with a bit of additional coconut milk or water. If it’s too thin, simmer it longer until it thickens up.
Texture Control: Grind peanuts to your desired consistency. For a chunkier sauce, leave some peanut pieces unground!
Experimenting with Marinades: I’ve tried this recipe using different meats—beef works wonderfully too! Just make sure to adjust cooking time accordingly.
SERVING SUGGESTIONS
This Easy Thai Chicken Satay pairs beautifully with steaming jasmine rice, enhancing its flavors. Consider presenting it on a vibrant platter with the peanut sauce drizzled artfully on top, a sprinkle of chopped peanuts for crunch, and vibrant cucumbers alongside. Perfect for a laid-back family dinner, a summer BBQ, or even as finger food at a festive get-together!
VARIATIONS & SUBSTITUTIONS
Flavor Combinations: If you’re feeling adventurous, experiment with adding lime zest to your marinade for a zesty twist, or even try a mango marinade for a tropical fling.
Dietary Adaptation: For a plant-based alternative, replace chicken with tofu or seitan, and follow the same marinating and cooking procedure.
Seasonal Variations: In the cooler months, try serving the dish with roasted sweet potatoes or butternut squash alongside your skewers for a heartwarming meal.
NUTRITION & STORAGE INFO
- Prep Time: 30 minutes
- Cook Time: 20 minutes
- Total Time: 50 minutes
- Yield: Serves 4
- Estimated Calories: Approximately 450 calories per serving
Storage Instructions:
- Room Temp: Best served fresh, do not leave out for more than 2 hours.
- Fridge: Store in an airtight container for up to 3 days.
- Freezer: Chicken and sauce can be frozen separately for up to 2 months.
FAQ SECTION
Can I use other meats for satay?
Yes, beef, pork, or even shrimp are delicious alternatives! Just adjust cooking times.How can I make this recipe gluten-free?
Ensure your fish sauce is gluten-free or substitute with tamari sauce.Can the peanut sauce be made in advance?
Absolutely! Just store it in a sealed container in the fridge. Reheat gently before serving.What can I serve instead of rice?
Noodles, quinoa, or even a fresh salad make great accompaniments!How spicy is this dish?
The heat level can be adjusted based on the number of chilies used. Omit them for a milder version.Do I have to grill the chicken?
If grilling isn’t an option, pan-frying works just as well. Aim for a hot, non-stick skillet.What can I substitute for palm sugar?
Brown sugar is a great alternative.Can I skip the marinating time?
While you can make it without marinating, letting the chicken sit in the spices elevates the flavor.How long should I cook the chicken?
Usually, around 6-8 minutes per side, ensuring it hits at least 165°F internally.Is this recipe kid-friendly?
Yes! The flavors are mild, so kids usually love it. Just adjust the spice levels if necessary.
CONCLUSION
This Easy Thai Chicken Satay and Peanut Sauce recipe holds a special place in my heart and is sure to be a favorite in your home, too. With its vibrant flavors and comforting essence, it’s perfect for sharing with loved ones. I invite you to give it a try and let me know how it turns out for you! Your feedback and stories mean the world to me.
And if you’re looking for more delightful recipes, check out my other posts—there’s definitely something delicious waiting for you!
5. Thai Chicken Potato Soup
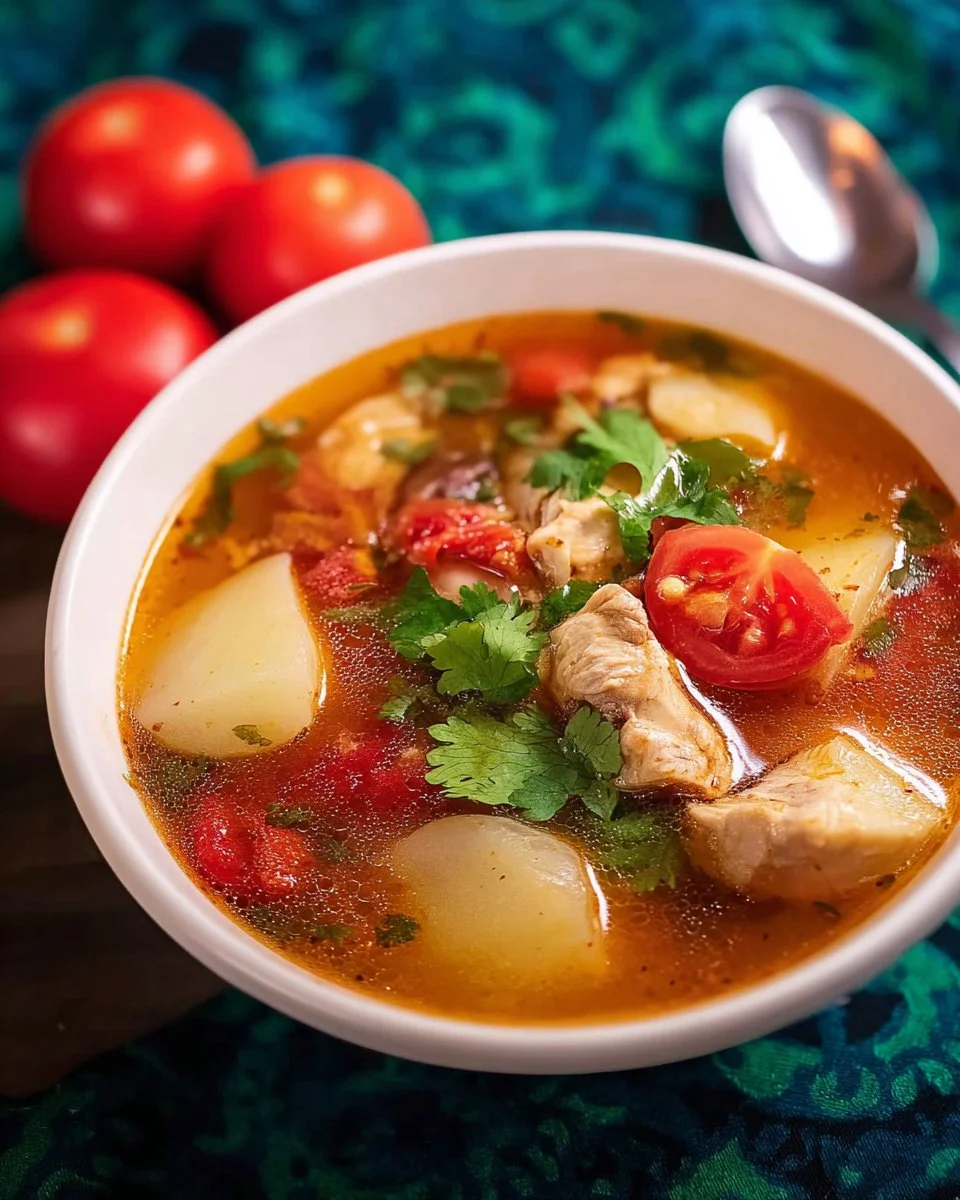
Irresistibly Flavorful Thai Chicken Potato Soup: A Heartwarming Comfort for Any Table
There’s something magical about a bowl of soup that warms your heart and soul, isn’t there? I remember chilly evenings spent around my grandmother’s kitchen table, savoring her aromatic Thai Chicken Potato Soup. Each spoonful was coziness personified, a perfect balance of spices and textures that wrapped you in a comforting embrace. Thinking back to those moments, I realized that this recipe isn’t just about nourishment; it’s a portal to family memories and cultural heritage.
What makes my version of Thai Chicken Potato Soup special? While many recipes might lean heavily on coconut milk or other heavy bases, this one harmoniously melds the earthiness of potatoes with tender chicken drumettes for a soup that feels both hearty and light. Plus, it’s a snap to whip up, making it an easy recipe perfect for weeknight dinners or special occasions.
With every ladleful, I promise you’ll learn to create a bowl of joy that pays homage to tradition while inviting your own family to make new memories. Let’s dive into the tantalizing world of Thai Chicken Potato Soup together!
What Are Thai Chicken Potato Soups?
Thai Chicken Potato Soup is a beautiful fusion of Thai culinary elements and hearty soup comfort. Originating from various regional dishes in Thailand, this soup features tender chicken and creamy potatoes, seasoned with distinct spices that make your taste buds dance.
The taste is a unique melody of savory and slightly sweet, with the rich umami of fish sauce balancing the earthiness of the potatoes. The texture is luxurious: creamy potato contrasts with juicy chicken, while the tomatoes dissolve delicately into the broth, creating a delightful medley.
You might opt for making this soup on a busy weeknight when comfort food is calling, or perhaps during a rainy day when you need a bit of warmth. Wherever you find yourself, this Thai Chicken Potato Soup is sure to be your new go-to recipe!
Why You’ll Love This Recipe
Quick and Easy Preparation: Unlike many soups that require hours of simmering, this Thai Chicken Potato Soup is ready in under 30 minutes! You won’t be tethered to the stove for hours, making it the perfect choice for busy weeknights.
Customization Galore: Whether you prefer your soup spicier or sweeter, this recipe allows for plenty of adjustments. Add a dash of chili flakes for some heat, or toss in extra vegetables like carrots or bell peppers.
Cost-Effective and Family-Friendly: With only a handful of affordable ingredients like chicken drumettes, potatoes, and fresh veggies, it’s a meal that won’t break the bank. Plus, kids love the flavors, making it a win-win!
Taste Over Takeout: Why settle for store-bought soup that often lacks depth of flavor? With freshly crushed garlic and regional ingredients, this homemade version offers a warmth that supermarket alternatives can’t replicate.
Made with Love: Cooking this Thai Chicken Potato Soup transforms your kitchen into a fragrant haven that brings back those cozy family moments. You’ll find yourself lingering over the stove, inhaling the delicious aromas, and finding joy in the process.
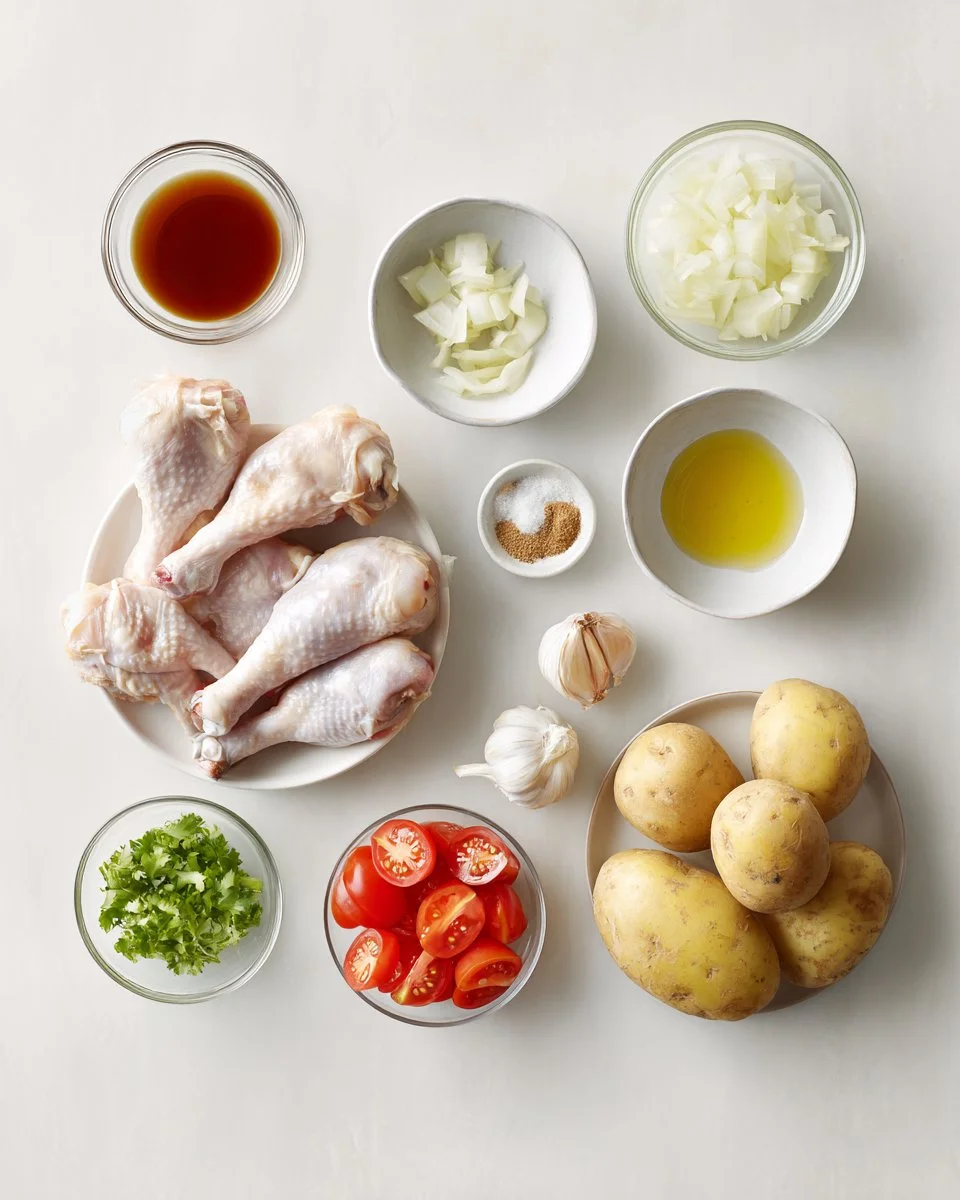
Ingredients

- 1 1/2 lb chicken drumettes (look for organic, free-range if possible)
- 1 1/2 tablespoon fish sauce (the higher quality, the better the flavor)
- 4 cups water
- 300g potato (approximately 1 medium russet potato, peeled and cubed)
- 1/2 onion, cut into 1 cm strips
- 4 cloves garlic, crushed (fresh garlic brings out the best flavor)
- 1/2 teaspoon white pepper, ground
- 1 tablespoon soy sauce (use low-sodium for a healthier option)
- 1/4 teaspoon salt, or to taste
- 2 roma tomatoes, chopped
- Chopped cilantro or green onions for garnish
Ingredient Notes
- Chicken Drumettes: For optimal flavor and tenderness, I prefer using organic chicken drumettes from trusted brands like Bell & Evans or Organic Prairie. They carry better taste and texture.
- Fish Sauce: Look for brands labeled "Nuoc Mam," like Red Boat Fish Sauce for potent umami flavor.
- Potatoes: Russets absorb the flavors wonderfully, but Yukon gold can also add a creamy element if you prefer.
Prep Notes
- Ensure your chicken is at room temperature for even cooking.
- Crush garlic in a garlic press or chop it finely to maximize flavor release.
Step-by-Step Instructions
Marinate the Chicken: Place your chicken drumettes in a flat casserole dish in a single layer. Drizzle with fish sauce and toss to coat thoroughly. Let it marinate for 15 minutes while you prep the other ingredients.
Prepare the Base: In a large pot over medium heat, combine 4 cups of water, onion, crushed garlic, white pepper, and soy sauce. Bring this fragrant mixture to a gentle boil.
Simmer the Chicken: Once boiling, add the marinated chicken along with any juices from the dish. Reduce the heat to low, cover, and let it simmer gently for 15 minutes. This allows the chicken to infuse its flavor into the broth.
Cook the Potatoes: Taste the broth and adjust salt as needed. Add cubed potatoes to the mix, cover, and simmer for about 10 minutes, or until potatoes are tender but not mushy.
Final Touches: Add the chopped tomatoes to the pot and simmer for another 5 minutes until they soften but still hold their shape. Check seasoning one last time and adjust if necessary.
Serve It Up: Stir in the chopped cilantro and serve piping hot. You can enjoy it solo or over a bed of fluffy jasmine rice for a heartier meal.
Chef’s Tips:
- Avoid overcooking the potatoes; you want them tender yet intact.
- If you’re finding the broth too salty, adding a bit of water can help dilute the flavors without upsetting the balance.
- The key is to taste, taste, taste!
Expert Tips & Tricks
Storage: Store any leftovers in an airtight container in the fridge for up to 3 days. Reheat gently in a pot over low heat to maintain flavor.
Make-Ahead: Prep your ingredients a day in advance. Marinate your chicken overnight for even deeper flavor penetration.
Troubleshooting: If your soup is too thick, add more water gradually. For a more robust flavor, simmer for longer to deepen the broth.
Variations: Consider making it a noodle soup by adding rice noodles during the last 5 minutes of cooking.
Garnish Ideas: Alongside cilantro, lime wedges can elevate the dish further with a burst of freshness.
Serving Suggestions
This Thai Chicken Potato Soup pairs beautifully with jasmine rice or crunchy baguette slices to soak up the delicious broth. For an elegant presentation, serve the soup in individual bowls topped with extra cilantro and a spritz of lime. It’s perfect for a cozy family dinner, but it also dazzles at gatherings!
Variations & Substitutions
Spicy Twist: Add sliced jalapeños or a teaspoon of red curry paste while sautéing the aromatics for an extra kick.
Vegetarian Version: Substitute chicken with firm tofu and vegetable broth. This soup still retains its hearty essence.
Seasonal Changes: Incorporate seasonal vegetables based on availability, such as zucchini or corn in the summer.
Nutrition & Storage Info
- Prep Time: 15 minutes
- Cook Time: 30 minutes
- Total Time: 45 minutes
- Yield: Serves 4
- Estimated Calories per Serving: About 350 calories
- Storage: Keep in the fridge for up to 3 days, or freeze for 2-3 months. Reheat gently.
FAQ Section
Can I use breast meat instead of drumettes?
Absolutely! Just adjust cooking time as breasts cook faster.How can I make it gluten-free?
Use tamari sauce in place of regular soy sauce for a gluten-free alternative.Is this soup kid-friendly?
Yes! The flavors are mild, but you can adjust spice levels according to your children’s tastes.How do I make this in a slow cooker?
Combine all ingredients and set on low for 6-7 hours. Add tomatoes last hour of cooking.Can I add lentils for extra protein?
Yes, but add them at the beginning since they take longer to cook.What if I can’t find fish sauce?
A mix of soy sauce and a splash of vinegar can substitute to mimic the umami flavor.Can I use frozen chicken?
Yes, but ensure it’s fully defrosted and adjust cooking time accordingly.How spicy is this recipe?
It’s quite mild, but you can add more spices for heat as desired.Is this recipe suitable for meal prep?
Definitely! It holds well in the fridge and can be frozen.What should I serve with it?
Jasmine rice, or a light salad are excellent accompaniments.
Conclusion
As we’ve crafted this delightful Thai Chicken Potato Soup together, I hope you can see not just how easy and delicious it is, but also how it can bring warmth and joy to your family table. Your kitchen will be filled with the comforting aroma, evoking memories with every simmer. Remember to share your own experiences and tweaks—you never know, your variation might just become a family favorite too! Also, check out my other comforting recipes, like the creamy Coconut Curry Chicken or Spicy Thai Peanut Noodles, to keep the cozy vibe going. Happy cooking!
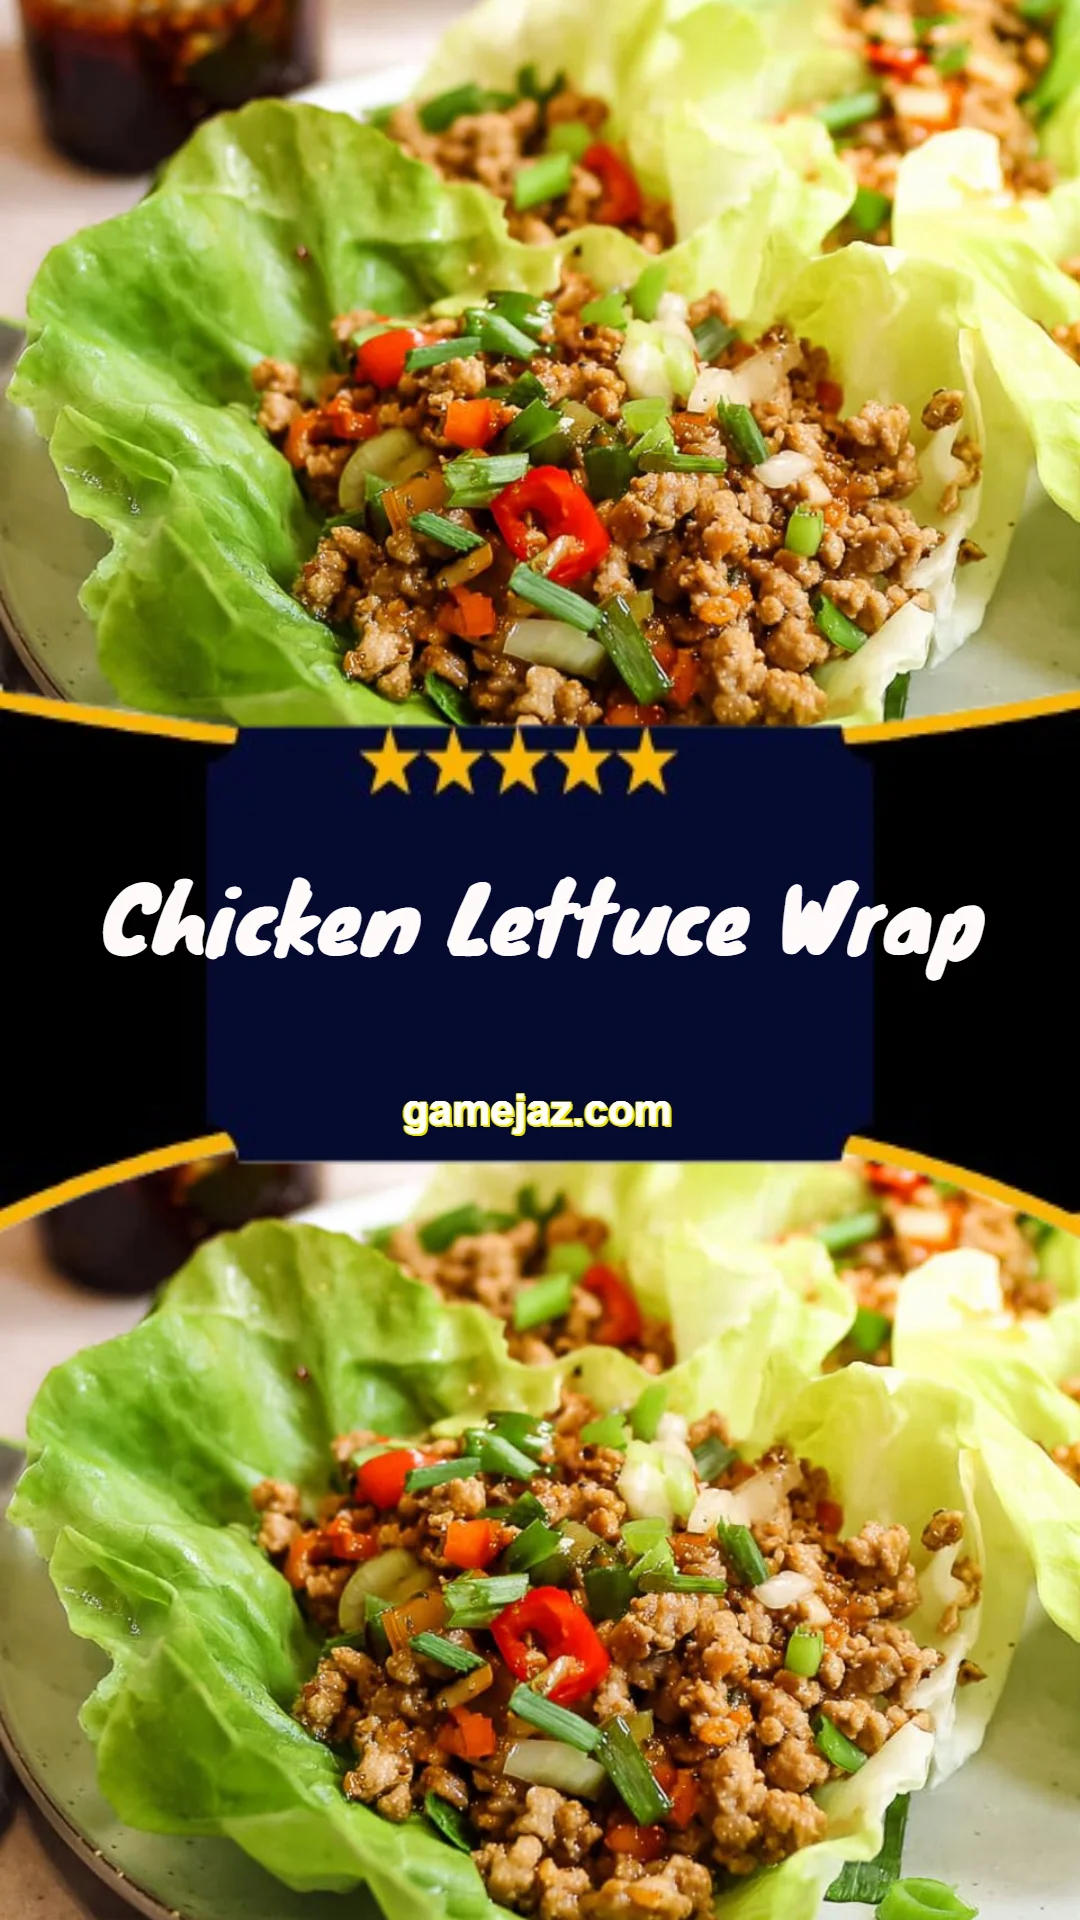
6. Chicken Lettuce Wrap
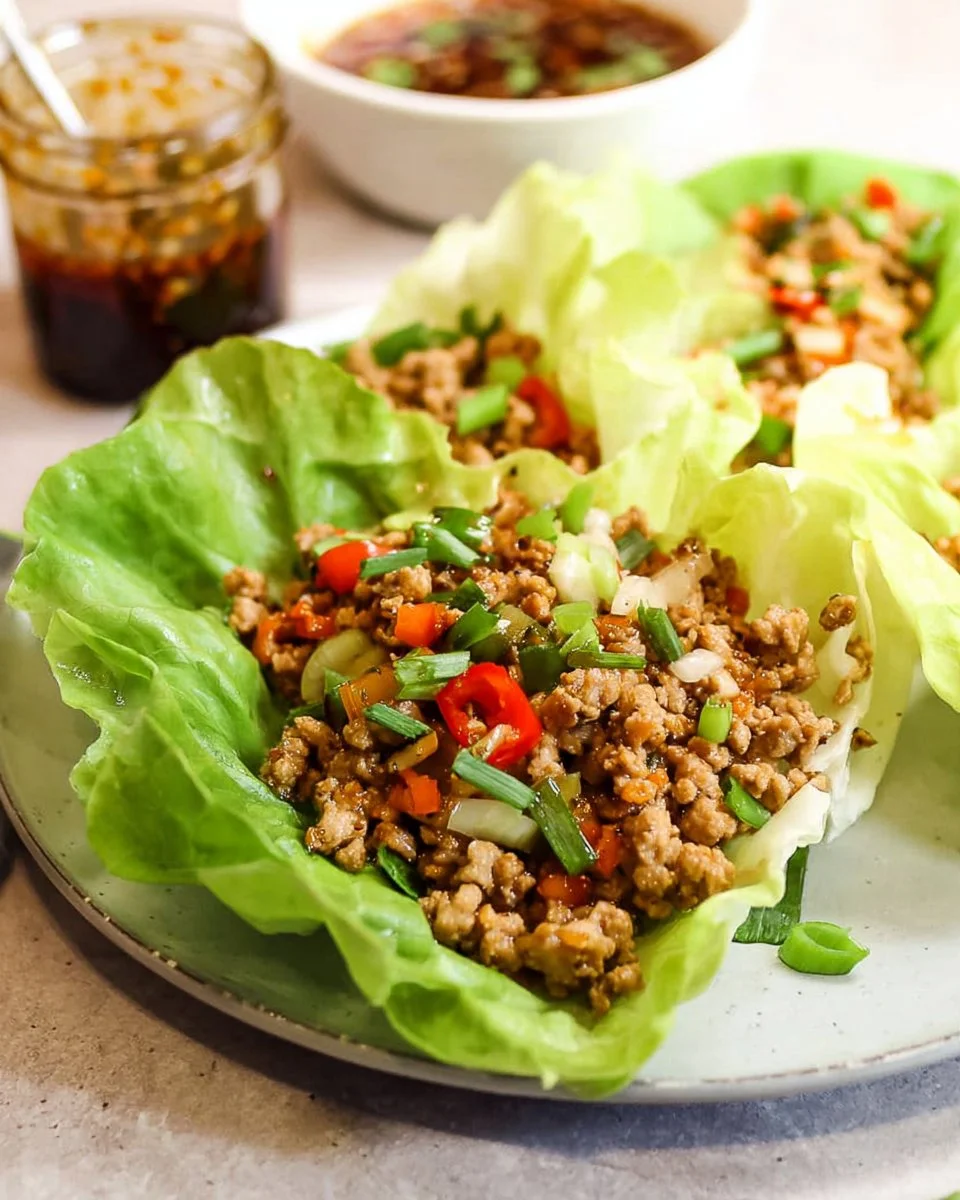
The Ultimate Chicken Lettuce Wrap Recipe: Your Go-To for Flavor and Fun!
Oh, let me tell you about the first time I made Chicken Lettuce Wraps! It was a Saturday night, and my family couldn’t decide between picking up takeout or cooking together. In a lightbulb moment, I suggested we whip up my own version of those famous wraps we’ve had at our favorite Asian restaurant. The kitchen quickly filled with laughter and the inviting aroma of savory chicken sautéing with garlic and ginger. These Chicken Lettuce Wraps are not just a dish; they are a celebration—of flavors, togetherness, and those simple moments that bring us closer.
What sets my wraps apart from others is the balance of crunchy fresh vegetables with the tender, flavor-packed chicken, all draped in crisp lettuce. It’s not just about eating; it’s an experience! I still remember my youngest biting into her wrap, eyes wide, as she exclaimed, “This is better than takeout!” Every time we gather around the table for this meal, it feels like home—warm, inviting, and utterly delicious.
In this post, I’ll share my secret recipe for Chicken Lettuce Wraps that you can easily replicate. You’ll get not just a lovely dish to serve but the confidence to make it your own!
What Are Chicken Lettuce Wraps?
Originating from the vibrant streets of Asia, Chicken Lettuce Wraps are a delightful, health-conscious appetizer that has captured hearts (and appetites) around the world. Typically, these wraps consist of seasoned ground chicken, fresh vegetables, and savory sauces, all enveloped in crisp lettuce leaves—think of them as a fresh, low-carb alternative to tacos.
The taste is a beautiful symphony! You’ll enjoy the sweetness of hoisin sauce, the subtle heat from chili flakes, and the satisfying crunch from water chestnuts and carrots. The texture is equally enticing, with the tender chicken and the fresh, crunchy lettuce creating a unique bite.
These wraps are perfect for a quick weeknight dinner, a weekend gathering, or even a fun party dish. They are versatile and can be tailored to whatever flavor profile you’re going for. The best part? They’re just as enjoyable when served fresh from your own kitchen!
Why You’ll Love This Recipe
Better Than Takeout: Forget about spending too much money at a restaurant—these Chicken Lettuce Wraps are bursting with flavor and cost significantly less than takeout. Plus, the satisfaction of making them yourself can’t be beaten!
Customize Your Fillings: Want to swap the ground chicken for turkey, beef, or even tofu? Go for it! You can easily modify the recipe to suit your preferences or dietary needs, making them perfect for anyone at your table.
Saves You Time: This is an incredibly quick dish to prepare, taking about 30 minutes from start to finish. Whether it’s a busy weeknight or a casual gathering, you’ll find yourself reaching for this recipe often.
Fresh and Healthy: Packed with lean protein, fresh vegetables, and served in a light lettuce wrap, you’ll feel good about indulging in these delicious bites. It’s a meal that tastes good and feels good too!
Perfect for Meal Prep: Make a larger batch and store it safely in the fridge for healthy lunches throughout the week. They only get better as the flavors meld together!
Ingredients

Sauce Ingredients:
- 2 Tbsp oyster sauce
- 1 Tbsp hoisin paste (or for a sweeter option, 1 1/2 Tbsp hoisin sauce)
- 1 1/2 Tbsp soy sauce
- 1 Tbsp tamarind juice
- 1/2 tsp sesame oil
- 1/4 tsp white pepper
- Chili flakes, to taste; watch out if you like spicy!
- 1 tsp cornstarch
Chicken Wrap Ingredients:
- 1 Tbsp neutral oil (like vegetable or canola)
- 1/2 onion, diced
- 3 cloves garlic, minced
- 1 Tbsp finely grated ginger
- 1/2 tsp five-spice powder
- 500g ground chicken (or your choice of protein)
- 1/2 cup carrot, diced small
- 1/3 cup water chestnuts, diced small
- 1 tsp black soy sauce (optional, for extra color)
- 1 green onion, chopped
- Half a head iceberg lettuce, separated into leaves
- 1 Tbsp toasted white sesame seeds for garnish (optional)
Note: Always opt for high-quality ingredients when possible. Fresh ground chicken is a great choice for taste; you can also use ground turkey. For sauce brands, I recommend Lee Kum Kee for oyster sauce and Kikkoman for soy sauce.
Step-by-Step Instructions
Prep the Sauce: In a small bowl, combine all the sauce ingredients (oyster sauce, hoisin paste, soy sauce, tamarind, sesame oil, white pepper, chili flakes, and cornstarch) and stir until blended. If it’s too thick, add a splash of water to loosen it.
Dissolve Cornstarch: Dissolve the cornstarch in a little bit of cold water in another bowl; this will thicken your filling later.
Sauté: In a hot wok or large skillet, heat the neutral oil over medium-high heat. Add diced onion and cook for about 3-4 minutes until translucent, then toss in the garlic and ginger. Sauté these aromatics for about 1-2 minutes until fragrant.
Cook Chicken: Add the five-spice powder, mixing for about 30 seconds before adding the ground chicken. Use your spatula to break the chicken into small pieces as it cooks (around 5-7 minutes) until it’s thoroughly cooked.
Add Sauce: Pour in the sauce mixture, and cook until the chicken absorbs the flavors and no sauce pools at the bottom (around 3-4 minutes). Toss in the diced carrots and water chestnuts, giving it a good stir.
Thicken: Increase the heat to high. Stir constantly until the mixture is thoroughly coated and heated through. Optionally, add a splash of black soy sauce for a deeper hue.
Finish Up: Quickly mix in the cornstarch slurry and give it a good stir to thicken the mixture (30 seconds to 1 minute). Remove from heat and fold in the chopped green onions.
Serve: Lay out the iceberg lettuce leaves and spread a thin layer of hoisin sauce on each. Add a generous spoonful of the chicken mixture, sprinkle with toasted sesame seeds, and enjoy your wraps!
Chef’s Tips:
- To prevent the lettuce from tearing, choose larger outer leaves for wrapping.
- Keep a splash of hoisin on the side for those who want a little more sauce.
Expert Tips & Tricks
Storage: Store leftovers in an airtight container in the fridge for up to 3 days. Reheat in a skillet for best results—microwaving can make the chicken chewy.
Make-Ahead: Prepare the filling in advance and store it separately. When you’re ready to eat, just reheat and assemble the wraps for a fresh taste.
Troubleshooting: If your filling seems dry, a quick drizzle of additional hoisin or soy sauce mixed in can revive it!
Customize Ingredients: If you’re craving a kick, try adding diced jalapeños or sriracha to the filling or sauce. You can even swap the chicken for shrimp or mushrooms for a seafood or vegetarian twist.
Freshness Matters: Use the freshest vegetables you can find. Adding elements like sliced cucumbers or bell peppers can add an extra crunch!
Serving Suggestions
These Chicken Lettuce Wraps are delicious on their own, but consider pairing them with a side of steamed jasmine rice or a crisp cucumber salad for a complete meal. For presentation, enlist the serving dish that showcases the colorful wraps beautifully—perhaps a simple white platter to let those vibrant colors shine. They’re perfect for taco nights, casual gatherings, or family dinners!
Variations & Substitutions
Vegetarian Option: Swap in chopped mushrooms (I love shiitake for their rich flavor) or cooked quinoa for a protein-packed veggie version.
Flavor Innovations: Try out different sauces like teriyaki or sweet and sour to give your Chicken Lettuce Wraps a twist, or add fresh herbs such as cilantro or mint for a refreshing vibe.
Seasonal Add-Ins: In the summer, consider adding grilled pineapple to the filling for a sweet touch, while in autumn, chopped butternut squash adds a seasonal, sweet flavor.
Nutrition & Storage Info
- Prep Time: 15 minutes
- Cook Time: 15 minutes
- Total Time: 30 minutes
- Yield: Serves 4
- Estimated Calories: Approximately 350 calories per serving
Storage Tips
- Room Temperature: Serve at room temp if they are going to be out for more than an hour.
- Fridge: Store leftovers in an airtight container; they last up to 3 days.
- Freezer: While I don’t recommend freezing lettuce wraps (they get soggy), you can freeze the filling! Just defrost and reheat when you’re ready to serve.
FAQ Section
Can I use a different type of meat?
Yes, you can easily substitute ground turkey, beef, or even a meat substitute like Beyond Meat for a plant-based option.What’s the best way to store leftovers?
Store the chicken filling and the lettuce wraps separately. The filling can last up to 3 days in an airtight container in the fridge.Can I prepare the filling in advance?
Absolutely! Make the filling ahead of time and store it in the fridge. Just reheat and assemble when you’re ready to eat.What if I don’t have hoisin sauce?
You can substitute a mix of soy sauce, peanut butter, and a hint of honey for a similar taste and texture.How spicy are these wraps?
The spice level can be adjusted based on your preference by controlling the amount of chili flakes you use.What kind of lettuce is best for wraps?
Iceberg lettuce is commonly used for its crunch and structure, though butter lettuce or romaine can also work well.Can I make these wraps gluten-free?
Yes! Switch the soy sauce for tamari or a gluten-free soy sauce, and ensure other sauces are gluten-free as well.Do I need to cook the chicken beforehand?
Yes, you’ll be cooking the ground chicken along with the aromatics and sauces in the recipe.Can I add more vegetables to the filling?
Definitely! Chopped bell peppers, zucchini, or snap peas would be great additions.How do I roll the wraps without them falling apart?
Ensure you’re using large enough leaves and avoid overstuffing them. Start from one end and roll tightly.

Conclusion
These Chicken Lettuce Wraps are truly a wonderful family treat that combines the joy of cooking with the warmth of shared meals. They promise a delightful experience, bringing together flavors and memories in every bite. I encourage you to try this recipe—you’ll love the versatility and freshness it brings to your meal rotation.
Did you give it a go? I’d love to hear about your experiences in the comments! Be sure to check out other delicious recipes on my blog that pair perfectly with these wraps. Happy cooking!
7. Authentic Thai Yellow Curry with Chicken and Potatoes
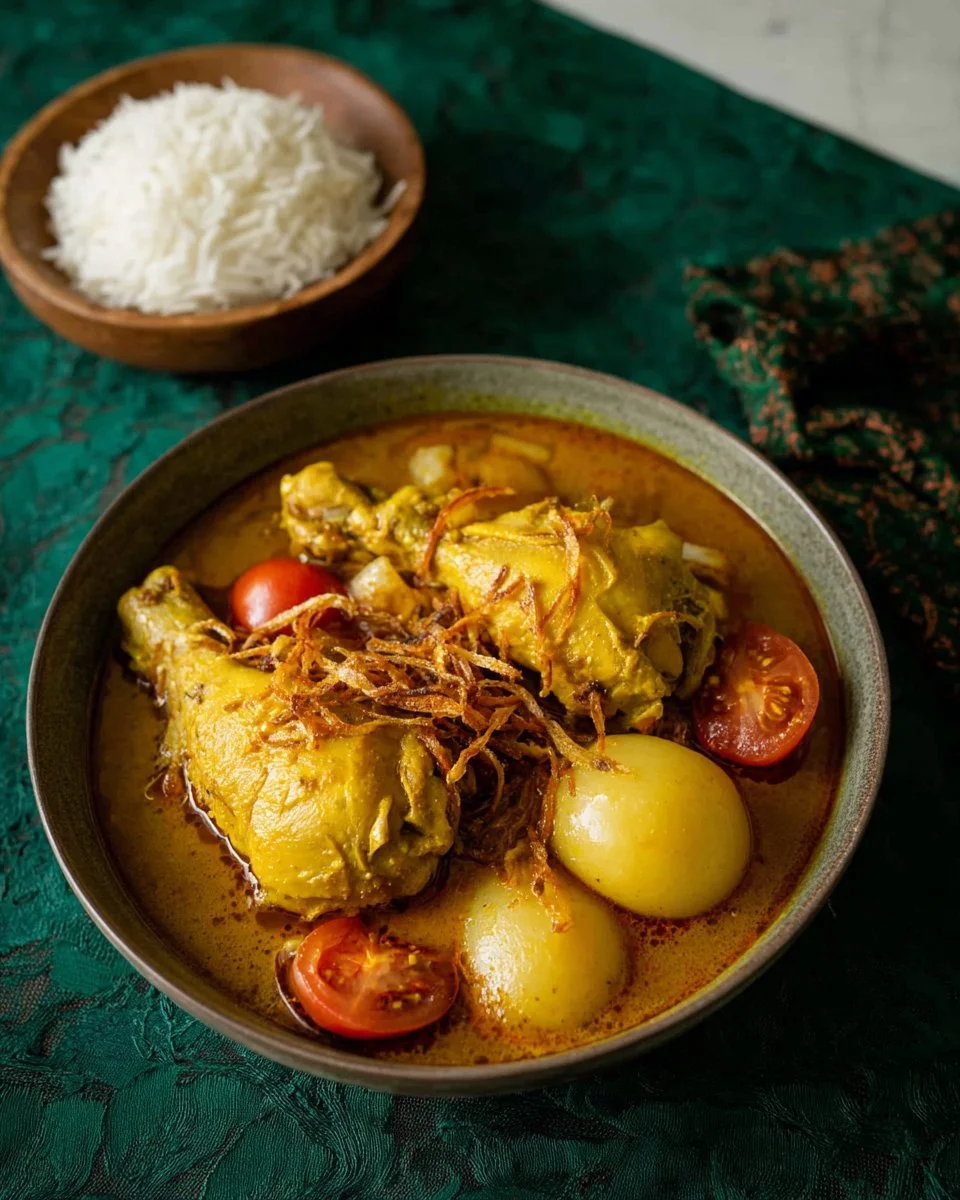
Deliciously Authentic Thai Yellow Curry with Chicken and Potatoes: A Comforting Family Favorite
There’s something incredibly comforting about the aroma of a simmering curry that instantly transports me back to childhood kitchen escapades. Picture this: it’s a rainy Sunday afternoon, and the smell of Authentic Thai Yellow Curry with Chicken and Potatoes fills the air. Growing up in an adventurous foodie family, my mom frequently experimented with recipes, but this Thai yellow curry was a staple. It not only satisfied our taste buds but also wrapped us in warmth and nostalgia.
What makes this particular recipe so special is its balance of flavors — the vibrant spices of the yellow curry paste meld harmoniously with tender chicken and soft, waxy potatoes. Unlike other recipes that can be overly complex or bland, this golden delight infuses my adventurous spirit with excitement while remaining straightforward.
This isn’t just food; it’s a slice of home, memories served on a plate. With this recipe, I promise you’ll learn how to create that magical comfort in your kitchen and may just find yourself creating new family memories of your own.
What Are Authentic Thai Yellow Curry with Chicken and Potatoes?
Authentic Thai Yellow Curry with Chicken and Potatoes is a beloved staple of Thai cuisine, featuring roots that travel back to the southern regions of Thailand. The dish is known for its rich, creamy coconut base that perfectly complements the warmth of spices like turmeric and coriander found in yellow curry paste. With its slightly sweet and spicy flavor profile, each spoonful offers a comforting complexity that is both satisfying and invigorating.
What truly sets this dish apart is its delightful texture. The succulent chicken combined with the soft chunks of potato creates a symphony of creamy and hearty characteristics that dance in your mouth. This curry is perfect for various occasions—whether you’re seeking a comforting family dinner or impressing guests at a cozy gathering. Plus, it’s an excellent way to celebrate important family moments or simply unwind after a long day.
Why You’ll Love This Recipe
Here are five compelling reasons you’ll adore making this Authentic Thai Yellow Curry with Chicken and Potatoes at home:
Unmatched Flavor Profile: Say goodbye to bland takeout! The homemade curry packs a rich and deep flavor that store-bought options simply can’t compete with. The layer of spices from the yellow curry paste harmonizes beautifully with the coconut milk, making every bite a celebration.
Cost-Effective Solution: Eating out can quickly add up, especially when it comes to gourmet dishes like Thai curry. By cooking at home, you not only save money but also gain control over the ingredients, allowing for healthier substitutions if desired.
Customization Galore: This recipe is incredibly versatile. Want to swap chicken for tofu or add more vegetables? Go for it! You can craft your unique version, so there’s a fun creative element involved.
Time-Friendly: You don’t need to spend ages in the kitchen! With about 45 minutes of cooking time, this dish is perfect for busy weeknights when you want a delicious meal without all the fuss.
Comfort in a Bowl: This curry is a meal that wraps you in warmth and comfort. It’s family-friendly, and just like my mother’s recipe, it evokes feelings of love and togetherness.

Ingredients
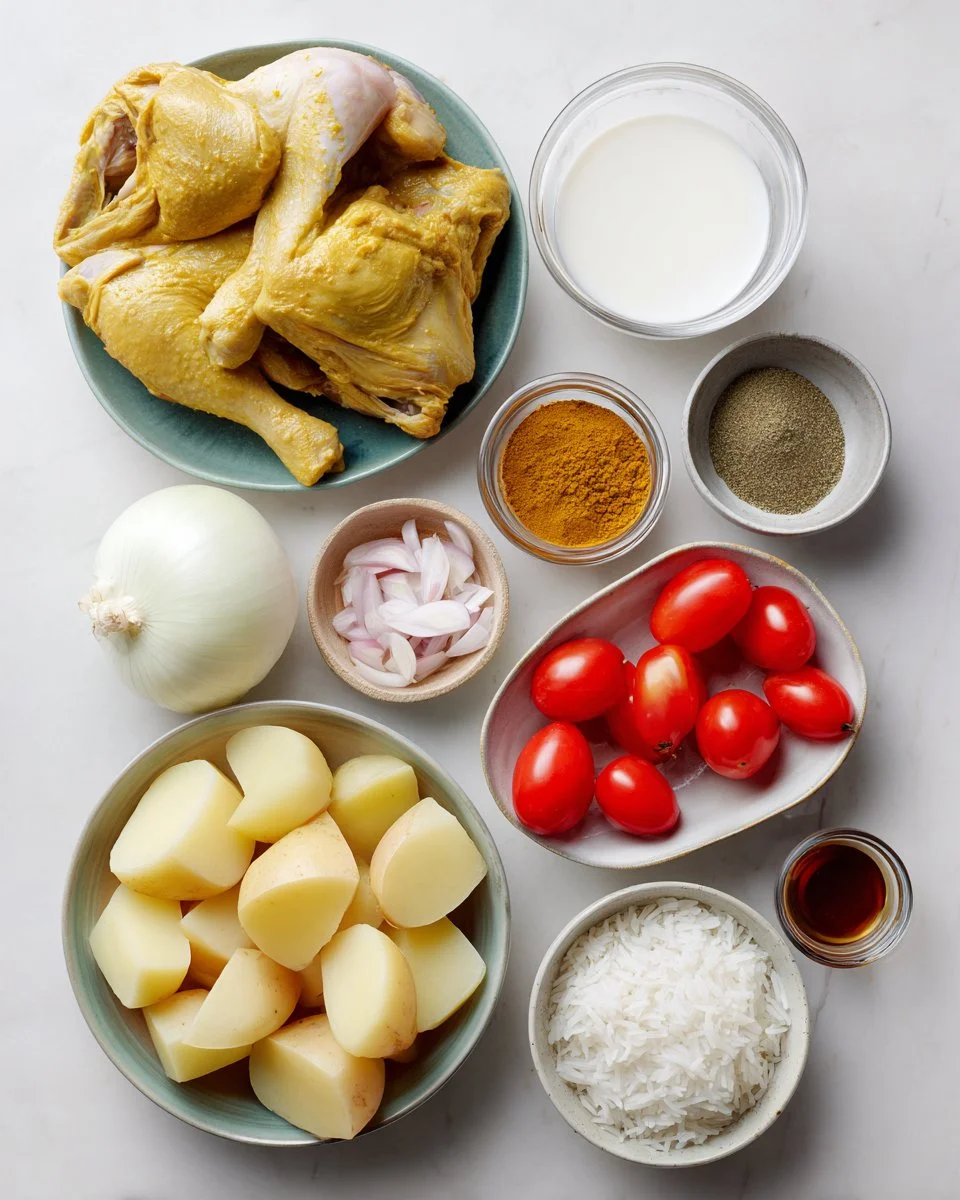
To capture the wonderful flavors of Authentic Thai Yellow Curry with Chicken and Potatoes, you’ll need the following ingredients:
- 5-6 tablespoons yellow curry paste (Look for a high-quality brand like Aroy-D)
- 2 lbs bone-in chicken thighs (Use skinless for less fat)
- 2 cups coconut milk (Full-fat coconut milk is the way to go for creaminess)
- 10.5 oz waxy potatoes, cut into 1-inch chunks
- Half a medium onion, cut into 1 cm strips
- 1 cup water (or as needed)
- 1-2 tablespoons fish sauce (Adjust to taste)
- 1 ½ tablespoons palm sugar, finely chopped and packed
- 1-2 tablespoons tamarind paste (Make sure to use the right consistency)
- 1 cup cherry or grape tomatoes, pierced
- Fried shallots, for garnish (optional)
- Jasmine rice, for serving
Notes on Ingredients:
- Yellow Curry Paste: Fresh is best, but if you can’t find it, a dried alternative can work. Just keep in mind it will change the flavor slightly.
- Boneless Chicken Thighs: You can also use chicken breast, but thighs are more flavorful and tender in this dish.
- Potatoes: Waxy potatoes like red or yellow potatoes are ideal since they hold their shape well in cooking.
- Fish Sauce & Tamarind: These add the hallmark umami and tang to the dish, respectively. Feel free to adjust according to your taste.
Prep Notes:
- Allow your coconut milk to come to room temperature before using for a smoother mix.
Step-by-Step Instructions
Prepare the Base: In a medium pot, bring ¾ cup of the coconut milk to a boil over medium-high heat. Add the yellow curry paste and mix well, turning the heat down to medium. Stir this lovely mixture until it thickens and starts to release its fragrant aroma, about 2-3 minutes.
Simmer the Chicken: Next, add the remaining coconut milk, chicken, 1 tablespoon fish sauce, 1 tablespoon palm sugar, and 1 tablespoon tamarind paste. Add just enough water to barely cover the chicken. Let this simmer gently for about 30 minutes, during which time you’ll gradually watch it transform into a rich curry.
Prep the Tomatoes: While the curry is simmering, pierce the cherry tomatoes with a fork or sharp knife (this helps them release their juices).
Add the Veggies: After 30 minutes, toss in the potatoes and onion into the pot. Allow everything to simmer for another 15 minutes until the chicken is fork-tender and the potatoes are cooked through. Keep an eye on it and add more water if needed.
Taste and Adjust: Before plating, taste your curry. This is the moment to adjust with more fish sauce, sugar, or tamarind to get that perfect sweet-salty balance.
Finishing Touch: Turn off the heat, stir in the pierced cherry tomatoes, and let the residual heat cook them for a minute or two.
Serve and Garnish: Serve your delightful curry in a bowl, garnished with fried shallots if desired. Don’t forget to dish it up alongside a serving of fluffy jasmine rice for the ultimate experience.
Chef’s Tips:
- For a richer flavor, consider marinating your chicken in spices about an hour before cooking.
- Avoid boiling the curry too rapidly to prevent curdling the coconut milk.
- If the curry becomes thicker than desired, add a little more coconut milk or water until it reaches your preferred consistency.
Expert Tips & Tricks
- Storage: Leftover curry can be safely stored in the fridge for up to 3 days. Simply reheat when you’re ready to enjoy.
- Freezer-Friendly: This curry freezes well! Cool it completely before transferring to an airtight container, and it will last up to 3 months.
- Make-ahead: Prepare everything up to step 5 in advance, then finish cooking when you’re ready to serve.
- Troubleshooting: If your curry seems too salty, balancing it with a bit of sugar or tamarind can help bring back the flavor’s harmony.
Serving Suggestions
Pair your Authentic Thai Yellow Curry with Chicken and Potatoes with fluffy jasmine rice to soak up the luscious sauce. You could also serve it with a side of fresh cucumber salad to lighten the meal. For special occasions, consider a beautiful platter of Thai spring rolls for an appealing appetizer.
Variations & Substitutions
- Vegetarian/Vegan Option: Swap in tofu or tempeh for the chicken and replace fish sauce with soy sauce for a delicious plant-based version.
- Herbal Twists: For a fresh twist, consider adding some fresh basil or cilantro as a garnish.
- Seasonal Additions: In the fall, sweet potatoes can be substituted for a lovely depth of flavor.
Nutrition & Storage Info
- Prep Time: 15 minutes
- Cook Time: 45 minutes
- Total Time: 1 hour
- Yield: Serves 4-6
- Estimated Calories: About 450 calories per serving (adjust depending on serving size and specific ingredients)
- Storage Instructions: Allow leftovers to cool, then refrigerate for up to 3 days; reheating before serving. Freeze for up to 3 months; thaw in the fridge before reheating.
FAQ Section
What kind of chicken should I use?
Bone-in chicken thighs give the best flavor and tenderness, but boneless works too. Just adjust the cooking time slightly.Can I use other meats?
Absolutely! This recipe also works well with beef, pork, or shrimp. Adjust cooking times accordingly.Is it necessary to use tamarind?
While tamarind adds a wonderful tanginess, you can substitute it with lime juice in a pinch for a similar acidic flavor.How do I thicken the curry?
If your curry is too thin, simmer it longer to allow it to reduce. Alternatively, you can mix a little cornstarch with water, then gradually stir it in.Can I add vegetables?
Absolutely! Fresh bell peppers, carrots, or snap peas can be delicious additions. Just make sure to adjust the cooking time based on their texture.What if I can’t find yellow curry paste?
In a pinch, you can create the paste using a blend of turmeric, coriander, cumin, and a little garlic. Not an exact match, but will work in a bind!What’s the best way to serve curry?
Serve it in a beautiful bowl with jasmine rice on the side, garnished with fresh herbs for an added pop.Can I make this curry ahead of time?
Yes! It actually tastes even better the next day as the flavors meld, making it perfect for meal prep.Is this dish spicy?
It has a mild spice level typically, but you can adjust the curry paste according to your taste for more heat.Can I use lite coconut milk?
You can, but the texture won’t be as rich. Full-fat coconut milk gives the best results and creaminess.
Conclusion
This Authentic Thai Yellow Curry with Chicken and Potatoes isn’t just a recipe—it’s a journey into the heart of Thai cuisine that brings people together around the table. I encourage you to give it a try and let the comforting flavors guide you to create cherished memories in your own kitchen. I’d love to hear how your experience turns out! Feel free to share your thoughts in the comments or check out related recipes on my blog for more culinary adventures. Happy cooking!
8. Tom Yum Soup with Chicken Wings
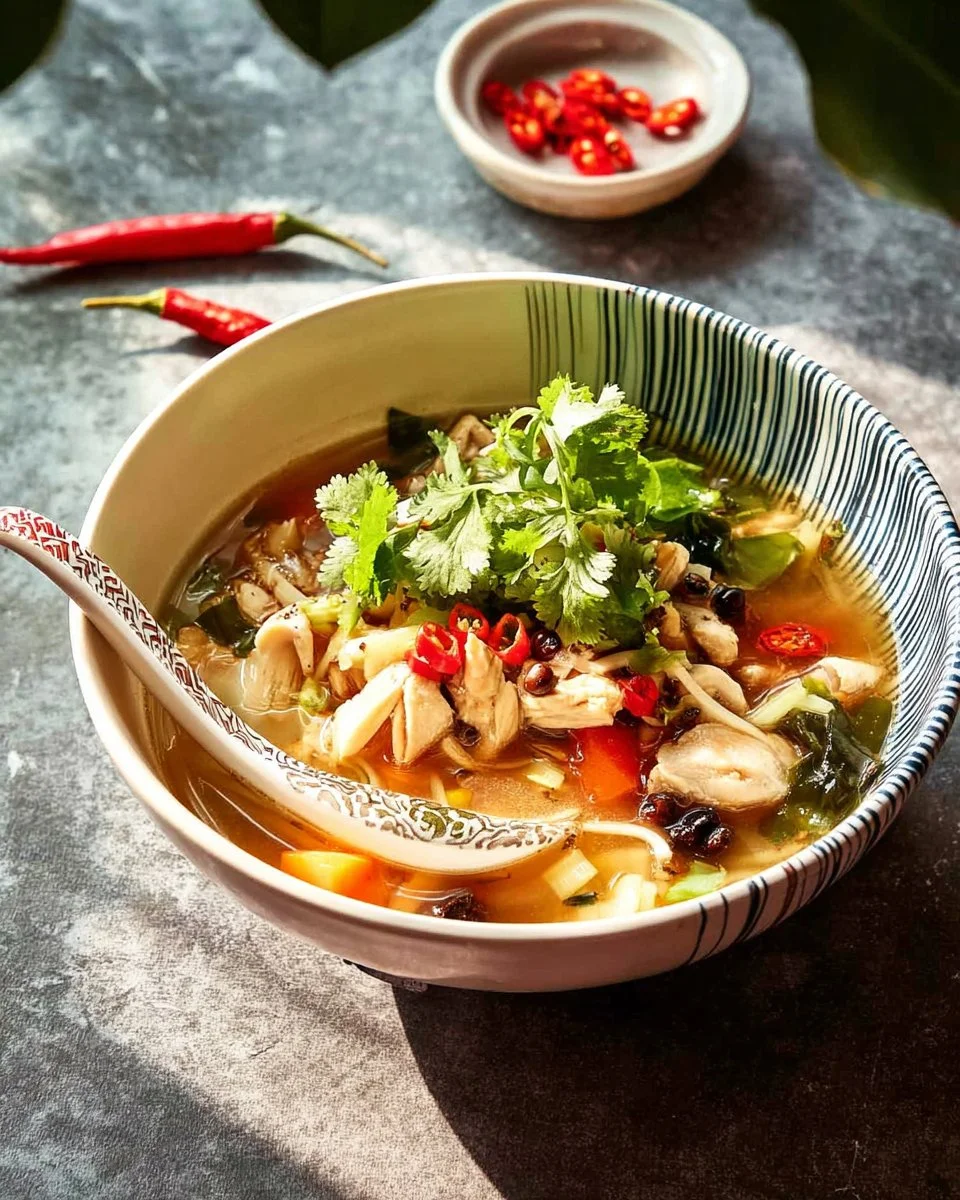
Irresistible Tom Yum Soup with Chicken Wings: A Warm Embrace in a Bowl
Introduction
Ah, the first chilly evening of autumn—I was at my parents’ house, wrapping up in my favorite blanket, when the familiar, mouthwatering scent of Tom Yum Soup began to waft through the kitchen. It’s funny how it only takes a single aroma to whisk you back in time, isn’t it? My mom had perfected her Tom Yum recipe, but this time, she added a twist: luscious chicken wings. That’s right! Tom Yum Soup with Chicken Wings became our cozy family tradition.
What makes this dish stand out? The delightful combination of spicy, sour, and aromatic flavors integrates beautifully with the tender, juicy wings, crafting a unique experience that’s unforgettable. Unlike your typical Tom Yum, this variation packs a punch with the added essence of fried chicken skins mingling in the savory broth. You’ll never want to revert back to plain Tom Yum after this!
With each slurp, I can feel the love and warmth surrounding me—a reminder of family gatherings and laughter-filled dinners. Today, I’m thrilled to share my twist on this classic recipe that will not only elevate your dinner but will leave you with cherished memories to savor. Stick around, and I promise you’ll discover the secrets to creating the best-ever Tom Yum Soup with Chicken Wings!
What Are Tom Yum Soup with Chicken Wings?
Tom Yum is a traditional Thai soup known for its bold flavors that dance beautifully among the palate. Originating in Southeast Asia, the dish dates back centuries and is celebrated for its blend of exotic spices and aromatics. The broth embodies a refreshing tang from lime juice, balanced by the richness of chicken wings, which tenderize and infuse their essence into the soup.
The unique texture of the wings complements the smooth broth, adding an indulgent element as they soak up flavors of lemongrass and galangal. Perfect for a family-style dinner or to warm you up on a cold day, this dish embraces the essence of Thai cuisine—invigorating yet comforting. So why prepare it? Whether you need to impress guests or simply crave a cozy night in, no one can resist a piping hot bowl of Tom Yum Soup with Chicken Wings.
Why You’ll Love This Recipe
Unmatched Flavor Explosion: Unlike store-bought soups, my Tom Yum Soup with Chicken Wings bursts with freshness. Each ingredient plays a role—spicy chilies kick things up while fragrant herbs harmonize with the rich chicken broth.
Cost-Effective Meal: Dine luxuriously without breaking the bank! Chicken drumettes are affordable, and this recipe utilizes simple pantry staples. You’ll save money without sacrificing quality; what’s not to love?
Customization Galore: Personalize the heat level by adjusting the dried chilies, or throw in seasonal vegetables. Not a fan of chicken? Swap in shrimp or tofu! The world is your oyster… in this case, your soup!
Easy to Prepare: I promise you, it isn’t complicated! In less than an hour, you’ll have a delicious, restaurant-worthy meal ready to enjoy. And as an added bonus, it’s a straightforward recipe that’ll leave you looking like a culinary genius.
Comfort Food Worth Feeding Your Soul: As you let the aromatic broth envelop your senses and sip away, you’ll feel the embrace of comforting warmth much like a hug from a friend on a bad day. It’s nourishing in every possible way!
Ingredients

- 5 cups water: For a perfectly balanced broth, adjust as needed for personal preference.
- 1 and 1/2 pounds chicken drumettes: Dark meat provides richer flavor. Opt for organic or free-range for the best results.
- 1/2 cup coarsely chopped shallots: Sweet and aromatic, shallots elevate the flavor profile!
- 3-4 tablespoons fish sauce: This adds depth—choose a high-quality brand like Red Boat for a cleaner taste.
- 2-3 teaspoons granulated sugar: Balances the sour herbs. Feel free to substitute with coconut sugar.
- 5 spicy dried chilies: Adjust based on your heat tolerance! I recommend Thai Bird’s Eye for authenticity.
- 2 stalks lemongrass (bottom halves only, smashed, cut into 2-inch pieces): Adds a delightful citrus note; fresh is best!
- 10 thin slices galangal: A must-have—adds an earthy spiciness typical in Thai dishes; substitute ginger cautiously.
- 10 makrut lime leaves: Shredded for fragrance and flavor; these are essential!
- 3.5 ounces oyster or shimeji mushrooms: They lend an umami taste and a delightfully chewy texture.
- 1 and 1/2 cups halved cherry tomatoes: Sweet bursts of flavor; try substituting with heirlooms in season!
- 3 to 4 tablespoons lime juice: Freshly squeezed is key—nothing beats the zing of fresh lime!
- 7 to 8 sprigs cilantro: For garnish, use the vibrant green tops for a fresh contrast!
- Jasmine rice, for serving: A classic backbone to absorb the delicious broth!
Ingredient Notes
- Quality: Use the freshest ingredients for maximum flavor impact. Choose organic where possible, especially for produce.
- Prep Notes: Make sure ingredients like butter are at room temperature when applicable, to ease blending.
- Substitutions: Don’t fret! If you can’t find specific ingredients, let creativity guide you. For instance, if galangal is unavailable, ginger can work great as a stand-in!
Step-by-Step Instructions
Prepare the Broth: Bring the water to a rolling boil over high heat. This ensures that the chicken cooks evenly.
Cook the Chicken: Add the chicken drumettes, shallots, 3 tablespoons of fish sauce, and 2 teaspoons of sugar. Let it simmer for about 20 minutes or until the chicken reaches fork-tender perfection (check with a fork!).
Toast the Chilies: While the chicken is cooking, char the dried chilies in a dry skillet over medium heat until they develop charred spots that smell smoky. It’s a sensory experience that hypes up the dish. Set aside once done!
Combine Aromatics: When the chicken is tender, introduce the dried chilies into the pot (keep them whole for milder soup or break them up for added spice), followed by lemongrass, galangal, and mushrooms.
Infuse the Citrus: Twist the makrut lime leaves to bruise them—it releases essential oils—and tear them into chunks before adding to the pot.
Simmer for Flavor: Let this aromatic mix simmer for another 5 to 7 minutes as the flavors meld together.
Finish with Tomatoes: Add the cherry tomatoes, cooking for about 2 minutes until they soften and juiciness melds with the broth.
Season to Taste: Turn off the heat and stir in lime juice. Taste and adjust seasoning with more fish sauce, sugar, or lime juice as needed.
Garnish and Serve: Garnish with chopped cilantro before serving it hot over Jasmine rice, and dive into tranquility!
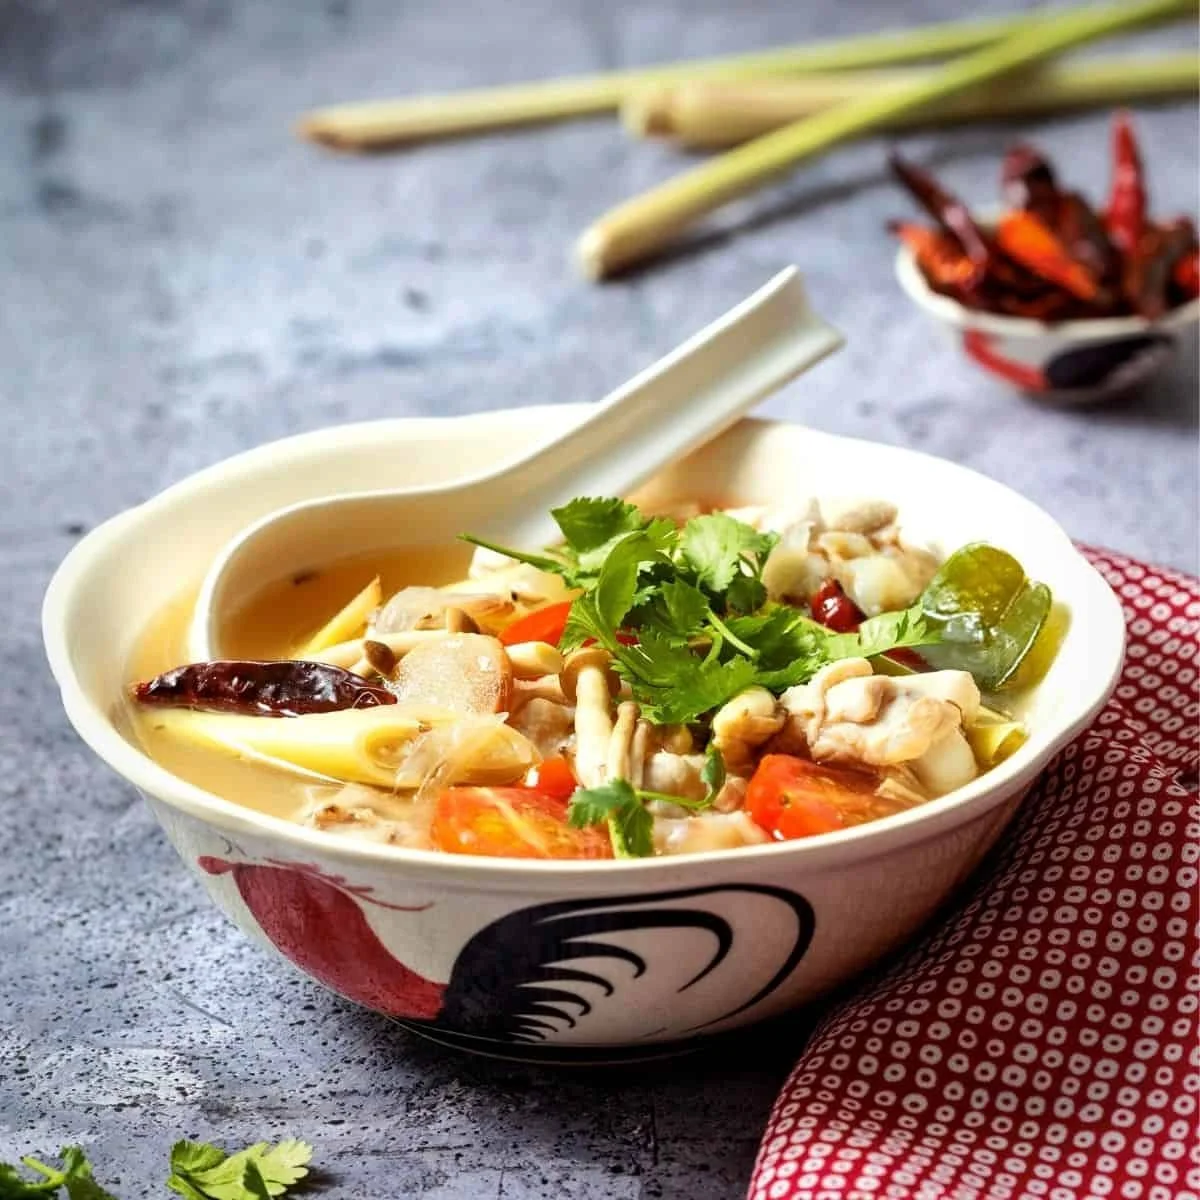
Expert Tips & Tricks
Storage Recommendations: Any leftovers can be stored in an airtight container in the fridge for up to 3 days. Simple reheat on the stove, adding a splash of water if needed.
Make-Ahead Magic: For busy weekdays, prepare your soup and refrigerate before adding lime juice and cilantro. Just finish it on the stovetop when ready to serve.
Common Mistakes to Avoid:
- Don’t skip the toasting of chilies; it’s key to deepen the flavors.
- Be cautious not to overcook the tomatoes—they should remain juicy and fresh!
Serving Suggestions
For a complete meal, pair your Tom Yum Soup with a side of fragrant jasmine rice. Consider a light Thai salad or spring rolls to complement the flavor profile. Present the soup in a beautiful bowl, garnished with an extra sprinkle of cilantro for that Instagram-worthy touch! This dish is perfect for gatherings, cozy nights in, or impressing a special someone!
Variations & Substitutions
- Flavor Combinations: Feel free to add your favorite vegetables like bok choy, snap peas, or bell peppers for increased nutrition and diverse flavors.
- Dietary Adaptations: Vegetarian or vegan? Swap chicken for tofu or tempeh and use vegetable broth in place of water.
Nutrition & Storage Info
- Prep Time: 15 minutes
- Cook Time: 30 minutes
- Total Time: 45 minutes
- Yield: Serves 4-6
- Estimated Calories: Approx. 350 calories per serving, depending on specific ingredients used.
Storage Instructions:
- Room Temp: Not recommended; best enjoyed warm.
- Fridge: Lasts for up to 3 days.
- Freezer: Can freeze for up to 3 months; however, fresh vegetables may lose texture.
FAQ Section
Can I use other cuts of chicken?
Absolutely! Thighs would be a great choice for more richness, though cooking times may vary.What if I’m sensitive to spicy food?
Use less dried chilies, or omit them completely while still enjoying the aromatic broth.Can I make this in advance?
Yes! Just add lime juice and cilantro before serving for the freshest taste.What side dishes pair best?
Light sides like papaya salad or shrimp crackers complement the dish beautifully.Is jasmine rice necessary?
While traditional, you can serve with other grains like brown rice or even quinoa!What’s the difference between lemongrass and galangal?
Lemongrass offers a citrusy flavor and galangal provides a ginger-like spicy aroma.Is there a non-fish alternative to fish sauce?
Yes! Coconut aminos or soy sauce can substitute for a similar umami flavor.Are makrut lime leaves mandatory?
While they add distinct flavor, you can skip them if they’re hard to find—fresh lime zest can be a nice substitute.What if I don’t have cherry tomatoes?
Cut regular tomatoes into chunks; they work just as brilliantly!How can I make it more nutritious?
Add leafy greens like spinach or kale to the soup toward the end!
Conclusion
This Tom Yum Soup with Chicken Wings isn’t just a recipe—it’s an invitation to gather, connect, and savor the moment. By weaving together aromatic ingredients, warmth, and joyful memories, you’ll create an unforgettable dining experience. I can’t wait for you to try this dish; it deserves a spot on your table! Please share your thoughts in the comments below, and check out other recipes that I adore on the blog. Happy cooking, my friends!
9. Vietnamese Caramel Chicken
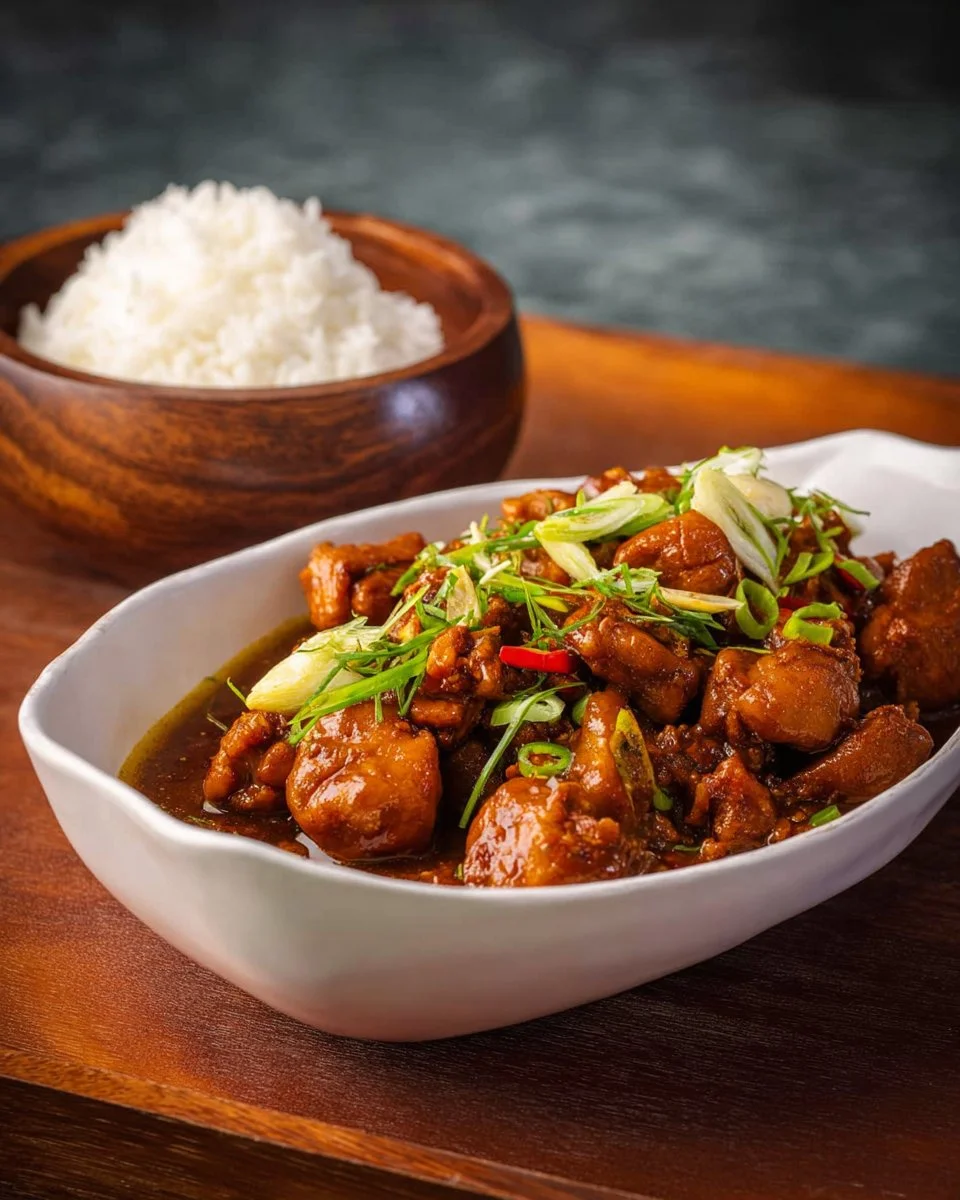
Sweet and Savory Vietnamese Caramel Chicken: A Flavorful Journey
There’s something truly magical about comfort food that transports you back to childhood, isn’t there? For me, that nostalgia comes alive with my family’s beloved Vietnamese Caramel Chicken. I can still vividly remember the aroma wafting through the kitchen as my mom expertly balanced the sweet and salty flavors, creating a dish that felt like a warm embrace. Each bite was a delightful burst of caramelized goodness with tender chicken thighs that melted in your mouth—pure bliss!
What makes this Vietnamese Caramel Chicken recipe stand out from others is the way it captures the essence of home-cooked love. Many recipes overcomplicate simplicity, but this one celebrates its ingredients, allowing you to savor each layer of flavor effortlessly. Not only is this dish an easy recipe to whip up, but it’s also a meal that sparks joy and fosters connections, filling your home with laughter and shared moments.
In this post, I promise you’ll learn how to recreate this delightful dish, infusing it with your personal touch while keeping its alluring charm intact. Let’s get started on this delicious journey together!
What Are Vietnamese Caramel Chicken?
Originating from the heart of Vietnamese cuisine, Caramel Chicken is known as Gà Kho Muối, a dish steeped in both history and flavor. Traditionally, it combines the rich umami of soy sauce and fish sauce with the sweetness of caramel to create a unique, slightly sticky glaze that clings beautifully to the chicken.
The taste is an exquisite balance of savory and sweet, resulting in a beautifully caramelized exterior with tender, juicy meat on the inside. The combination of coconut water or chicken stock in the sauce lends an additional depth of flavor, creating a dish that’s comforting yet sophisticated.
This dish is perfect for family gatherings, weeknight dinners, or even as a delightful centerpiece for a special occasion. It’s a celebration of flavors and emotions that beckons you to relax and enjoy.
Why You’ll Love This Recipe
Flavor Explosion: This dish brings together the perfect blend of sweet, salty, and savory elements that dance on your palate. Homemade caramel sauce elevates the dish far beyond anything you might find in a store!
Cost-Effectiveness: You can prepare Vietnamese Caramel Chicken for a fraction of the cost of dining out. Plus, it’s made with pantry staples that you might already have on hand!
Customizable: Love spicy food? Incorporate some Thai chilies for an extra kick! Prefer a milder version? Skip the heat—this recipe adapts beautifully.
Easy to Make: With a few steps and basic ingredients, even novice cooks can create this delightful dish. You’ll be surprised at how easily it comes together!
Memory Maker: This meal is not just sustenance; it’s an experience. Serving it over Jasmine rice and fresh veggies creates a feast that brings everyone around the table, sharing stories and laughter.
Ingredients
1½ lb boneless skinless chicken thighs, cut into 1.5-inch cubes
- Chicken thighs are ideal for this dish as they remain juicy and tender.
2 tablespoons fish sauce
- Brands like Red Boat or Three Crabs work well; this adds the umami flavor.
3 tablespoons palm sugar, finely chopped, or granulated sugar
- Palm sugar lends a unique flavor, but granulated sugar is a good substitute if you’re in a pinch.
½ tablespoon rice vinegar
- This adds a touch of acidity to balance the sweetness.
½ cup coconut water or unsalted chicken stock
- Opt for natural coconut water for a hint of sweetness.
2 tablespoons neutral oil
- You can use canola or vegetable oil for frying.
4 cloves garlic, chopped
½ cup julienned shallots
1½ tablespoons finely julienned ginger
½ teaspoon ground black pepper
Thai chilies, chopped, to taste (optional)
1 green onion and/or 4 sprigs cilantro, chopped
Jasmine rice and a side of veggies, for serving
- Steamed broccoli or bok choy complement the dish perfectly!
Note on Ingredients
- Quality Matters: Use fresh herbs and spices for the best flavor. I highly recommend visiting an Asian market if possible for authentic ingredients!
- Prep Tip: It’s best if the chicken is at room temperature before cooking for more even cooking.
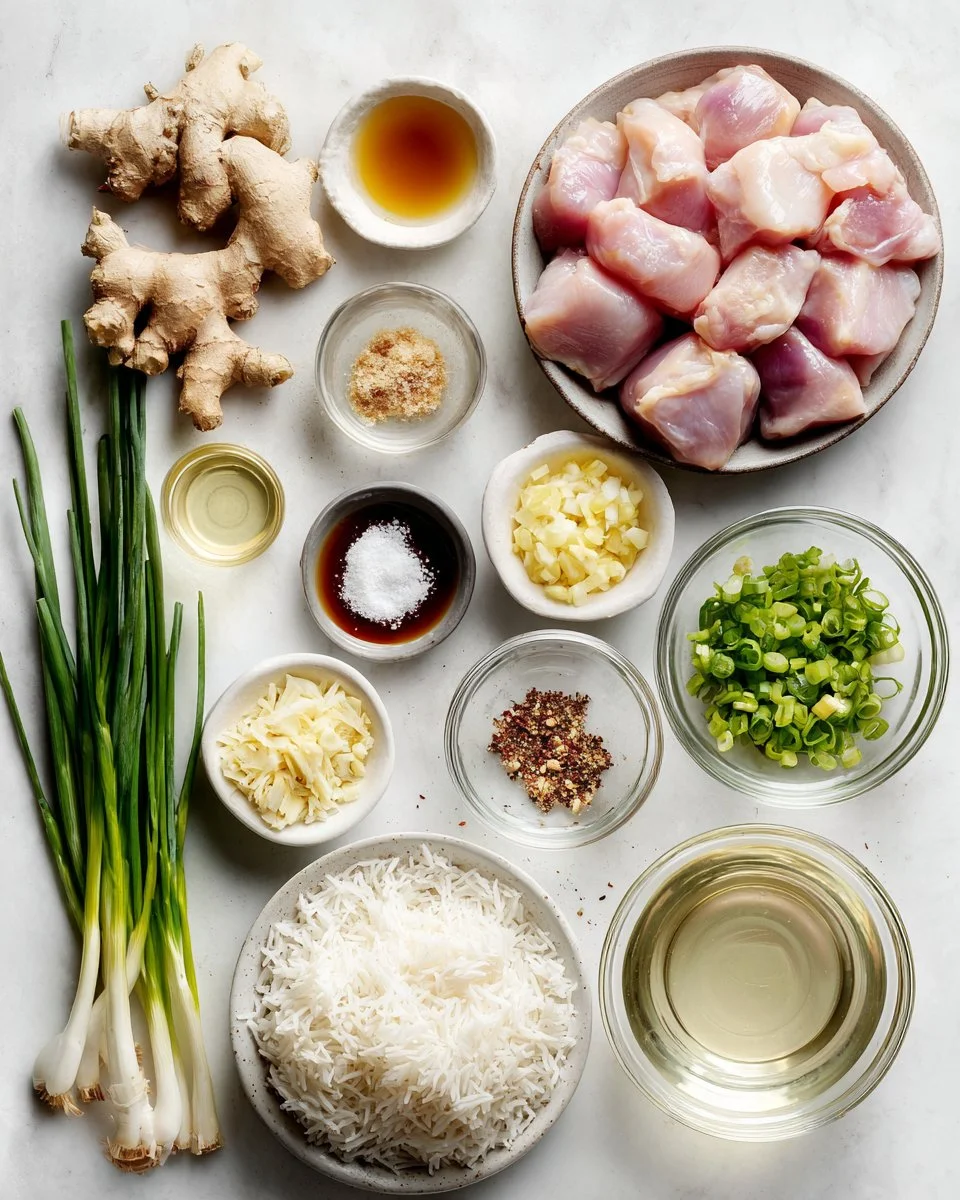
Step-by-Step Instructions
Marinate the Chicken: In a mixing bowl, combine the chicken with 1 tablespoon of fish sauce. Allow it to marinate for about 15 minutes. This step infuses flavor into the chicken.
Make the Caramel Sauce: In a small pot over medium heat, melt the palm sugar. Keep a close eye on it, stirring constantly until it reaches a dark brown color—this should take about 5-7 minutes. Once ready, carefully deglaze the pot with coconut water. Stir in the remaining fish sauce and rice vinegar, then set the sauce aside.
Sauté Aromatics: In a large wok (or a deep frying pan), heat the neutral oil over medium heat. Add the garlic, shallots, ginger, and black pepper. Sauté for about 3-5 minutes until they become translucent and fragrant.
Brown the Chicken: Add the marinated chicken into the wok. Let it brown without stirring it for about 5 minutes—this creates a nice crust! Once browned, pour in the caramel sauce and stir gently to combine.
Simmer: Lower the heat and let the chicken simmer uncovered for about 15 minutes, stirring occasionally. This allows the sauce to thicken and the chicken to absorb all those delightful flavors.
Final Touches: If you like some heat, stir in chopped Thai chilies. Plate your chicken and generously garnish with green onions and cilantro. Serve it over Jasmine rice with a side of steamed veggies for the ultimate experience.
Chef’s Tips:
- Pay close attention during the caramelization process; sugar can burn quickly!
- If your sauce is too thick, simply add a little water to adjust the consistency.
Expert Tips & Tricks
Best Results: For even more flavor, allow the chicken to marinate for a few hours, or even overnight, in the fish sauce.
Storage: Leftovers can be stored in an airtight container in the fridge for up to 3 days. Reheat gently to avoid drying out the chicken.
Make-Ahead: You can prepare the caramel sauce in advance and store it in the fridge. Just warm it up before adding it to the chicken.
Troubleshooting: If your sauce is too bitter, add a touch more sugar to balance it out.
Freezer-Friendly: This dish can be frozen for up to 2 months. Thaw it overnight in the refrigerator before reheating.
Serving Suggestions
When serving Vietnamese Caramel Chicken, I love to plate it over fluffy Jasmine rice. Add a bright side of sautéed greens like bok choy or snap peas for a vibrant touch. For an extra special touch, drizzle a little extra caramel sauce over the top. Don’t forget to garnish with fresh cilantro or green onions for that pop of color!
This dish is perfect for family dinners, casual gatherings with friends, or even festive occasions. It’s sure to impress everyone at the table!
Variations & Substitutions
Flavor Combinations: Swap out chicken for tofu or shrimp for a unique twist. You can also add vegetables like bell peppers for extra crunch.
Dietary Adaptations: This recipe can be made gluten-free by omitting soy sauce or using gluten-free alternatives.
Seasonal Variations: Consider incorporating seasonal vegetables or fruit for a fresh flavor—think bell peppers in summer or root vegetables in winter.
Nutrition & Storage Info
- Prep Time: 20 minutes
- Cook Time: 30 minutes
- Total Time: 50 minutes
- Yield: Serves 4
- Estimated Calories per Serving: 350 calories
- Storage: Store leftovers in the fridge for up to 3 days. This dish can also be frozen for up to 2 months.
FAQ Section
Can I use chicken breast instead of thighs?
- Yes, but keep in mind that chicken breasts can dry out more quickly. Cook them carefully until just done.
What can I use instead of palm sugar?
- Brown sugar or granulated sugar works well as substitutes.
Is this dish spicy?
- It can be! Feel free to adjust the amount of Thai chilies based on your heat preference.
Can I make this recipe vegetarian?
- Absolutely! Use tofu instead of chicken, and make sure to use vegetarian fish sauce for flavor.
How do I store leftovers?
- Place leftovers in an airtight container in the refrigerator for up to 3 days.
Can I make it in advance?
- Yes, you can make the caramel sauce ahead of time and store it in the fridge.
What should I serve with it?
- Jasmine rice and steamed vegetables make perfect companions!
Can I meal prep this dish?
- Yes! This dish holds up well for meal prepping.
How do I avoid burning sugar when making the caramel?
- Stir consistently and keep a close eye on the color. If it starts to darken too quickly, lower the heat.
Could I add vegetables to the dish?
- Yes, sliced bell peppers or snap peas can be fantastic additions!
Conclusion
This Vietnamese Caramel Chicken recipe is a true celebration of flavors that you’ll want to make again and again. It’s a dish that not only satisfies hunger but also feeds the soul, bringing memories of family and warmth right to your kitchen. I hope you’ll give this recipe a try and create your delicious memories!
I’d love to hear your thoughts—how did your version turn out? Feel free to leave comments below or check out related recipes on my blog for more delicious ideas. Happy cooking!
10. Thai Basil Chicken Fried Rice
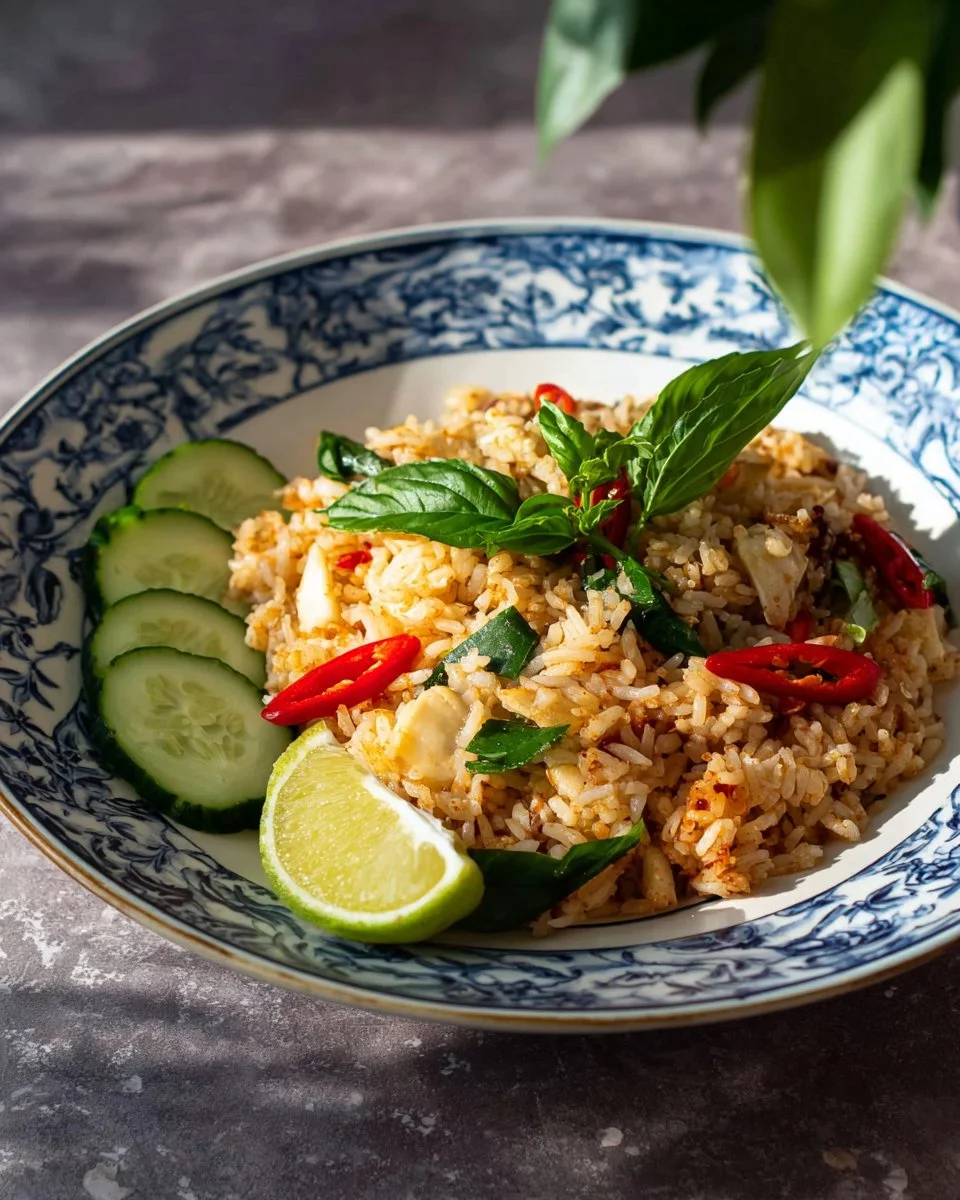
Thai Basil Chicken Fried Rice: A Flavorful Journey to Comfort
Ah, the aroma of sizzling garlic and chicken brings back fond memories of my childhood nights spent in my grandmother’s bustling kitchen. She’d whip up her famous Thai Basil Chicken Fried Rice, and no matter how my day went, a bowl of that dish would transform my mood instantly. The combination of tender chicken, fragrant jasmine rice, and that unstoppable kick from the Thai basil has become a staple not only in my household but also in my heart.
What sets my recipe apart from every takeout you’ll find is the personal touch and the fulfilling experience of making it from scratch. Unlike the often-greasy versions served in restaurants, this homemade treasure is brimming with fresh ingredients and bold flavors, yet it takes just under 30 minutes to prepare. It’s more than just a meal; it’s a slice of comfort that evokes love, family, and warmth. With this recipe, I promise you’ll not only savor every bite but also learn the secrets to perfecting this dish at home.
What Are Thai Basil Chicken Fried Rice?
Thai Basil Chicken Fried Rice, known as Khao Pad Ga Prow in Thailand, showcases the beautiful marriage of jasmine rice with star ingredients: tender chicken and aromatic Thai basil. It’s a dish steeped in tradition, often arising from street vendors who have perfected the art of quick, delicious meals. The dish features a tantalizing blend of savory, sweet, and slightly spicy flavors, creating a taste explosion in every forkful.
The unique aspect of this dish lies in the fragrant Thai holy basil that adds depth and a peppery freshness commonly found in traditional Thai cuisine. You should make this dish for busy weeknights, family gatherings, or when cravings for comforting, home-cooked meals strike. In less than 30 minutes, you will have a vibrant, colorful meal on your table, ready to nourish both body and soul.
Why You’ll Love This Recipe
Wholesome Goodness at Home: I know that the temptation to order takeout can be strong, but let’s be real—making Thai Basil Chicken Fried Rice at home not only tastes better but is also healthier and fresher. There’s something so rewarding about creating your own meals that beats a hurried delivery any day.
Customization Options: One of the beauties of this dish is its versatility. Want to spice it up? Toss in some extra chili flakes! Prefer tofu? Swap it in for chicken. You can adjust seasonings, proteins, and even vegetables to what you have on hand, making it perfect for using leftovers.
Cost-Effective Delight: Why pay the premium prices at restaurants when you can create the same mouthwatering flavors in your own kitchen? The ingredients for this dish are not only easy to find but also quite affordable. Trust me; this will become your go-to recipe for gourmet flavors on a budget!
Quick & Easy Preparation: With an estimated cook time of just 20 minutes, you’ll be feasting on your flavorful Thai Basil Chicken Fried Rice before you know it. Whether you’re whipping it up on a busy weekday night or planning a cozy weekend dinner, this dish won’t steal your time.
Family Favorites: It’s a crowd-pleaser, and my family simply adores it! I’ve tested this recipe with every age group and every unique palate—and everyone can’t help but go for seconds. Don’t take my word for it; your family will thank you when they take that first bite!
Ingredients

- 8 oz chicken breast, boneless skinless, cut into bite-size pieces: For the star protein, I recommend using fresh chicken. If you opt for frozen chicken, ensure it’s fully thawed before cooking.
- 2 teaspoons soy sauce: A must-have for depth and umami.
- 1/4 teaspoon sugar: Enhances the overall flavor—trust my kitchen-tested experience!
- 1 tablespoon water: Helps in marinating the chicken for juiciness.
- 1 1/2 tablespoons Thai chili paste: Adjust according to your heat preference; my favorite brand is Mae Ploy.
- 2-3 teaspoons fish sauce: Essential for authenticity—use a high-quality brand like Red Boat for better aroma.
- 3 tablespoons neutral oil: I prefer canola oil, but avocado oil works well too.
- 2 eggs: Scramble these in for added richness.
- 4 cloves garlic, chopped: Chop fine for maximum flavor impact.
- 1/2 to 1 teaspoon roasted chili flakes: Spice level can be adjusted; I sometimes go all out!
- 12.5 oz cooked jasmine rice: Using day-old rice ensures that it fries up perfectly without turning mushy.
- 1/2 cup diced onion: Sweet, caramelized onions bring that lovely base flavor.
- 3 tablespoons sliced fresh chilies: Optional but recommended if you enjoy fresh heat.
- 1 cup Thai basil leaves: Fresh is best for the unique flavor; if unavailable, you can use regular basil as a backup.
- Lime wedges for serving: Adds that zesty brightness to finish the dish.
- Cucumber slices for serving: Perfect for contrast and refreshment.
Prep Notes:
- Always keep your ingredients prepped in advance—this means cutting chicken, chopping garlic, and cooking rice beforehand (day-old rice is perfect!).
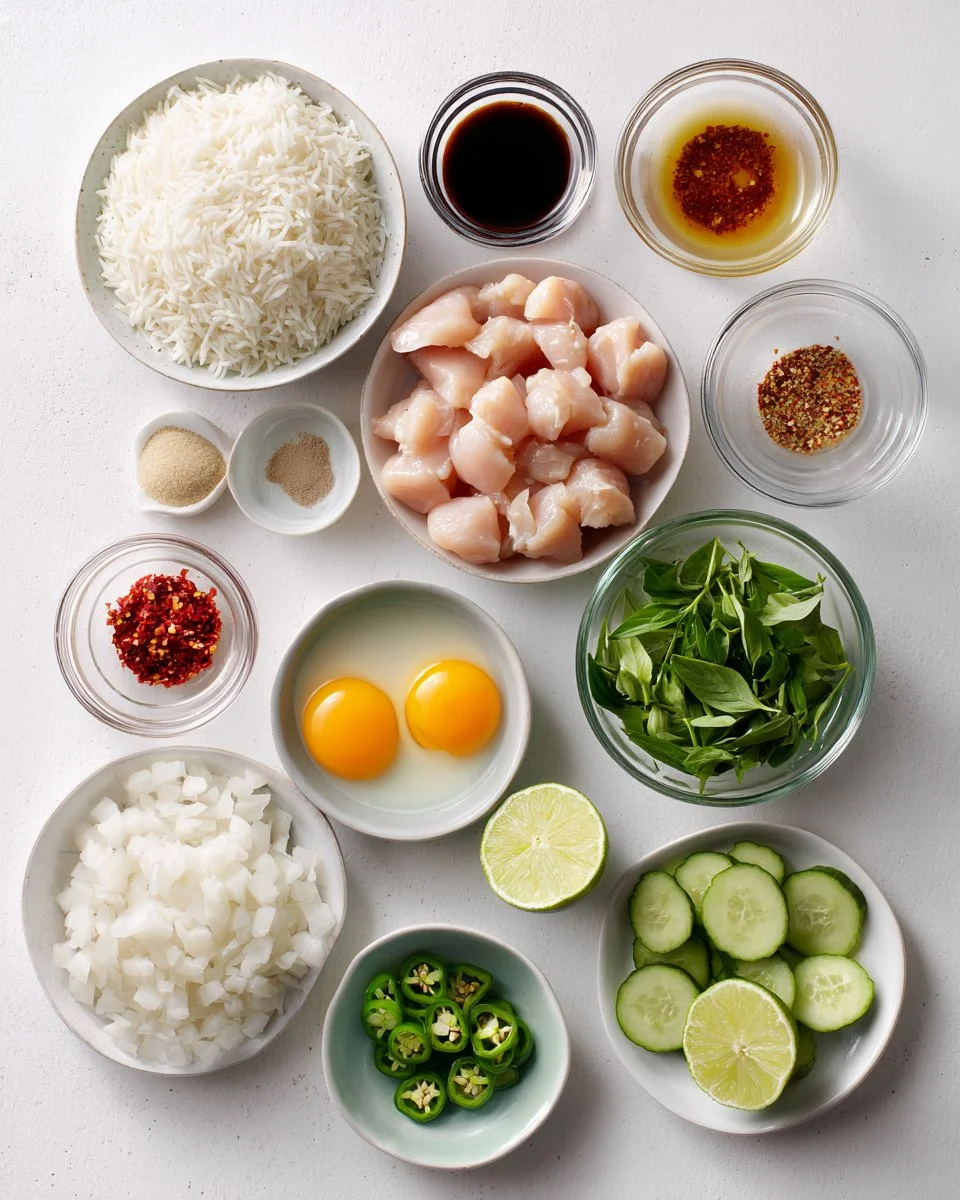
Step-by-Step Instructions
Marinate the Chicken: In a bowl, combine the bite-sized chicken pieces with soy sauce, sugar, water, Thai chili paste, and fish sauce. Let this marinate for a minimum of 15 minutes, allowing those flavors to penetrate.
Sear the Chicken: Heat a wok or large nonstick skillet over high heat. Add 2 tablespoons of oil, then add the marinated chicken. Sear until browned (about 5 minutes), ensuring it’s cooked through. Remove and set aside.
Scramble the Eggs: In the same pan, add about a teaspoon of oil if needed, then crack in the two eggs. Stir with a spatula until scrambled and slightly set. Remove from the pan and set aside with the chicken.
Sauté Garlic: With the pan still hot, add another tablespoon of oil if necessary. Add chopped garlic and roasted chili flakes, stirring until fragrant (about 30 seconds). The aroma will be irresistible!
Add Jasmine Rice: Toss in the cooked jasmine rice, mixing it thoroughly with the garlic for flavor. Following that, add diced onions and stir again until the onions begin to soften (around 2-3 minutes).
Combine All Ingredients: Gently fold in the scrambled eggs and the seared chicken. Toss everything together to mix well and ensure the rice is coated with tasty bits.
Add Fresh Ingredients: Turn off the heat and mix in your fresh chilies and Thai basil leaves, stirring until just wilted.
Serve it Up: Plate your Thai Basil Chicken Fried Rice, garnished with lime wedges and cucumber slices. Ready to dig in!
Chef’s Tips:
- Timing is Key: When cooking, keep everything prepped and ready so you can execute each step seamlessly!
- Avoid the Mush: Ensure your rice is dry (using day-old rice helps) to prevent a mushy consistency.
Common Mistakes to Avoid:
- Don’t overcrowd the pan; cook in batches if needed to achieve a good sear.
- Don’t rush the marinating time—let that chicken soak in all that lovely flavor!
Expert Tips & Tricks
Choosing Chicken: Opt for chicken thighs if you prefer juicier meat that holds up better during frying!
Storage: If you have leftovers (which is rare at my house!), store them in an airtight container. They’ll last up to 3 days in the fridge.
Make-ahead Magic: You can marinate the chicken a day in advance for even deeper flavors. Also, preparing rice the day before can make cooking a breeze!
Troubleshooting: If your fried rice is sticking to the pan, ensure you have enough oil, and keep the heat up—high heat is key for frying such dishes!
Freezing: While best fresh, you can freeze this dish for up to a month. Reheat thoroughly before serving.
Serving Suggestions
Having a side of pickled vegetables or a fresh Asian slaw pairs beautifully with Thai Basil Chicken Fried Rice. You might even enjoy wrapping it in lettuce leaves for a fun twist!
For presentation, serve the fried rice in a large bowl topped with additional Thai basil leaves and fresh chilies to wow your guests. This dish is perfect for mid-week dinners or special occasions where you want to impress!
Variations & Substitutions
- Vegetarian/Vegan Version: Swap chicken for tofu or tempeh and replace fish sauce with soy sauce for a vegan-friendly meal.
- Add Veggies: Carrots, bell peppers, or peas can easily be included for a colorful and nutritious boost.
- Seasonal Adaptations: In summer, incorporate summer squash and fresh herbs; in winter, root veggies like carrots or parsnips might be wonderful.
Nutrition & Storage Info
- Prep Time: 15 minutes
- Cook Time: 20 minutes
- Total Time: 35 minutes
- Yield: Serves 4
- Estimated Calories: Approximately 400 calories per serving
- Storage: Store in the fridge for up to 3 days or freeze for up to a month.
FAQ Section
Can I use regular basil instead of Thai basil?
- Yes, while the flavor may differ slightly, regular basil will work in a pinch!
How do I make it spicier?
- For more heat, add more chili paste or fresh chilies based on your preference.
Can I make this dish with brown rice?
- Absolutely! Just be sure to adjust the cooking time since brown rice takes longer to cook.
Is this dish gluten-free?
- Yes, as long as you use a gluten-free soy sauce and fish sauce.
What pantry staples do I need?
- Ensure you have soy sauce, sugar, fish sauce, and chili paste on hand for the best results!
Can I make this dish ahead of time?
- You can prep your ingredients and cook it up to 24 hours in advance; it reheats well.
Is it necessary to use fish sauce?
- While it adds authenticity, you can omit it or use soy sauce as a substitute if preferred.
What’s the best rice to use?
- Jasmine rice is ideal due to its fragrance and fluffiness but short-grain rice can work in a pinch.
Can I add pineapple or other fruits to the mix?
- Yes! They can add a sweet and tangy flavor—just be cautious with proportions!
What if my rice turns out mushy?
- That might mean it was overcooked before stir-frying; try using day-old rice next time!
Conclusion
Thai Basil Chicken Fried Rice isn’t just a recipe—it’s a heartfelt creation, blending flavors and memories into something truly special. With every bite, you’ll embrace a piece of my family tradition while adding your touch to the dish. I hope you’ll share your stories and variations with me in the comments below! If you’re craving more delicious recipes like this, don’t hesitate to browse through my blog—there are endless culinary journeys waiting for you!
11. Grilled Lemongrass Chicken with Vietnamese Dipping Sauce
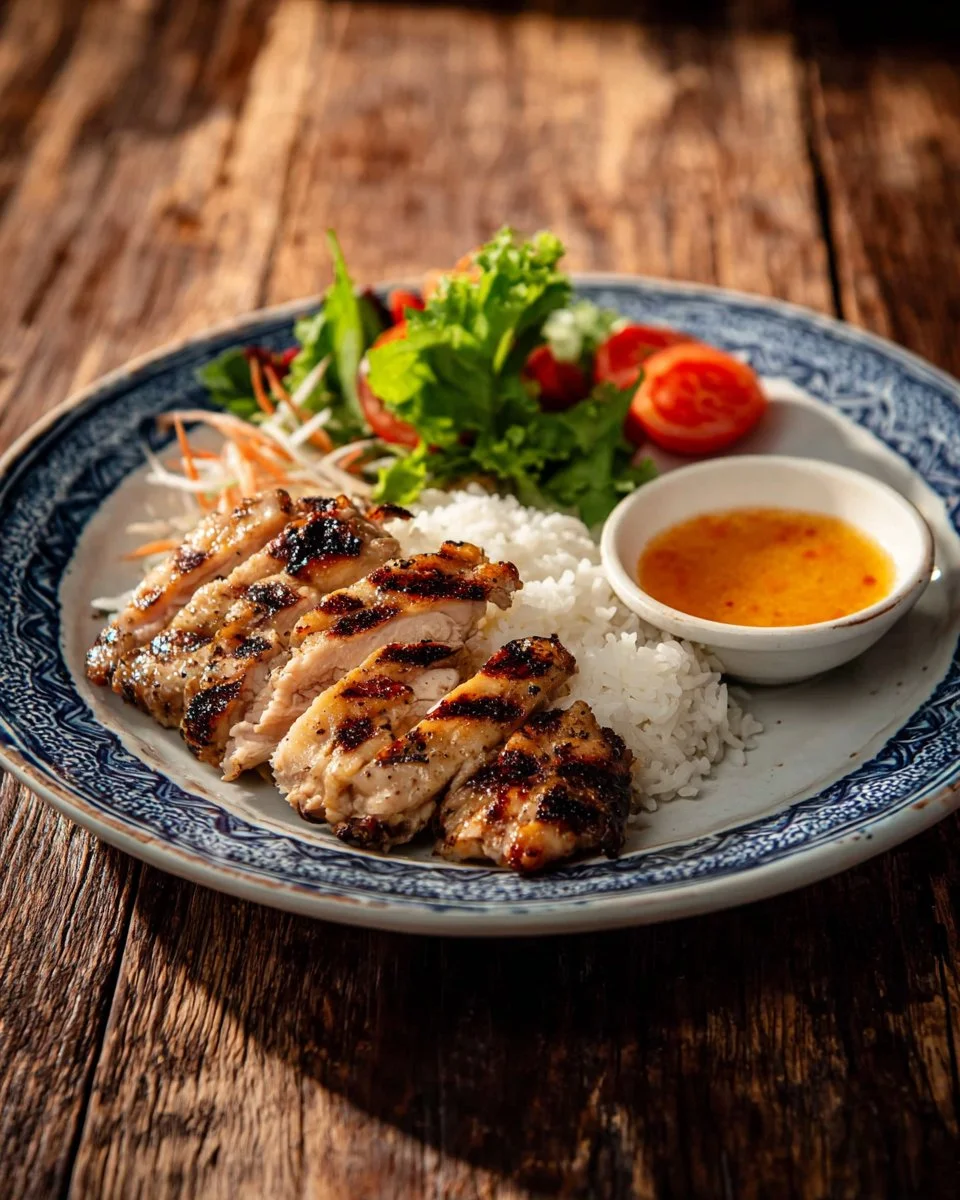
Grilled Lemongrass Chicken with Vietnamese Dipping Sauce: A Flavor-Packed Delight You’ll Want to Share!
I still remember the first time I tasted grilled lemongrass chicken at a quaint Vietnamese restaurant tucked away in my neighborhood. The moment that first bite hit my taste buds, it was a revelation! The bright, aromatic flavors of the lemongrass danced with the savory notes of the marinade, making it impossible to stop at just one piece. Today, I want to share with you my version of this delightful dish—Grilled Lemongrass Chicken with Vietnamese Dipping Sauce.
What makes my recipe stand out? It’s not just the freshness of the ingredients or the vibrant flavors; it’s that this dish embodies nostalgia and warmth. When I prepare this meal, I’m transported back to family gatherings where laughter and conversation flowed as freely as the delicious food. The chicken turns out tender and juicy with a crispy, charred exterior that contrasts beautifully with the tangy, sweet, and spicy dipping sauce.
In this post, I’ll walk you through the steps to create a mind-blowingly delicious grilled lemongrass chicken that will make you a culinary rockstar in your kitchen. You’ll discover not just the recipe but the secret to grilling perfection.
What Are Grilled Lemongrass Chicken with Vietnamese Dipping Sauce?
Grilled lemongrass chicken is a beloved dish in Vietnamese cuisine, showcasing tender chicken marinated in a vibrant blend of lemongrass, garlic, fish sauce, and spices before being grilled to juicy perfection. The citrusy aroma of lemongrass is the star here, complemented by the sweet and savory marinade that penetrates the meat, yielding an explosion of flavor in every bite.
Uniquely tender and juicy, the grilled chicken boasts a delightful char that enhances its richness while the homemade dipping sauce, known as Nuoc Cham, adds a refreshing zing with its balance of sweetness, acidity, and heat. You’ll want to drizzle it, dip it, and savor every bit. Perfect for warm weather gatherings or cozy family dinners, this dish is a testament to how simple ingredients can create extraordinary flavors.
You can whip this up for any occasion—whether a casual weekday dinner or a weekend barbecue with friends. It’s not just a meal; it’s a celebration of authentic Vietnamese flavors right in your home.
Why You’ll Love This Recipe
Flavor Explosion: This dish epitomizes the power of fresh ingredients with the aromatic lemongrass, garlic, and savory fish sauce. You’ll be amazed by how these elements come together!
Cost-Effective: Buying chicken thighs, which are usually more affordable than chicken breasts, means you can feed a crowd without breaking the bank. Plus, homemade is always better than store-bought.
Customization Galore: Don’t have a particular ingredient? No problem! You can easily substitute with what’s in your pantry without compromising the dish’s integrity.
Easy Peasy: If you’re intimidated by grilling, fear not! This recipe is straightforward and, with my pro tips, anyone can achieve that beautiful char on their chicken.
Make-Ahead Magic: Marinate the chicken overnight for richer flavors, making it a perfect option for meal prep. Just grill it fresh when you’re ready to eat.

Ingredients
Marinade:
- 4 cloves garlic (fresh is best for vibrant flavor)
- 1/2 teaspoon black peppercorns
- 1 stalk lemongrass, bottom half only, finely chopped (look for firm stalks)
- 2 tablespoons neutral oil (canola or vegetable works well)
- 1 tablespoon fish sauce (I recommend Red Boat for authentic flavor)
- 1 tablespoon soy sauce
- 1 tablespoon sugar
- 2 tablespoons water
- 1 lb chicken thighs, boneless, skinless (for tenderness and flavor)
For Serving:
- Jasmine rice or rice vermicelli (your choice!)
Nuoc Cham (Dipping Sauce):
- 1 small garlic clove (for crisp flavor)
- 1 Thai chili (adjust to your heat preference)
- 1 1/2 tablespoons sugar
- 1/4 cup water
- 2 tablespoons lime juice (freshly squeezed for brightness)
- 1 1/2 tablespoons fish sauce (again, choose a high-quality brand)
Note: Always opt for the freshest ingredients available; they make a significant difference in flavor. Ensure to use room-temperature ingredients when necessary (e.g., oil, garlic).
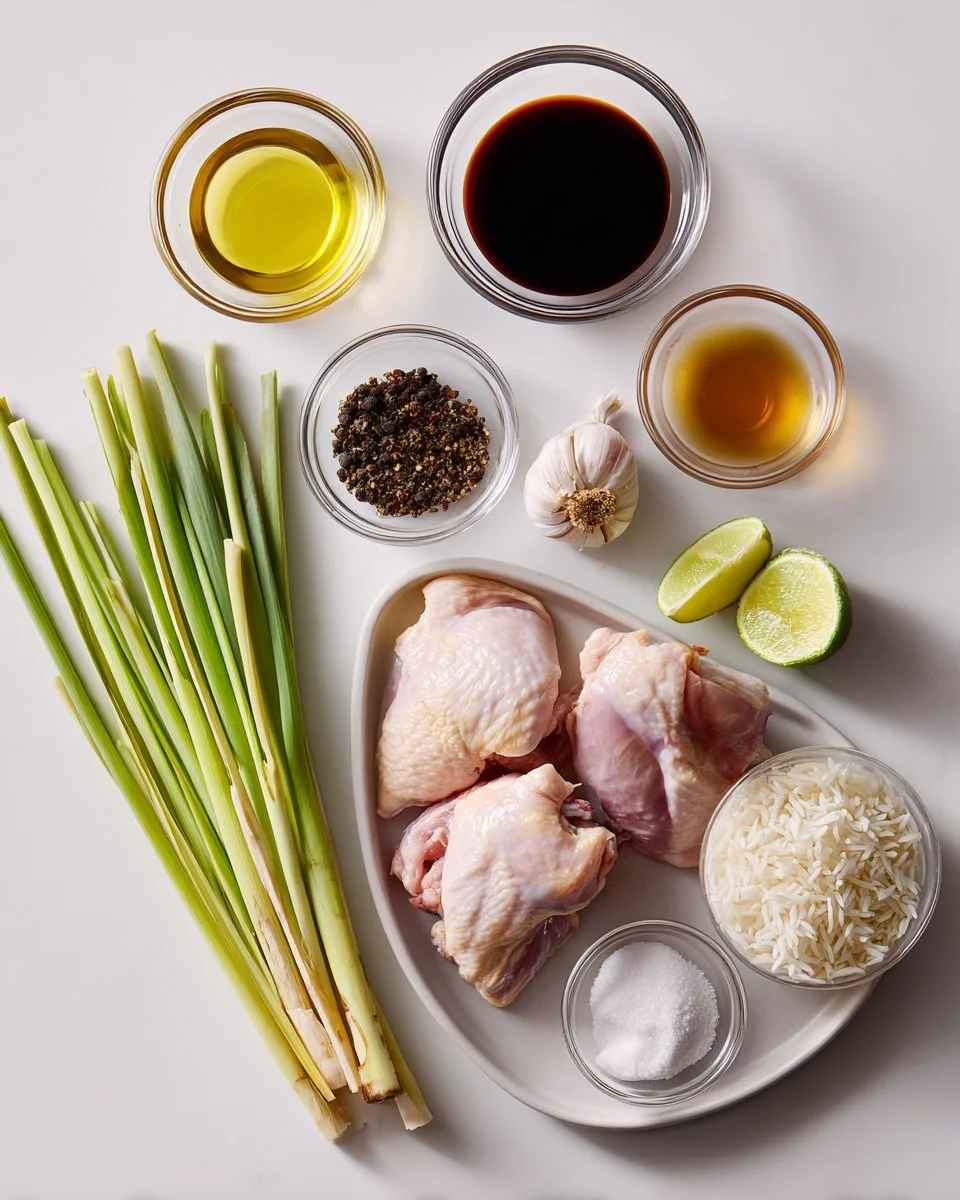
Step-by-Step Instructions
Prepare the Marinade: In a mortar and pestle, pound the garlic and black peppercorns until fine. This releases all those essential oils for an aromatic punch.
Add Lemongrass: Toss in the finely chopped lemongrass and pound it into a rough paste. The more you pound, the more aromatic oils are released!
Combine Ingredients: Add the neutral oil, fish sauce, soy sauce, sugar, and water to the paste. Mix until the sugar completely dissolves.
Marinate the Chicken: Pour the marinade over the chicken thighs, ensuring they are well-coated. Let them marinate for at least 2 hours, preferably overnight for maximum flavor.
Grilling Method: Preheat your grill on high. Oil the grates to prevent sticking. Grill the chicken for 1-2 minutes with the lid closed. Flip and rotate for those picturesque grill marks, cooking an additional 1-2 minutes until the chicken is fully cooked.
Broiling Method: If broiling, preheat your broiler and place the chicken on a lined baking sheet. Broil for approximately 7-10 minutes, flipping halfway through until browned and cooked through.
Prepare the Dipping Sauce: While the chicken is grilling, pound the small garlic clove and Thai chili into a paste. Add sugar and grind it in before stirring in the remaining ingredients until the sugar dissolves.
Serve: Serve the grilled chicken sizzling with jasmine rice or rice vermicelli and a side of the vibrant Nuoc Cham dipping sauce. Enjoy each flavorful bite!
Chef’s Tip: Look for chicken thighs with skin on for even more flavor, and remember to let the chicken rest for a few minutes before slicing for juiciness.
Expert Tips & Tricks
- Quality Ingredients: Whenever possible, use high-quality fish sauce, as it significantly impacts the overall flavor.
- Don’t Rush the Marinade: Longer marination helps deep flavor development. If you can, let it marinate overnight!
- Grill Temperature: Make sure the grill is hot enough before putting the chicken on. It helps achieve that beautiful sear.
- Storage: Store leftover grilled chicken in an airtight container in the fridge for up to 3 days. They can also be frozen for up to 3 months.
- Make it Ahead: To save time on busy days, marinate the chicken in advance and freeze it uncooked. Just grill from frozen—add a few extra minutes to the cooking time.
Serving Suggestions
Pair your Grilled Lemongrass Chicken with fragrant jasmine rice or rice vermicelli. Fresh herbs such as cilantro and mint can add vibrant touches on the plate. A side of pickled vegetables complements the dish beautifully. Set up a DIY taco-style assembly station with the rice, veggies, and dipping sauce for a fun family feast!
Variations & Substitutions
- Herb Swap: Feeling adventurous? Add chopped Thai basil or mint to your marinade for a unique twist.
- Spice Levels: If you love heat, add more Thai chili or a sprinkle of chili flakes in the marinade.
- Dietary Needs: Swap out the chicken for tofu or tempeh for a delicious vegetarian option.
- Seasonal Flavors: Incorporate seasonal vegetables like bell peppers or zucchini when grilling for added color and flavor variety.
Nutrition & Storage Info
- Prep Time: 15 minutes (excluding marination)
- Cook Time: 10-15 minutes
- Total Time: 2 hours 15 minutes (marination time included)
- Yield: Serves 4
- Estimated Calories: About 350 calories per serving
- Storage Instructions: Refrigerate leftovers for up to 3 days or freeze uncooked marinated chicken for up to 3 months.
FAQ Section
Can I use chicken breasts instead of thighs?
- Yes, you can, but thighs tend to be juicier and more flavorful. If using breasts, be careful not to overcook them to avoid dryness.
What if I can’t find fresh lemongrass?
- You can substitute with lemongrass paste, but fresh will provide the best flavor.
How spicy is the Nuoc Cham?
- The heat level depends on how much Thai chili you use. Adjust to your preference!
Is there a vegetarian version?
- Absolutely! Substitute the chicken with firm tofu or tempeh and marinate them just the same.
Can I make the dipping sauce in advance?
- Yes, the dipping sauce can be made ahead and stored in the fridge for up to a week.
What should I serve with the chicken?
- Jasmine rice, rice vermicelli, or a fresh salad make excellent sides!
Is this recipe kid-friendly?
- Yes, but you may want to adjust the amount of chili in the dipping sauce for younger palates.
Can I grill this indoors?
- Yes, if you have a grill pan or broiler, those will work well too.
Will the chicken still taste great reheated?
- Yes! Just make sure to reheat gently to keep it tender.
How can I store leftover chicken?
- Keep it in an airtight container in the fridge for up to 3 days.
Conclusion
This Grilled Lemongrass Chicken with Vietnamese Dipping Sauce is not just a recipe but a gateway to flavorful experiences and cherished memories shared around the dinner table. The vibrant flavors and aroma will make your kitchen feel alive with the spirit of Vietnam. I encourage you to try making this dish—trust me, once you do, you’ll be hooked! Don’t forget to leave me your feedback or any twists you’ve added to the recipe in the comments below.
And if you love this dish, be sure to check out my other mouthwatering recipes on the blog! Happy cooking!
12. Fresh BLT Chicken Salad Lettuce Wraps
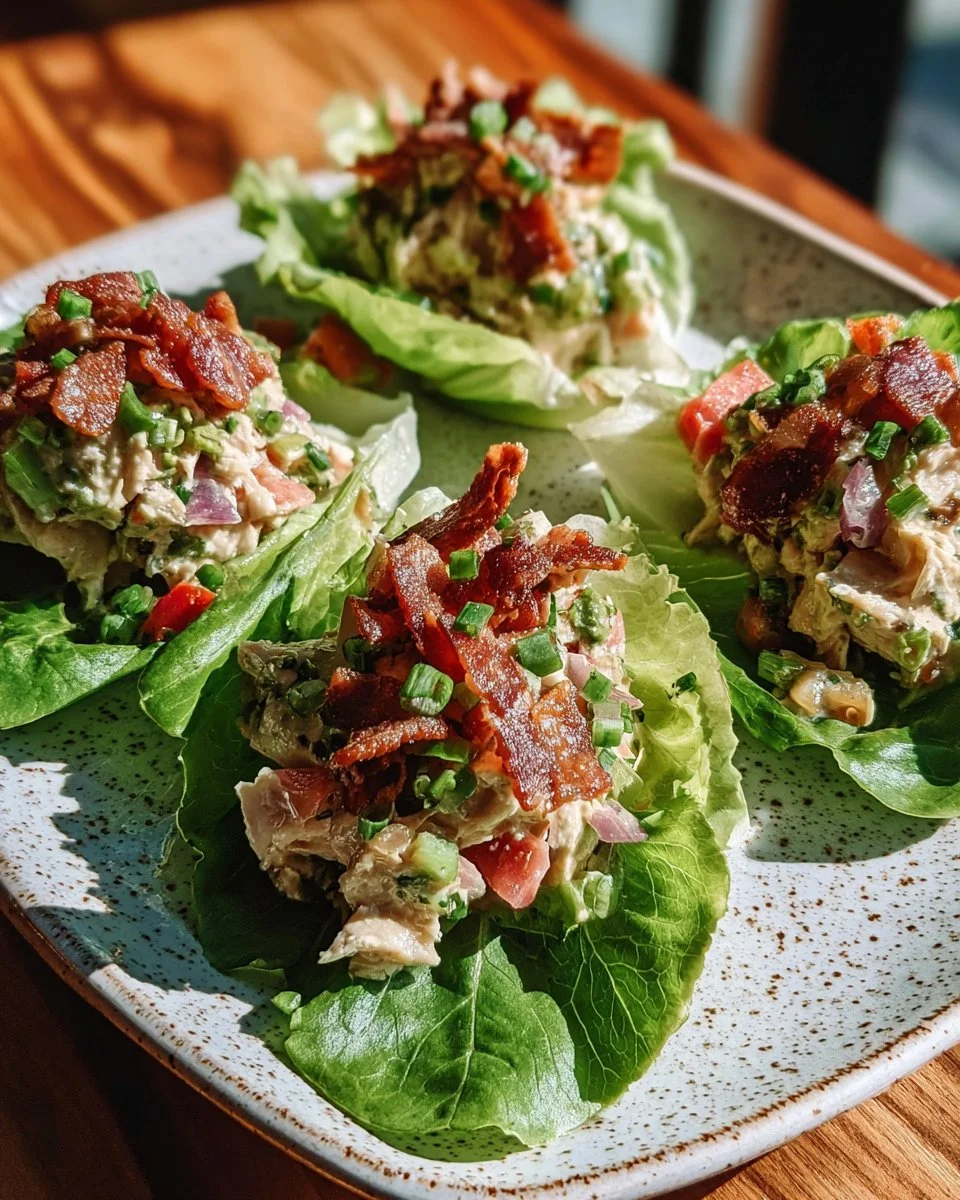
Fresh and Flavorful BLT Chicken Salad Lettuce Wraps: A Light Twist on a Classic
In my house, summer afternoons are synonymous with light meals and plenty of laughter around the table. I remember the first time I made my Fresh Light BLT Chicken Salad Lettuce Wraps. It was a spontaneous decision while rummaging through my fridge. I had leftover chicken, some bacon I had crisped earlier, and a gorgeous head of romaine lettuce that begged to be used. What started as a simple lunch turned into a delicious family favorite, bringing everyone together and evoking memories of warm days spent outdoors.
These wraps are not just another chicken salad; they’re a delightful fusion of flavors and textures that elevate the classic BLT into something fresh and satisfying. The crunch of romaine, the creaminess of avocado, and the tang of Greek yogurt come together to create a chicken salad that’s light yet packed with flavor. Compared to traditional heavy salads, this recipe leaves you feeling energized instead of weighed down.
In this post, I’ll guide you through every step to recreate these delicious wraps and share tips and tricks to make them your own. Get ready to learn how to whip up a dish that will brighten your mealtimes and please your family – as I promise, they’ll be asking for seconds!
What are Fresh Light BLT Chicken Salad Lettuce Wraps?
The beauty of Fresh Light BLT Chicken Salad Lettuce Wraps lies in their simplicity and adaptability. These wraps take the timeless flavors of a classic BLT—bacon, lettuce, and tomato—and introduce juicy diced chicken, creamy avocado, and a zesty dressing, all held together in crisp romaine lettuce leaves. This dish offers a fresh approach to a favorite, perfect for warm days or bustling weeknights.
The combination of flavors is truly special. You’ll experience the smokiness of the bacon, the juicy crunch of the tomato, and the creamy richness of avocado that blends beautifully with the light mayonnaise and Greek yogurt. It’s a complex yet comforting dish that works wonderfully as a light lunch, appetizer, or even a healthy dinner option when you’re craving something fresh and vibrant.
You’ll want to whip these wraps up when you’re in need of a quick meal, to impress guests at a summer gathering or to enjoy a nutritious option on those busy weeknights.
Why You’ll Love This Recipe
Flavor Explosion: The combination of the savory bacon, fresh vegetables, and creamy avocado creates a flavor profile that vibrates with freshness and satisfaction. Each bite is like a classic summertime picnic!
Healthier Alternative: These wraps have all the classic BLT goodness but with lighter ingredients that won’t leave you feeling sluggish afterward. You’ll love how light yet filling they are – plus, the Greek yogurt adds a boost of protein.
Easily Customizable: This recipe is a blank canvas for your creativity. Add your favorite veggies, swap out proteins to make it your own, or even make it vegetarian with chickpeas! The possibilities are endless.
Cost-Effective: Why head to the deli when you can make something just as delightful at home? You’re not only saving money but also ensuring the quality of the ingredients.
Quick and Easy: In less than 30 minutes, you’ll have a delicious meal ready to go! This recipe is perfect for busy weekdays when time is of the essence. Plus, it’s simple enough for beginner cooks to master without breaking a sweat.
Now, ready to dive into the delicious details? Let’s gather our ingredients!

Ingredients
- 2 cups cooked chicken breast, diced: Fresh or leftover rotisserie chicken works perfectly! For a quicker option, use a canned chicken but choose a high-quality brand.
- 4 slices bacon, cooked and crumbled: Go for thick-cut bacon for an extra crispy texture. You can substitute turkey bacon for a lighter version.
- 8 leaves romaine lettuce: Use fresh, sturdy leaves for the best wrap – these will hold everything together!
- 1 medium tomato, diced: Any variety will work, but vine-ripened tomatoes offer the best flavor.
- 1/4 cup red onion, finely chopped: Sweet onions can be a milder option if you prefer less bite.
- 2 tablespoons light mayonnaise: For a healthier twist, use avocado mayo or make your own!
- 2 tablespoons plain Greek yogurt: Adds creaminess with fewer calories. Ensure it’s full-fat for the best texture.
- 1/2 avocado, diced: Ripe avocados will provide that creamy goodness.
- 1 teaspoon lemon juice: Freshly squeezed is ideal for brightening flavors!
- 1/4 teaspoon garlic powder
- 1/4 teaspoon black pepper
- 1/4 teaspoon sea salt
- 1 tablespoon chopped fresh chives: Fresh herbs elevate this dish; feel free to swap for dill or parsley.
Prep notes: Have your ingredients at room temperature for better mixing, and be sure to have your kitchen tools – mixing bowl and serving platter – ready before you start!
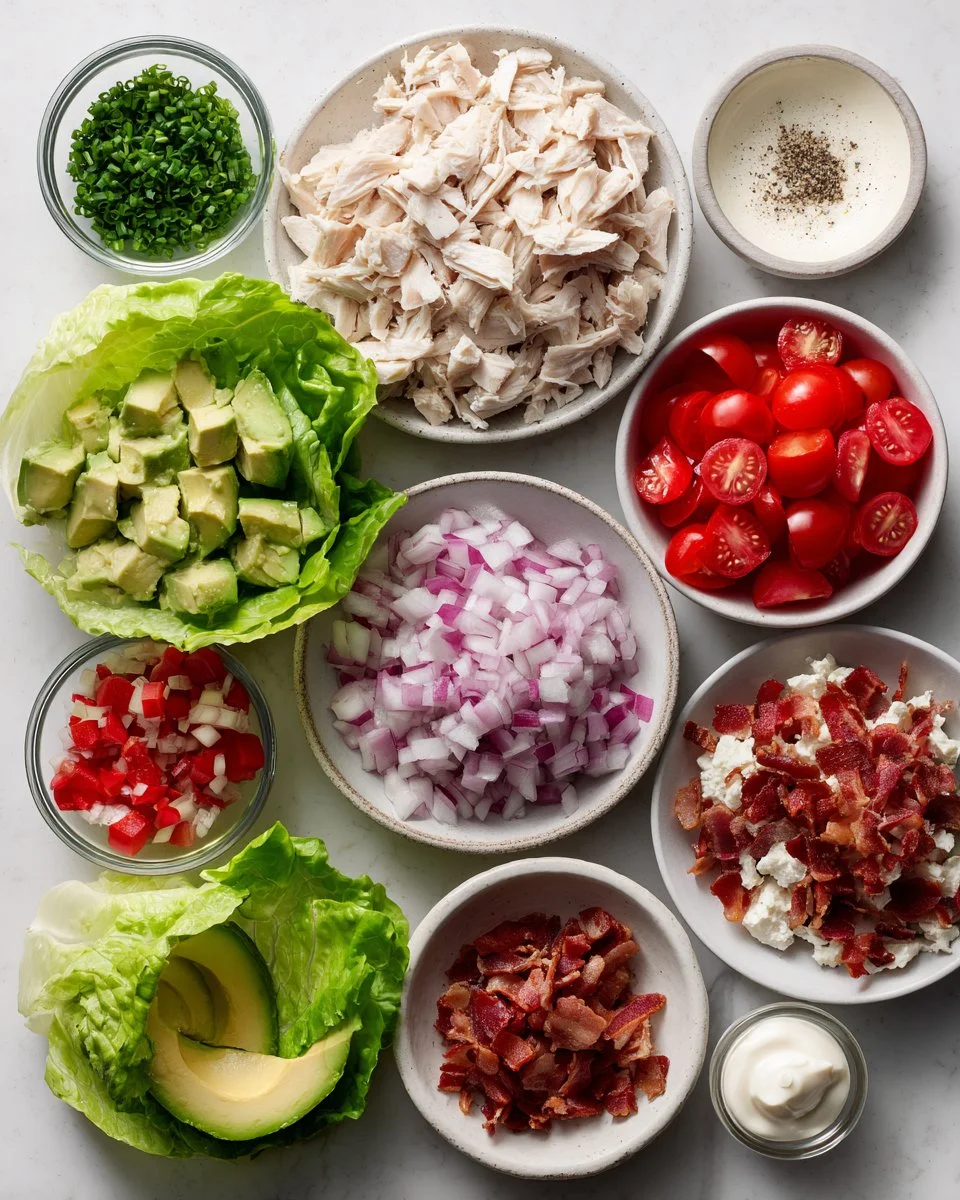
Step-By-Step Instructions
Cook the Bacon: In a skillet over medium heat, cook the bacon for about 8-10 minutes until crispy. Drain on paper towels and crumble it once it cools. (Chef’s Tip: Don’t overcrowd the pan; it helps with crispiness!)
Combine Ingredients: In a mixing bowl, add the diced chicken, crumbled bacon, diced tomato, finely chopped red onion, diced avocado, light mayonnaise, Greek yogurt, lemon juice, garlic powder, black pepper, and sea salt.
Mix Thoroughly: Use a spatula to gently stir the ingredients together until well combined. (Visual cue: You’ll want it all to be evenly coated and creamy!)
Assemble Wraps: Arrange the romaine lettuce leaves on a serving platter. Spoon the chicken salad evenly onto each leaf, typically 1-2 heaping tablespoons per wrap.
Garnish and Serve: Sprinkle chopped fresh chives over the top and enjoy your delicious wraps immediately as tasty handheld bites!
(*Common mistake to avoid: Don’t overfill your lettuce wraps; too much filling can lead to messy eating!")
Expert Tips & Tricks
Storage Recommendations: If you have leftovers, store the chicken salad in an airtight container in the fridge for up to 3 days. However, don’t assemble the wraps until you’re ready to eat for optimal freshness.
Make-Ahead Instructions: You can prepare the chicken salad in advance and keep it in the refrigerator. Just half the lettuce leaves and assemble right before serving to maintain their crunch!
Troubleshooting: If your chicken salad seems dry, a little drizzle of extra yogurt or mayo can help. Also, be sure not to bash your avocado too much when mixing – you want those beautiful chunks intact!
Spice it Up: For those who enjoy heat, consider adding diced jalapeños or a dash of hot sauce to the mix!
Ingredient Freshness: Always opt for the freshest ingredients you can find; they significantly improve flavor and texture.
Serving Suggestions
These Fresh Light BLT Chicken Salad Lettuce Wraps are delightful on their own but can be paired well with crunchy carrot sticks, a side of fresh fruit, or any light salad of your choice! For a festive gathering, serve them alongside a refreshing cold beverage or a zesty fruit spritzer.
For presentations, arrange the wraps on a bright platter and garnish with lemon wedges for a pop of color. These wraps are perfect for summer barbecues, picnic lunches, or a casual dinner with friends.
Variations & Substitutions
Feeling adventurous? Change the flavor profile by adding fresh herbs like basil or cilantro for an extra twist. You can also swap out the bacon for crispy chickpeas for a vegetarian option or substitute turkey for the chicken if you prefer a leaner meat.
For seasonal variations, add diced apple or cranberries during fall for a sweeter bite or use heirloom tomatoes in the summer for a burst of freshness. The adaptable nature of this recipe means it can complement any dietary needs!
Nutrition & Storage Info
- Prep Time: 10 minutes
- Cook Time: 10 minutes (for cooking bacon)
- Total Time: 20 minutes
- Yield: 4 servings
- Estimated Calories per Serving: Approximately 320 calories
- Storage Instructions: Keep chicken salad in the fridge for 3 days. Do not freeze as lettuce will become watery when thawed.
FAQ Section
Can I use leftovers?
Absolutely! Leftover cooked chicken makes a quick and easy base for this salad.What can I substitute for Greek yogurt?
Sour cream or more mayonnaise can work as substitutes, but Greek yogurt is preferable for a healthier option.Is this recipe gluten-free?
Yes! Just make sure your bacon does not contain any gluten and use gluten-free spices.Can I make this ahead of time?
Yes! The chicken salad can be made up to 3 days in advance, but assemble the lettuce wraps just before serving.How can I make this a meal prep option?
Store the chicken salad in individual containers with lettuce leaves on the side for grab-and-go meals throughout the week.Can I use a different kind of lettuce?
Absolutely! Butter lettuce or even collard greens can be used for a different texture.What if I don’t like avocados?
You can simply leave them out or replace them with diced cucumber for a refreshing crunch.Is there a vegetarian version?
Yes! Replace the chicken with chickpeas or diced tempeh and keep the rest of the ingredients as they are.Are there any additional toppings?
Sliced olives, crumbled feta cheese, or diced bell peppers can add an additional layer of flavor.How should I store leftovers?
Store the chicken salad in an airtight container in the fridge for up to 3 days; the lettuce should be kept separate.
Conclusion
These Fresh Light BLT Chicken Salad Lettuce Wraps represent everything I love about summer cooking: fresh ingredients, vibrant flavors, and the joy of sharing a meal with loved ones. I encourage you to give this recipe a try—it’s too good to miss!
Let me know how your version turns out in the comments below, and be sure to check out my other scrumptious recipes that celebrate fresh, wholesome ingredients. Together, let’s make cooking a joyful adventure!
13. Honey Lime Chicken with Avocado Rice
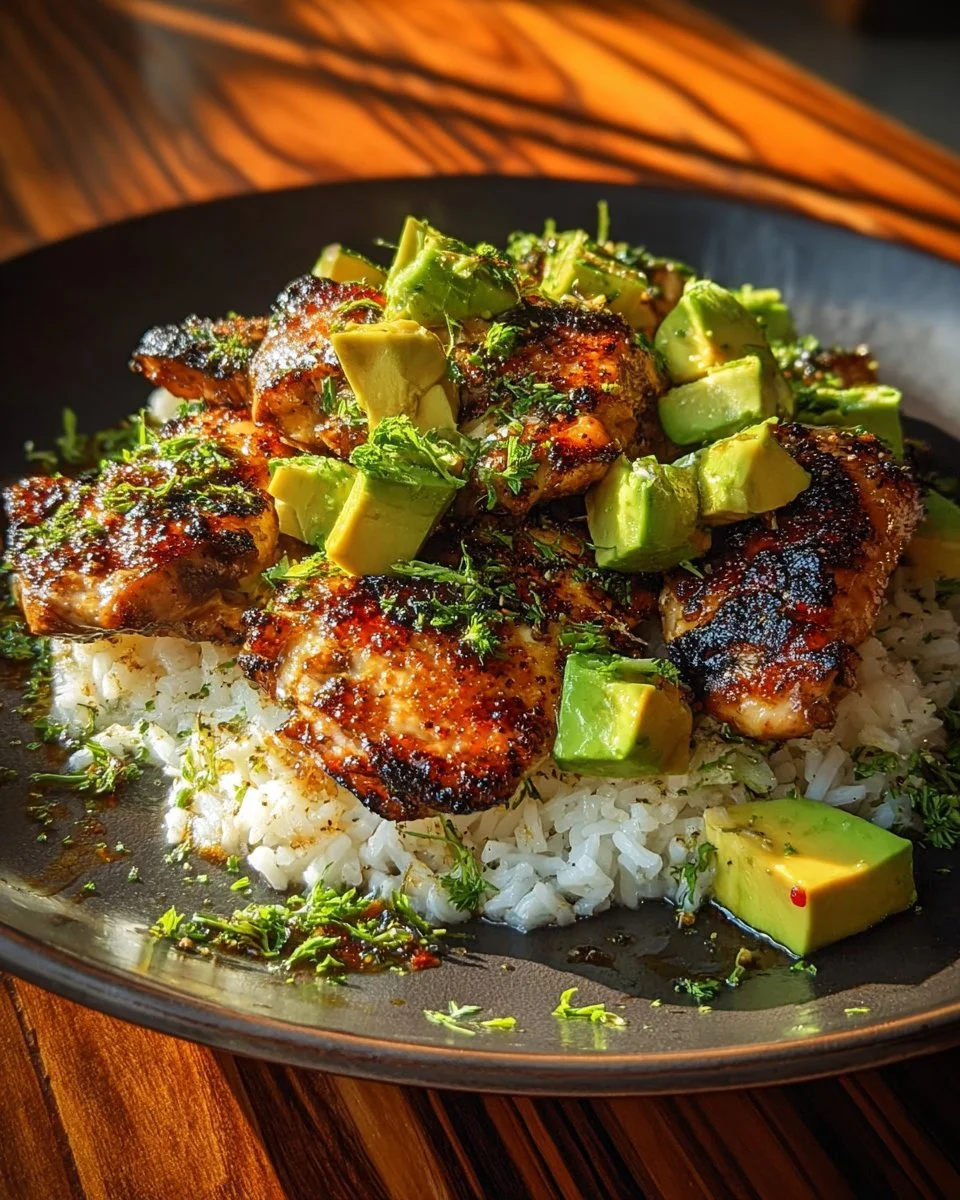
Zesty Honey Lime Chicken with Creamy Avocado Rice: A Flavorful Family Favorite
Picture this: the sun is setting, casting a golden hue over your backyard, and the tantalizing aroma of grilled chicken fills the air. It’s a warm summer evening, and everyone gathers around the table, eager to indulge in the perfect meal. This is where my love for Honey Lime Chicken with Avocado Rice began—a dish that transforms simple ingredients into a family feast.
I remember the first time I made this dish for a Sunday family dinner. My sister was home from college, and my little brother couldn’t stop talking about how tasty it was. The combination of zesty honey-lime marinated chicken paired with creamy avocado rice instantly turned into a family favorite. What sets this recipe apart is not just the symphony of sweet and tangy flavors but also how it brings my loved ones together around the dinner table, making lasting memories.
In this recipe, you’ll learn how to achieve that perfectly charred chicken, paired with smooth avocado rice that adds a delightful creaminess. Whether you’re cooking for family or hosting friends, this meal is sure to impress and is simple enough for any home cook to prepare. Let’s dive into this delicious journey that promises not just food, but nourishment for the soul!
What Are Honey Lime Chicken with Avocado Rice?
Origins of Honey Lime Chicken with Avocado Rice can be traced back to a blend of Latin and American cuisine, where citrus flavors meld beautifully with fresh ingredients, creating unforgettable dishes. The flavor palette is vibrant—a combination of zesty honey, refreshing lime, and fragrant spices that dance on your tongue. The textural contrast between the juicy chicken and creamy, rich avocado rice adds another layer of enjoyment.
This dish is unique because it’s not just about the taste—it’s a buildable family meal. You can easily customize the spices in the marinade or include additional toppings to make it your own. Serve it up at barbecues, cozy family dinners, or even for meal prep throughout the week. Not only does it satisfy, but it also evokes feelings of warmth and joy, making it a perfect choice for any occasion.
Why You’ll Love This Recipe
1. Flavor Explosion
The combination of honey, lime, and spices creates an irresistible marinade that caramelizes beautifully on the grill, offering a sweet and savory bite in every mouthful. Say goodbye to bland chicken; this recipe elevates your poultry game!
2. Cost-Effective
Homemade is not only tastier but also more economical than pricey restaurant fare. You can whip up this delicious dish for less than what you’d spend dining out—with the added bonus of leftovers!
3. Customizable
Feeling adventurous? Play around with the spices! Add chili powder for heat, or toss in some pineapple for a tropical twist. You can adjust the marinade according to your family’s preferences.
4. Quick and Easy
The prep time is minimal! Just marinate the chicken and while it rests, whip up the avocado rice. You’ll have a delish meal ready in about 30 minutes!
5. Health-Friendly
Rich in lean protein and healthy fats, this dish is not only fulfilling but can easily fit in with various dietary lifestyles. Plus, the freshness of lime and cilantro offers a refreshing burst of nutrients.
Trust me; cooking this Honey Lime Chicken with Avocado Rice will become a cherished routine in your household.

Ingredients
For the best results, I recommend using high-quality, fresh ingredients whenever possible. Here’s what you’ll need to create this delicious meal:
- 2 tbsp olive oil: Look for extra virgin for a more robust flavor.
- 4 boneless skinless chicken breasts: Opt for organic, free-range chicken for better taste and texture.
- 3 cloves garlic, minced: Adds so much depth. Fresh garlic is best, but you can use pre-minced if short on time.
- 1 tsp ground cumin: A warm, earthy spice that enhances the dish’s flavor.
- 1 tsp paprika: Sweet or smoked, this adds a lovely color and subtle smokiness.
- 1 tsp salt: Enhances all flavors—be sure to adjust according to your dietary preferences.
- 1/2 tsp black pepper: Freshly cracked is ideal for a more aromatic taste.
- 3 limes, juiced: Fresh is always best; the zest can also be used for extra zing!
- 1 tbsp honey: Choose a local or raw honey for a more complex sweetness.
- 1 cup long grain rice: Basmati or jasmine would work wonderfully.
- 1 1/2 cups water: Adjust according to your rice package instructions.
- 1/2 tsp salt: For the rice; enhances flavor.
- 1 ripe avocado, diced: Choose one that gives slightly to gentle pressure, indicating ripeness.
- 1/4 cup fresh cilantro, chopped: This adds a refreshing finish—don’t skip it!
Prep Notes: For best flavor, make sure to bring your chicken to room temperature before marinating.
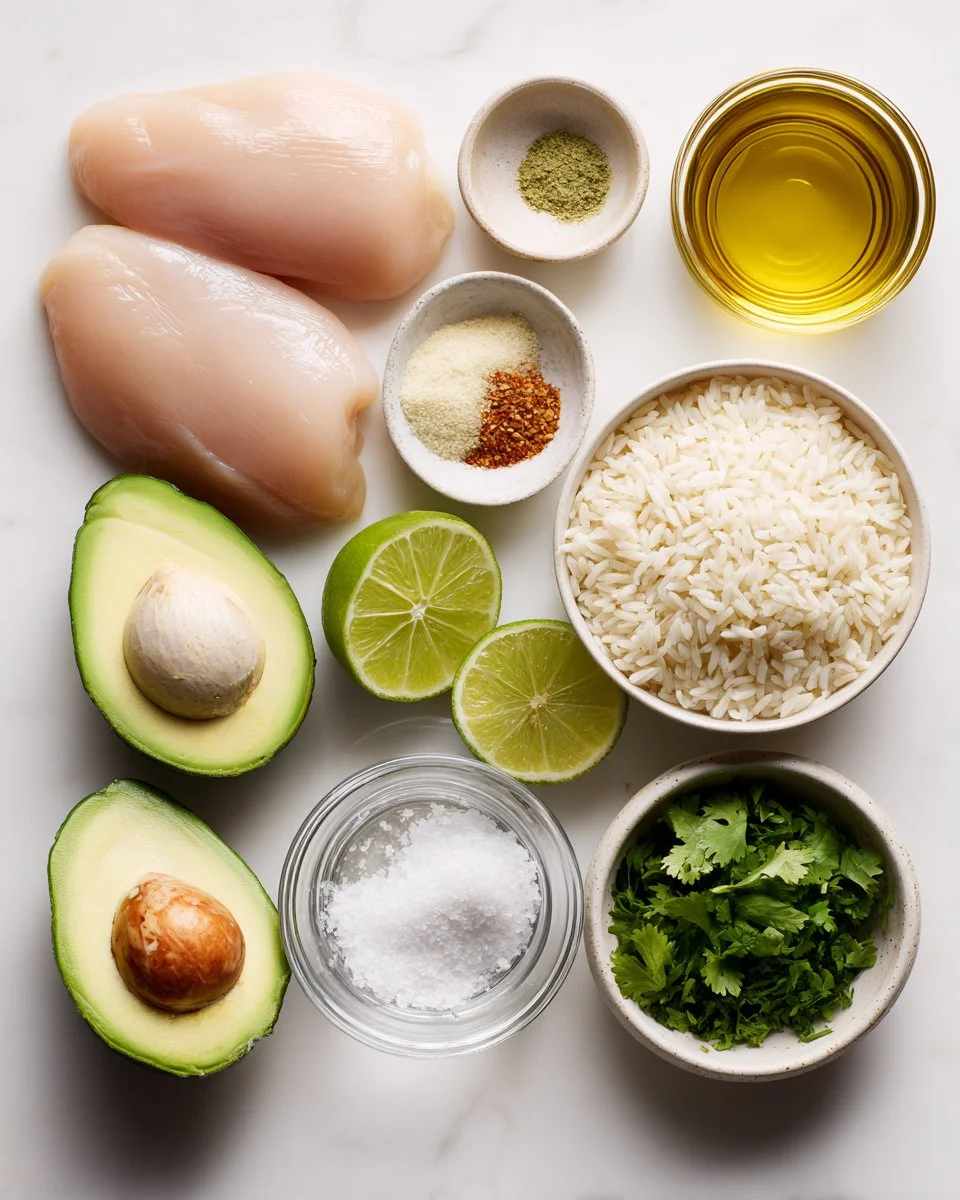
Step-by-Step Instructions
Marinate the Chicken: In a bowl, whisk together 2 tbsp olive oil, 3 cloves minced garlic, 1 tsp ground cumin, 1 tsp paprika, 1 tsp salt, 1/2 tsp black pepper, juice of 2 limes, and 1 tbsp honey to create a zesty marinade.
Chef’s Tip: Marinade can be made in advance and stored in the fridge for up to 24 hours!Add Chicken: Add the 4 boneless skinless chicken breasts to the marinade. Cover and refrigerate for at least 15 minutes or up to 2 hours for maximum flavor.
Prepare the Rice: While the chicken marinates, rinse 1 cup long grain rice under cold water until the water runs clear. Combine rice, 1 1/2 cups water, and 1/2 tsp salt in a pot and bring to a boil.
Tip: Using a pot with a lid is crucial for great results.Cook Rice: Reduce heat to low, cover, and simmer the rice for 15 to 18 minutes until the water is absorbed. Remove from heat and let sit covered for another 5 minutes.
Fluff and Mix: Fluff the rice with a fork, then gently fold in the diced avocado, 1/4 cup chopped cilantro, and juice from the remaining lime.
Grill the Chicken: Heat a grill pan or skillet over medium-high heat and lightly oil the surface. Cook the marinated chicken breasts for 6 to 7 minutes on each side or until fully cooked (internal temperature reaches 165°F).
Visual Cue: Look for nice grill marks and a golden-brown exterior!Slice and Serve: Transfer chicken to a cutting board, let it rest for 5 minutes, then slice into strips. Serve the sliced chicken over the creamy avocado rice, garnishing with extra cilantro or lime wedges if desired.
Common Mistake: Avoid overcrowding the pan when cooking chicken; it can steam instead of grill!
Expert Tips & Tricks
- Storage Recommendations: Store any leftover chicken and rice in an airtight container in the fridge for 3-4 days.
- Make-Ahead Instructions: The chicken can be marinated up to a day in advance, and the avocado rice can be prepared a couple of hours prior; just fold in the avocado last to prevent browning.
- Troubleshooting Common Problems: If your chicken isn’t browning well, ensure your pan is hot enough before adding the meat. For the rice, if it’s mushy, you may have added too much water.
- Batch Cooking: This recipe is great for meal prep—double it and portion out the chicken and rice for easy lunches!
Serving Suggestions
To round out your meal, I recommend serving this Honey Lime Chicken with Avocado Rice alongside a simple green salad with a light vinaigrette or some grilled corn on the cob brushed with lime for that extra zing. For a fun presentation, try plate stacking—artfully layer the rice and top it with chicken, garnishing with a sprig of cilantro. These dishes are perfect for casual weeknight dinners or laid-back gatherings with friends!
Variations & Substitutions
- Different Flavor Combinations: Try using mango instead of avocado for a fruity twist!
- Dietary Restrictions: Want to keep it lower-carb? Swap the rice for cauliflower rice.
- Seasonal Variations: Add grilled zucchini or bell peppers during summer for a fun veggie boost.
Nutrition & Storage Info
- Prep Time: 15 minutes
- Cook Time: 20 minutes
- Total Time: 35 minutes
- Yield: 4 servings
- Estimated Calories per Serving: About 450 calories
- Storage Instructions: Keep in an airtight container; chicken lasts 3-4 days in the fridge, while avocado-based dishes are best eaten within 1 day for freshness.
FAQ Section
Can I use chicken thighs instead of breasts?
Absolutely! Chicken thighs will give you a juicier result due to their higher fat content.Is there an alternative to honey for a vegan option?
Yes! You can substitute honey with maple syrup or agave nectar for a vegan-friendly sweetener.Can I grill this chicken instead of pan-frying?
Yes! Grilling enhances the smoky flavor; just preheat your grill and cook for the same amount of time, turning halfway through.What toppings can I add to this dish?
Feel free to get creative—add diced tomatoes, slaw, or even corn salsa for added texture.How can I make this dish spicier?
Add some chili powder or diced jalapeños into the marinade for a kick!Can I prepare this dish in advance?
You can marinate the chicken ahead of time; just cook the rice closer to serving for optimal freshness.What can I do with leftovers?
Leftover chicken and rice can be turned into wraps or salads—the options are endless!How do I know the chicken is done?
Use a meat thermometer; it should read 165°F (74°C) for safe consumption.What sides pair well with this?
A light salad or roasted veggies make excellent companions!How should I store leftovers?
In airtight containers in the refrigerator for up to four days; enjoy cold or reheat gently.
Conclusion
This Honey Lime Chicken with Avocado Rice recipe is more than just a meal; it’s a celebration of flavors, cherished moments, and heartfelt dinners. I encourage you to try it out and experience how it can bring your loved ones together. Don’t forget to share your thoughts or any adjustments you made in the comments below—I love hearing from you! If you enjoyed this recipe, check out other delicious offerings on my blog; who knows, your next favorite could be just a click away!
14. Chicken Shawarma Crispy Rice Salad

Deliciously Unique Chicken Shawarma Crispy Rice Salad: A Flavorful Adventure on a Plate!
Have you ever found yourself staring into your fridge, searching for a spark of inspiration to turn a bunch of ingredients into something extraordinary? A while back, I faced that very situation, but instead of a sad bowl of leftovers, I crafted something that brought back unforgettable family memories: Chicken Shawarma Crispy Rice Salad. As I tossed together juicy chicken marinated in spices, crispy grains of rice, and vibrant fresh veggies, I could almost hear the laughter of our family dinners echoing through my kitchen.
This salad isn’t just another recipe; it’s a celebration of flavors and textures that will delight your palate. While many recipes may fall flat, this one stands out with its perfect balance of spices, the satisfying crunch of crispy rice, and the freshness from herbs and vegetables. It combines nostalgia with innovation, making it a true comfort food that you’ll crave again and again.
In this post, I promise to guide you through every step of making this sensational Chicken Shawarma Crispy Rice Salad, sharing tips and tricks that will make it even more enjoyable. Let’s embark on this culinary adventure together!
What Are Chicken Shawarma Crispy Rice Salad?
Originating from the Middle East, Chicken Shawarma is a beloved dish known for its melt-in-your-mouth tender meat marinated in a fragrant blend of spices. When you combine this with crispy rice and a colorful array of fresh veggies, you create a dish that elevates shawarma to a whole new star status.
Imagine sinking your teeth into spiced chicken, followed by the delightful crunch of golden rice—each bite is filled with contrasting textures and flavors. The crispy rice adds a fun twist that separates this salad from traditional versions, making it unique and exciting. This dish is perfect for any occasion, whether hosting a dinner party or enjoying a comforting meal at home.
Now that you know what makes Chicken Shawarma Crispy Rice Salad special, let’s dive deeper into why this recipe deserves a spot in your meal rotation!
Why You’ll Love This Recipe
Flavor Explosion: The marinated chicken is bursting with spices like cumin, coriander, and paprika, while the crispy rice provides a satisfying crunch. Each forkful is a joyride for your taste buds!
Cost-Effective & Homemade: Unlike pricey restaurant versions, you can whip this dish up at home for a fraction of the cost. Plus, you know exactly what goes into it—no hidden ingredients!
Customization Galore: This recipe is forgiving! You can add your favorite veggies, switch up the herbs, or even replace chicken with chickpeas for a vegetarian option. The possibilities are endless.
Easy to Prepare: I know cooking can feel intimidating, but this recipe is straightforward. With just a few steps, you’ll be plating this masterpiece in no time!
Perfect for Meal Prep: Make a big batch for the week! This salad holds up beautifully, making it ideal for lunchboxes or quick dinners. You can prepare the chicken and rice separately, ensuring a fresh taste every time you dig in.
Ingredients
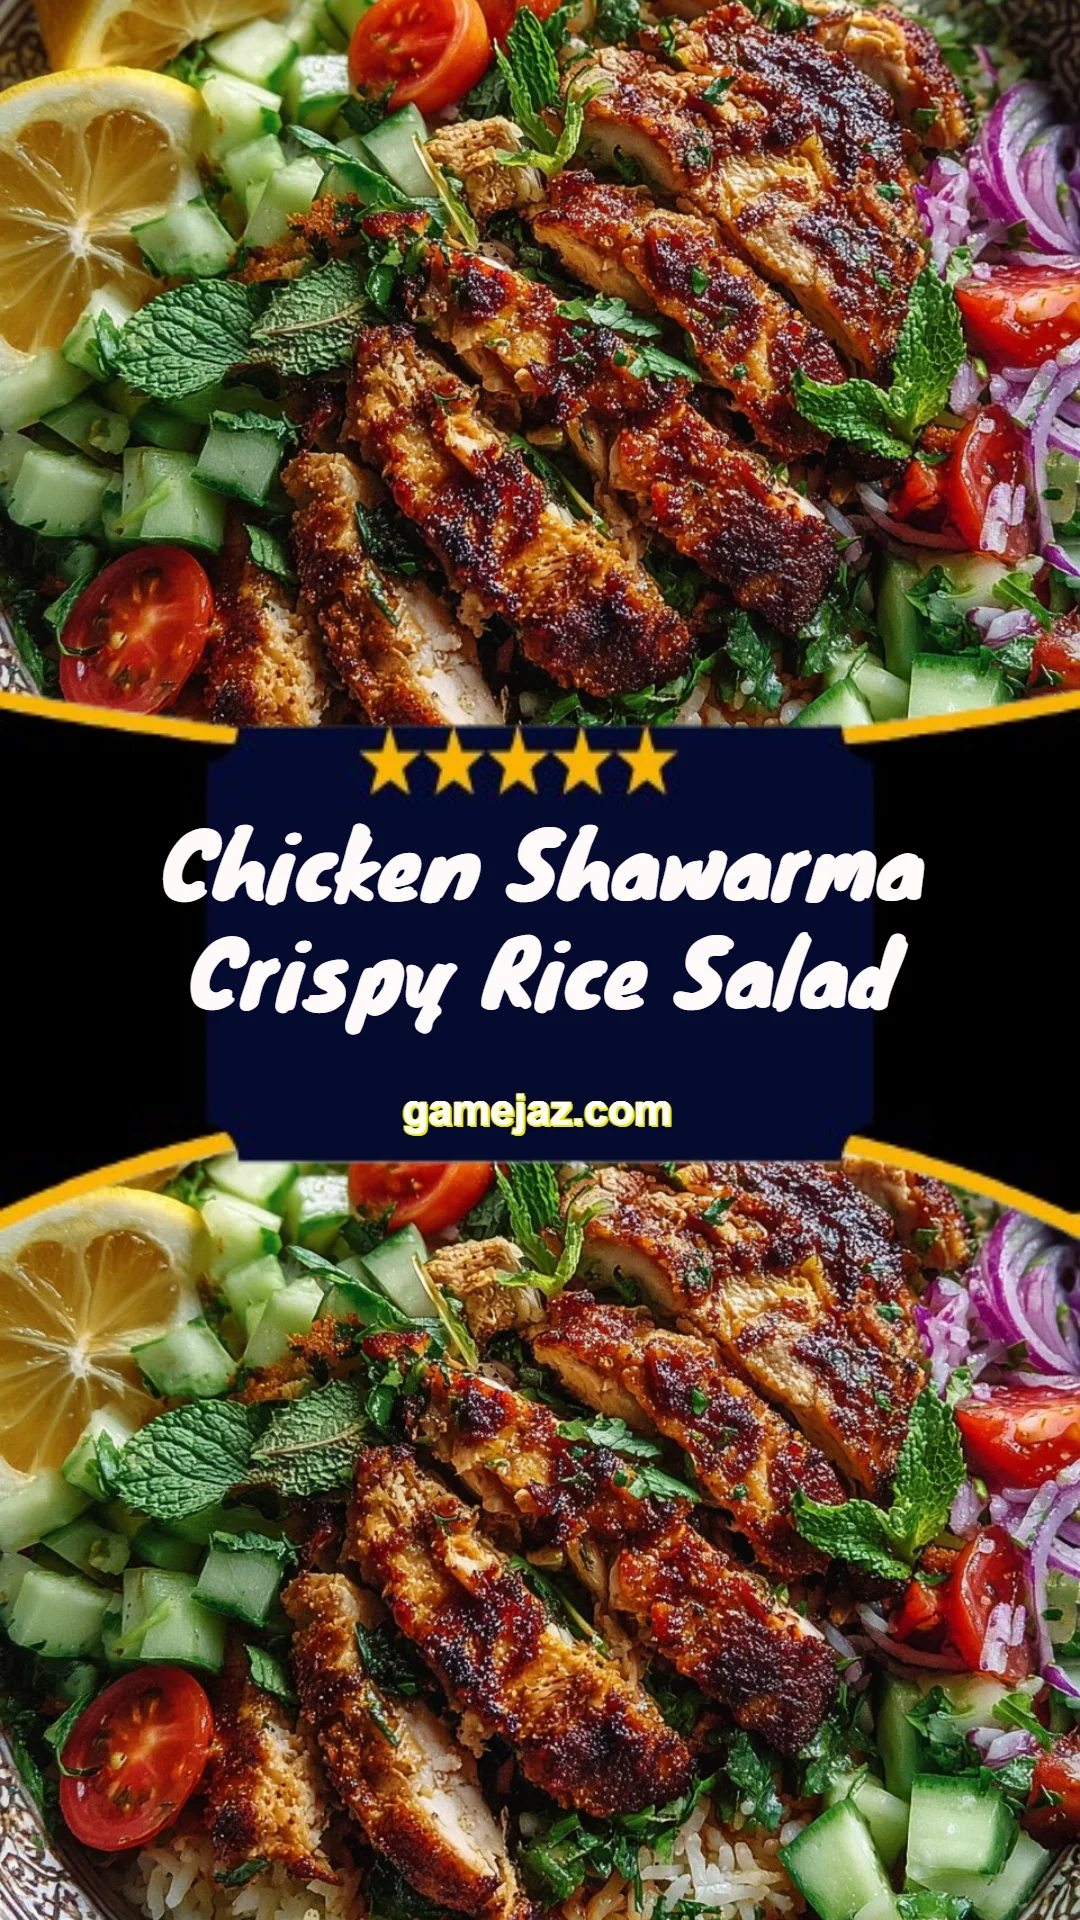
For the Chicken:
- 500 grams boneless chicken thighs (Look for organic or free-range for the best flavor)
- 2 tablespoons olive oil (Extra virgin is my go-to for a richer taste)
- 1 teaspoon ground cumin
- 1 teaspoon ground coriander
- 1 teaspoon paprika (Smoked paprika adds a lovely depth)
- 1/2 teaspoon turmeric
- 1/4 teaspoon cayenne pepper (Adjust for spice preference)
- 2 cloves garlic, minced
- 1 tablespoon lemon juice (Freshly squeezed is best)
- 1/2 teaspoon salt
- 1/4 teaspoon black pepper
For the Salad:
- 200 grams long grain rice, cooked and cooled (I prefer jasmine rice for its aroma)
- 2 tablespoons olive oil
- 1 cup cherry tomatoes, halved
- 1 cup cucumber, diced (Remove seeds for crunch)
- 1/2 cup red onion, thinly sliced (Soak in cold water to mellow the flavor)
- 1/4 cup fresh parsley, chopped
- 2 tablespoons fresh mint, chopped
- 2 tablespoons fresh cilantro, chopped
- 2 tablespoons lemon juice
- 2 tablespoons olive oil
- 1/2 teaspoon salt
- 1/4 teaspoon black pepper
Notes:
- Make sure the butter for any additional sides is at room temperature for easy mixing.
- Substitute chicken thighs with breasts if preferred, but thighs offer more flavor.
- Feel free to swap the fresh herbs based on what you have!
Step-by-Step Instructions
Begin by marinating the chicken. In a bowl, whisk together 2 tablespoons olive oil, 1 teaspoon ground cumin, 1 teaspoon ground coriander, 1 teaspoon paprika, 1/2 teaspoon turmeric, 1/4 teaspoon cayenne pepper, 2 cloves minced garlic, 1 tablespoon lemon juice, 1/2 teaspoon salt, and 1/4 teaspoon black pepper.
Add the chicken thighs to the marinade and toss to coat thoroughly. Allow it to sit for 30 minutes to absorb those wonderful flavors.
Meanwhile, cook your rice according to package instructions until tender. Once cooked, spread it out on a baking sheet to let excess moisture evaporate—this is key for achieving that crispy texture!
In a large skillet, heat 2 tablespoons olive oil over medium-high heat. Add the cooked rice and sauté, stirring occasionally, until the grains are golden and crisp, about 8–10 minutes. You’ll know it’s ready when it’s fragrant and beautifully colored. Transfer the crispy rice to a bowl and set aside.
In the same skillet, add the marinated chicken. Cook over medium-high heat until cooked through and browned, about 6–8 minutes per side. Remove the chicken from the heat and let it rest for about 5 minutes, then slice it thinly.
In a large bowl, combine the crispy rice, 1 cup halved cherry tomatoes, 1 cup diced cucumber, 1/2 cup thinly sliced red onion, 1/4 cup chopped parsley, 2 tablespoons chopped mint, 2 tablespoons chopped cilantro, 2 tablespoons lemon juice, 2 tablespoons olive oil, 1/2 teaspoon salt, and 1/4 teaspoon black pepper. Toss gently to combine all the vibrant ingredients.
Divide the salad among serving plates, and top generously with your sliced chicken shawarma. Drizzle those delicious pan juices from the skillet over the top for added flavor.
Expert Tips & Tricks
Marination Matters: The longer you marinate the chicken, the more flavorful it will be. If you have time, let it marinate for a few hours or even overnight!
Crispy Rice: If you find the rice isn’t getting as crispy as you’d like, try using leftover rice. Older rice tends to fry better as it loses moisture over time.
Storage: Store any leftovers in an airtight container in the fridge. They’ll last up to 3 days. Just reheat the chicken for maximum enjoyment.
Make-Ahead Magic: You can prepare the chicken and rice ahead of time, and assemble the salad shortly before serving for crispiness.
Troubleshooting: If your chicken is dry, it may have been overcooked. Aim for an internal temperature of 165°F (74°C) for the juiciest results.
Presentation: For an extra pretty plate, sprinkle some extra herbs and drizzle with a touch of olive oil before serving.
Serving Suggestions
Pair your Chicken Shawarma Crispy Rice Salad with refreshing side dishes like tzatziki for dipping, or serve alongside warm pita bread for a more substantial meal. For presentation, scatter some extra herbs over the top, and a wedge of lemon on the side invites guests to add a zesty squeeze to their portions. This salad shines at summer cookouts, casual dinners, or even as a meal-prep option for a busy week!
Variations & Substitutions
- Vegetarian Option: Swap out chicken for crispy chickpeas or your favorite plant-based protein for a hearty vegetarian alternative.
- Seasonal Flavors: Add roasted sweet potatoes in the fall for a touch of sweetness, or top with sliced avocado for a creamy element.
- Dressing Alternatives: Try a yogurt-based dressing for a cooling effect, or a spicy harissa sauce to kick up the heat!
Nutrition & Storage Info
- Prep Time: 15 minutes
- Cook Time: 25 minutes
- Total Time: 40 minutes
- Yield: 4 servings
- Estimated Calories: About 450 calories per serving
Storage Instructions:
- Room Temperature: Not recommended; best enjoyed fresh.
- Fridge: Store in an airtight container for up to 3 days.
- Freezer: Not recommended, as the crispy texture will be lost.
FAQ Section
Can I use a different type of meat?
Yes! You can use chicken breast if you prefer leaner meat, or even beef or lamb for a different flavor profile.What can I substitute for rice?
Quinoa, farro, or couscous are great alternatives for a unique twist!How spicy is this recipe?
The spice level is adjustable! You can omit or reduce the cayenne pepper for a milder flavor.Can I make this salad vegan?
Absolutely! Use tofu or tempeh instead of chicken and consider adding more veggies for texture.What is the best way to cook the chicken?
Grilling or baking the chicken thighs is great for added flavor, but pan-searing gives that lovely crispy edge.Can I prep the salad ahead of time?
You can prep individual components ahead and mix them right before serving for the best texture.What type of rice is best for this recipe?
Long-grain varieties like jasmine or basmati work best for achieving that crispy texture.What if I don’t have fresh herbs?
Dried herbs can be used, but remember to adjust the quantities since dried herbs are more potent.How can I make this gluten-free?
Ensure you check that your rice and any additional sauces you use are certified gluten-free.What’s the best way to serve leftovers?
Reheat the chicken gently in a pan and serve over fresh crisp salad for a delightful meal the next day.
Conclusion
Chicken Shawarma Crispy Rice Salad is not just a meal; it’s a culinary journey that combines textures and flavors in a way that’s truly unforgettable. I can’t wait for you to try it! Your family and friends will love this dish just as much as mine do. Don’t forget to share your thoughts and any variations you create—I’d love to hear about your adventures in the kitchen! And if you’re hungry for more delicious recipes, check out my blog for other exciting dishes that will keep your taste buds dancing!
15. Bang Bang Chicken Crispy Rice Salad

Crunchy Bang Bang Chicken Crispy Rice Salad: Elevate Your Dinner Game!
In my kitchen, few things spark joy quite like a simple, vibrant salad that can whip up in no time, and the Bang Bang Chicken Crispy Rice Salad has quickly become a beloved staple. Picture this: it’s a warm Friday evening, my family is gathered around the table, laughing over our week’s adventures while the aroma of crispy rice fills the air. Memories of family dinners flood back, reminding me why I love cooking so much. This salad isn’t just food; it’s a dish packed with vibrant flavors and memories that make any meal feel special.
What sets my version of this Bang Bang Chicken Crispy Rice Salad apart is the perfect balance of textures—crunchy, creamy, and a hint of heat that will make your taste buds dance. Unlike other salad recipes that often fall flat with their flavor, this dish bursts with freshness and zesty goodness. The well-combined crunch of the veggies, the crispy rice, and the succulent chicken drizzled with a mouthwatering sauce creates a symphony that you won’t forget!
Join me as I guide you through this culinary adventure. I promise you’ll learn how to create a dish that not only fills your belly but also warms your heart.
What Are Bang Bang Chicken Crispy Rice Salads?
The Bang Bang Chicken Crispy Rice Salad is an explosion of textures and flavors that captures the essence of Southeast Asian cuisine. Originating from creative fusion dishes, it has become famous for its crispy rice base, topped generously with seasoned chicken and fresh veggies. The luscious sauce—typically a delightful combination of sweet chili, sriracha, and mayonnaise—adds an addictive creaminess that ties everything together.
When you take that first bite, you experience the crunch of beautifully cooked rice followed by tender shreds of chicken that melt in your mouth, accentuated by the refreshing crunch of cabbage and carrots. It’s unique in its layering of flavors and textures, making it the ideal dish for any occasion—be it a busy weeknight dinner or a gathering with friends. This salad is not just a meal; it’s a celebration on a plate!
Why You’ll Love This Recipe
Irresistibly Delicious: The combination of crispy rice topped with tender chicken and a bright, flavorful slaw is downright addictive. It’s a dish that delivers a punch of flavor with every bite!
Cost-Effective: Making your Bang Bang Chicken Crispy Rice Salad at home is much more economical than ordering takeout. With simple ingredients, you can whip up this meal for a fraction of the cost, making it a perfect choice for families.
Customizable Options: This recipe is incredibly versatile. You can easily tweak the heat level with sriracha, switch up the protein, or even make it vegetarian by replacing the chicken with tofu or chickpeas.
Easy and Quick: Prep and cook time together takes about 30 minutes—perfect for those hectic nights when you want something delicious without the fuss.
Satisfying and Nourishing: Packed with protein from the chicken and tons of essential vitamins from the veggies, this dish doesn’t just taste good; it also nourishes your body and soul!
When you put these factors together, it’s clear why the homemade version of the Bang Bang Chicken Crispy Rice Salad reigns supreme over store-bought or restaurant alternatives!

Ingredients Section
To make a vibrant Bang Bang Chicken Crispy Rice Salad, you’ll need the following fresh ingredients:
Ingredients:
- 2 cups cooked jasmine rice, chilled (Preferably day-old for optimal crispiness)
- 2 tablespoons vegetable oil (Avocado oil is a great alternative for a healthy touch)
- 2 chicken breasts, cooked and shredded (Rotisserie chicken works fabulously)
- 1/2 cup mayonnaise (A light mayo or vegan option can be substituted)
- 2 tablespoons sweet chili sauce (Look for brands with low sugar)
- 1 tablespoon sriracha sauce (Adjust to your heat preference)
- 1 tablespoon rice vinegar
- 1 teaspoon sugar (Use coconut sugar for a healthier choice)
- 1 cup shredded cabbage (Red cabbage adds a fun pop of color)
- 1/2 cup shredded carrots
- 2 green onions, sliced
- 1/4 cup cilantro leaves
- 1 lime, cut into wedges
- Salt and pepper to taste
Preparation Notes: Make sure your rice is chilled and day-old if possible; this helps in achieving the perfect crispy texture when cooking. Allow your chicken to come to room temperature for easy shredding.

Step-by-Step Instructions
Prepare the Crispy Rice: Heat the vegetable oil in a large nonstick skillet over medium-high heat until shimmering (about 2 minutes). Add the chilled jasmine rice, and gently press it down with a spatula into an even layer.
Crisp the Rice: Cook the rice undisturbed for 5 to 7 minutes, until the bottom turns a rich golden brown and develops a crisp crust. Carefully flip sections of rice (using a spatula) and crisp the other side for 3 to 4 minutes. It should look beautifully golden.
Make the Bang Bang Sauce: In a medium bowl, whisk together the mayonnaise, sweet chili sauce, sriracha, rice vinegar, and sugar until smooth and creamy. This is your signature bang bang sauce!
Season the Chicken: Toss the shredded chicken in half of the prepared sauce, ensuring each strand is evenly coated. Set aside to let the flavors infuse.
Create the Vegetable Slaw: In a clean mixing bowl, combine shredded cabbage, carrots, sliced green onions, and cilantro. Season with salt and pepper, and gently toss everything together to create a vibrant slaw.
Assemble the Salad: Divide the crispy rice among serving plates. Heap on the crunchy vegetable slaw followed by the sauced chicken. Drizzle the remaining sauce over the top for extra creaminess.
Serve: Garnish each salad with fresh lime wedges and serve immediately to maintain that irresistible crunch in the rice.
Chef’s Tips:
- Aim for high heat when crisping the rice; that’s what gives you that gorgeous texture!
- If you find your rice is sticking to the pan, add a touch more oil.
- Don’t be afraid to experiment with extra toppings like chopped peanuts or sesame seeds for added crunch!
Expert Tips & Tricks
Storage Recommendations: While this dish is best enjoyed fresh, any leftovers can be stored in an airtight container in the fridge for up to 2 days. The crispy rice may lose its crunch, but it’ll still be delicious!
Make-Ahead Instructions: Prepare the elements separately in advance. You can make your rice, chicken, and slaw beforehand; when you’re ready to serve, just crisp the rice and assemble!
Troubleshooting Common Problems:
- Rice Not Crispy Enough: Ensure that the rice is chilled before cooking to create that crispy texture.
- Too Spicy?: If the sauce is too spicy for your taste, mix in a bit more mayonnaise to mellow it out.
Serving Suggestions
For a complete meal, consider pairing your Bang Bang Chicken Crispy Rice Salad with a light soup, like Tom Yum or a refreshing cucumber salad. Presentation-wise, I love serving it in colorful bowls; it makes the vibrant colors pop even more. This dish shines for casual get-togethers, potlucks, or even for a weeknight family dinner when you need something quick yet impressive.
Variations & Substitutions
Different Flavor Combinations: Love a bit of sweetness? Try adding mango chunks or peach slices to your salad for a tropical twist. For a nutty flavor, sprinkle some toasted sesame seeds or crushed peanuts on top.
Dietary Restrictions: Make this salad vegetarian by swapping the chicken with baked tofu or mushrooms. You could also use cashew cream in place of mayonnaise for a dairy-free version.
Seasonal Variations: During the fall, roast seasonal veggies like sweet potatoes and Brussels sprouts to add to your salad. In the summer, mango and avocados bring a delightful flair!
Nutrition & Storage Info
- Prep Time: 10 mins
- Cook Time: 15 mins
- Total Time: 25 mins
- Yield: Serves 4
- Estimated Calories per Serving: 450 calories
- Storage Instructions:
- Room temperature: Serve immediately for best quality.
- Fridge: Store in an airtight container for up to 2 days; reheat crispy rice in a skillet to regain some texture.
- Freezer: Best not to freeze due to the rice texture.
FAQ Section
Can I make this salad in advance?
- Yes, you can prep the components separately and assemble them just before serving to keep everything fresh!
What if I don’t like spicy food?
- Reduce the amount of sriracha in the sauce or omit it entirely for a milder version.
Can I use brown rice instead of jasmine rice?
- Absolutely! Brown rice will take a bit longer to crisp up but will provide a chewier texture and more fiber.
What’s the best chicken to use?
- Rotisserie chicken is perfect; simply shred it and mix it with the sauce for maximum flavor!
What can I substitute for mayonnaise?
- Greek yogurt or a vegan mayo can be great alternatives if you’re looking for lighter or dairy-free options.
How long does the salad last in the fridge?
- It lasts for about 2 days, though the crunch from the rice might soften over time.
Is this recipe gluten-free?
- Yes! Just ensure that your sauces are gluten-free, as some brands may contain gluten.
Can I add nuts to the salad?
- Definitely! Chopped peanuts or cashews add a delightful crunch and depth to the salad.
Can I use other vegetables in the slaw?
- Yes, feel free to get creative! Bell peppers, radishes, or even apple slices can enhance the salad’s flavor profile.
What’s a good drink pairing with this salad?
- A light iced tea or citrus-infused water complements the flavors beautifully!
Conclusion
The Bang Bang Chicken Crispy Rice Salad is more than just a meal; it’s a vibrant experience that brings together comfort and creativity. From the seasoned chicken to the crispy rice and fresh veggies, every bite tells a story. I encourage you to give this recipe a try and watch your family light up with joy at the dinner table just like mine does!
I would love to hear your thoughts—let me know how it turns out or if you made any fun variations. If you enjoyed this recipe, check out more delicious ideas on the blog to keep the culinary adventures going! Happy cooking!
16. Rosemary Lemon Chicken Patties
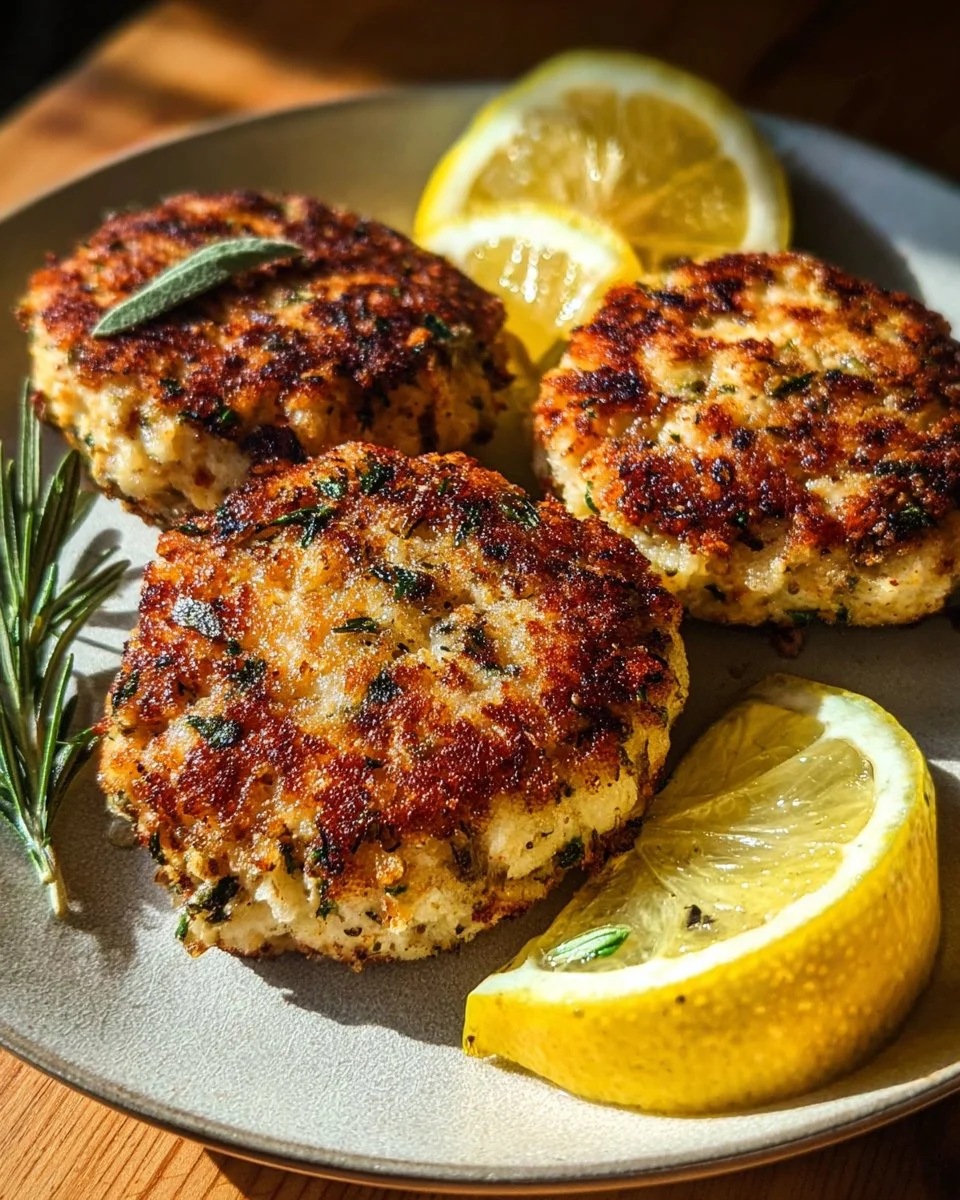
Zesty Rosemary Lemon Chicken Patties: A Flavor-Packed Delight
Imagine returning home after a long day, the aroma of something savory wafting through the air. That’s the feeling I get every time I whip up a batch of rosemary lemon chicken patties. Growing up, my mom had this magical ability to transform simple ingredients into unforgettable meals that made our kitchen feel warm and inviting. The combination of fragrant rosemary and zingy lemon makes these chicken patties undeniably special; they dance on your taste buds, offering a burst of flavor with every bite.
What sets my rosemary lemon chicken patties apart from others is the perfect balance between the herbal brightness of rosemary and the tangy kick of lemon. It’s comfort food that feels light but still satisfying, a breezy dish that’s reminiscent of family barbecues during summer. No overly complicated steps or long prep times here; just pure, delicious joy wrapped in every crispy, golden bite.
In this recipe, I’ll guide you through the process of creating these delightful patties. Together, we’ll not only explore the ingredients and methods but also unearth the joy of cooking that comes from sharing a meal with loved ones. Are you ready to bring a bit of sunshine to your kitchen with these rosemary lemon chicken patties? Let’s dive in!
What Are Rosemary Lemon Chicken Patties?
Rosemary lemon chicken patties are a fantastic blend of ground chicken combined with aromatic herbs and zesty citrus. This delightful dish has its origin in casual family meals, where the intention was to create something simple yet incredibly flavorful. You can expect a texture that’s tender on the inside while achieving that perfect golden crisp on the outside, providing an irresistible contrast in every bite.
These patties are unique because they effortlessly balance bright and earthy flavors, making them equally fitting for a weeknight dinner or a weekend gathering with friends. They are an excellent choice when you want to whip up something delicious and quick, making them a go-to comfort food in my kitchen. Plus, they are a healthier alternative to heavier fried options, giving you all the satisfying flavor without the guilt!
Why You’ll Love This Recipe
Fresh Flavor: You’ll love the fresh, vibrant taste that the rosemary and lemon bring. Unlike store-bought options, which can often be bland, these patties burst with natural flavors, making your taste buds dance.
Cost-Effective: Why spend on expensive restaurant meals when you can whip up this delicious dish at home? With just a handful of ingredients, you’ll create a meal that’s just as good, if not better!
Versatile and Customizable: One of the really fun parts of this recipe is how you can customize it. Want an extra kick of heat? Add some red pepper flakes! Prefer a milder flavor? Adjust the lemon and rosemary to suit your palate.
Easy to Make: This is a recipe that anyone can tackle, even if you’re a novice in the kitchen. With just a few simple steps, you’ll have a meal ready in no time.
Perfect for Meal Prep: You can easily make these chicken patties ahead of time, refrigerate or freeze them, and simply cook them when you’re ready to eat. They hold up beautifully, making weeknight dinners a breeze.
Ingredients Section

To make my rosemary lemon chicken patties, you’ll need the following ingredients:
- 1 pound ground chicken: I prefer using organic, free-range chicken for superior flavor.
- 1/2 cup breadcrumbs: I recommend using panko for a crunchier texture, but regular breadcrumbs can work too.
- 1 large egg: This will help bind everything together.
- 1 tablespoon fresh rosemary, chopped: Fresh is best; it amplifies the flavor! You can substitute dried herbs if needed, but reduce the amount, as dried herbs can be more potent.
- 1 tablespoon lemon zest: Make sure to use fresh lemon; the zest adds a vibrant flavor punch.
- 2 tablespoons lemon juice: Freshly squeezed is ideal here for that zesty brightness.
- 1 clove garlic, minced: Don’t skip the garlic; it adds depth and aroma!
- 1/4 cup onion, finely chopped: You can use yellow or sweet onions for a milder flavor.
- 1 teaspoon salt: To enhance the flavors.
- 1/2 teaspoon black pepper: Freshly ground is always preferred.
- 2 tablespoons olive oil: Use a good quality extra-virgin olive oil for cooking; it adds richness to the patties.
Feel free to let your chicken patties mixture rest at room temperature for about 20 minutes before forming patties. This little trick allows the flavors to meld beautifully!
Step-By-Step Instructions
Prepare the Mixture:
- In a large bowl, combine the ground chicken, breadcrumbs, egg, chopped rosemary, lemon zest, lemon juice, minced garlic, chopped onion, salt, and black pepper.
- Chef’s Tip: Make sure your chicken is at room temperature for even mixing.
Mix:
- Using your hands, gently mix until all ingredients are evenly distributed and the mixture holds together well. Avoid overmixing to maintain a tender texture.
Shape Patties:
- Divide the mixture into 6 to 8 equal portions. Using your hands or a mold, shape into patties about 1 inch thick.
Heat the Skillet:
- Heat the olive oil in a skillet over medium heat until shimmering. Avoid high heat to ensure the patties don’t burn.
Cook the Patties:
- Place the patties in the skillet, cooking for about 5 to 6 minutes on each side until golden brown and cooked through. They should register 165°F (75°C) inside.
- Visual Cue: Look for a crispy outer edge and a juicy interior.
Rest and Serve:
- Once cooked, remove the patties from the skillet and let them rest for a few minutes before serving to lock in moisture.
Expert Tips & Tricks
- Storage Recommendations: Store leftovers in an airtight container in the fridge for up to 3 days or freeze them for up to 3 months. Reheat in the oven or skillet for the best texture.
- Make-Ahead Instructions: Form the patties ahead of time and keep them in the fridge for 24 hours or freeze them. Just cook them straight from the freezer, adding a few extra minutes to cooking time.
- Common Problems: If the patties fall apart, it may be due to not enough binding (add more breadcrumbs or egg) or too much moisture (drain excess juice from veggies).
- Chef’s Tip: The key to juicy patties is not overcooking them. Use a meat thermometer to ensure they’re perfectly done without drying out.
- Flavor Boosts: Adding Parmesan cheese or herbs like parsley can deepen the flavor profile.
Serving Suggestions
Rosemary lemon chicken patties are best served alongside a crisp salad or some roasted vegetables. A light lemon vinaigrette dressing is a splendid match! For a festive touch, consider garnishing with extra lemon zest and fresh rosemary sprigs. These patties make for a fantastic main dish at summer barbecues, family dinners, or even meal prep for busy weekdays.
Variations & Substitutions
- Different Flavor Combinations: Swapping rosemary for thyme or adding spices like cumin or smoked paprika can give these patties a whole new twist.
- Dietary Adaptations: These patties are gluten-free if you substitute breadcrumbs with ground oats or almond flour, suitable for various diets.
- Seasonal Variations: During the fall, consider adding ingredients like diced apple or sage for a seasonal twist.
Nutrition & Storage Info
- Prep time: 15 minutes
- Cook time: 15 minutes
- Total time: 30 minutes
- Yield: 6-8 servings
- Estimated calories: 190 calories per patty (varies based on portion size and ingredients)
- Storage instructions: Room temperature for up to 2 hours; in the fridge for up to 3 days; and in the freezer for up to 3 months.
FAQ Section
Can I substitute ground chicken with turkey?
Yes! Ground turkey works wonderfully and offers a similar texture and flavor.Do I have to use fresh rosemary?
While fresh is preferred for maximum flavor, you can use dried rosemary. Use about 1 teaspoon of dried for each tablespoon of fresh.Can I bake these patties instead?
Absolutely! Bake in a preheated oven at 375°F (190°C) for about 20-25 minutes or until cooked through.What are some good side dishes to serve with these patties?
These pair well with steamed vegetables, a refreshing salad, or even as a filling for a sandwich!Can I double the recipe?
Yes! Feel free to double the ingredients. Just make sure to cook them in batches to avoid overcrowding the pan.Can I freeze the uncooked patties?
Yes, you can freeze them. Just place them in a single layer on a baking sheet, freeze until firm, then transfer to a freezer-safe bag or container.What can I use instead of breadcrumbs for a low-carb option?
Almond flour or crushed pork rinds can be a great alternative for a low-carb diet.How can I ensure my patties are moist?
Avoid over-mixing the meat mixture and use a thermometer to check for doneness.What’s the best way to reheat leftovers?
For the best texture, reheat them in a skillet or the oven instead of the microwave.How long do leftovers last?
In the fridge, leftovers can last up to 3 days. In the freezer, they may last up to 3 months.
Conclusion
These rosemary lemon chicken patties hold a special place in my heart and my kitchen, bringing a bit of sunshine and warmth to every meal. They’re not just easy to make; they’re a delightful reminder of home-cooked comforts. I encourage you to give them a try—you just might end up wondering how you ever lived without them! I’d love to hear your thoughts or any personal twists you add to the recipe. Don’t forget to check out my other favorite recipes on the blog for more delicious inspirations!
17. Creamy French Onion Chicken Orzo Casserole
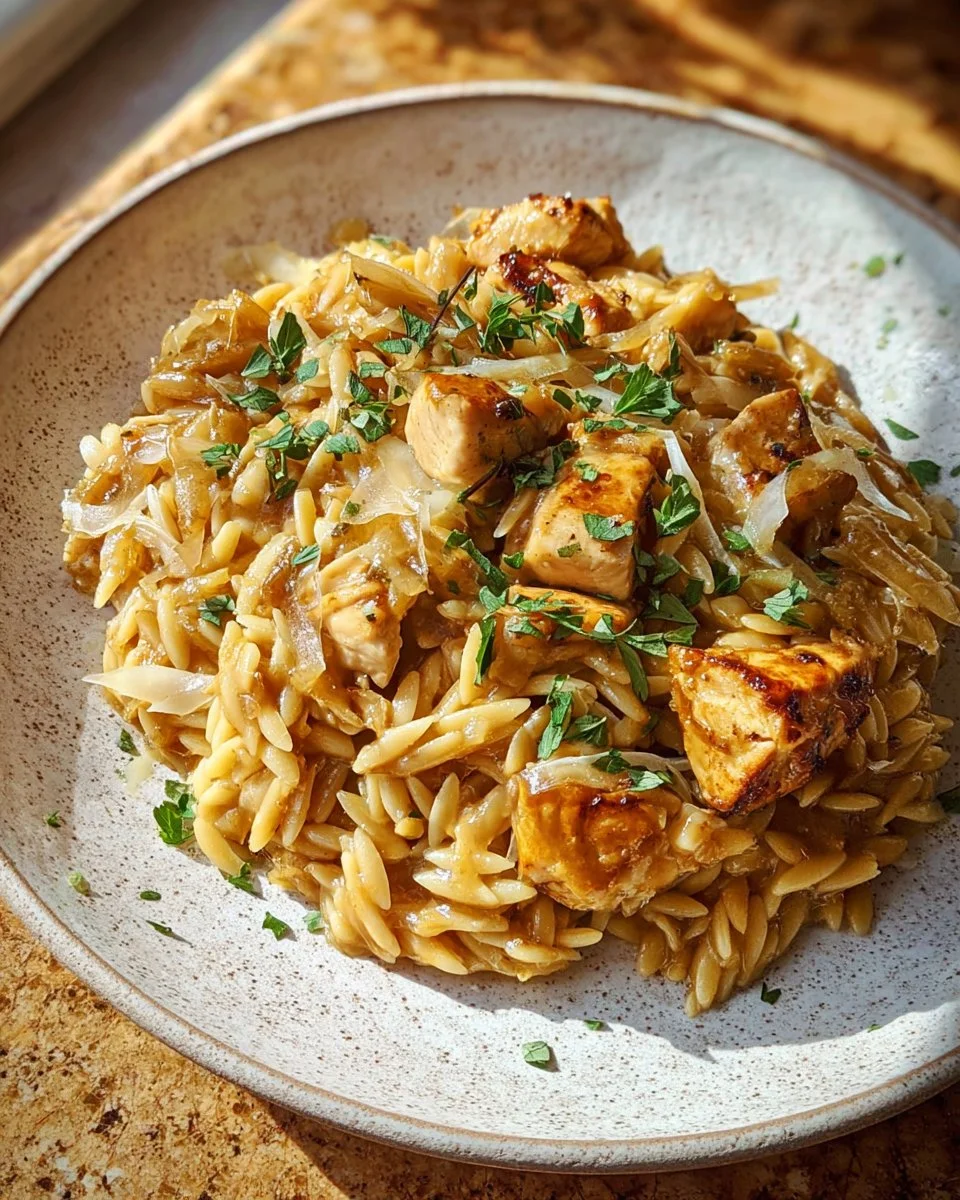
Delightful Creamy French Onion Chicken Orzo Casserole: A Heartwarming Twist on a Family Classic
There’s something truly magical about comfort food that transports you back to your childhood—warm kitchens, the aroma of home-cooked meals filling the air, and the laughter of loved ones gathered around the table. For me, that nostalgia comes rushing back with every bite of my Creamy French Onion Chicken Orzo Casserole. This dish is a delightful combination of savory chicken, tender orzo, and the rich, comforting flavor of French onion soup that truly warms the heart.
As a passionate home cook, I’ve experimented with countless recipes, but this one holds a special place in my heart. Unlike the many lackluster casseroles out there, this version boasts layers of creamy goodness, crunchy cheese topping, and an irresistible depth of flavor that keeps everyone coming back for seconds (or thirds!). Picture cozy family dinners or a casual get-together with friends—this dish is a surefire hit that even picky eaters can’t resist.
In this post, you’ll learn how to simplify your weeknight meals with this easy, yet absolutely delicious recipe. Trust me; your family will thank you for inviting them to experience this creamy casserole magic!
What is Creamy French Onion Chicken Orzo Casserole?
The origins of French onion soup trace back to the Romans, but its transformation into a casserole is something special. Our Creamy French Onion Chicken Orzo Casserole takes the beloved flavors of that classic soup—sweet caramelized onions, rich broth, and gooey cheese—and marries them with juicy chicken and petite pasta.
At its core, this dish is a multi-textured delight. You’ll experience the creamy richness of the sauce, the bite of the orzo, the savoriness of the chicken, and the comforting sweetness of caramelized onions. What makes this casserole unique is its delightful complexity of flavors combined with the ease of preparation—no one will know just how simple it is to whip up!
Whether you’re looking for a comforting weekend dinner, an easy dish to impress your guests, or simply something to warm your soul after a long day, this casserole is the answer.
Why You’ll Love This Recipe
One-Pan Wonder: Who doesn’t love an easy clean-up? This casserole combines all your ingredients in one pan, meaning less mess and more time spent enjoying time with family.
Packed with Flavor: This recipe transcends store-bought versions, blending caramelized onions, savory chicken, creamy sauce, and gooey cheese into a flavor explosion that can’t be beat. It’s like a fancy restaurant meal served right in your kitchen!
Budget-Friendly: Forget those overpriced take-out meals! Not only is this casserole delicious, but it’s also kind to your wallet. Most of the ingredients are pantry staples or easily found at your local grocery store, making it an economical choice.
Customizable: The beauty of this dish is its versatility! You can easily swap out the chicken for turkey, use different cheeses, or even add in seasonal vegetables like spinach or cooked mushrooms to personalize it to your family’s tastes.
Quick to Prepare: With just about 15 minutes of prep time, you can have this dish in the oven and let it do its magic while you relax or help your kids with homework.

Ingredients
- 1 pound boneless skinless chicken breasts, cut into bite-sized pieces (If you prefer, try using rotisserie chicken for even easier prep!)
- 1 tablespoon olive oil
- 1 tablespoon butter (Make sure it’s at room temperature for easy melting)
- 1 large yellow onion, thinly sliced (For a sweeter flavor, you can substitute with Vidalia onions)
- 1 teaspoon sugar (This enhances the caramelization of the onions)
- 2 teaspoons minced garlic (Fresh garlic makes all the difference!)
- 1 cup uncooked orzo pasta
- 2 cups low sodium chicken broth (Homemade broth elevates the dish even further)
- 1 cup water
- 1 cup heavy cream
- 1/2 cup sour cream
- 1 ounce dry French onion soup mix (This is the magic of this recipe!)
- 1 cup shredded Gruyere cheese (For a nutty flavor; Swiss cheese works as a substitute)
- 1/2 cup grated Parmesan cheese
- 1 teaspoon fresh thyme leaves (Dried thyme works in a pinch!)
- Salt and pepper to taste
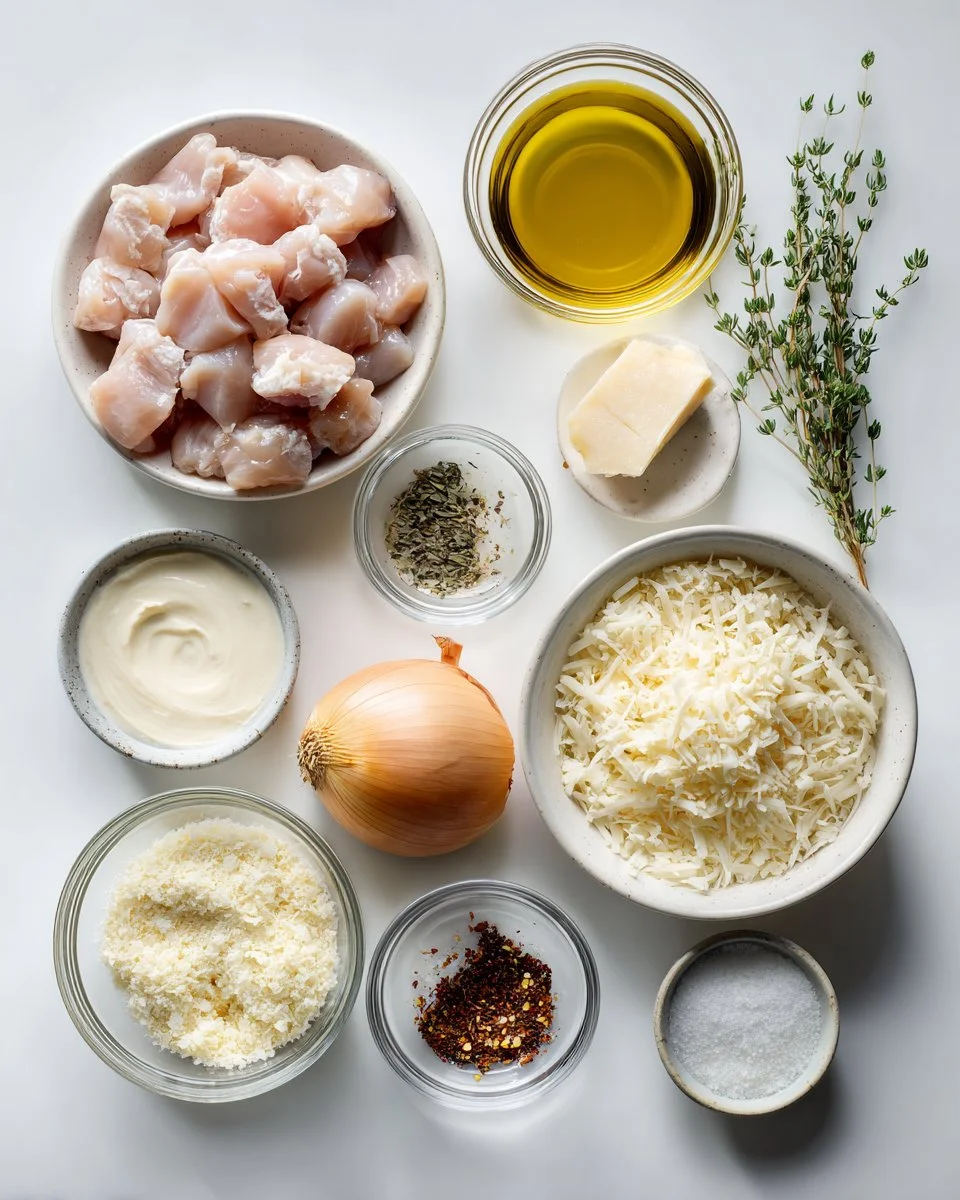
Step-by-Step Instructions
Preheat your oven to 375°F (190°C). Lightly grease a 9×13-inch baking dish. This step is crucial to ensure your casserole doesn’t stick!
In a large skillet, heat olive oil and butter over medium heat until melted and bubbly. This is where you’ll get those delicious flavors rolling.
Add sliced onion and sugar. Cook for 10–12 minutes, stirring frequently until onions become golden and caramelized. If you notice them browning too quickly, lower your heat a bit; you want those lovely, caramel hues without burning.
Stir in minced garlic and let it cook for 1 minute until fragrant. The aroma should be heavenly at this point—your taste buds are about to be delighted!
Push onions to one side of the skillet and add chicken pieces. Season with salt and pepper, then cook for about 4–5 minutes until lightly browned but not fully cooked through. This ensures they finish cooking in the oven without drying out.
Pour in the orzo, chicken broth, water, and dry French onion soup mix. Stir to combine and allow to simmer gently. The flavors will mingle beautifully here.
Reduce heat and stir in heavy cream, sour cream, half of the shredded Gruyere, all of the Parmesan, and thyme leaves. Continue to season to taste with salt and pepper. This creamy combination is what sets this casserole apart!
Pour the mixture into your prepared baking dish and spread it evenly. Don’t forget to sprinkle the remaining Gruyere on top for that cheesy, bubbly finish.
Bake uncovered for 20–25 minutes until the orzo is tender and cheese is golden brown and bubbly. Keep an eye on it! This is when you can start to smell the magic in the air.
Remove from oven and let it rest for 5 minutes before serving. This short wait will help the casserole set up nicely, making serving easier.
Expert Tips & Tricks
Do Not Rush Caramelization: Take your time with the onions for that optimal sweetness. Patience is key—no one likes burnt bits!
Make Ahead for Convenience: You can prepare everything up to the baking step ahead of time. Just keep it covered in the fridge and pop it in the oven when ready to serve.
Storage Tips: Leftovers can be stored in an airtight container in the fridge for up to 4 days.
Freezing for Later: You can freeze the casserole before baking. Just thaw it in the fridge overnight and bake as directed.
Troubleshooting Texture: If your orzo seems dry after baking, you can add a splash of chicken broth or water before serving to enhance its creaminess.
Check for Doneness: To avoid overcooking, make sure the chicken is cooked and orzo is tender but not mushy.
Serving Suggestions
This Creamy French Onion Chicken Orzo Casserole is a meal on its own, but pairing it with a fresh green salad or some roasted vegetables can make it even more delightful! Think of a zesty arugula salad tossed with lemon vinaigrette that will balance the richness of the casserole. For presentation, serve it straight from the baking dish for that homey feel, or transfer it to a rustic serving platter to impress guests at a potluck or dinner party.
Variations & Substitutions
Want to shake things up? Try these delicious twists:
- Accessory Ingredients: Shredded spinach, peas, or even artichoke hearts can add a fresh touch!
- Meatless Option: Substitute chicken with cooked lentils or chickpeas. They’ll soak up all the flavors beautifully.
- Cheesy Variations: Switch Gruyere for cheddar or goat cheese for a tangy touch.
Nutrition & Storage Info
- Prep Time: 15 minutes
- Cook Time: 25 minutes
- Total Time: 40 minutes
- Yield: Serves 6
- Estimated Calories: 600 calories per serving (depends on ingredient substitutions)
Storage:
- Room Temp: Best eaten right away.
- Fridge: Store leftovers for up to 4 days.
- Freezer: Can last up to 2 months; just thaw and reheat thoroughly.
FAQ
Can I use brown rice instead of orzo?
Yes, but adjust the cooking times since brown rice takes longer to cook. Consider using a bit more liquid.What if I don’t have sour cream?
Plain Greek yogurt works as a great substitute!How can I make this gluten-free?
Use gluten-free orzo or sub with quinoa for a similar texture.Is it possible to make this casserole vegetarian?
Absolutely! Skip the chicken and use vegetable broth, adding mushrooms for a meaty texture.Can I add other vegetables?
Definitely! Feel free to throw in zucchini, bell peppers, or spinach.What’s the best way to reheat leftovers?
Reheat in the oven at 350°F until warmed through, adding a splash of broth if necessary.How do I store leftovers?
Store in an airtight container in the fridge for up to 4 days or freeze for up to 2 months.Can I skip the cream?
While the cream enriches the dish, you can substitute with a non-dairy option or additional broth if you prefer it lighter.Would this work as a freezer meal?
Yes! Prep the casserole, freeze before baking, then just thaw and cook later.What side dishes pair well with this casserole?
Light salads or roasted veggies complement the richness of the casserole.
Conclusion
This Creamy French Onion Chicken Orzo Casserole is not just a recipe; it’s a heartfelt invitation to gather around the table with family and friends. Its warm flavors and creamy texture make it a standout, and I hope you’ll find it as comforting and delightful as I do. I’d love to hear your thoughts or any variations you try out, so drop a comment below!
And while you’re here, don’t forget to check out my other cozy casseroles and weeknight dinner ideas on the blog! Happy cooking!
18. Garlic Butter Chicken Caesar Sandwiches

Irresistible Garlic Butter Chicken Caesar Sandwiches: The Ultimate Comfort Food Delight
Picture this: a cozy Sunday afternoon spent in the kitchen, the sun streaming through the window, filling the air with the aroma of garlic and butter. That’s how my love affair with Garlic Butter Chicken Caesar Sandwiches began. It was an impromptu lunch for my family, an delightful unexpected twist to our usual meal routine. As I pulled the golden chicken from the skillet, tossing it with garlic-infused butter and authentic Caesar dressing, I could feel the anticipation building in the air.
What makes these sandwiches so special? It’s the combination of textures—crunchy romaine, buttery chicken, and tangy Caesar dressing—all nestled between warm, toasty buns. Unlike those pre-packaged meals or bland restaurant versions, my Garlic Butter Chicken Caesar Sandwiches are homemade with love and packed with flavor, making them the ideal comfort food. They remind me of sunny picnics with my family and spontaneous gatherings with friends, moments that turn into cherished memories.
In this post, I’m excited to share my tried-and-true recipe, filled with tips and tricks to make it your favorite dish too. You’re going to learn how to create these scrumptious sandwiches in just under an hour, and trust me, your taste buds will thank you!
What Are Garlic Butter Chicken Caesar Sandwiches?
Garlic Butter Chicken Caesar Sandwiches are a delightful fusion of traditional Caesar salad components and a hearty chicken sandwich. Originating from a blend of Italian cuisine, the concept celebrates the robust flavors of garlic, savory Caesar dressing, and succulent chicken. The dish is simple yet profound in taste, showcasing creamy dressing contrasted by crisp lettuce and rich, buttered chicken.
The soft sandwich buns add a comforting touch, making these sandwiches both a meal and a nostalgic experience. They’re perfect for casual get-togethers, busy weeknights, or as game-day fare that everyone will rave about. They’re versatile too! Whether you’re hosting a family gathering or just in need of a tasty dinner, these sandwiches are sure to impress.
Why You’ll Love This Recipe
Homemade Goodness: Imagine biting into that first sandwich—the warm, succulent chicken smeared with garlic butter, a crunch from fresh romaine, and a coating of creamy Caesar dressing. These flavor combinations will have you craving them over any store-bought sandwich!
Customization Galore: Unlike pre-packaged meals, you control every aspect of this recipe. Want extra garlic? Go for it! Prefer a spicier kick? Add some crushed red pepper flakes!
Cost-Effective: Eating out can add up quickly, but making these sandwiches at home saves money without sacrificing taste. The ingredients can serve a family of four while keeping your kitchen stocked.
Quick and Easy: This recipe takes about 30 minutes of hands-on time, plus some resting and cooking, making it perfect for a weeknight dinner or a lunch treat. You’ll be amazed at how easily you can whip these up for any occasion.
Family-Friendly: Kids and adults alike will love this dish! It’s an excellent way to introduce new flavors while still serving something familiar and comforting.
Ingredients

- 1 pound chicken breast: Opt for organic or free-range for the best flavor.
- 4 sandwich buns: Choose hearty buns like ciabatta or whole wheat for added texture.
- 2 tablespoons butter: Use unsalted butter for better control of seasoning.
- 1 tablespoon olive oil: Extra virgin gives a rich flavor.
- 4 cloves garlic, minced: Freshly minced garlic adds an aromatic punch.
- 1 teaspoon Italian seasoning: This blend will enhance the flavor of your chicken.
- Salt and black pepper: To taste; always use kosher salt for seasoning.
- 1/3 cup Caesar dressing: A homemade dressing can elevate your sandwiches; store-bought versions like Annie’s or Ken’s are also good.
- 1 cup romaine lettuce, chopped: Fresh and crunchy, the lettuce adds texture.
- 1/4 cup grated Parmesan cheese: Use freshly grated for the best taste and melt-in-your-mouth effect.
- 1 tablespoon fresh parsley, chopped: Adds a touch of freshness.
Prep Notes: Make sure your butter is at room temperature for easy melting. Let your chicken come to room temperature before seasoning; this ensures even cooking.
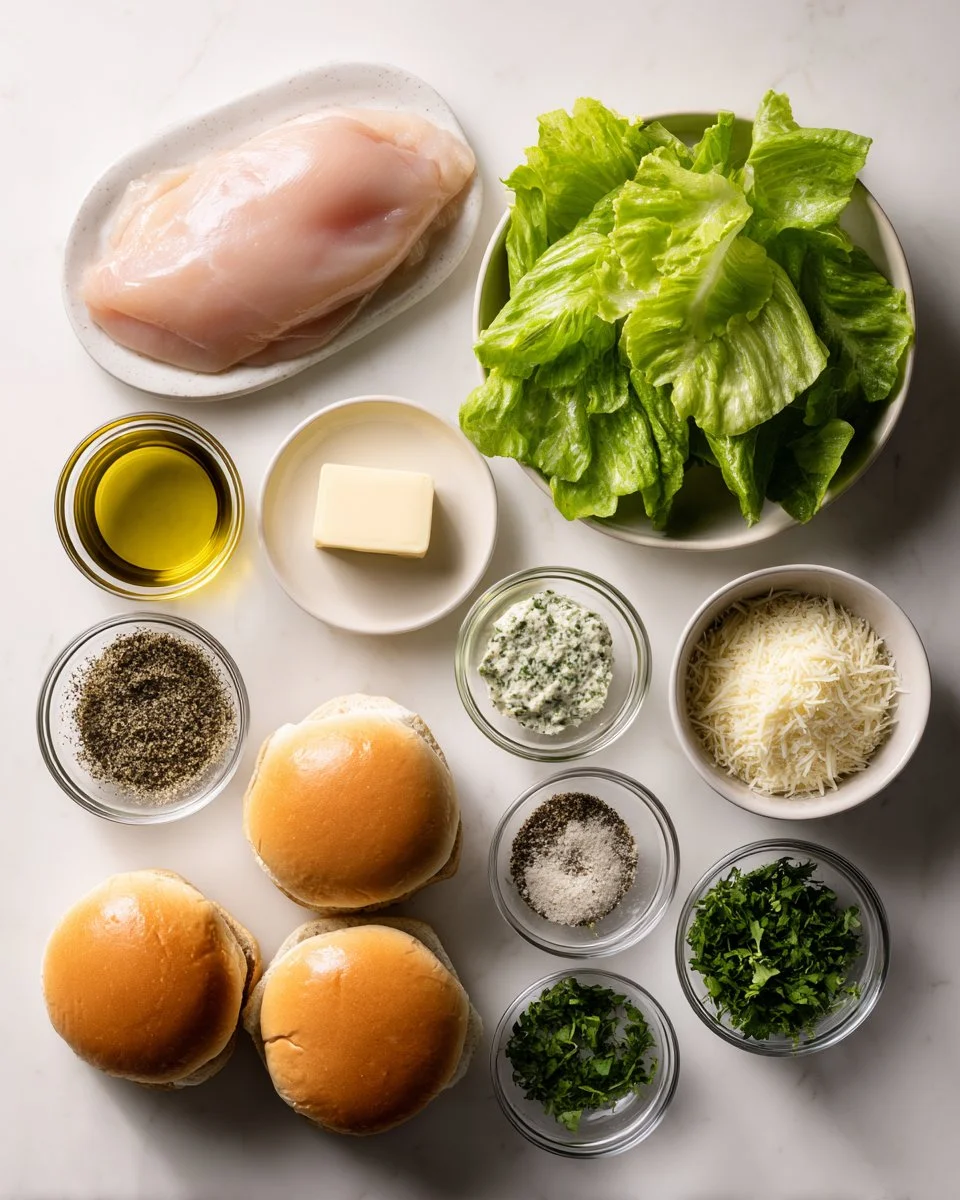
Step-by-Step Instructions
Season the Chicken: Start by seasoning your chicken breast generously with Italian seasoning, salt, and black pepper, making sure to cover both sides thoroughly.
Cook the Chicken: In a skillet, heat 1 tablespoon of olive oil over medium heat. Once hot, add the seasoned chicken. Cook for about 6-8 minutes per side until golden brown and cooked through, with an internal temperature of 165°F (74°C).
Rest and Slice: Transfer the chicken to a cutting board and let it rest for a few moments. This allows the juices to redistribute, making it juicy when sliced. Carefully slice the chicken thinly.
Prepare the Garlic Butter: In the same skillet, melt 2 tablespoons of butter over medium heat. Add the minced garlic and sauté for about 30 seconds to 1 minute until fragrant, taking care not to burn it.
Combine Chicken and Butter: Return the sliced chicken to the skillet and toss it in the garlic butter until everything is nicely coated.
Toast the Buns: Lightly toast your sandwich buns in a toaster or on the skillet until golden brown.
Assemble the Sandwiches: Spread Caesar dressing on the cut sides of each bun. Layer the bottom buns with the garlic butter chicken, followed by the chopped romaine lettuce and a generous sprinkle of Parmesan cheese. Top with the other bun halves.
Garnish and Serve: Finish with a sprinkle of chopped parsley on top and serve immediately, while warm and irresistible!
Chef’s Tips:
- Watch the Garlic: Garlic can burn easily, so keep an eye on it while sautéing.
- Slice the Chicken Against the Grain: This creates more tender bites.
- Load Up on Toppings: Feel free to add tomatoes, cucumbers, or even crispy bacon!
Expert Tips & Tricks
Storage: Keep any leftovers in an airtight container in the fridge for up to 3 days. Reheat in the microwave or on the stovetop to avoid soggy bread.
Make-ahead Options: You can prepare the chicken and garlic butter in advance. Just store them separately in the fridge and assemble the sandwiches when ready to serve.
Troubleshooting: If your chicken isn’t browning, ensure your pan is hot enough before adding it.
Grill It: For a smoky flavor, grill the chicken instead of pan-frying it.
Elevate the Dressing: Consider making your own Caesar dressing for added flavor and freshness. Keep an eye on ingredient quality; fresh always wins!
Serving Suggestions
These Garlic Butter Chicken Caesar Sandwiches are fabulous on their own but pair beautifully with a side of crispy potato wedges or a mixed green salad drizzled with a zingy vinaigrette. For a casual gathering, set up a little sandwich bar allowing guests to customize their creations. They’re perfect for picnics or backyard BBQs, as well as an easy Sunday lunch!
Variations & Substitutions
Vegetarian Option: Swap out the chicken for marinated and grilled zucchini or portobello mushrooms. Use a plant-based Caesar dressing to keep it entirely meat-free.
Flavored Sauces: Try different dressings like ranch or honey mustard to switch up the flavor profile. You can also spice things up with added sriracha or jalapeños.
Seasonal Variations: Add roasted seasonal vegetables in the summer or swap out romaine for spinach in the fall for a seasonal twist.
Nutrition & Storage Info
- Prep time: 10 minutes
- Cook time: 20 minutes
- Total time: 30 minutes
- Yield: 4 servings
- Estimated calories: Approximately 450 per serving
Storage Instructions
- Room Temperature: Best enjoyed immediately.
- Fridge: Store leftovers for up to 3 days.
- Freezer: Cooked chicken can be frozen for up to 3 months.
FAQ Section
Can I use frozen chicken?
Yes, just make sure it’s completely thawed before cooking for even results.Can I grill the chicken instead?
Absolutely! Grilling adds wonderful flavor and is a fantastic alternative.How do I make it gluten-free?
Use gluten-free buns and ensure all ingredients (like the dressing) are gluten-free.What other toppings can I add?
Feel free to experiment with avocado, crispy bacon, or sautéed mushrooms!How long can leftovers last?
They can be kept in the fridge for up to three days.Can I make the chicken in advance?
Yes, prepare and store it in the fridge ahead of time, then assemble the sandwiches when ready.What side dishes go well with this?
A fresh salad or crispy fries are perfect companions to these sandwiches!What’s the best way to reheat them?
Microwave them briefly, but to avoid soggy bread, reheat on the stovetop or toaster oven.Can I use leftover rotisserie chicken?
Yes! Just warm it up in the garlic butter to enhance the flavors.What can I substitute for Caesar dressing?
Use ranch dressing, or a homemade blend made from yogurt and lemon for a lighter option.
Conclusion
These Garlic Butter Chicken Caesar Sandwiches are not just a recipe; they’re a celebration of flavors and memories that bring us closer together. The next time you need a quick dinner or want to wow your family and friends, try this dish out. Each bite is a delicious reminder of home, love, and good times.
I can’t wait for you to try this and make it your own. Please share your thoughts and any variations you’ve come up with! Also, be sure to explore more scrumptious recipes on my blog; you may just find your next favorite dish waiting for you!
19. Herbed Ricotta Stuffed Chicken Rolls

Herbed Ricotta Stuffed Chicken Rolls: A Deliciously Cozy Family Favorite
There’s something about a warm, cheesy dish that brings me back to those sun-drenched Sunday afternoons at my grandmother’s kitchen table. The aroma of her cooking wafting through the air was like a warm hug; it was where comfort lived, where memories were made, and where family came together to break bread. Today, I’m thrilled to share with you my twist on that nostalgia: Herbed Ricotta Stuffed Chicken Rolls.
These delectable rolls are the perfect blend of tender chicken and creamy, herbed ricotta, creating an experience not just for the taste buds, but for the soul. Unlike many recipes that let the chicken dry out or skimp on flavor, this one ensures that every bite is succulent and packed with freshness. Whether it’s a cozy weekday dinner or a special gathering, these stuffed chicken rolls are sure to steal the spotlight.
In this post, not only will you learn how to create these mouthwatering rolls, but you’ll also get tips for making them your own. So, let’s dive in and turn ordinary chicken into a culinary celebration!
What Are Herbed Ricotta Stuffed Chicken Rolls?
Herbed Ricotta Stuffed Chicken Rolls have their origins rooted in Italian cuisine, where creamy cheeses and fresh herbs elevate simple proteins into extraordinary dishes. The combination of ricotta and Parmesan cheese, infused with vibrant basil and parsley, offers a unique flavor profile that’s both comforting and refined.
When you take a bite, the tender chicken envelops the velvety, herbaceous ricotta, creating a delightful contrast in textures—crispy on the outside and creamy within. They are perfect for those nights when you want to impress with minimal effort, all while filling your home with an irresistible aroma that beckons everyone to the dinner table.
Whether you’re making these for a cozy family dinner or a gathering with friends, they bring a touch of elegance without the fuss. Trust me; once you experience these Herbed Ricotta Stuffed Chicken Rolls, you’ll want to make them a regular on your menu!
Why You’ll Love This Recipe
Flavor Explosion: The herbed ricotta filling isn’t just delicious; it’s a celebration of freshness! It offers a rich blend of flavors that elevate the simple chicken breast to fine dining status.
Healthier Option: Compared to many store-bought stuffed chicken options loaded with fillers and preservatives, my homemade version is not only fresher, but you get complete control over the ingredients!
Cost-Effective: Cooking at home can save you a ton! This recipe utilizes simple ingredients found in your pantry, and you can make up to four servings for a fraction of the cost of restaurant fare.
Customizable: Feel free to switch up the herbs or add vegetables like spinach or sun-dried tomatoes to the filling. The world is your oyster—make it a signature dish!
Easy Yet Impressive: If you’re worried about cooking skills, fret not! This recipe is beginner-friendly, and I’ll guide you through each step. Your family and friends will think you’re a culinary genius!
Ingredients

- 4 large boneless skinless chicken breasts: Look for organic, free-range chicken for the best flavor. If you’re in a pinch, chicken thighs work too!
- 1 cup ricotta cheese: A must for creaminess; opt for full-fat for the richest taste. You can swap in cottage cheese if you need a lower-fat option.
- 1/4 cup grated Parmesan cheese: Freshly grated is best. It’ll elevate the dish to another level.
- 2 tablespoons chopped fresh basil: If you can’t find fresh, dried basil can substitute, but adjust the quantity as it’s more potent.
- 2 tablespoons chopped fresh parsley: Adds a vibrant touch.
- 1 teaspoon lemon zest: Don’t skip this—it brightens the dish!
- 1 clove garlic, minced: Fresh garlic is key for that aromatic kick.
- 1 tablespoon olive oil: Extra virgin will give you the best flavor.
- 1/2 teaspoon salt: Kosher salt is preferred for better control over seasoning.
- 1/4 teaspoon black pepper: Freshly ground pepper adds a hint of warmth.
- 1 tablespoon melted butter: For searing the chicken to perfection.
Prep Notes: Make sure your butter is at room temperature for easy mixing. When prepping chicken, consider letting it rest at room temperature for about 15 minutes before cooking—it helps with even cooking.
Step-by-Step Instructions
Preheat the Oven: Begin by preheating your oven to 375°F (190°C). This ensures that the chicken cooks evenly.
Prepare the Chicken: Take each chicken breast and slice it horizontally to create a pocket (don’t cut all the way through!). Use a meat mallet to pound them to an even thickness of about 1/2 inch. This helps ensure even cooking.
Prepare the Filling: In a medium bowl, combine ricotta cheese, Parmesan cheese, chopped basil, parsley, lemon zest, minced garlic, salt, and pepper. Mix until well blended—it should have a delightfully creamy texture.
Fill the Chicken: Spread the herbed ricotta mixture evenly onto each chicken breast, ensuring to leave some space at the edges.
Roll It Up: Carefully roll each breast tightly from one end to the other, then secure the rolls with toothpicks to hold in the filling.
Sear the Chicken: Heat olive oil and melted butter in an oven-safe skillet over medium-high heat. Once hot, sear the chicken rolls on all sides until golden brown—about 2 minutes per side. This step brings depth of flavor.
Bake the Chicken: Transfer the skillet to the preheated oven and bake for 20-25 minutes, or until the chicken is cooked through (internal temperature should reach 165°F).
Rest and Serve: Once done, remove from the oven, discard the toothpicks, and let the chicken rest for 5 minutes before slicing. This will keep the rolls juicy!
Chef’s Tip: Avoid the common mistake of skipping resting time; it’s crucial for juicy chicken!
Expert Tips & Tricks
Choosing Chicken: Go with a quality cut! Organic and free-range not only taste better but often have better nutrient profiles.
Storage Tips: Store leftovers in an airtight container in the refrigerator for up to 3 days. You can also freeze them before baking; just thaw overnight in the fridge before cooking.
Make-Ahead Instructions: You can assemble the chicken rolls a day in advance, just keep them covered in the fridge until you’re ready to bake.
Troubleshooting: If your filling spills out while cooking, it’s a sign you might need to secure the rolls tighter with toothpicks or twine.
Temperature Control: Use a meat thermometer to ensure perfect doneness without drying out the chicken—a must for all proteins!
Serving Suggestions
Wondering what to serve alongside your Herbed Ricotta Stuffed Chicken Rolls? A light arugula salad with a simple lemon vinaigrette complements the richness of the dish beautifully. For a heartier side, roasted seasonal vegetables drizzled with balsamic reduction pair perfectly, adding color and flavor to your plate. Finish with a glass of white wine for a lovely dining experience!
Variations & Substitutions
Feeling adventurous? Here are some exciting alternatives for your Herbed Ricotta Stuffed Chicken Rolls:
Flavor Combinations: Swap out the herbs for sun-dried tomatoes and feta for a Mediterranean twist. You can also add spinach for extra greens!
Dietary Adaptations: For gluten-free, make sure your chicken broth or stock is certified gluten-free, as some brands may contain gluten.
Seasonal Variations: In the fall, consider using pumpkin puree mixed with ricotta for a cozy autumn-inspired dish!
Nutrition & Storage Info
- Prep Time: 20 minutes
- Cook Time: 30 minutes
- Total Time: 50 minutes
- Yield: 4 servings
- Estimated Calories per Serving: 350 calories
Storage Instructions: Leftovers can be stored at room temperature for about two hours; refrigerate for up to 3 days. They can be frozen cooked for about 2 months.
FAQ Section
Can I use frozen chicken breasts?
Absolutely! Just make sure to fully thaw them before preparing.Can I bake these rolls instead of pan-searing?
Yes, preheat the oven to 375°F and bake directly without searing, but the texture will be less crispy.How do I know when my chicken is done?
Use a meat thermometer; the internal temperature should reach 165°F.Is there a good substitution for ricotta?
Cream cheese or cottage cheese can work in a pinch!How can I make this dish dairy-free?
Substitute the cheeses with vegan cheese, and ensure to check other ingredient labels as well!What sides do you recommend?
Pair with a fresh salad or roasted vegetables for a balanced meal.Can these be grilled instead?
Definitely! Just ensure the rolls are secure and use indirect heat.How long will the leftovers last?
In the fridge, they last about 3 days, and in the freezer, up to 2 months.Can I add more veggies to the filling?
Yes, feel free to incorporate sautéed spinach or mushrooms for added flavor.Is this recipe kid-friendly?
Absolutely! Kids love the cheesy filling, and you can adjust the herbs to their liking!
Conclusion
There you have it! My crowd-pleasing Herbed Ricotta Stuffed Chicken Rolls that blend nostalgia with modern flavor. They’re perfect for impressing guests or enjoying a comforting family meal. I can’t wait for you to try this out—when you do, leave me a comment to share how they turned out! And don’t forget to check out some of my other family favorite recipes on the blog—let’s keep the cooking memories alive!
20. Teriyaki Pineapple Chicken and Rice Stuffed Peppers
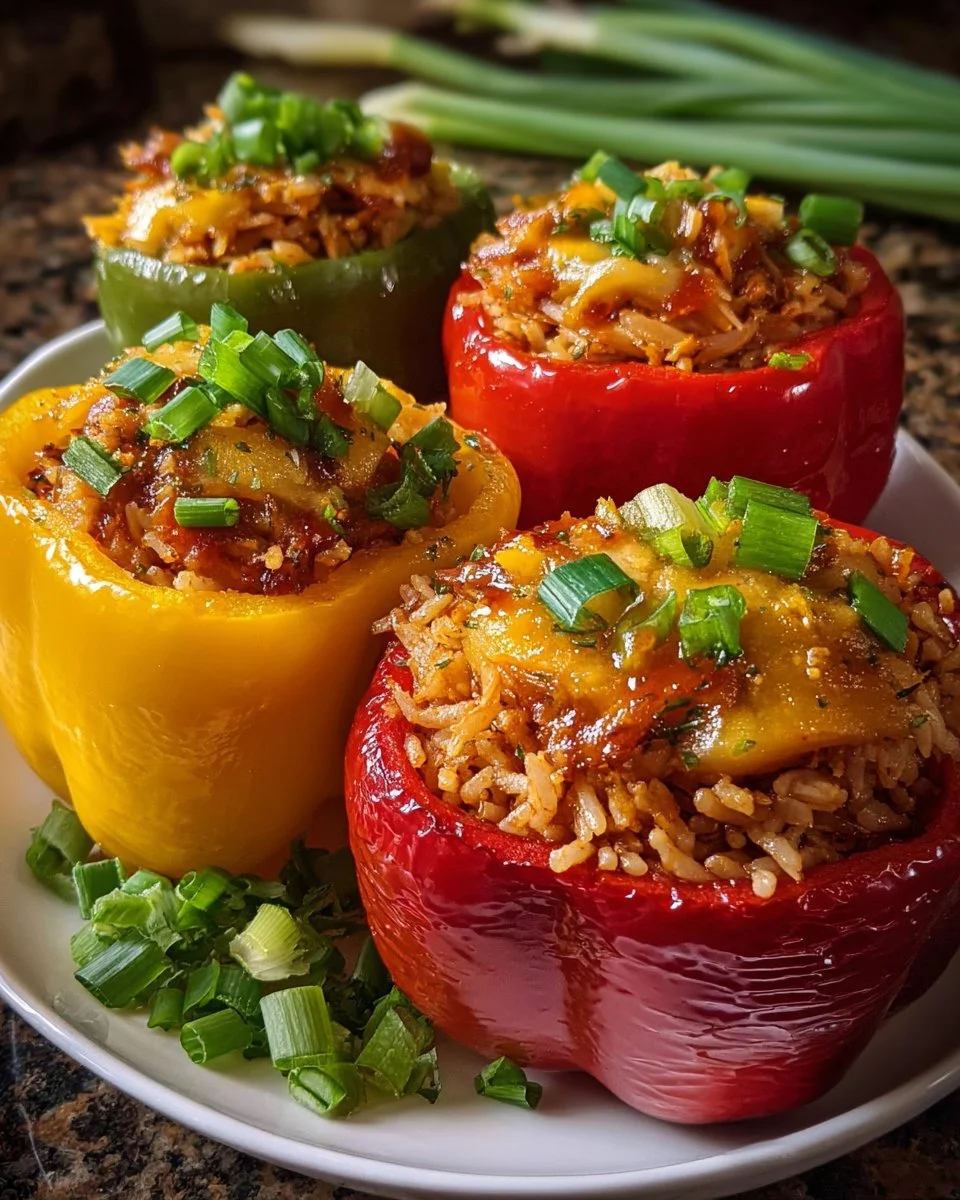
Savory Teriyaki Pineapple Chicken and Rice Stuffed Peppers: An Island Escape on Your Plate
Imagine walking into your kitchen after a long day, the aroma of savory teriyaki wafting through the air, mingled with the sweet scent of fresh pineapple. That’s the magic of Teriyaki Pineapple Chicken and Rice Stuffed Peppers. This isn’t just another dinner recipe; it’s a nostalgic escape to the family gatherings of my childhood, where love was served not only on plates but also in moments captured around the dining table.
Whether you’re looking to impress your family or simply satisfy your cravings, these stuffed peppers have you covered. They’re loaded with tender chicken, vibrant vegetables, and juicy pineapple, all enveloped in the comforting embrace of a cheesy topping. What sets these stuffed peppers apart from others is the balance of sweet and savory flavors that dance together harmoniously. Not to mention, this heartwarming meal is easy on the budget and offers a customizable recipe for every palate.
So, if you’re ready to bring a little sunshine to your dinner plate, allow me to guide you through this delightful culinary adventure! You’ll learn how to whip up these flavorful gems that promise to elevate your family meal times and create sweet memories along the way.
What Are Teriyaki Pineapple Chicken and Rice Stuffed Peppers?
Originating from the soaring, tropical atmosphere of Hawaiian cuisine, Teriyaki Pineapple Chicken and Rice Stuffed Peppers combine fresh island flavors into a comforting and nutritious meal. The taste is a delightful blend of sweet and salty, with juicy chicken mingling with tender rice, succulent pineapple chunks, and a rich teriyaki sauce all nestled inside vibrant bell peppers. It’s a texture lover’s dream—tender yet slightly crunchy, creamy from the cheese, and with an explosion of flavors in every bite.
These stuffed peppers are a fantastic choice for any occasion, be it a cozy family dinner, a gathering of friends, or uncomplicated meal prep for the week ahead. They’re adaptable too, allowing you to showcase whatever fresh veggies you have on hand. Always flavorful and bursting with life, these still manage to feel like a warm hug on a plate.
Why You’ll Love This Recipe
Flavor Explosion: Unlike many store-bought alternatives that tend to lack flavor, these Teriyaki Pineapple Chicken and Rice Stuffed Peppers are loaded with vibrant flavors. Each ingredient works together, and your taste buds will be singing with joy as you bite into the tender chicken and sweet pineapple.
Cost-Effectiveness: You’ll find that creating this dish at home is not only delicious but budget-friendly. Think about the savings compared to a night out at a restaurant—your wallet will thank you.
Customization Abound: Maybe you’re a fan of extra spice or prefer it mild? You can easily tweak the recipe to fit the taste buds of everyone at your table. Throw in some jalapeños for a kick or opt for a vegetarian twist using beans and quinoa instead of chicken.
Easy to Prepare: As a busy home cook, you’ll appreciate that this recipe is straightforward. The majority of the work is in prepping your ingredients, and cooking time is a speedy 25-30 minutes.
Store for Later: Make more than you need and save some for later! These stuffed peppers store beautifully and make for a delicious reheat-and-eat lunch.
Ingredients

4 medium bell peppers: Opt for vibrant colors like red, yellow, or orange for a beautiful presentation. They should feel firm and free of blemishes.
1 cup cooked white rice: Use leftover rice if you have it. For better flavor, consider using jasmine or basmati rice.
1 cup pineapple chunks: Fresh is best for maximum juiciness; however, canned pineapple can work in a pinch (just drain it well).
2 tablespoons vegetable oil: For sautéing; can use olive oil or coconut oil for a twist.
1 pound boneless skinless chicken breast: Tender chicken thighs also work well if you prefer more richness in flavor.
1/2 cup teriyaki sauce: Homemade or store-bought—the latter is time-saving, but check for lower sodium options.
2 cloves garlic, minced: Fresh garlic adds a punch; jarred minced garlic is acceptable if you’re short on time.
1 teaspoon fresh ginger, grated: A little fresh ginger goes a long way in enhancing the authenticity of flavors.
1/4 cup chopped green onions: The green tops give a nice freshness and a pop of color.
1/2 cup shredded cheese: I love using a mix of mozzarella and cheddar for creaminess and flavor.
Salt and pepper to taste: Always use to enhance flavor!
Preparation Notes: Ensure chicken is at room temperature before cooking for even browning.
Step-by-Step Instructions
Preheat oven to 375°F (190°C): Preheating ensures an evenly cooked dish and allows cheese to melt beautifully.
Prepare the bell peppers: Slice the tops off each pepper and remove their seeds and membranes carefully. Keep the tops to use as a garnish if desired. Set them aside.
Cook the chicken: In a skillet, heat the vegetable oil over medium heat. Dice your chicken breast into bite-sized pieces and add to the skillet. Cook, stirring occasionally, for about 7-8 minutes or until no longer pink.
Incorporate the flavors: Add in the minced garlic, grated ginger, pineapple chunks, and teriyaki sauce. Stir and cook for an additional 3 minutes, allowing those lovely flavors to meld.
Mix in rice and green onions: Stir in the cooked rice and chopped green onions. Season with salt and pepper to your liking. Taste and adjust seasoning if necessary.
Stuff the peppers: Generously spoon the chicken-rice mixture into each bell pepper, pressing down slightly to ensure they’re filled. Top each one with shredded cheese.
Bake: Place the stuffed peppers upright in a baking dish—if they don’t want to stand, a little trick is to slice a tiny bit off the bottom to give them stability. Bake for about 20-25 minutes until the peppers are tender and the cheese is bubbly and melted.
Chef’s Tip: Watch the cheese carefully at the end to prevent over-browning, and consider covering the dish with foil in the last few minutes if needed.
Expert Tips & Tricks
Quality Ingredients: Fresh, high-quality ingredients make a noticeable difference. Don’t skimp on your cheese or chicken.
Make Ahead: Prep the filling a day ahead, and simply stuff the peppers right before baking. Great for meal prep!
Storage: Leftovers can be refrigerated in an airtight container for up to 3-4 days. They also freeze well; just thaw overnight in the fridge before reheating.
Troubleshooting: If the peppers are still firm after baking, leave them in for a little longer until they reach the desired tenderness.
Reheating: When reheating, consider using the oven as it helps to keep the texture intact compared to microwaving. Cover with foil to prevent drying out.
Serve with Style: Garnish with freshly chopped herbs or additional green onions for a beautiful presentation.
Serving Suggestions
Pair your Teriyaki Pineapple Chicken and Rice Stuffed Peppers with a crisp green salad or creamy coleslaw for a refreshing contrast. A side of steamed broccoli or some crunchy Asian-style vegetable spring rolls would also work wonders, offering a variety of textures. For a delightful presentation, consider arranging the stuffed peppers on a vibrant platter with edible flowers or fresh herbs scattered around.
This dish is versatile for any casual occasion, but I especially love it for family gatherings when everyone can customize their pepper to their liking.
Variations & Substitutions
Vegetarian Delight: Swap chicken for black beans, quinoa, or lentils. Add extra diced vegetables such as zucchini, mushrooms, or corn for added nutrition.
Flavor Twists: Try using different sauces! Swap teriyaki for hoisin sauce, or create a spicy kick with sriracha mixed into the stuffing.
Seasonal Adjustments: During autumn, add cooked butternut squash or sweet potatoes for a seasonal flair.
Nutrition & Storage Info
- Prep Time: 15 minutes
- Cook Time: 25-30 minutes
- Total Time: 45 minutes
- Yield: Serves 4
- Estimated Calories: Approx. 350 calories per serving.
Storage Instructions: Leftovers should be stored in the fridge for 3-4 days or can be frozen for up to 2 months. Reheat at 375°F (190°C) until warmed thoroughly.
FAQ Section
Can I make these stuffed peppers vegetarian?
Yes! Substitute the chicken with your favorite vegetables, beans, or a blend of grains.How can I store leftover stuffed peppers?
Keep them in an airtight container in the fridge for up to 4 days or freeze them for longer storage.Can I use other types of rice?
Absolutely! Brown rice or even cauliflower rice work well, though keep in mind cooking times will vary.What if my peppers aren’t tender after baking?
Simply give them a few more minutes in the oven until they reach your preferred level of tenderness.Can I prep these ahead of time?
Yes, you can prepare the filling and stuff the peppers a day in advance and bake them before serving.What can I serve on the side?
A light salad, steamed veggies, or even some simple garlic bread pair nicely.Can I use frozen chicken?
For best results and safety, we recommend using thawed chicken.Can I double the recipe?
Yes! Just ensure you have a sufficiently large baking dish, or bake in batches.Is there a gluten-free option for the sauce?
Yes, look for gluten-free teriyaki sauce or make your own with tamari.What’s the best way to reheat these?
Oven reheating maintains texture. Cover with foil until warmed through.
Conclusion
Teriyaki Pineapple Chicken and Rice Stuffed Peppers are far more than just a delicious meal; they are a feast for the senses, a comfort food that warms the heart, and a wonderful way to connect through food. I encourage you to give this recipe a try; I promise it will quickly become a household favorite.
Please share your thoughts, experiences, and any modifications you made in the comments. I’d love to hear how these stuffed peppers worked for you! And don’t miss out on exploring other flavorful recipes on the blog to keep your culinary adventures going strong!
21. Spicy Yogurt Marinated Chicken with Crispy Baby Potatoes and Dill Feta Cream
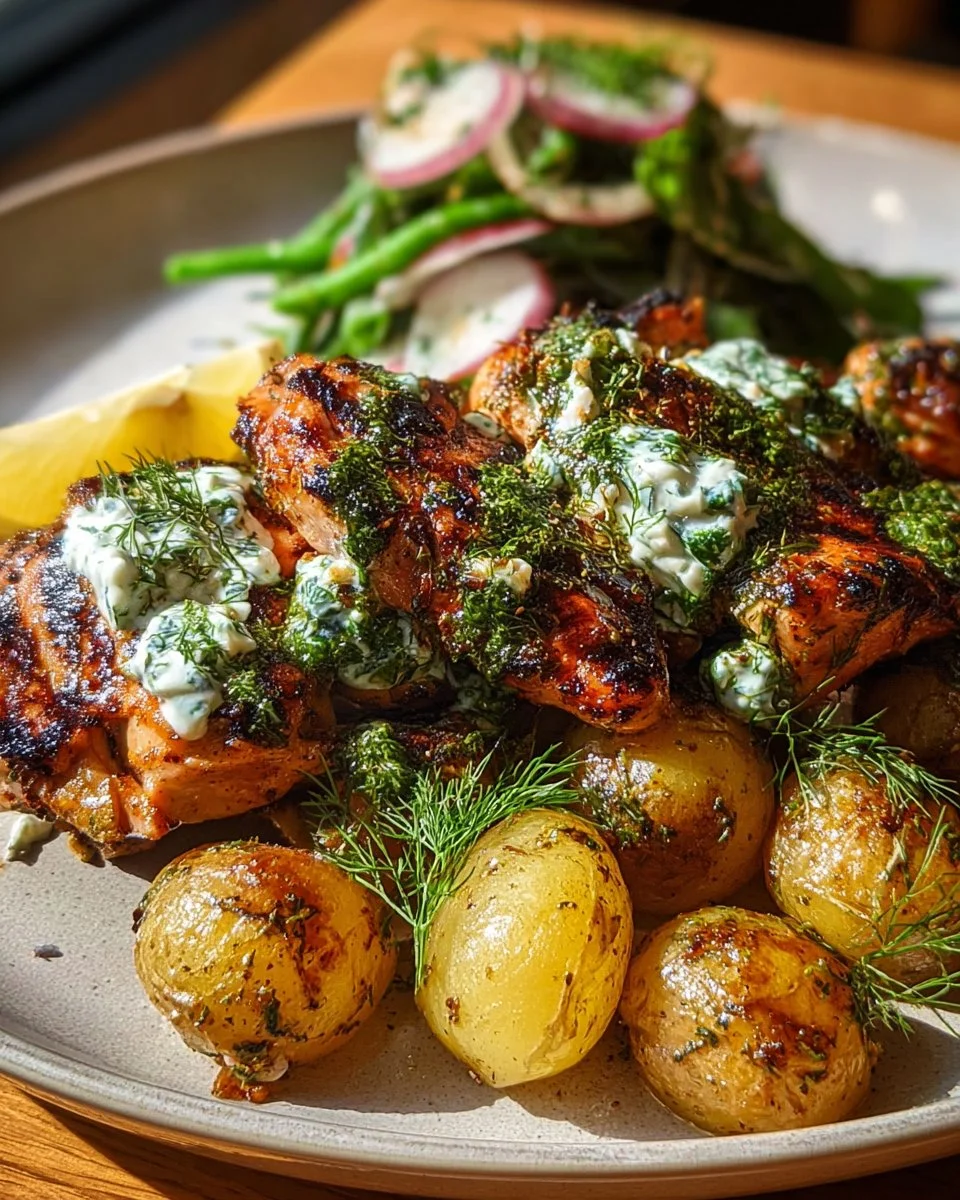
Spicy Yogurt Marinated Chicken with Dill Feta Cream & Crispy Baby Potatoes: A Flavorful Family Favorite
If you’ve ever had one of those days where comfort food calls your name like an old friend, then let me tell you about one of my all-time favorite dishes: Spicy Yogurt Marinated Chicken with Dill Feta Cream & Crispy Baby Potatoes. This recipe doesn’t just pack a flavor punch; it’s filled with the warmth of family gatherings and the tantalizing scents that waft through the kitchen, pulling everyone together.
I remember my first attempt at making this dish. My kitchen transformed into a mini Greek taverna, and as the chicken marinated in a creamy, zesty yogurt mix, I couldn’t resist sneaking a taste of that dill feta cream. It was pure bliss! What sets this recipe apart from others is that it’s not only delicious but incredibly easy to prepare. The marinade tenderizes the chicken while the crispy baby potatoes offer the perfect crunch alongside the creamy texture of the dill feta sauce.
I’ll walk you through every step, sharing tips and tricks so you can impress your family with a dish that’ll have them asking for seconds (and third helpings!). The stage is set for culinary magic in your kitchen—let’s get started!
What Are Spicy Yogurt Marinated Chicken with Dill Feta Cream & Crispy Baby Potatoes?
This delightful dish marries tender chicken with a tangy yogurt marinade, inspired by Middle Eastern flavors. Traditionally, yogurt-based marinades are used to break down the proteins in meat, making it delightfully succulent. The addition of spices like paprika, cumin, and cayenne creates a bold flavor profile, while the dill feta cream adds a refreshing and creamy finish.
You’ll love how the chicken develops a slightly charred crust, locking in moisture, while the baby potatoes become crispy golden treasures. You can make this dish any day of the week or save it for a special occasion, as it beautifully balances effort and reward. Whether you’re hosting a weekend barbecue or having a cozy dinner at home, this recipe is your ticket to culinary applause!
Why You’ll Love This Recipe
Flavor Explosion: The marinade is a flavor bomb with the perfect blend of spices, resulting in chicken that’s succulent and bursting with vibrant tastes.
Cost-Effective: Cooking at home means you can enjoy restaurant-quality dishes without breaking the bank. With simple ingredients, this dish offers great value.
Customization: Want to amp up the spice? Add more cayenne or load on fresh herbs. Prefer a milder version? Simply adjust the spices to your taste.
Easy to Make: With a short active time of just about 15 minutes (plus marinating), this recipe fits perfectly into a busy lifestyle. It’s simple enough for a weeknight yet impressive enough for guests!
Healthy Ingredients: Packed with protein from the chicken and probiotics from the yogurt, this meal is a healthy option compared to many takeout choices.

Ingredients Section
Here’s what you need to make Spicy Yogurt Marinated Chicken with Dill Feta Cream & Crispy Baby Potatoes shine:
For the Chicken Marinade:
- 1 cup plain yogurt (preferably full-fat for creaminess)
- 4 boneless skinless chicken breasts
- 1 tbsp lemon juice (freshly squeezed for the best flavor)
- 2 cloves garlic, minced (use fresh for maximum aroma)
- 1 tbsp paprika
- 1 tsp cayenne pepper
- 1 tsp ground cumin
- 1 tsp ground coriander
- 1 tsp salt
- 1/2 tsp black pepper
- 2 tbsp olive oil (extra virgin recommended for flavor)
For the Baby Potatoes:
- 1 lb baby potatoes, halved (look for firm, smooth-skinned ones)
- 2 tbsp olive oil (extra virgin for a rich taste)
- Salt and black pepper to taste
For the Dill Feta Cream:
- 1/2 cup Greek yogurt (thick and creamy, for amazing texture)
- 1/2 cup crumbled feta cheese (the tangy flavor is key)
- 2 tbsp fresh dill, chopped (dill is the star here)
- 1 tbsp lemon juice (freshly squeezed)
- 1 clove garlic, minced
- Salt and black pepper to taste
Prep Notes: Always let the yogurt and feta come to room temperature for the best results. Fresh herbs elevate the dish, so if you can, use fresh dill instead of dried.
Step-by-Step Instructions
1. Marinate the Chicken:
- In a large bowl, whisk together 1 cup plain yogurt, 1 tbsp lemon juice, 2 minced garlic cloves, 1 tbsp paprika, 1 tsp cayenne pepper, 1 tsp ground cumin, 1 tsp ground coriander, 1 tsp salt, 1/2 tsp black pepper, and 2 tbsp olive oil until smooth.
- Add the 4 boneless skinless chicken breasts to the bowl and turn to coat evenly in the yogurt mixture. Cover the bowl with plastic wrap and refrigerate for at least 30 minutes or up to overnight for maximum flavor.
2. Prepare the Potatoes:
- Preheat your oven to 425°F (220°C).
- Wash and halve 1 lb baby potatoes, and toss them in a bowl with 2 tbsp olive oil, salt, and black pepper. Spread the potatoes cut side down on a baking sheet lined with parchment paper.
- Roast for about 20 to 25 minutes until they are golden and crispy.
3. Cook the Chicken:
- While the potatoes are roasting, heat a large skillet over medium-high heat. Carefully remove the chicken from the marinade, shaking off any excess.
- Cook each piece for about 6 to 7 minutes per side, or until golden brown and the internal temperature reaches 165°F (75°C). Transfer the cooked chicken to a plate and let it rest for 5 minutes.
4. Make the Dill Feta Cream:
- In a small mixing bowl, combine 1/2 cup Greek yogurt, 1/2 cup crumbled feta, 2 tbsp chopped fresh dill, 1 tbsp lemon juice, and 1 minced garlic clove. Mix until well combined, then season with salt and pepper to taste.
5. Serve:
- Slice the chicken into strips and serve alongside the crispy potatoes, dolloping the dill feta cream generously on top. Savor every bite!
Chef’s Tips: Letting the chicken rest before slicing helps retain its juices. Also, don’t skip the resting step for the potatoes—they’ll stay crispy if allowed to cool slightly after roasting.
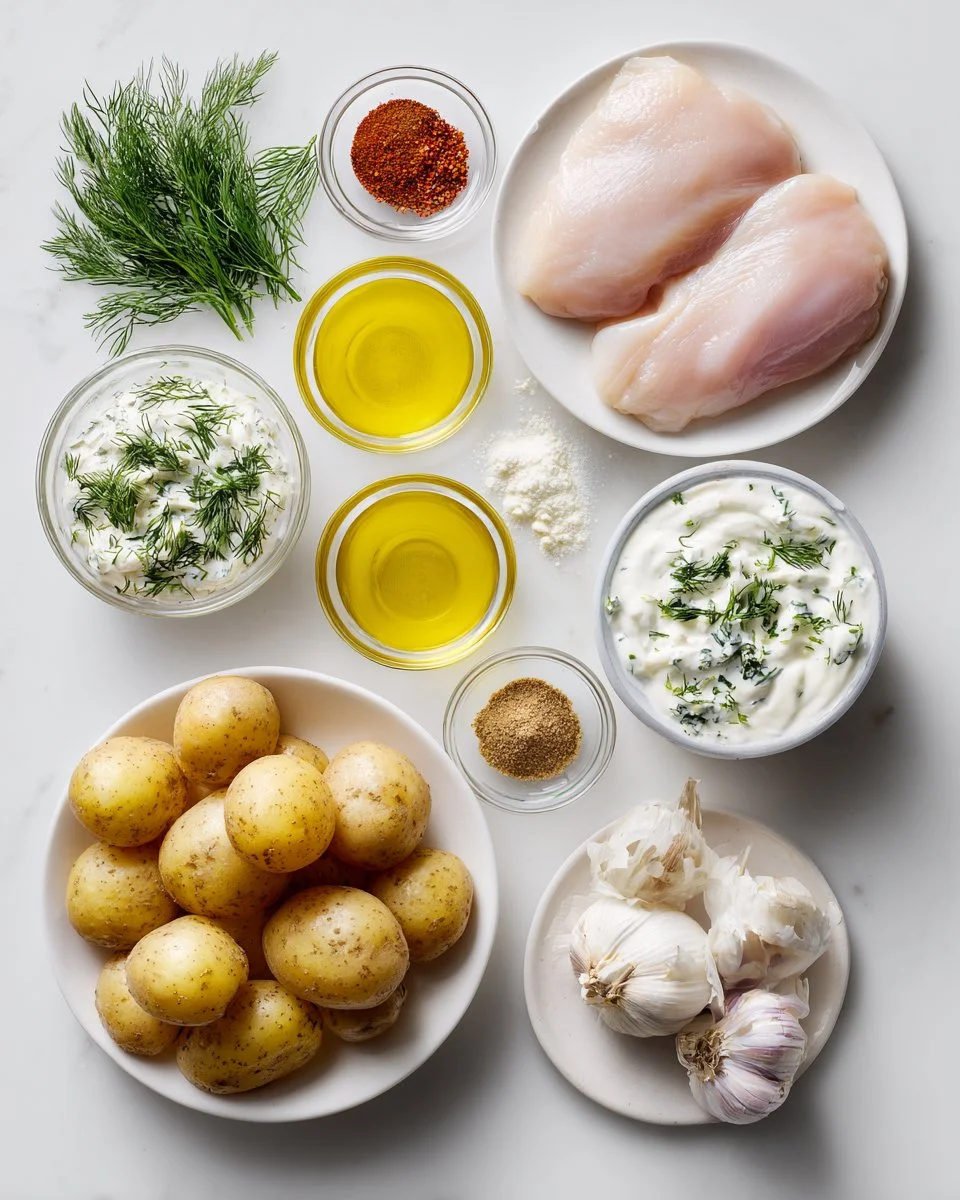
Expert Tips & Tricks
Ingredient Quality: Fresh, high-quality ingredients make all the difference. Opt for organic chicken and local dairies for yogurt and feta.
Storage: Leftovers can be stored in an airtight container in the fridge for up to 3 days. Reheat gently in the microwave or in a skillet on low.
Make-Ahead: The chicken can marinate overnight, and you can prepare the dill feta cream in advance. Just give it a good stir before serving.
Troubleshooting: If your potatoes don’t crisp up, make sure they’re not overcrowded on the baking sheet and that the oven is preheated.
Grilling Option: If the weather’s nice, grill the marinated chicken for extra smoky flavor. You won’t regret it!
Serving Suggestions
This dish is quite versatile! Serve it with a fresh green salad drizzled with a light vinaigrette or some grilled vegetables for a colorful plate. As for presentation, consider stacking the chicken and potatoes for a tower of deliciousness topped with a generous scoop of dill feta cream. This dish is perfect for summer BBQs, cozy family dinners, or even a gathering with friends.
Variations & Substitutions
Herb Variations: Instead of dill, try fresh mint or parsley for a different flavor twist.
Spicy Variants: If you love heat, add sliced jalapeños to the marinade or serve with a spicy yogurt sauce on the side.
Potato Alternatives: Substitute baby potatoes for sweet potatoes or even roasted cauliflower for a low-carb option.
Dietary Needs: This recipe is incredibly adaptable; make it dairy-free by using coconut yogurt and a vegan feta option.
Nutrition & Storage Info
- Prep Time: 15 minutes (plus marinating)
- Cook Time: 30 minutes
- Total Time: 45 minutes (plus marinating)
- Yield: Serves 4
- Estimated Calories: Approximately 400 calories per serving.
Storage Instructions:
- Room Temperature: Cooked chicken should not be left out longer than 2 hours.
- Fridge: Store leftovers in an airtight container for up to 3 days.
- Freezer: Not recommended for freezing once cooked. The texture may change.
FAQ Section
Can I use chicken thighs instead of breasts?
Yes, chicken thighs can be juicier! Just adjust cooking time accordingly.Can I make the dill feta cream ahead of time?
Definitely! Just store it in the fridge until you’re ready to serve.What can I serve this dish with?
Pair it with a light salad, grilled veggies, or crusty bread to soak up the feta cream.Is this recipe spicy?
The spice level can be adjusted depending on how much cayenne you add!How do I know when the chicken is done?
Use an instant-read thermometer to ensure the internal temperature is 165°F (75°C).Can I grill the chicken instead of pan-frying?
Yes! Grilling adds a great smoky flavor, just marinate and throw it on the grill.What’s the best way to store leftovers?
Keep leftovers in an airtight container in the fridge for up to 3 days.Can I substitute Greek yogurt?
Yes, any thick yogurt will work, though Greek yogurt gives the creamiest texture.What’s the best type of feta to use?
Go for a Greek feta for the best flavor, but any crumbly feta will work.Is this meal kid-friendly?
Absolutely! Kids usually love the creamy dill sauce and crispy potatoes.
Conclusion
The Spicy Yogurt Marinated Chicken with Dill Feta Cream & Crispy Baby Potatoes is more than just a meal—it’s an experience filled with flavor and warmth, perfect for gathering around the dinner table with family or friends. I truly hope you give this recipe a try; I’d love to hear how it turned out for you! If you’re searching for more culinary inspiration, be sure to check out my other recipes on the blog that will elevate your home cooking game.
Remember, cooking is about love and sharing. Enjoy!
22. Chicken Sausage & Broccoli Orzo
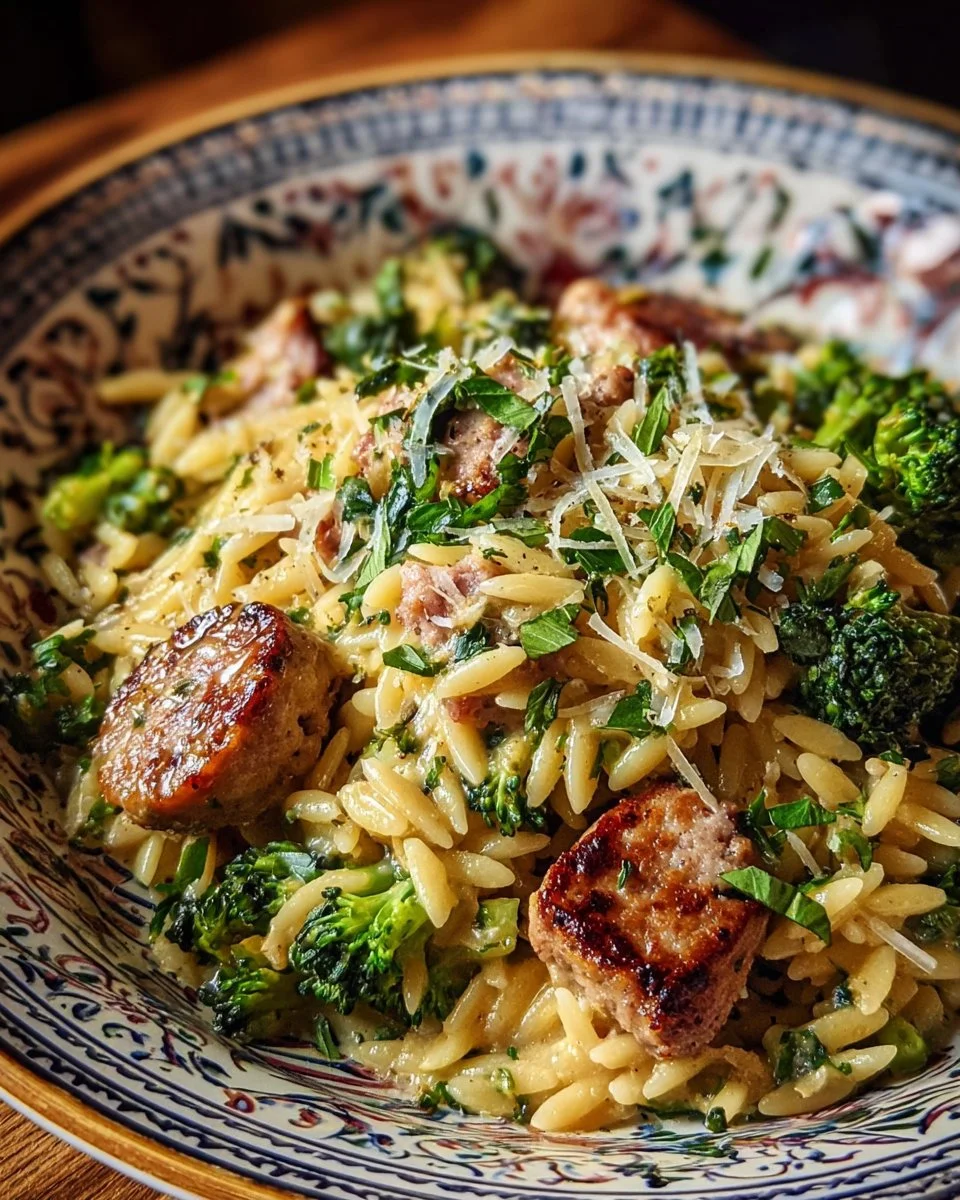
Creamy One-Pot Chicken Sausage & Broccoli Orzo: Your New Favorite Dinner Delight
Picture this: It’s a chilly evening, the kind that nudges you to seek warmth not just from a cozy sweater but from a heartwarming bowl of comfort food. I remember those nights growing up when my mom would whip up her creamy chicken orzo dish, filling our home with the tantalizing aroma of garlic and herbs. Today, I’m thrilled to share a deliciously updated version of that classic comfort—my Creamy One-Pot Chicken Sausage & Broccoli Orzo.
This recipe holds a special place in my heart, not only for its nostalgic essence but also because it combines simplicity with layers of flavor. Unlike other orzo recipes that often involve multiple pots and pans (who has time for that?), this one-pot wonder makes clean-up a breeze while still delivering a creamy, savory meal that feels fancy without the fuss.
As you dive into this recipe, you’ll gain not just step-by-step guidance but also insights on customizing it to suit your family’s taste. Trust me; once you try it, this dish will likely become your go-to weeknight meal filled with cherished memories, smiles, and satisfied bellies.
What Are Creamy One-Pot Chicken Sausage & Broccoli Orzo?
Creamy One-Pot Chicken Sausage & Broccoli Orzo is a delightful dish that encapsulates all the comforting aspects of home cooking. Drawing inspiration from traditional Italian cuisine, this recipe features tender orzo pasta, succulent chicken sausage, and vibrant broccoli—all simmered together in a rich and creamy sauce that binds them in harmony.
The creamy texture, paired with the slight chew of the orzo and the crisp-tender broccoli, creates a balanced bite that’s both satisfying and nourishing. What truly makes this dish unique is the infusion of savory chicken sausage, which adds depth and flavor without needing excessive seasoning.
This is your perfect go-to when you want to whip up something nutritious and delicious at the end of a long day or host a simple gathering with friends. You can enjoy this dish any day of the week; it shines during family dinners and holiday gatherings alike, offering warmth and comfort in every spoonful.
Why You’ll Love This Recipe
One-Pot Convenience: Who loves washing dishes? Not me! This recipe minimizes clean-up time, which means more time for binge-watching your favorite show or hanging out with family.
Cost-Effective: Let’s face it, eating out can add up quickly! This creamy orzo dish comes in at a fraction of the cost of takeout, but the flavor will make you feel like you’re dining in a fancy restaurant.
Easy Customization: Whether you’re looking to spice things up with some red pepper flakes or throwing in a handful of spinach for extra nutrition, this dish adapts effortlessly to your taste and pantry needs.
Quick and Simple: In just about 30 minutes, you can serve a homemade meal that has both elegance and heartiness. This guarantees that you can please even the pickiest eaters without the stress of complicated cooking methods.
Family Greatness: This dish is a crowd-pleaser, perfect for family dinners! I’ve had countless happy faces around my table—proving that this creamy goodness shakes things up from the usual pasta night!
With this recipe, you’ll learn how to create a comforting meal that warms both body and soul, and when you take your first bite, you’ll understand just why I love it so much!

Ingredients
- 1 tablespoon olive oil (extra virgin for flavor)
- 12 ounces chicken sausage, sliced (look for brands without fillers, like Applegate for the best quality)
- 1 small onion, diced (sweet onions work beautifully)
- 2 cloves garlic, minced (fresh garlic is key)
- 1 cup orzo (a small pasta that cooks quickly)
- 2 cups chicken broth (homemade makes this even better; or use low-sodium options)
- 1 cup milk (whole milk provides creaminess, but you can substitute with almond or oat milk)
- 2 cups broccoli florets (fresh is best, but frozen can work in a pinch)
- 1/2 cup grated Parmesan cheese (use freshly grated for a creamier finish)
- 1/2 teaspoon salt (or to taste)
- 1/4 teaspoon black pepper (freshly ground elevates the flavor)
Prep Notes: Make sure ingredients like chicken broth and milk are at room temperature for better incorporation.
Step-by-Step Instructions
Heat the Oil: Heat 1 tablespoon of olive oil in a large pot over medium heat. Watch closely—it should shimmer, but not smoke!
Brown the Sausage: Add the 12 ounces of sliced chicken sausage and cook for about 5-7 minutes until browned. Stir occasionally to achieve even cooking and let those flavors develop.
Sauté Aromatics: Stir in the 1 small diced onion and 2 cloves of minced garlic. Cook for another 2 minutes, until you can truly smell that delightful aroma wafting through your kitchen.
Add Orzo & Liquids: Toss in 1 cup of orzo, followed by 2 cups of chicken broth and 1 cup of milk. Bring to a gentle simmer, making sure to stir continuously to prevent sticking.
Simmer: Once simmering, cover the pot and let it cook for about 8-10 minutes, stirring occasionally. You’ll know it’s close when the orzo has absorbed most of the liquid.
Add Broccoli & Cheese: Uncover and add the 2 cups of broccoli florets and 1/2 cup grated Parmesan cheese. Stir until the cheese is melted and the broccoli is bright green and tender, about 3-4 minutes.
Season & Serve: Finally, season with 1/2 teaspoon of salt and 1/4 teaspoon of black pepper. Mix to combine and serve immediately, garnishing with extra Parmesan or chopped parsley for that burst of freshness.
Chef’s Tip: Make sure to frequently stir the pot while the orzo cooks to avoid it sticking to the bottom!
Expert Tips & Tricks
Storage: You can store leftovers in an airtight container in the fridge for up to 3 days. Reheat gently on the stove with a splash of milk to bring back the creaminess.
Make-Ahead: Prepping the sausage and chopping the veggies earlier in the day can save you time when it’s dinner time.
Troubleshooting: If your dish turns out too thick, simply add a little more chicken broth or milk to loosen it up during reheating.
Adjust flavors: If you’re looking for more flavor, consider adding a squeeze of fresh lemon juice before serving or fresh herbs like basil or parsley for a boost.
Serving Suggestions
Serve your Creamy One-Pot Chicken Sausage & Broccoli Orzo alongside a crisp side salad or crunchy garlic bread for a fully rounded meal. Presentation is key—dressing up your plate with a sprinkle of parsley and a dash of extra Parmesan can elevate even the simplest dish to restaurant-worthy; don’t forget to impress your guests!
Variations & Substitutions
Vegetarian Option: Swap out chicken sausage for plant-based sausage or mushrooms for a hearty alternative. Adding extra veggies like bell peppers or carrots can give it a vibrant twist.
Different Flavors: Consider adding sun-dried tomatoes, spinach, or even a bit of smoked paprika for a unique flavor profile. Feel free to experiment!
Seasonal Variations: In winter, you could add in some roasted butternut squash, while in summer, consider fresh corn or zucchini for a lighter, refreshing touch.
Nutrition & Storage Info
- Prep Time: 10 minutes
- Cook Time: 20 minutes
- Total Time: 30 minutes
- Yield: Serves 4
- Estimated Calories: 450 calories per serving
- Storage Instructions:
- Room Temperature: Do not leave out for long.
- Fridge: Up to 3 days in an airtight container.
- Freezer: Should be consumed within 2 months for the best taste.
FAQ Section
Can I use another type of pasta?
Yes! You can use any small pasta shape you prefer, such as cavatappi or small shells. Adjust cooking times as needed.What can I use instead of chicken sausage?
Feel free to use turkey sausage, or for a vegetarian option, try plant-based sausage or roasted chickpeas.How can I make this dairy-free?
Simply swap out the milk for a dairy-free alternative and omit the Parmesan cheese or use a plant-based version.Can I freeze leftovers?
Absolutely! Just ensure you store them in a suitable airtight container, and consume within two months.Is this recipe spicy?
No, but you can add red pepper flakes if you like a little heat!What if I don’t have fresh broccoli?
Frozen broccoli florets work perfectly; just adjust the cooking time accordingly.Can I add another vegetable?
Definitely! Feel free to include other vegetables like peas, spinach, or carrots for a fun twist.Is this suitable for meal prep?
Yes! It’s a great meal prep option, just store it in serving-sized containers for easy reheating.What’s the best way to reheat it?
Reheat on the stovetop with a splash of broth or milk, stirring frequently to prevent sticking.What’s the texture supposed to be like?
The dish should be creamy with well-cooked orzo and tender broccoli.
Conclusion
So there you have it—the magic of Creamy One-Pot Chicken Sausage & Broccoli Orzo! It’s not just another dinner option; it’s a warm embrace in a bowl, providing all the comforts of home. I encourage you to try it, tweak it to your liking, and witness how it can effortlessly become a staple your family adores.
I would love to hear about your experiences with this recipe! Don’t forget to leave your thoughts in the comments and check out more delightful recipes on my blog to keep the culinary inspiration flowing. Happy cooking!
23. Sticky Chicken Poke Bowls
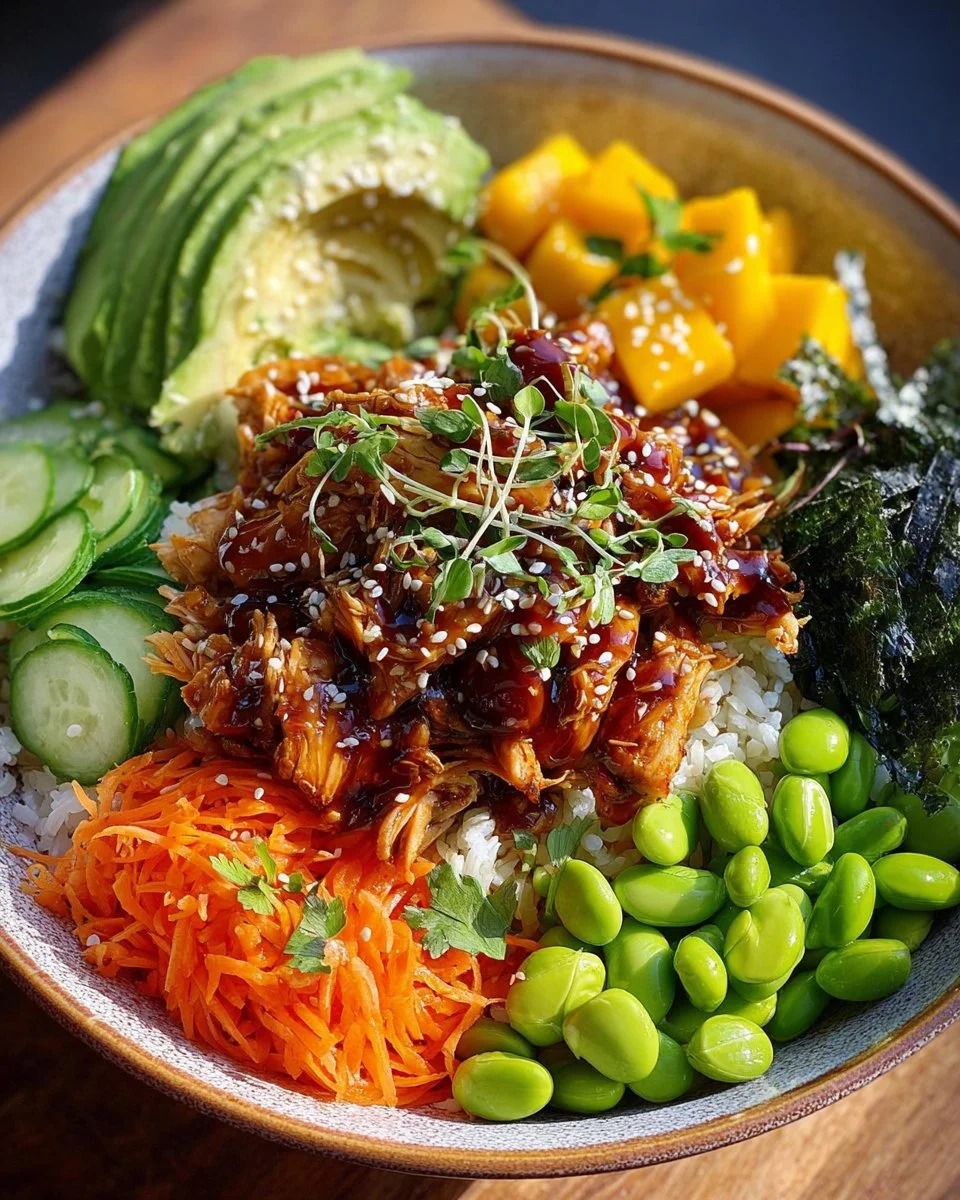
Irresistibly Sticky Chicken Poke Bowls: A Flavorful Journey
As I rolled up my sleeves in the kitchen one lazy Saturday afternoon, chaos erupted in my household. My kids were bouncing off the walls, begging for something quick and delicious to eat. That’s when I thought of my go-to comfort food: Sticky Chicken Poke Bowls. These vibrant, flavor-packed bowls not only satisfy hunger but bring everyone to the table, laughter echoing as we dig in. With juicy, sticky chicken atop a base of fluffy sushi rice and a rainbow of crisp veggies, these bowls are a sensory delight.
What makes my Sticky Chicken Poke Bowls truly special is the combination of sweet, savory, and tangy flavors harmonizing in every bite. Unlike takeout versions that can be heavy or overly salty, my homemade bowls allow for a delicate balance, offering endless customization and wholesome ingredients, all at a fraction of the cost.
This recipe holds a special place in my heart, not just for its incredible flavors, but for the memories it creates—a simple meal that sparks joy and togetherness. So roll up your sleeves and join me as we explore how to make these unforgettable Sticky Chicken Poke Bowls, ensuring your family will request them again and again!
What Are Sticky Chicken Poke Bowls?
Originating from the Hawaiian Islands, poke bowls have made their way into kitchens everywhere as a refreshing, satisfying meal option. The term “poke” means "to slice or cut," typically referring to the raw fish often found in traditional poke bowls. However, my version swivels away from tradition, replacing fish with beautifully marinated and cooked chicken that becomes tender and sticky, thanks to a scrumptious marinade.
The texture of these Sticky Chicken Poke Bowls is truly magical—the sticky chicken glides over a mound of velvety sushi rice, while fresh, crisp vegetables offer a perfect crunch. And the explosion of flavors? Each bite combines the sweetness of honey, the umami of soy sauce, and a hint of spice from sriracha, delivering an experience that’s both comforting and exciting.
Make these bowls during busy weeknights or for a fun weekend meal; they’re perfect for family dinners, meal preps, or even casual gatherings with friends!
Why You’ll Love This Recipe
Here are just a few reasons you’ll fall head over heels for my Sticky Chicken Poke Bowls:
Quick and Easy: With minimal prep and cooking time, you can whip up these healthy bowls in under 30 minutes! It’s the ideal weeknight dinner or last-minute gathering option.
Cost-Effective: Why splurge on takeout when you can create a restaurant-quality poke bowl at home? The cost of fresh ingredients is far less than dining out, and you’re left with generous servings for the whole family!
Ultimate Customization: One of the best parts about this recipe is that it’s fully adaptable. Feel free to swap the veggies according to your preferences or what’s in season! Want more crunch? Toss in some radishes. Prefer different protein? Try shrimp or tofu with the same marinade.
Health-Conscious: Packed with colorful vegetables, protein, and fiber, these bowls are a great way to sneak in your daily nutrients without sacrificing flavor.
Impressive Yet Simple: You’ll be surprised at how effortlessly these bowls come together, but they look and taste gourmet. Serve them at a dinner party or family gathering, and watch as everyone praises your culinary skills.
By now, you’re probably itching to get into the kitchen and create this masterpiece!

Ingredients
To make your Sticky Chicken Poke Bowls, gather these star ingredients:
- 1 pound chicken breast, thinly sliced (Use organic, free-range if possible for the best flavor)
- 3 tablespoons soy sauce (I recommend using low-sodium soy sauce to control saltiness)
- 2 tablespoons honey (Local honey adds a beautiful floral note.)
- 1 tablespoon sesame oil (Toast your seeds for the freshest taste.)
- 2 cloves garlic, minced (Fresh garlic always elevates the dish.)
- 1 teaspoon ginger, grated (You can substitute with ground ginger in a pinch.)
- 1 tablespoon rice vinegar (This adds a nice tang! Use unseasoned for a neutral flavor.)
- 1 teaspoon sriracha sauce (Adjust to your spice tolerance!)
- 2 cups cooked sushi rice (Make sure it’s a short-grain variety for optimal stickiness.)
- 1 avocado, sliced (Use ripe avocados—they’re creamy and enhance the texture.)
- 1 cup cucumber, diced (English cucumbers work wonders here—no need to peel!)
- 1 cup carrot, shredded (Fresh, sweet carrots bring color and crunch.)
- 1 cup edamame, cooked
- 1 mango, diced (The sweetness balances the savory flavors.)
- 2 green onions, sliced (Use both white and green parts for visual appeal!)
- 2 tablespoons sesame seeds (Toasted sesame seeds amplify that nutty flavor.)
- 1 sheet nori, sliced into strips (Add an umami-rich component.)
- 2 tablespoons cilantro, chopped (Fresh herbs brighten the entire dish!)
- 2 tablespoons mayonnaise (I like using Japanese mayo for added creaminess.)
- 1 tablespoon lime juice (Fresh is best for that bright zing!)
- Cooking oil for frying (Opt for a neutral oil such as canola or sunflower.)
Prep Notes: Have your ingredients room temperature (especially honey) to ensure a smooth marinade process.
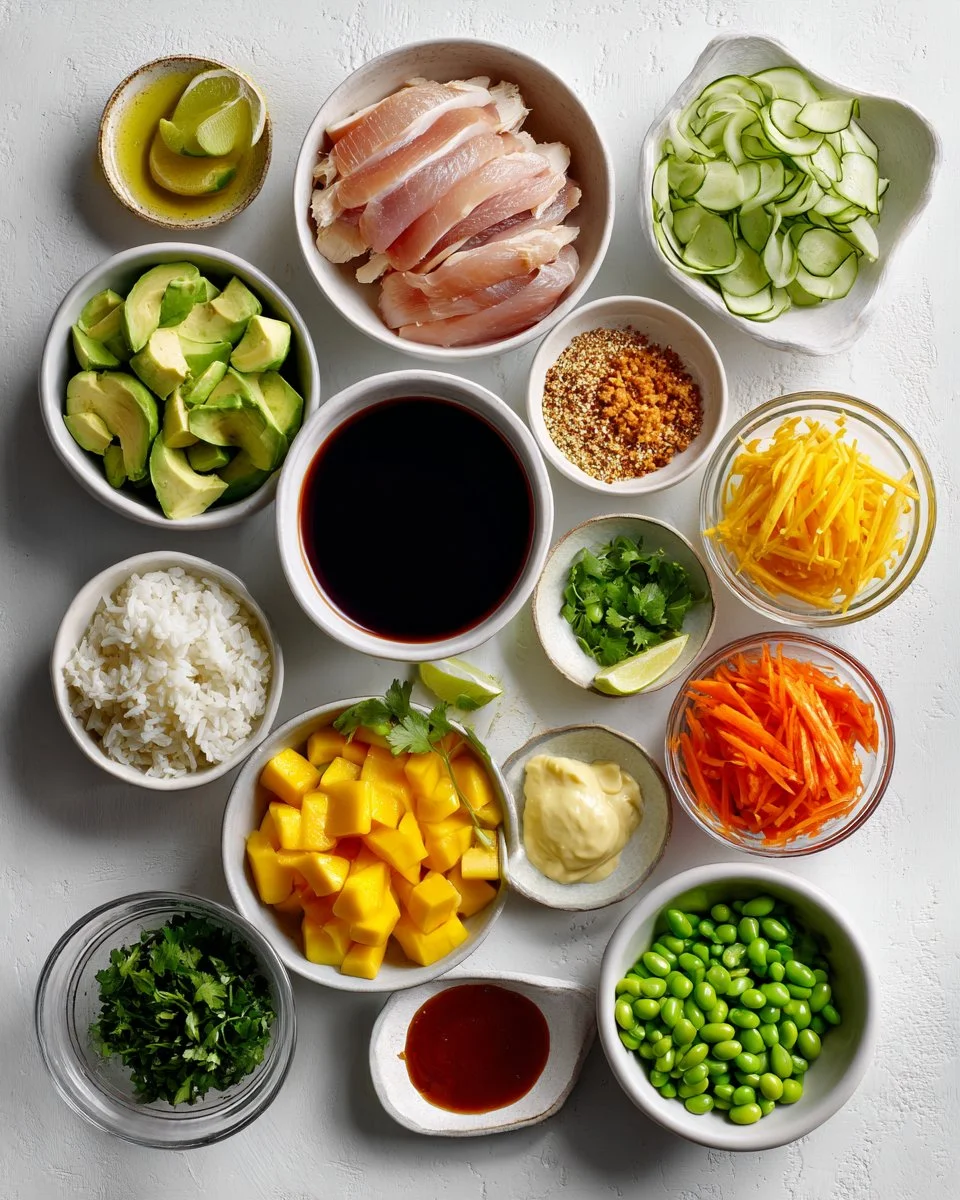
Step-by-Step Instructions
Make the Marinade: In a mixing bowl, combine soy sauce, honey, sesame oil, garlic, ginger, rice vinegar, and sriracha sauce. Whisk until well blended.
Marinate the Chicken: Add the thinly sliced chicken to the marinade, ensuring each piece is coated. Allow it to sit for 15 minutes for maximum flavor absorption.
Cook the Chicken: Heat a drizzle of cooking oil in a skillet over medium-high heat. When the oil is hot, toss in the marinated chicken. Cook for 5 to 7 minutes, stirring occasionally, until the chicken is fully cooked and wonderfully sticky. You’ll know it’s ready when the sauce has thickened and caramelized slightly!
Prepare the Rice Base: Divide the cooked sushi rice among bowls, creating a generous base layer. It should be warm and slightly sticky for best results.
Assemble Your Bowls: Top each bowl with piles of sticky chicken, sliced avocado, diced cucumber, shredded carrot, edamame, and diced mango.
Drizzle and Garnish: In a small bowl, mix the mayonnaise with lime juice. Drizzle this creamy goodness over your toppings.
Finish with Flair: Garnish with sliced green onions, sesame seeds, nori strips, and chopped cilantro for a final burst of color and flavor!
Chef’s Tips:
- Be careful not to overcrowd the skillet when cooking the chicken to ensure even cooking.
- For added depth, let the chicken marinate longer when possible—up to an hour or even overnight.
Expert Tips & Tricks
Creating the perfect Sticky Chicken Poke Bowls is easier than you think! Here are professional tips to ensure your bowls come out fabulous every time:
Store Leftovers Wisely: Keep leftover chicken and veggies in an airtight container in the fridge for up to 3 days. Reheat the chicken gently to avoid drying it out!
Make Ahead: Prep your ingredients—like slicing vegetables and marinating chicken—up to a day in advance to save time during busy nights.
Cook Chicken Perfectly: For juicy chicken, ensure it’s cut evenly. If your pieces are different sizes, they may not cook evenly.
Troubleshoot: If your chicken isn’t sticky enough, allow it to cook a bit longer, letting the sauce reduce. This will enhance the ‘sticky’ factor!
Experiment with Marinades: I’ve tried different flavors like teriyaki or even a spicy lime marinade. They work wonderfully too!
Embark on Flavor Adventures: Switch it up with seasonal veggies or even different proteins like grilled shrimp or firm tofu for a different twist.
Serving Suggestions
These vibrant Sticky Chicken Poke Bowls shine on their own, but if you’re looking to complement your meal, consider serving them with:
- Crispy seaweed snacks or any Asian-inspired appetizers for a delightful starter.
- An ice-cold beverage such as iced green tea or a tropical fruit mocktail pairs beautifully.
- Wrap up your meal with light, refreshing desserts like mango sorbet or coconut pudding.
With an explosion of color and flavor, they’ll be the highlight of any gathering!
Variations & Substitutions
The beauty of Sticky Chicken Poke Bowls lies in their adaptability. Here are some fun variations to try:
- Vegan Twist: Swap chicken for marinated tofu or grilled tempeh, and use a vegan mayo alternative.
- Protein Swaps: Grilled shrimp, diced seared pork, or pulled chicken would also bring excitement to the dish.
- Seasonal Veggies: Try using asparagus in spring, roasted pumpkin in fall, or even fresh radishes in summer.
The combinations are virtually endless; let your creativity guide you!
Nutrition & Storage Info
- Prep Time: 15 minutes
- Cook Time: 15 minutes
- Total Time: 30 minutes
- Yield: 4 servings
- Estimated Calories: Approximately 400-500 calories per serving, depending on the toppings and portion sizes.
Storage: Cool before storing. Leftovers can be kept in the refrigerator for up to 3 days. For longer storage, freeze the marinated chicken (cooked chicken keeps well for about 2 months in the freezer).
FAQs
Can I make these bowls gluten-free?
Yes! Substitute soy sauce for tamari or coconut aminos.What can I use instead of sushi rice?
Short-grain brown rice or quinoa can serve as excellent alternatives.Can I prepare the chicken ahead of time?
Absolutely! Just marinate it the night before for deeper flavors.What other vegetables work well in these bowls?
Try adding bell peppers, snap peas, or radishes for different textures!Can I use frozen edamame?
Yes! Just make sure to follow package instructions for cooking.How do I make this dish spicier?
Increase the sriracha in the marinade or add chili flakes to the bowl as a topping.Can I make these poke bowls with fish?
Yes, traditional poke bowls usually feature raw ahi tuna or salmon; just ensure it’s sushi-grade!What’s the best way to reheat chicken?
Heat it gently in a skillet or microwave to prevent dryness.Can I serve these bowls chilled?
Definitely! Chilled bowls make a refreshing summer meal.What if I don’t like cilantro?
You can skip it or substitute with parsley or green onion for a fresh kick!
Conclusion
Sticky Chicken Poke Bowls are more than just a meal; they’re a vibrant, interactive dining experience that fosters connection around the table. With layers of flavor, a fun assemble-your-own style, and the ability to customize with your favorite ingredients, they are sure to become a family favorite. I encourage you to try out this recipe and explore all the variations; each bowl will tell its own delicious story!
And please, I’d love to hear from you! Share your experiences, tips, or questions in the comments. If you enjoyed this recipe, don’t miss out on my other flavorful creations on the blog—your next culinary adventure awaits!
24. Vegan Chickpea Chicken Salad
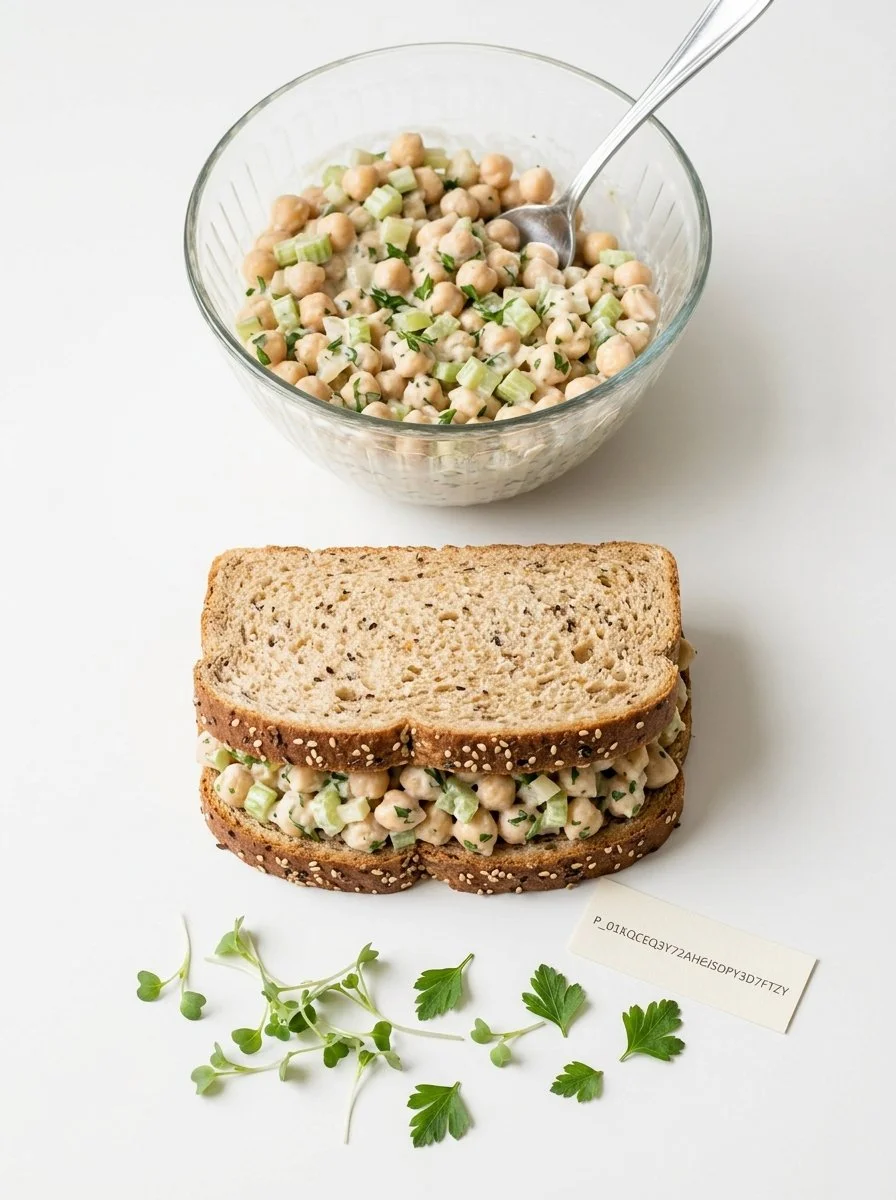
Vegan Chickpea Chicken Salad: The Flavor-Packed Plant-Based Delight You Need in Your Life!
Introduction
Growing up, my family had a strong tradition of Sunday brunches, always filled with laughter, good company, and some of the most delicious comfort foods! While my mom’s chicken salad was a family favorite, I knew I wanted to create something equally delightful, but plant-based. Enter my Vegan Chickpea Chicken Salad—a dish that’s become the star of our gatherings! With its creamy texture and burst of flavors, this lovely concoction has all the charm of traditional chicken salad but without the meat.
What makes this salad so special? First, it’s incredibly versatile and satisfying, combining protein-rich chickpeas with crunchy veggies and a hint of tanginess. Unlike other recipes that often feel lacking or bland, this one packs a punch, evoking memories of family cookouts while embracing a wholesome lifestyle. If you’ve ever felt torn between craving comfort food and wanting something light yet filling, you’re in for a treat!
In this post, I’ll guide you step-by-step through crafting this vibrant Vegan Chickpea Chicken Salad, ensuring your next meal is not only nutritious but bursting with flavor.
What Are Vegan Chickpea Chicken Salads?
Vegan Chickpea Chicken Salad is a delightful twist on the classic chicken salad, a dish that has stood the test of time in many households. Originating from a desire to make comfort food more accessible for everyone, this particular salad uses chickpeas as the hero ingredient—an excellent source of plant-based protein!
The taste is a perfect harmony of creamy, zesty, and crunchy elements, thanks to the chickpeas, vegan mayo, and diced vegetables like celery and bell peppers. Texturally, the mashed chickpeas create a beautifully flaky base that mimics the traditional chicken salad, combined with the crispness of fresh veggies.
Whether you’re packing it for lunch, serving it at a picnic, or whipping it up for an everyday family dinner, this salad is not just quick to make but utterly fulfilling. It’s also the perfect solution when you’re craving a healthy meal that doesn’t compromise on flavor or satisfaction!
Why You’ll Love This Recipe
Flavor Explosion: The combination of chickpeas and spices offers a mouthwatering experience that’s both refreshing and hearty. The vegan mayo and Dijon mustard add creaminess and zesty notes that will make your taste buds dance!
Cost-Effective: Buying a can of chickpeas is cheaper than purchasing pre-made salads. Plus, you can whip up a generous batch without breaking the bank—perfect for meal prepping.
Endless Customization: Want to spice things up? Toss in some chopped pickles or fresh herbs! Are you feeling Mediterranean? Add olives and a sprinkle of dill. Each version can become your personal favorite, ensuring you never get bored!
Quick and Easy: This is a no-fuss recipe that anyone can tackle—perfect for busy weekdays or unexpected guests. In just about 15 minutes, you can have a scrumptious dish ready to serve.
Wholesome and Nutritious: Packed with protein and fiber, this vegan chicken salad is not only delicious but also brain-boosting and satisfying—perfect for fueling your daily activities!
Unlike store-bought versions that can be overly salty or packed with preservatives, making your own version at home ensures you know exactly what goes into it, resulting in a cleaner and more satisfying meal.
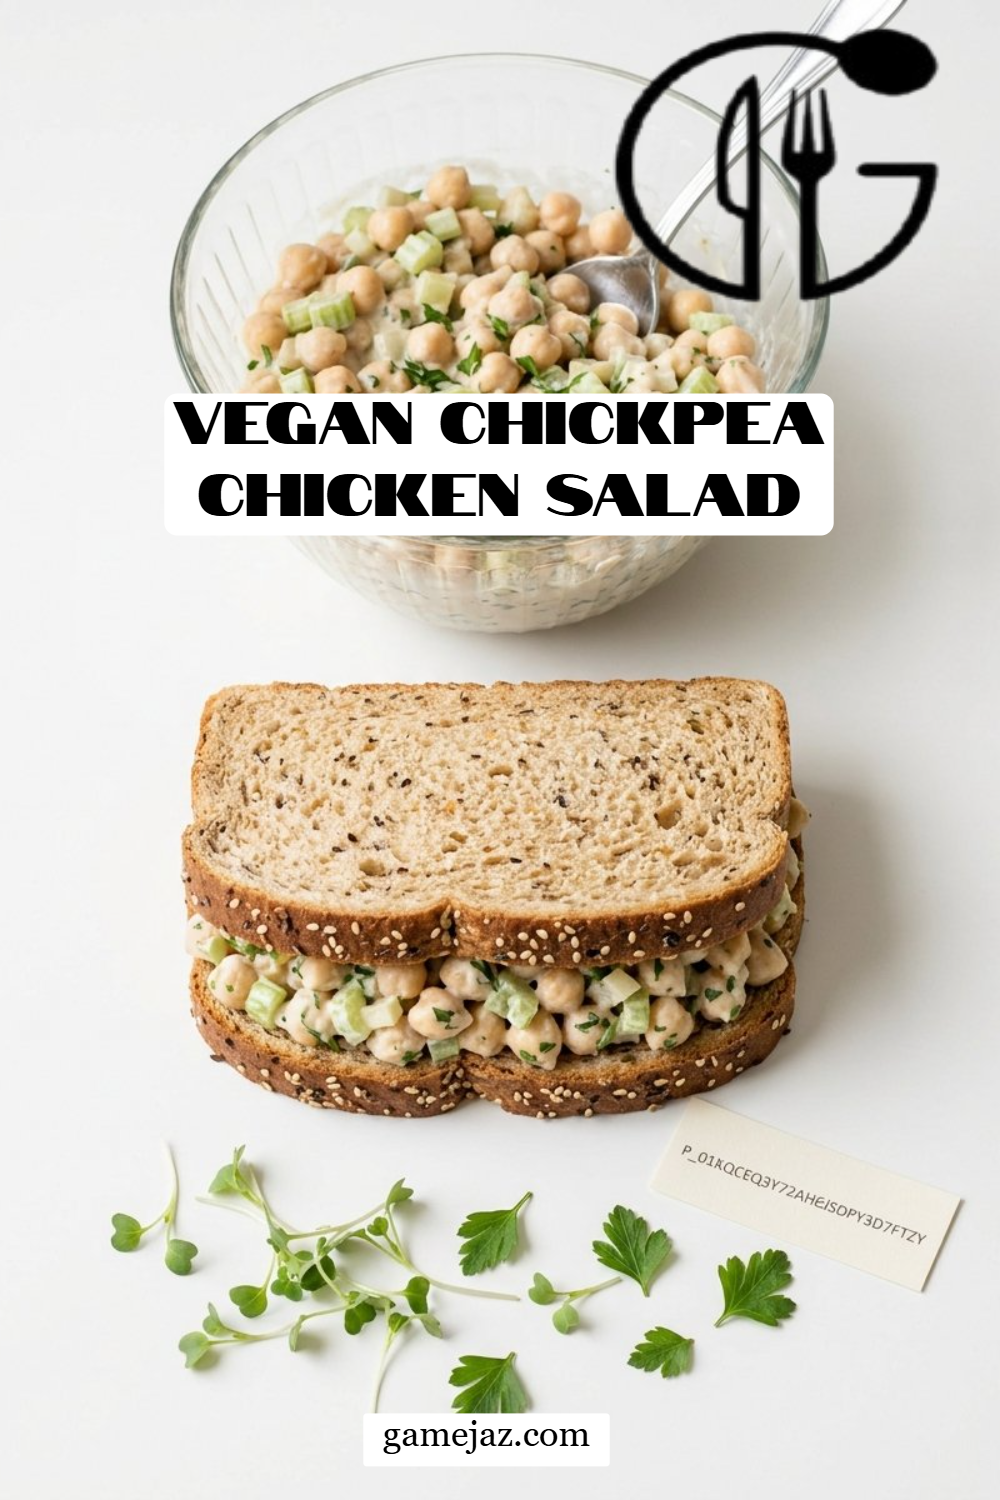
Ingredients
- 1 can chickpeas, drained and rinsed
- 1/4 cup vegan mayo (I recommend Just Mayo for its creaminess)
- 1 tablespoon Dijon mustard (for zing!)
- 1 tablespoon lemon juice (freshly squeezed if possible)
- 1/4 cup celery, diced (crunch is key)
- 1/4 cup red onion, diced (flavor enhancer)
- 1/4 cup green bell pepper, diced (for color and sweetness)
- Salt and pepper to taste
- Lettuce leaves for serving (great for wraps!)
- Optional: pickles, herbs, or spices for added flavor
Ingredient Notes:
- For best flavor, pick high-quality vegan mayo. If you’re inadvertently allergic to soy, check labels, or try a homemade version!
- Adding diced apples or walnuts can create a lovely crunch and sweetness—especially delightful in fall!
Always take time to prep your ingredients: ensure your chickpeas are well-drained and rinsed!
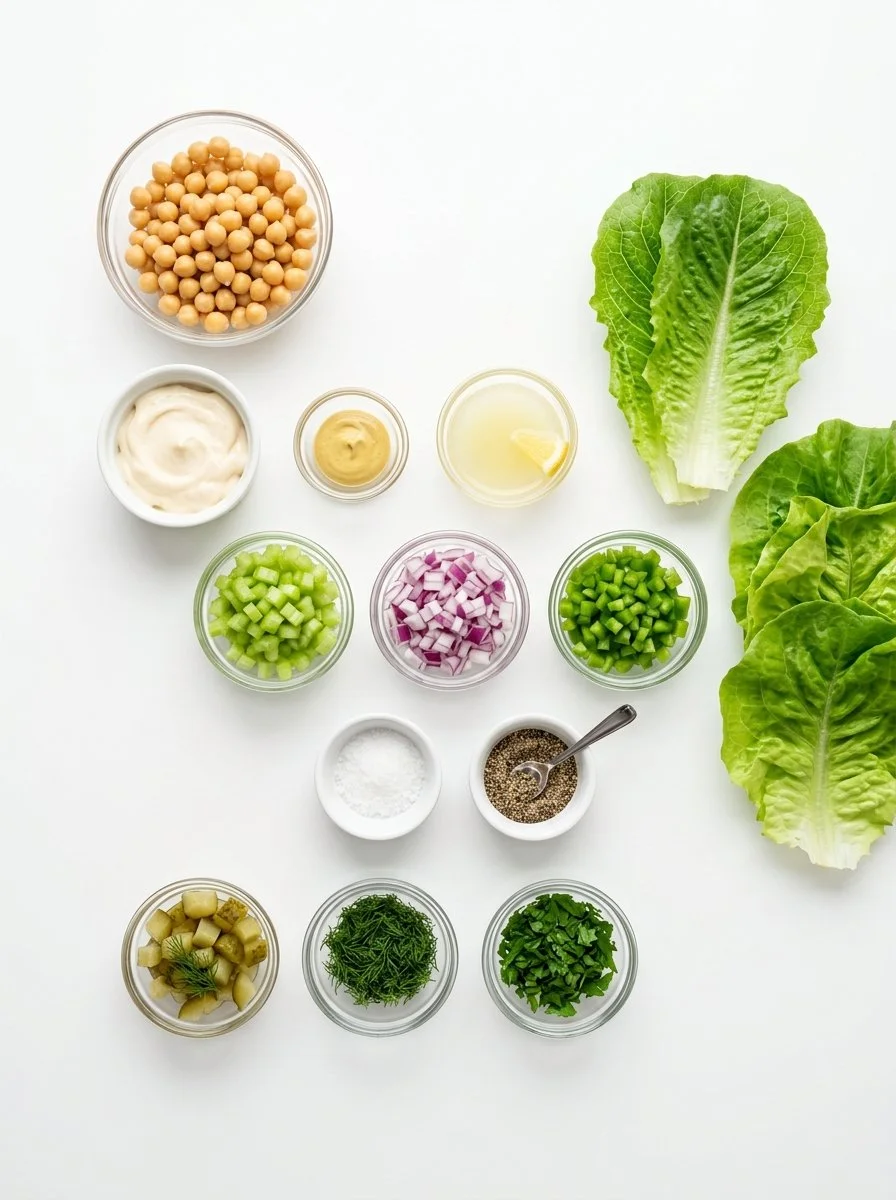
Step-by-Step Instructions
Mash the Chickpeas: In a mixing bowl, mash the chickpeas with a fork until flaky but not pureed. This takes about 2-3 minutes; you want to keep some texture!
Mix the Mayo Dressing: In a separate bowl, combine the vegan mayo, Dijon mustard, lemon juice, salt, and pepper. Whisk until smooth—a visual cue is when the mixture becomes a creamy consistency.
Combine Ingredients: Now, fold in the chickpeas with the diced celery, red onion, and green bell pepper using a spatula. This mixing process should take about 1-2 minutes.
Add Mayo Mixture: Gently fold in the mayo mixture until everything is well coated. This step not only enhances flavor but also ensures every bite is creamy (approximately 1 minute).
Adjust the Seasoning: Taste and adjust your seasoning with more salt, pepper, or additional ingredients as desired. I often add a sprinkle of paprika for extra warmth.
Serve: Enjoy immediately on lettuce leaves or as a sandwich filling. For best results, chill for 30 minutes in the fridge to let the flavors meld!
Chef’s Tip: Avoid over-mashing the chickpeas; you want them to be flaky for that perfect texture!
Expert Tips & Troubleshooting
Storage: Keep your salad in an airtight container in the fridge. It’ll last up to 3-4 days, making it ideal for meal preps!
Make-Ahead Instructions: You can prepare the salad a day in advance and store it in the fridge, as the flavors get better over time!
Common Mistakes: Avoid adding too many wet ingredients at once, as this can make the salad soupy. Start with the mayo and add only half before mixing!
Parting Suggestions: If you’d like to make it spicier, consider adding a dash of hot sauce or cayenne pepper.
Taste Adjustment: For more zest, a squeeze of lime juice will brighten up the salad. Don’t shy away from experimenting!
Texture Fix: If you find the salad too creamy, add more diced veggies to absorb some moisture and add crunch.
Serving Suggestions
This Vegan Chickpea Chicken Salad is stellar on a bed of crisp lettuce, but you can also serve it in a whole grain pita, or atop a salad for a satiating meal. Pair it with some crunchy carrot sticks or cucumber slices for an extra crunch!
Make it special by garnishing with fresh herbs or a sprinkle of sunflower seeds for that added texture. Perfect for summer picnics, potlucks, or even as a light dinner, this recipe transitions seamlessly between occasions.
Variations & Substitutions
There’s so much room to mix things up with this salad! Feel free to experiment with:
- Flavor Combinations: Add curry powder for a delicious twist or fresh cilantro and lime for a zesty kick!
- Dietary Restrictions: Substitute the vegan mayo for tahini for a nutty flavor or use silken tofu blended until smooth for a lower-fat option.
- Seasonal Variations: In the fall, add diced apples or roasted butternut squash for warmth. In the summer, toss in cherry tomatoes and basil for a fresh Mediterranean flair.
Nutrition & Storage Info
- Prep Time: 15 minutes
- Cook Time: 0 minutes (no cooking required!)
- Total Time: 15 minutes
- Yield: Serves 4-6
- Estimated Calories: Approximately 200 calories per serving
- Storage Instructions: Keep refrigerated for up to 4 days. This salad does not freeze well due to the mayo.
FAQ Section
Can I make this salad ahead of time?
Absolutely! I often make it the night before to let the flavors meld overnight.What can I substitute for vegan mayo?
You can use tahini, hummus, or blended silken tofu for a creamy consistency.Is this salad gluten-free?
Yes! This salad is naturally gluten-free when served on lettuce leaves or a gluten-free bread.Can I make this without mustard?
Yes, you can omit mustard or substitute it with a dash of vinegar for tanginess.How do I store leftovers?
Store in an airtight container in the fridge for up to 4 days.What’s a good side dish to serve?
I love serving it with a side of fresh fruit or a quinoa salad to complete the meal!Can I freeze this salad?
It’s best enjoyed fresh, but leftovers can be refrigerated—freezing may alter the texture.Can I make it spicier?
Yes! Add crushed red pepper flakes or a dash of hot sauce to spice it up!What other veggies can I add?
Try shredded carrots, chopped cucumber, or even diced avocado for varied textures.Is this a good recipe for meal prep?
Yes! It holds up well for meal prepping and can be tailored for lunches all week.
Conclusion
My Vegan Chickpea Chicken Salad brings a wave of nostalgia and satisfaction that everyone can enjoy, whether you’re vegan, vegetarian, or just looking for a healthier option! It’s an easy recipe that promises comfort without sacrificing taste. Give it a try, and I can assure you, it’ll become a staple in your kitchen. I’d love to hear your thoughts—let me know how your salad turns out! Plus, check out my other recipes for more plant-based delights that’ll thrill your taste buds and nourish your body!
🥗 Free Custom Keto Meal Plan?
Do you want to lose weight while still enjoying delicious Asian & Thai Fusion meals? Take this quick quiz to get your personalized Keto plan based on your favorite foods!
- ✅ No more guessing what to eat
- ✅ Delicious & easy-to-make recipes
- ✅ Tailored to your body type
Get My Custom Plan Now! →
*Over 100,000+ people have transformed their lives with this quiz.