
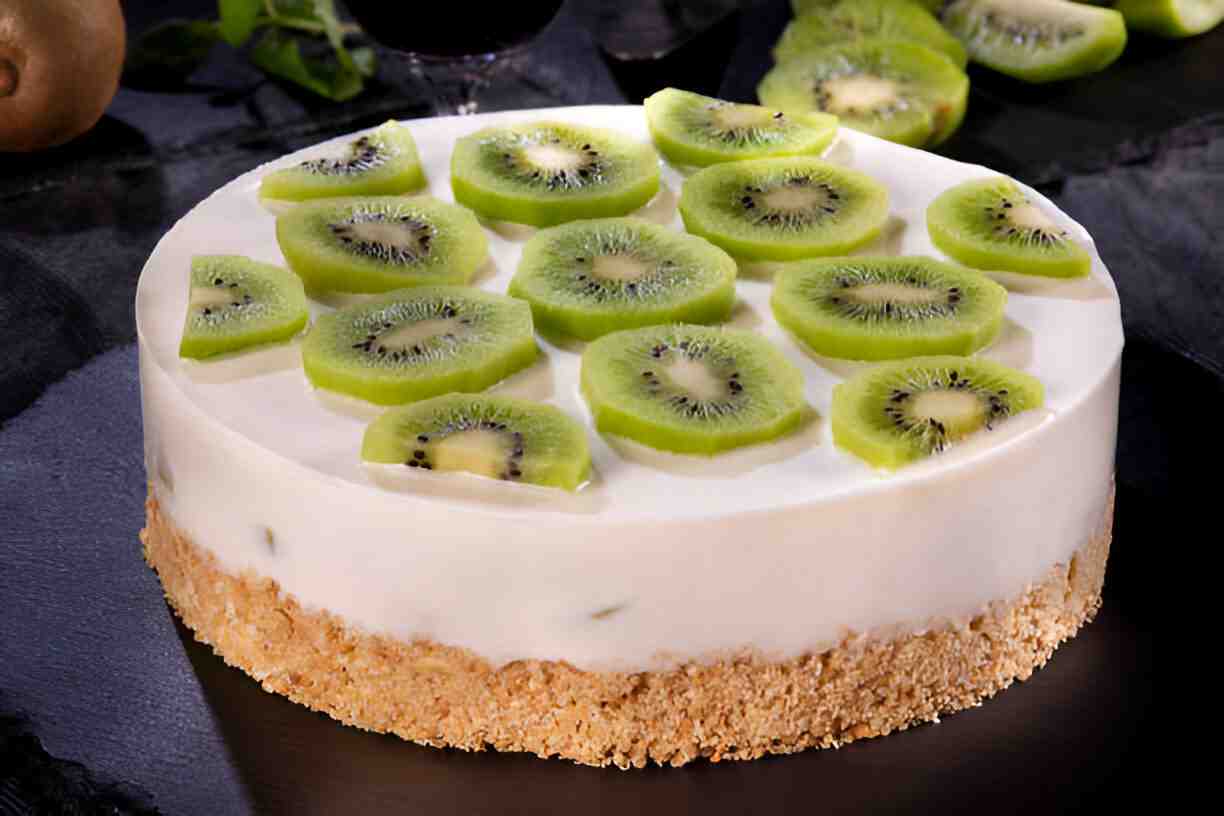
Delve into the world of desserts with this delightful Kiwi Cheesecake! Perfect for those who crave a creamy treat with a tropical flair, this dessert is sure to become a family favorite. Impress your guests with its vibrant colors and tantalizing flavors while enjoying its ease of preparation. In this article, we’ll explore the benefits of this cheesecake, the essential ingredients needed, cooking instructions, and much more. Prepare to embark on a culinary adventure!
Why You’ll Love Kiwi Cheesecake
Family Friendly, Quick, & Delicious
What’s better than a dessert that your entire family can enjoy? Kiwi Cheesecake is a fantastic option for family gatherings or casual weeknight treats. It’s quick to prepare—taking less than an hour to get started—while the crust and cheesecake chill in the fridge. The creamy filling combined with the zesty flavor of kiwi will have everyone asking for seconds!
Nutritional Benefits & Simple Ingredients
Not only is this cheesecake delicious, but it also brings nutritious benefits to the table. Kiwis are packed with vitamin C and dietary fiber, making them a healthy addition to this dessert. With simple, readily available ingredients like cream cheese, heavy cream, and a crumbly graham cracker crust, you can whip it up without stress, ensuring that indulgence doesn’t mean sacrificing health.
Flexibility & Adaptability
One of the best aspects of Kiwi Cheesecake is its adaptability. Whether you need to cater to dietary restrictions or simply want to switch things up, this recipe offers options for everyone. You can easily modify it to be gluten-free or vegan by using alternative ingredients, all while maintaining that incredible flavor profile!
Essential Ingredients for the Recipe
Ingredients
To make a scrumptious Kiwi Cheesecake, gather the following ingredients:
- For the Crust:
- 200g (7 oz) digestive biscuits (or graham crackers)
- 100g (3.5 oz) unsalted butter, melted
- 1 tbsp sugar
- For the Filling:
- 500g (17.5 oz) cream cheese, softened
- 150g (5 oz) powdered sugar
- 1 tsp vanilla extract
- 300ml (1¼ cups) heavy cream, whipped to stiff peaks
- 2 tsp gelatin powder + 2 tbsp water (optional, for stability)
- For the Kiwi Topping:
- 6-8 ripe kiwis, peeled and sliced
- 100g (½ cup) sugar
- 100ml (⅓ cup) water
- 1 tbsp lemon juice
- 1 tsp gelatin powder + 1 tbsp water (for glaze)
Graham Cracker Crumbs
The graham cracker crust is the foundation of your cheesecake, offering that delightful crunch and sweetness. If you prefer, you can substitute with digestive biscuits or even gluten-free options for a gluten-free cheesecake.
Cream Cheese
Using full-fat cream cheese creates a creamy texture that is essential for a luscious cheesecake. If you’re looking for lighter options, consider using Neufchâtel cheese or dairy-free cream cheese, though the texture may vary slightly.
Fresh Kiwis
Fresh kiwis not only provide a vibrant color but also a refreshing taste to your cheesecake. Look for firm, ripe kiwis, and be careful not to choose those that feel mushy, as they can affect the overall texture of your dessert.
Ingredient Preparation
Step 1 – Prepare the Crust
Start by preheating your oven to 350°F (175°C). In a medium bowl, mix graham cracker crumbs, melted butter, and granulated sugar until well combined. Press the mixture firmly into the bottom of a 9-inch springform pan to form an even layer.
Step 2 – Cream Cheese Filling
While your crust is baking (for about 10 minutes until golden), combine softened cream cheese, powdered sugar, lemon juice, and vanilla extract in a large bowl. Beat with an electric mixer until smooth and fluffy.
Step 3 – Whip the Cream
In another bowl, whip heavy cream until stiff peaks form. Gently fold the whipped cream into the cream cheese mixture until fully combined, ensuring a light and airy texture.
Step-by-Step Cooking Instructions
Step 1 – Initial Preparation
Begin by preparing your ingredients as outlined in the previous section. Preheat your oven and bake the graham cracker crust. Allow it to cool completely to ensure proper layering.
Step 2 – Ingredient Assembly
Spread the cream cheese filling over the cooled crust in an even layer. Using a spatula, smooth it out to prevent air bubbles. Then, arrange the freshly sliced kiwis on top, creating a beautiful pattern.
Step 3 – Chill and Serve
Refrigerate your cheesecake for at least 4 hours or overnight for the best results. Before serving, you can top with an optional light glaze made of warmed kiwi puree and unflavored gelatin, briefly mixed until thickened.
Tips for an Even Tastier Version
Adding Extra Ingredients
Want to enhance the flavor? Consider adding a layer of raspberry sauce before the kiwi slices or incorporating other fruits like strawberries or mangoes to create a vibrant fruit medley.
Techniques to Enhance Flavor
For those who love a hint of citrus, adding a touch of lime juice alongside the lemon juice will brighten up the flavors even more. Alternatively, integrate some finely grated zest from lemons or limes for added complexity.
Adjustments for Preferences
Don’t hesitate to modify the recipe to suit aromantic or dietary needs. For a vegan kiwi cheesecake, simply substitute the cream cheese with a cashew cream or another dairy-free alternative.
Recipe Variations and Adaptations
Vegetarian Option
This recipe is already vegetarian-friendly! However, to make it vegan, replace the cream cheese with a dairy-free alternative and use coconut cream in place of heavy cream.
Gluten-Free or Low-Carb Option
For a gluten-free dessert, replace graham cracker crumbs with crushed almonds or gluten-free cookies. For a low-carb version, consider using almond flour to create a base while sweetening with a recommended sugar substitute.
Other Adaptations
Feel free to experiment with seasonal flavors. In the fall, incorporating spices like cinnamon or nutmeg could add warmth, while in winter, think about blending in chocolate or peppermint.

Serving Suggestions
Salad or Soup Ideas
Pair your Kiwi Cheesecake with a light salad made from mixed greens, avocado, and grapefruit for a refreshing start to your meal. Alternatively, a chilled cucumber and mint soup can be a lovely accompaniment.
Hearty Sides
To balance the sweetness of the cheesecake, serve it alongside roasted vegetables or homemade garlic bread. These savory sides will create a well-rounded dining experience.
Drink Recommendations
Complement your dessert with a glass of sparkling water or a light tea. For a festive touch, consider a crisp white wine or even a fruity mocktail for non-drinkers.
Storage and Reheating Tips
How to Store Leftovers
Store any leftover Kiwi Cheesecake in the refrigerator for up to 5 days. Ensure it’s covered with plastic wrap or placed in an airtight container to maintain freshness. For longer storage, consider freezing the cheesecake for up to 2 months.
Reheating Techniques
While cheesecake is typically enjoyed chilled, if desired, you can gently reheat it in a low-temperature oven (200°F or 95°C) for about 10-15 minutes, being careful not to overheat.
Portioning Tips
For meal prep enthusiasts, consider cutting the cheesecake into individual portions before storing. This makes it easy to grab a slice whenever you desire!
Nutritional Information and Benefits
Nutritional Values per Serving
Each serving of Kiwi Cheesecake (approximately 1 slice) contains about:
- Calories: 350
- Protein: 6g
- Total Fat: 25g
- Carbohydrates: 28g
Ingredient Benefits
Fresh kiwis are high in vitamins C and K, while cream cheese provides calcium and protein. The crust made from graham crackers offers a source of energy from carbohydrates.
Recommended Portions
A slice of cheesecake serves well as a dessert after dinner, but remember to enjoy it in moderation, especially for those managing their sugar intake.
Common Mistakes to Avoid
Issue 1 – Overbeating the Cream
Overbeating the heavy cream can result in a grainy texture. Stop when you see soft peaks, ensuring a smooth, creamy filling.
Issue 2 – Skipping the Chilling Time
Don’t rush it! Chilling the cheesecake is essential for setting the structure and enhancing the flavors. Always allow sufficient time for it to set in the refrigerator.
Issue 3 – Using Overripe Fruit
Using overly soft, mushy kiwis can lead to a watery cheesecake. Always opt for ripe but firm kiwis to prevent this issue and maintain beautiful presentation.
Inspiring Conclusion
This Kiwi Cheesecake is not just a dessert; it’s an experience waiting to be shared. The bright colors, delightful flavors, and creamy textures make it a standout choice for any gathering. Embrace the opportunity to try out different variations, and don’t hesitate to personalize the ingredients according to your taste. Encourage your family and friends to join in on the fun of making this cheesecake, ensuring that cooking together can spark joy and create unforgettable memories!
FAQ (Frequently Asked Questions)
- Can I prepare this recipe in advance?
Yes! You can make this cheesecake a day ahead. Just ensure it has enough time to set in the fridge. - What are the best substitutes for graham cracker crumbs?
Almond flour, crushed digestive biscuits, or gluten-free cookies work wonderfully in place of graham cracker crumbs. - Can I use frozen kiwis?
While fresh kiwis yield the best consistency, you can use frozen kiwis. Just ensure they are fully thawed and drained to prevent excess moisture. - What can I do if my cream cheese mixture is lumpy?
Make sure the cream cheese is at room temperature and softened before mixing. If it’s still lumpy, using an electric mixer can help achieve a smooth texture. - Can I make this without gelatin?
Absolutely! If you prefer a softer cheesecake, leave out the gelatin. It will still be deliciously creamy! - How long does the cheesecake last?
In the refrigerator, it will last up to 5 days. If frozen, it can be stored for up to 2 months. - What should I serve with this cheesecake?
Complement it with a light salad or a refreshing beverage, such as sparkling water or tea. - Can I use a different fruit instead of kiwis?
Yes! This recipe is adaptable, so feel free to experiment with your favorite fruits like strawberries, mangoes, or peaches! - Is this recipe suitable for vegans?
You can modify it by switching to dairy-free cream cheese and coconut cream to create a vegan version. - What is the best way to slice cheesecake?
Use a sharp knife that’s been rinsed in hot water, which helps to achieve clean slices without sticking.
Now, gather your ingredients and start crafting this luscious Kiwi Cheesecake! Enjoy the process and the delicious results.
White Chocolate Drip Cake: A Delectable Recipe to Wow Your Guests
PrintKiwi Cheesecake: A Delightful Twist on a Classic Dessert
A refreshing no-bake cheesecake with a buttery biscuit crust, creamy vanilla filling, and a glossy kiwi fruit topping. Perfect for summer or any occasion!
- Prep Time: 30 minutes
- Cook Time: 0 minutes (no-bake)
- Total Time: 6 hours (includes chilling)
- Yield: 10–12 servings 1x
- Category: Dessert
- Method: No-Bake
- Cuisine: International
- Diet: Vegetarian
Ingredients
- For the Crust:
- 200g (7 oz) digestive biscuits (or graham crackers)
- 100g (3.5 oz) unsalted butter, melted
- 1 tbsp sugar
- For the Filling:
- 500g (17.5 oz) cream cheese, softened
- 150g (5 oz) powdered sugar
- 1 tsp vanilla extract
- 300ml (1¼ cups) heavy cream, whipped to stiff peaks
- 2 tsp gelatin powder + 2 tbsp water (optional, for stability)
- For the Kiwi Topping:
- 6–8 ripe kiwis, peeled and sliced
- 100g (½ cup) sugar
- 100ml (⅓ cup) water
- 1 tbsp lemon juice
- 1 tsp gelatin powder + 1 tbsp water (for glaze)
Instructions
- Crust: Crush biscuits into fine crumbs. Mix with melted butter and sugar. Press firmly into a 9-inch springform pan. Chill for 30 mins.
- Filling: Beat cream cheese, powdered sugar, and vanilla until smooth. If using gelatin, dissolve it in water, microwave for 10 secs, then mix into filling. Fold in whipped cream. Spread over crust and refrigerate for 4+ hours.
- Kiwi Topping: Arrange kiwi slices over the set cheesecake. Simmer sugar, water, and lemon juice until syrupy (5 mins). Dissolve gelatin in water, add to syrup, and cool slightly. Brush over kiwis to glaze. Chill 1 hour before serving.
Notes
- For a firmer filling, use gelatin. Omit for a softer texture.
- Substitute agar-agar for a vegetarian option.
- Store in the fridge for up to 3 days.
- Add mint leaves for extra freshness.
Nutrition
- Serving Size: 1 slice
- Calories: 320
- Sugar: 25g
- Sodium: 180mg
- Fat: 22g
- Saturated Fat: 14g
- Unsaturated Fat: 6g
- Trans Fat: 0g
- Carbohydrates: 28g
- Fiber: 2g
- Protein: 4g
- Cholesterol: 65mg