
Table of Contents
Table of Contents
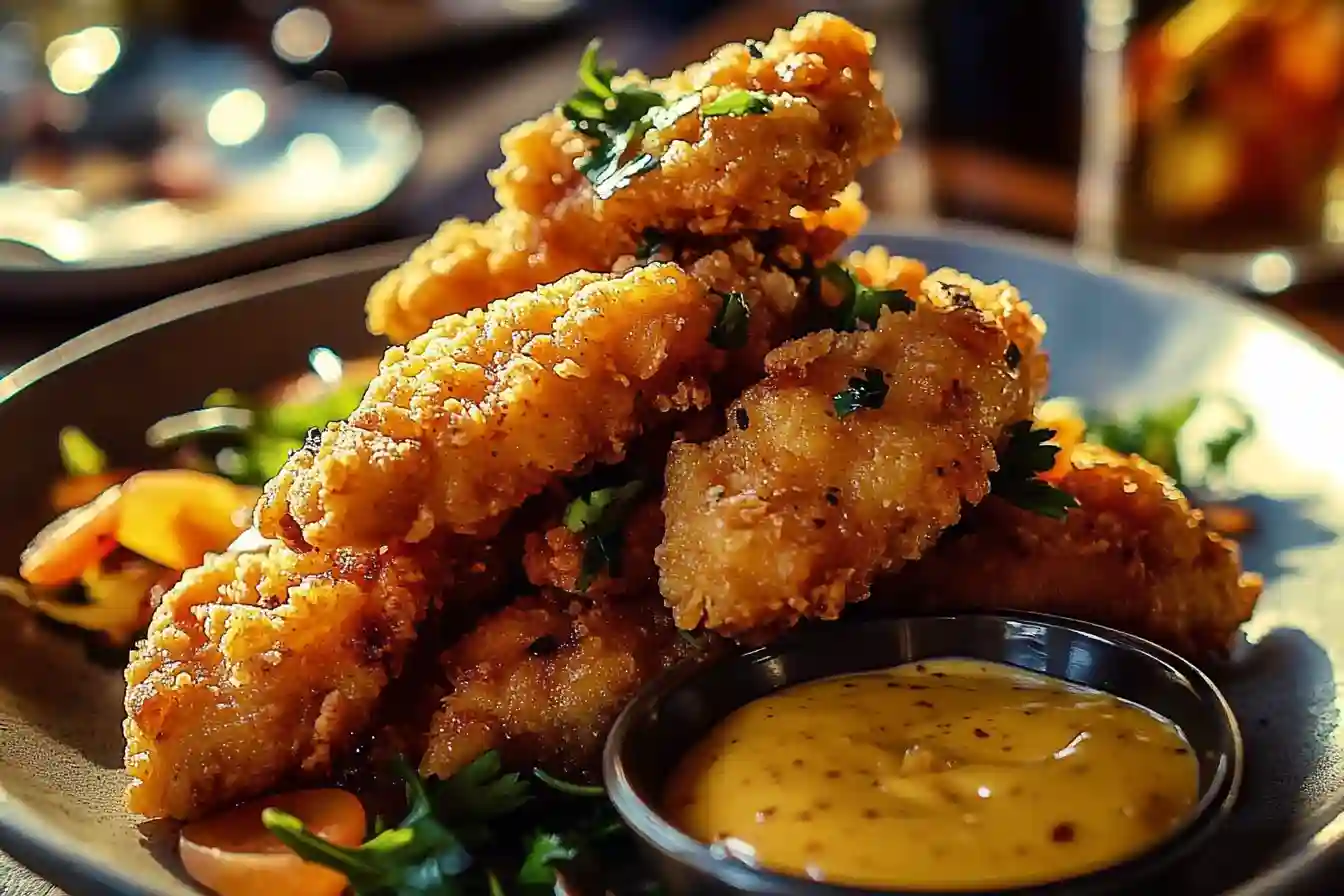
When it comes to comfort food, few dishes offer the same level of satisfaction as Crispy Buttermilk Chicken Tenders. This recipe combines juiciness and crunch in a way that’s perfect for families and gatherings. Today, we’ll delve into everything you need to know to create these mouthwatering tenders. From the essential ingredients to tips for making your dish even tastier, we’ve got you covered!
Why You’ll Love Crispy Buttermilk Chicken Tenders
Perfect for Families: Quick and Delicious
Crispy Buttermilk Chicken Tenders are not only finger-licking good, but they are also a fantastic solution for busy families. With a preparation time of around 30 minutes, this recipe is efficient enough to accommodate your hectic schedule. Kids love them, and adults can’t resist the satisfying crunch! You’re guaranteed to earn a family favourite status with this dish.
Nutritional Benefits and Simple Ingredients
In addition to being delicious, this dish can be surprisingly nutritious. The primary ingredient, chicken, is rich in protein, making it a hearty option for all age groups. Here, we use buttermilk to marinate the chicken, which not only makes it tender but also adds a unique flavour profile. With simple ingredients found in almost any pantry, you create a wholesome meal without breaking the bank.
Flexibility: Adaptable and Budget-Friendly
One of the outstanding aspects of Crispy Buttermilk Chicken Tenders is their adaptability. You can easily adjust the recipe to suit your dietary preferences or seasonal ingredients. Whether you want to spice things up, keep it simple, or create a gluten-free version, this dish accommodates a wide range of tastes and budgets seamlessly.
Essential Ingredients for the Recipe
Ingredients
- 1.5 lbs (680g) chicken tenders (or chicken breasts cut into strips)
- 1 cup buttermilk
- 1 tablespoon hot sauce (optional)
- 1 teaspoon garlic powder
- 1 teaspoon onion powder
- 1 teaspoon paprika
- 1 teaspoon salt (divided)
- 1/2 teaspoon black pepper
- 1 1/2 cups all-purpose flour
- 1/4 cup cornstarch
- 1 teaspoon baking powder
- 1/2 teaspoon cayenne pepper (optional)
- Vegetable oil for frying
- Lemon wedges and dipping sauces for serving
Chicken Tenders: The Main Attraction
The star of the dish is, of course, the chicken. Chicken tenders or boneless breasts can be used interchangeably, with the former often being more tender and easier to fry. If you prefer a leaner option, opt for chicken breasts; ensure they’re cut into even strips for uniform cooking.
Buttermilk: For Juiciness and Flavor
Buttermilk is quintessential for this recipe, acting as a marinade to tenderize the chicken. If you’re in a pinch, you can create a substitute by mixing milk with a tablespoon of vinegar or lemon juice and letting it sit for a few minutes. This will provide a similar tangy flavour and texture.
Spices: Adding Depth and Warmth
The spices like ground turmeric, garlic powder, and cumin serve to elevate the taste of the chicken, giving it a warm and aromatic flavour profile. Feel free to customize these spices to suit your family’s preference for heat or flavour.
Ingredient Preparation
Step 1 – Marinate the Chicken
In a mixing bowl, combine the chicken with buttermilk, lemon juice, salt, pepper, garlic powder, and ground cumin. Make sure all pieces are well-coated. Cover and let it marinate for at least 30 minutes or up to overnight for deeper flavour.
Step 2 – The Dry Mix
In another bowl, whisk together the all-purpose flour, panko breadcrumbs, ground turmeric, salt, and pepper. This is where the crunch comes from! You can also add extra spices here if you like your tenders with a kick.
Step 3 – Prepare for Cooking
After marination, remove the chicken from the buttermilk, letting excess drip off, and coat each piece thoroughly in the flour mixture. Make sure every side is covered—the crunch factor is key!
Step-by-Step Cooking Instructions
Step 1 – Initial Preparation
Begin by preheating your oven to 400°F (200°C) if you prefer baking. Alternatively, heat a pan over medium-high heat with enough olive oil to fry the chicken tenders.
Step 2 – Ingredient Assembly
Once the chicken is coated, place the tenders in the hot oil or on a baking sheet for baking. Avoid overcrowding the pan, as this can lower the oil temperature and compromise the crispiness.
Step 3 – Cooking and Finishing Touches
If frying, cook for 4-5 minutes on each side or until deep golden brown. Alternatively, bake in the oven for about 15-20 minutes, flipping halfway through. Keep an eye out for that golden brown crust—it’s a visual cue that tells you they’re ready to be devoured!
Tips for an Even Tastier Version
Adding Extra Ingredients
Consider adding chilli flakes, paprika, or even a dash of Parmesan cheese to the breadcrumb mixture to kick up the flavour even more. You can also add some finely chopped herbs, such as parsley or thyme, for a fresh touch.
Techniques to Enhance Flavor
For an even tastier dish, allow the chicken to rest after frying or baking. This lets the juices settle, making every bite more satisfying. For a twist, try a honey mustard dipping sauce or a zesty salsa.
Adjustments for Preferences
If someone in your family has dietary restrictions, consider using almond or coconut flour to accommodate gluten-free needs. Alternatively, you could substitute chicken with tofu or eggplant for a vegetarian option.
Recipe Variations and Adaptations
Vegetarian Option
Swap out chicken tenders for extra-firm tofu or even cauliflower. The marination process will work just as effectively, producing a stunningly crispy exterior that will leave everyone wanting more.
Gluten-Free or Low-Carb Option
Use a gluten-free flour blend or almond flour as a substitute for panko and all-purpose flour. This option is also suitable for those following a low-carb diet.
Other Adaptations
Depending on the season, consider adding a hint of cinnamon or nutmeg to the breading mixture for a warm, cozy feel. You can also adjust the spices to suit your dinner theme for festive occasions.
Serving Suggestions
Salad or Soup Ideas
Pair your Crispy Buttermilk Chicken Tenders with a light herb salad or a savoury tomato soup for a balanced meal.
Hearty Sides
Homemade bread, mashed potatoes, or roasted vegetables serve as superb companions that round out your dinner plate.
Drink Recommendations
Enhance your meal with a refreshing Iced Tea, a sweet white wine, or even a mocktail made from fizzy water and fresh fruit for a delightful family dinner.
Storage and Reheating Tips
How to Store Leftovers
If you have any leftovers (which is rare!), cool the chicken tenders completely before placing them in an airtight container. Store them in the fridge for up to three days or freeze them for long-term storage.
Reheating Techniques
For crispy results when reheating, place the tenders in an oven set to 375°F (190°C) for about 10-15 minutes. If you’re in a hurry, a microwave works, but note that it won’t be as crispy.
Portioning Tips
To effectively meal prep, divide cooked tenders into single-serve containers. This method is perfect not only for saving time but also for controlling portion sizes.
Nutritional Information and Benefits
Nutritional Values per Serving
On average, each serving of Crispy Buttermilk Chicken Tenders contains approximately 300 calories, 25 grams of protein, and 10 grams of fat. This makes it a filling option packed with nutrients.
Ingredient Benefits
The primary ingredients, like chicken, provide essential proteins, while buttermilk offers calcium and probiotics that support gut health.
Recommended Portions
A serving size of about 4-6 tenders, depending on appetite, is enough for adults. Pair with sides for a fuller meal.
Common Mistakes to Avoid
Issue 1 – Soggy Breading
One common issue is failing to let the excess buttermilk drip off before coating the dough. This can leave your tenders soggy instead of crispy.
Issue 2 – Overcrowding the Pan
When frying, avoid overcrowding the pan. This reduces oil temperature, resulting in less crispy tenders.
Issue 3 – Underseasoning
Make sure to season both the buttermilk marinade and the breadcrumb mixture. A well-seasoned dish will always shine compared to a bland one.
Inspiring Conclusion
Crispy Buttermilk Chicken Tenders stand out not just for their taste but also as a versatile dish that invites creativity. Whether you’re preparing them for a family dinner or a casual get-together, they serve as a wonderful centrepiece for a meal. Feel free to experiment with flavours and ingredients to make it your own, and don’t forget to share your delightful cooking experiences with friends and family!
More Inspiration:
Juicy Garlic Parmesan Grilled Chicken (Easy Summer Favorite)
Cowboy Chicken Bites: A Flavorful Crowd-Pleaser
FAQ (Frequently Asked Questions)
- Can I prepare this recipe in advance?
- Absolutely! You can marinate the chicken a day ahead to enhance flavours and save time during the cooking process.
- What are the best substitutes for buttermilk?
- You can use regular milk with a tablespoon of vinegar or lemon juice as a quick substitute.
- Can these tenders be baked instead of fried?
- Yes, baking is a healthier alternative. Just ensure they’re spread out evenly on a baking sheet.
- Can I freeze my leftover chicken tenders?
- Yes! They freeze well and can be stored for about 2-3 months. For optimal results, reheat in the oven.
- What dipping sauces pair well with these chicken tenders?
- Honey mustard, barbecue sauce, or a tangy ranch dressing make excellent choices.
- How can I make these tenders spicier?
- Add cayenne pepper to the spice mix or serve with a spicy dipping sauce.
- What side dishes should I serve with my chicken tenders?
- Consider coleslaw, fries, or a simple vegetable medley for a balanced meal.
- What’s the best oil for frying?
- Use oils with a high smoke point, like canola, vegetable, or peanut oil.
- How long can I store the cooked chicken tenders?
- They can be stored in the refrigerator for 3-4 days in an airtight container.
- Can I use this recipe for chicken wings?
- Yes! You can use the same coating technique for chicken wings; adjust the cooking times accordingly.
By utilizing this detailed and engaging recipe for Crispy Buttermilk Chicken Tenders, you’ll not only satisfy your family’s cravings for comfort food but also elevate your culinary skills. Happy cooking!
Print
Crispy Buttermilk Chicken Tenders: A Family Favorite Recipe
- Total Time: 30 minutes (+ marinating)
- Yield: 4–6 servings 1x
Description
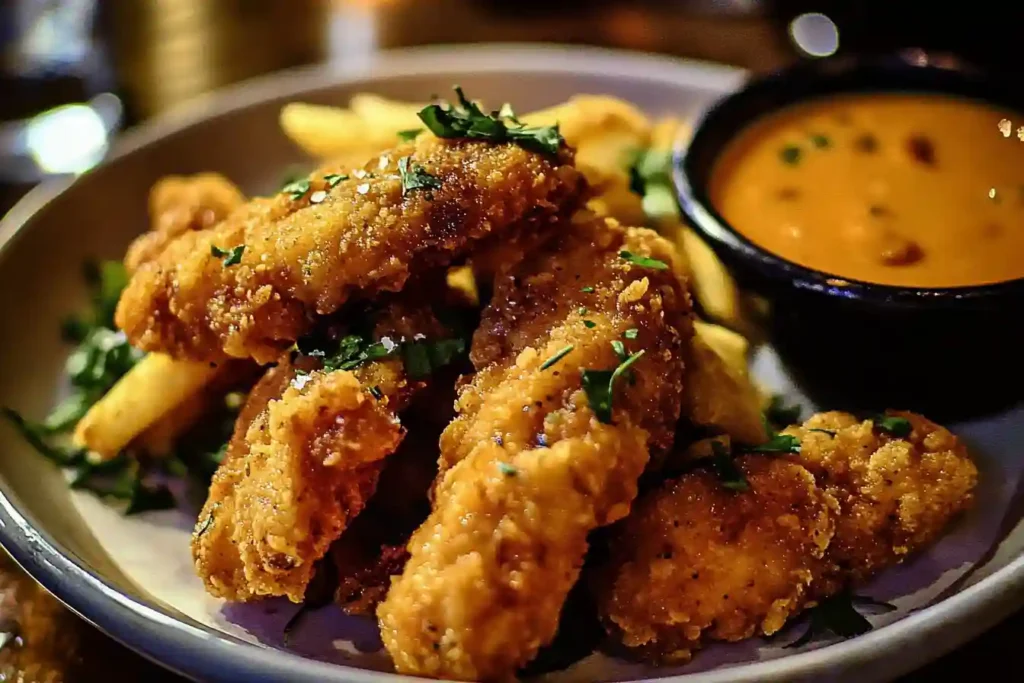
Ultra-crispy, golden brown chicken tenders with a perfectly seasoned buttermilk marinade that ensures juicy, flavorful meat inside and a shatteringly crunchy coating outside. These are way better than takeout!
Ingredients
- 1.5 lbs (680g) chicken tenders (or chicken breasts cut into strips)
- 1 cup buttermilk
- 1 tablespoon hot sauce (optional)
- 1 teaspoon garlic powder
- 1 teaspoon onion powder
- 1 teaspoon paprika
- 1 teaspoon salt (divided)
- 1/2 teaspoon black pepper
- 1 1/2 cups all-purpose flour
- 1/4 cup cornstarch
- 1 teaspoon baking powder
- 1/2 teaspoon cayenne pepper (optional)
- Vegetable oil for frying
- Lemon wedges and dipping sauces for serving
Instructions
- In a bowl, whisk together buttermilk, hot sauce (if using), garlic powder, onion powder, paprika, 1/2 teaspoon salt, and black pepper. Add chicken tenders, ensuring they’re fully submerged. Cover and refrigerate for at least 4 hours (best overnight).
- When ready to cook, in a shallow dish combine flour, cornstarch, baking powder, cayenne (if using), and remaining 1/2 teaspoon salt.
- Heat 1 inch of oil in a heavy skillet (cast iron works best) to 350°F (175°C).
- Remove chicken from buttermilk (letting excess drip off) and dredge in flour mixture, pressing firmly to adhere. Shake off excess.
- Fry in batches (don’t overcrowd) for 3-4 minutes per side until golden brown and internal temperature reaches 165°F (74°C).
- Transfer to a wire rack set over a baking sheet to drain (this keeps them crispy).
- Serve immediately with lemon wedges and your favorite dipping sauces.
Notes
- For extra crispy tenders: Double-dip by returning flour-coated chicken to buttermilk, then flour again
- Oven method: Bake at 425°F (220°C) for 15-18 minutes on a wire rack set over a baking sheet
- Gluten-free option: Use 1:1 GF flour blend instead of all-purpose
- Make ahead: Marinated chicken can be kept in fridge up to 24 hours
- Leftovers reheat best in air fryer at 375°F (190°C) for 3-4 minutes
- Prep Time: 15 minutes (+ marinating)
- Cook Time: 15 minutes
- Category: Main Dish
- Method: Pan-Frying
- Cuisine: American
Nutrition
- Serving Size: 3 tenders
- Calories: 380
- Sugar: 2g
- Sodium: 620mg
- Fat: 12g
- Saturated Fat: 3g
- Unsaturated Fat: 7g
- Trans Fat: 0g
- Carbohydrates: 30g
- Fiber: 1g
- Protein: 38g
- Cholesterol: 115mg