

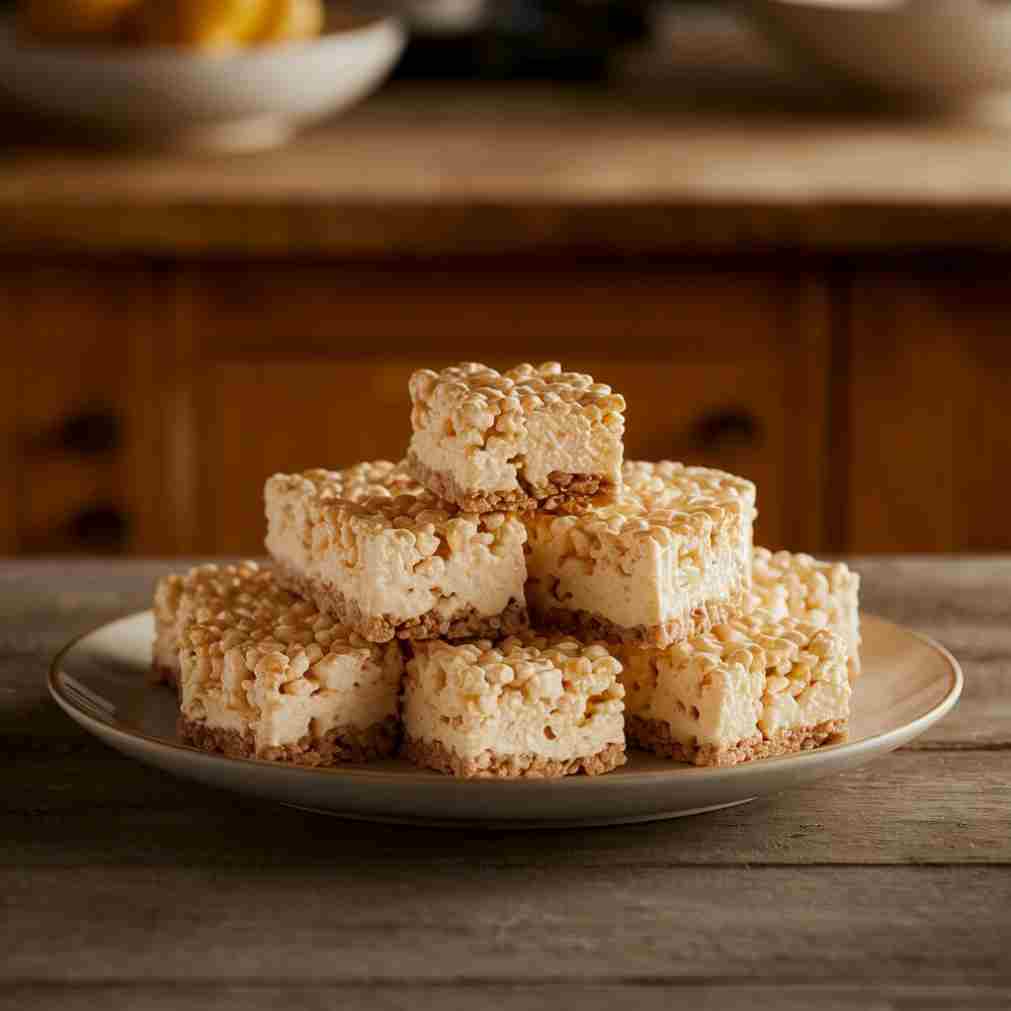
If there’s one dessert that has captured the hearts of families, it’s Rice Krispies Treats. But what if we could elevate this classic treat into something even more delightful? Enter Cheesecake Rice Krispies Treats! This recipe combines the crispy crunch of Rice Krispies with the rich, creamy goodness of cheesecake, resulting in a sweet, unforgettable dessert that’s perfect for any occasion.
Why You’ll Love Cheesecake Rice Krispies Treats
When you’re on the hunt for that perfect dessert, look no further! Cheesecake Rice Krispies Treats bring together the best of both worlds in a way that’s simple yet indulgent.
Easy and Family-Friendly
One of the standout benefits of Cheesecake Rice Krispies Treats is how quick and easy they are to make. With minimal prep time and no baking required, you can whip these up in a flash, making them ideal for families looking to indulge without the hassle. Kids will love the fun, chewy texture, and you’ll love having a treat that doesn’t require hours in the kitchen!
Nutritional Benefits
While no dessert is a health food, Cheesecake Rice Krispies Treats can be made with a few simple, wholesome ingredients. Using mini marshmallows and cream cheese adds some calcium and protein, making this dessert not only delicious but also a bit more nutritious compared to other sugary options.
Versatility at Its Best
One of the most notable features of this recipe is its flexibility. You can adapt it to suit your taste buds or dietary needs—whether you’re gluten-free, vegan, or simply want to change up the flavor, the possibilities are endless. Plus, it’s an affordable dessert that makes great use of pantry staples!
Essential Ingredients for the Recipe
Ready to gather your ingredients? Here’s what you will need to create your delightful Cheesecake Rice Krispies Treats.
Ingredients
- For the Crust:
- 1½ cups graham cracker crumbs
- ¼ cup granulated sugar
- 6 tbsp unsalted butter, melted
- For the Cheesecake Layer:
- 8 oz cream cheese, softened
- ¼ cup powdered sugar
- 1 tsp vanilla extract
- 1 tsp lemon juice
- For the Rice Krispies Layer:
- 3 tbsp unsalted butter
- 4 cups mini marshmallows
- 5 cups Rice Krispies cereal
- Optional: ½ cup white chocolate chips for drizzle
Rice Krispies Cereal
This cereal serves as the foundation for our treats, providing the essential crunchy texture. If you want to experiment, you can use other similar cereals such as Cornflakes or Puffed Rice.
Mini Marshmallows
These delightful little pillows of sweetness melt into gooeyness when heated, making them integral to the texture of the treat. If you’re looking for a sugar-free option, you can find sugar-free alternatives at specialty stores.
Cream Cheese
Softened cream cheese is what gives these treats their cheesecake flavor. Make sure it’s well-softened for easy mixing, and if you’re avoiding dairy, there are dairy-free cream cheese alternatives available.
Ingredient Preparation
Let’s get started on preparing our delicious Cheesecake Rice Krispies Treats!
Step 1 – Melt the Butter and Marshmallows
In a large saucepan over low heat, melt the salted butter and mini marshmallows together. Stir occasionally until smooth. This will create the sticky base for our treats!
Step 2 – Mix in the Cream Cheese and Sugar
Once the marshmallow mixture is smooth, remove it from heat. Stir in the softened cream cheese, granulated sugar, and vanilla extract until everything is well combined and creamy. This step is critical for ensuring a velvety texture throughout.
Step 3 – Combine with Rice Krispies
Now, gradually fold in the Rice Krispies cereal. Use a rubber spatula to make sure each piece is coated with the sticky mixture. Aim for even distribution so that each bite is packed with flavor!
Step-by-Step Cooking Instructions
You’re almost there! Let’s go through the cooking process so we can enjoy these tasty treats.
Step 1 – Prepare Your Pan
Grease a 9×13-inch baking dish with cooking spray or line it with parchment paper. This will prevent sticking and make for easy removal.
Step 2 – Press the Mixture into the Pan
Carefully pour the Rice Krispies mixture into the prepared baking dish. Using a clean, damp spatula (to prevent sticking), press down firmly and evenly. You want to create a dense layer, so don’t be shy with the pressure!
Step 3 – Chill and Set
Allow the mixture to cool at room temperature for about 30 minutes or until set. If you’re feeling impatient, pop it in the fridge for faster cooling. Once set, use a sharp knife to cut into squares.
Tips for an Even Tastier Version
Want to kick up the flavor even more? Here are a few tips to explore.
Adding Extra Ingredients
Consider adding in some fun mix-ins like chopped nuts, shredded coconut, or even mini chocolate chips for a twist. You could also replace some of the vanilla extract with a different flavor, such as almond extract, for a unique touch.
Techniques to Enhance Flavor
For an added depth of flavor, a touch of cinnamon or pumpkin spice can take these treats to the next seasonal level. Experiment with different extracts to find your favorite!
Adjustments for Preferences
If you’re catering to specific dietary needs or preferences, you can swap out the ingredients. Use vegan butter and cream cheese alternatives for a dairy-free version, or gluten-free Rice Krispies for a gluten-free treat.
Recipe Variations and Adaptations
The beauty of Cheesecake Rice Krispies Treats lies in their versatility. Here are some adaptations to try.
Vegetarian Option
Simply use vegetable-based butter substitutes and cream cheese for a complete vegetarian treat.
Gluten-Free or Low-Carb Option
For a gluten-free version, look for certified gluten-free Rice Krispies. If you’re monitoring carbs, you could replace the Rice Krispies with a mixture of nuts and seeds.
Other Adaptations
Feel free to switch up the flavors based on the season or occasion: peppermint extract for the holidays, lemon zest for summer, or spicy flavors like chai for fall—there are endless possibilities!
Serving Suggestions
When it comes to serving your Cheesecake Rice Krispies Treats, consider a balanced meal.
Salad or Soup Ideas
For a light and refreshing starter, pair these treats with a simple side salad or a creamy tomato soup. The sweet treat balances perfectly with savory dishes.
Hearty Sides
Homemade bread, roasted vegetables, or cheesy casseroles make great companions to your dessert and round out any meal.
Drink Recommendations
Complete the experience with a refreshing iced tea, a crisp glass of white wine, or a fun mocktail.
Storage and Reheating Tips
Wondering how to store your delicious Cheesecake Rice Krispies Treats? Here’s how!
How to Store Leftovers
These treats can be stored in an airtight container at room temperature for up to a week. If you need to keep them longer, consider chilling them in the refrigerator.
Reheating Techniques
If you prefer these treats warm, you can pop them in the microwave for a few seconds. Be careful—I recommend heating them in short bursts to maintain the texture.
Portioning Tips
For meal prep, you might want to cut them into individual portions right away. This makes grabbing a snack super easy during busy days!
Nutritional Information and Benefits
Curious about the nutritional content? Here’s what you need to know:
Nutritional Values per Serving
Approximately, each square contains around 150 calories, 2 grams of protein, and 1 gram of fiber. These are estimates based on regular ingredients, and values will vary based on your specific additions.
Ingredient Benefits
- Cream Cheese: A good source of calcium and protein.
- Rice Krispies: Fortified with vitamins, these can provide energy quickly.
- Butter: In moderation, it adds a richness that enhances flavor.
Recommended Portions
For a dessert, one square is typically a satisfying serving. However, feel free to indulge a little, especially if you’ve had a long day!
Common Mistakes to Avoid
Making Cheesecake Rice Krispies Treats should be fun and simple. Here are a few pitfalls to watch out for.
Issue 1 – Using Cold Ingredients
Be sure to soften your cream cheese ahead of time. Cold cream cheese can lead to clumps in the mixture, affecting the final texture.
Issue 2 – Overmixing the Cereal
When folding in the Rice Krispies, do it gently to maintain the cereal’s crunch. Overmixing can turn your treats into a dense block rather than a chewy delight.
Issue 3 – Not Letting Them Set
Patience is key! Allow your treats ample time to cool and set before cutting, or they may crumble apart.
Inspiring Conclusion
Cheesecake Rice Krispies Treats are not just a snack; they are an experience. Whether you’re making them for a birthday party, a family gathering, or just to enjoy on a quiet night in, they promise to bring smiles and satisfaction. This recipe embodies the joys of cooking—experimenting, sharing, and creating memories.
We hope you’ll feel inspired to try your hand at these delightful treats, experiment with different flavors, and share them with your loved ones. After all, there’s nothing quite like the joy of sharing a delicious dessert!
FAQ (Frequently Asked Questions)
Can I prepare this recipe in advance?
Absolutely! You can make these a day ahead. Just store them in an airtight container at room temperature.
What are the best substitutes for cream cheese?
You could use Greek yogurt or a dairy-free cream cheese alternative.
Do they need to be refrigerated?
No, they can be kept at room temperature, but you can refrigerate them for a firmer texture.
Can I use flavored marshmallows?
Using flavored marshmallows can add an extra layer of taste, feel free to experiment!
Are these suitable for freezing?
Yes! Just wrap them tightly in plastic wrap before placing them in the freezer, and they’ll last up to three months.
Can I make mini versions?
Definitely! Use a mini muffin tin to create bite-sized treats for parties.
What flavor variations can I try?
Lemon, chocolate, white chocolate raspberry, or even pumpkin spice for seasonal flair!
Will they turn out the same if I use low-fat cream cheese?
Yes, you can still achieve great results; just ensure you mix it well.
How do I make them look prettier?
Drizzle some melted chocolate on top and sprinkle with crushed graham crackers or fresh berries for a lovely finish.
Can I use different cereals?
Sure! Feel free to experiment with other crisped cereals for a different texture or flavor.
Kinder Bueno Cheesecake: A Deliciously Creamy Delight
PrintCheesecake Rice Krispies Treats: A Delicious Twist on a Classic Treat
A delightful mashup of creamy cheesecake and crispy Rice Krispies treats, featuring a buttery graham cracker crust and a tangy cream cheese layer swirled through the classic marshmallow-cereal mixture. Perfect for potlucks, birthdays, or when you can’t decide between two desserts!
- Prep Time: 20 minutes
- Cook Time: 10 minutes
- Total Time: 1 hour 30 minutes (includes chilling)
- Yield: 16 squares 1x
- Category: Dessert
- Method: No-Bake
- Cuisine: American Fusion
- Diet: Vegetarian
Ingredients
- For the Crust:
- 1½ cups graham cracker crumbs
- ¼ cup granulated sugar
- 6 tbsp unsalted butter, melted
- For the Cheesecake Layer:
- 8 oz cream cheese, softened
- ¼ cup powdered sugar
- 1 tsp vanilla extract
- 1 tsp lemon juice
- For the Rice Krispies Layer:
- 3 tbsp unsalted butter
- 4 cups mini marshmallows
- 5 cups Rice Krispies cereal
- Optional: ½ cup white chocolate chips for drizzle
Instructions
- Make Crust: Mix graham crumbs, sugar, and melted butter. Press firmly into 9×9 pan. Freeze 10 mins.
- Cheesecake Filling: Beat cream cheese, powdered sugar, vanilla, and lemon juice until smooth. Spread evenly over crust. Chill 15 mins.
- Krispies Layer: Melt butter over low heat. Add marshmallows, stir until smooth. Remove from heat, mix in cereal.
- Assemble: Gently press warm cereal mixture over cheesecake layer. Cool completely.
- Finish: Melt white chocolate and drizzle over top. Chill 1 hour before cutting.
Notes
- Pro Tip: Use parchment paper for easy removal
- Variations: Add strawberry jam swirls or crushed Oreos
- Storage: Keep refrigerated up to 5 days
- For Neater Slices: Dip knife in hot water before cutting
Nutrition
- Serving Size: 1 square
- Calories: 220
- Sugar: 18g
- Sodium: 120mg
- Fat: 12g
- Saturated Fat: 7g
- Unsaturated Fat: 3g
- Trans Fat: 0g
- Carbohydrates: 26g
- Fiber: 0g
- Protein: 2g
- Cholesterol: 30mg