Crispy Sushi Waffle

Crispy Sushi Waffle

Sushi Reinvented: The Crispy Waffle Sensation

Crispy Sushi Waffles brings together the best of two worlds—crispy, savory rice waffles topped with fresh sushi ingredients. This fun and innovative dish is perfect for adventurous eaters looking to put a twist on traditional sushi. The crispy waffle base adds a delightful crunch that complements the fresh toppings like salmon, avocado, and nori. Ideal for casual gatherings, sushi-themed parties, or whenever you want to try something new, this recipe is as visually stunning as it is delicious!

This unique dish is perfect for a fun twist on traditional sushi, ideal for festive occasions like sushi-themed parties, casual dinner nights, or even summer barbecues where you want to impress guests with something innovative and delicious.

How to Make From Scratch Crispy Sushi Waffle:

To make Crispy Sushi Waffles, you’ll need sushi rice, nori (seaweed), fresh seafood (like salmon or tuna), vegetables, and a waffle iron. The base is made from crispy rice waffles that act as a crunchy, savory foundation for sushi toppings.

When to Flip Crispy Sushi Waffle:

When cooking the sushi rice in the waffle iron, you’ll want to flip or check after about 5-6 minutes to ensure both sides are golden and crispy without burning.

How to Reheat Crispy Sushi Waffle:

Reheat your sushi waffles by placing them in a hot oven or air fryer for 5-7 minutes to regain their crispness without making the toppings too hot.

Can You Save Batter Crispy Sushi Waffle?

Since sushi rice isn’t a traditional batter, you can store the leftover rice in the refrigerator for up to 2 days and reshape it for more waffles when needed.

Can You Freeze Crispy Sushi Waffles?

Yes, you can freeze the crispy rice waffles without the toppings. Wrap them tightly in plastic wrap and store them in an airtight container for up to a month. When ready to serve, reheat in the oven or air fryer.

Ingredients:

  • 2 cups sushi rice (cooked)
  • 1 tbsp rice vinegar
  • 1 tsp sugar
  • 1/2 tsp salt
  • 1 sheet nori, cut into strips
  • 100g fresh salmon or tuna, thinly sliced
  • 1 avocado, thinly sliced
  • Soy sauce for dipping
  • Wasabi and pickled ginger for serving
  • Sesame seeds for garnish

Directions:

  1. Cook sushi rice according to package instructions. Mix in rice vinegar, sugar, and salt, and let cool.
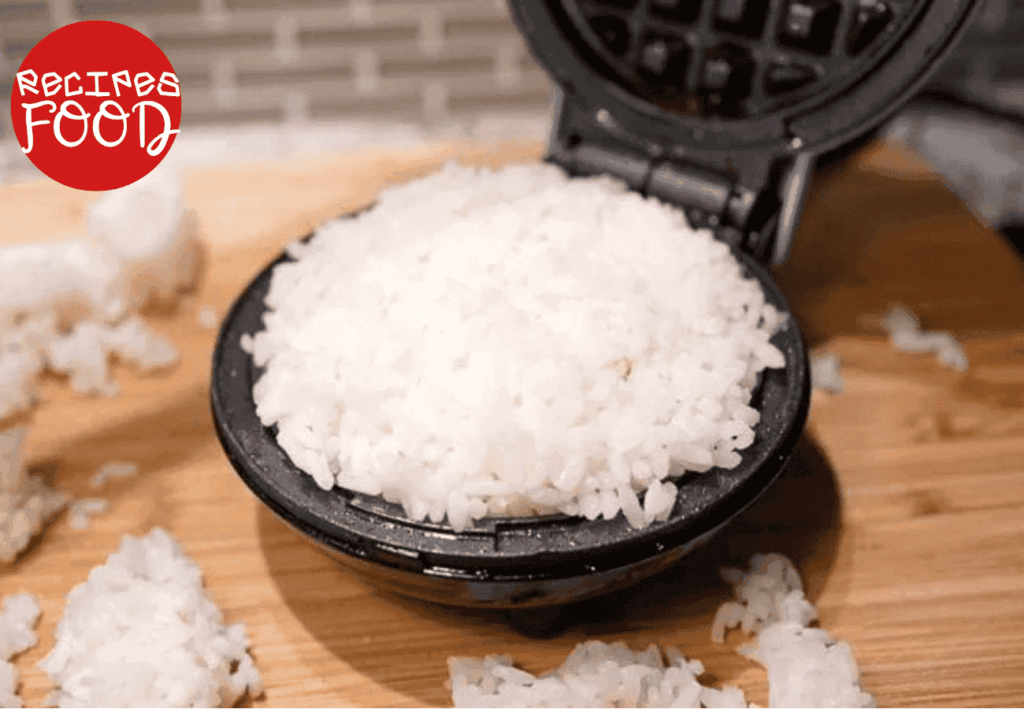
  2. Preheat the waffle iron and spray with non-stick cooking spray.
  3. Scoop a layer of rice into the waffle iron, pressing it down firmly to spread evenly.
  4. Cook the rice for 5-7 minutes or until golden and crispy on both sides.
  5. Carefully remove the rice waffle and top with slices of salmon or tuna, avocado, and nori strips.
  6. Garnish with sesame seeds and serve with soy sauce, wasabi, and pickled ginger.

Editor’s Note:

For added crunch, try using panko breadcrumbs mixed with the rice before placing it in the waffle iron. You can also customize your toppings with other sushi favorites like cucumber, crab, or spicy mayo.

Nutrition Facts (Per Serving):

  • Calories: 300
  • Protein: 12g
  • Carbohydrates: 45g
  • Fat: 8g
  • Fiber: 5g

California Roll Cucumber Salad

Quick Tomato Soup With Grilled Cheese

Quick Tomato Soup With Grilled Cheese

Golden, Gooey Grilled Cheese with Savory Tomato Soup – A Match Made in Comfort Food Heaven

Grilled Cheese and Tomato Soup is the ultimate comfort food pairing, perfect for cozy evenings at home or a nostalgic lunch. The combination of buttery, crispy grilled cheese sandwiches filled with melted cheese and a rich, creamy tomato soup is irresistible. This classic duo is easy to make, satisfying for all ages, and brings warmth to any occasion, from rainy days to family dinners.

This dish is great for rainy days, casual family dinners, or even comfort-food-themed parties.

How to Make From Scratch:

  1. Grilled Cheese: Start with fresh, thick slices of bread, spread butter on both sides, and place slices of your favorite cheese in between. Grill in a pan on medium heat until golden brown and crispy.
  2. Tomato Soup: For homemade soup, sauté onions and garlic, add canned or fresh tomatoes, and simmer with chicken or vegetable broth. Blend until smooth and add cream for richness.

When to Flip:

Flip the grilled cheese once the bottom side is golden brown, usually after 3-4 minutes.

How to Reheat:

To reheat grilled cheese, place it in a preheated oven at 350°F for 5-7 minutes to restore its crispiness. For soup, warm it on the stove on low heat while stirring.

Can You Save Batter?

For grilled cheese, there is no batter, but you can prepare extra sandwiches and keep them in the fridge for a day or two before cooking.

Can You Freeze?

Tomato soup freezes well for up to 3 months. Store it in an airtight container. Grilled cheese does not freeze well after cooking but can be assembled and frozen before grilling.


Ingredients:

  • Grilled Cheese:
    • 8 slices of bread
    • 4 tablespoons butter
    • 8 slices of cheddar or your favorite cheese
  • Tomato Soup:
    • 1 tablespoon olive oil
    • 1 small onion, chopped
    • 2 garlic cloves, minced
    • 1 can (28 ounces) crushed tomatoes
    • 2 cups vegetable or chicken broth
    • 1/2 cup cream
    • Salt and pepper to taste

Directions:

  1. Grilled Cheese:
    • Heat a skillet over medium heat.
    • Spread butter on both sides of each bread slice.
    • Place cheese between two slices of bread and grill until golden, about 3-4 minutes per side.
  2. Tomato Soup:
    • Heat oil in a pot over medium heat. Sauté onions until soft, then add garlic and cook for 1 minute.
    • Add crushed tomatoes and broth, then simmer for 15 minutes.
    • Blend until smooth, then stir in cream. Season with salt and pepper.
Quick Tomato Soup With Grilled Cheese

Editor’s Note:
Feel free to add herbs like basil to the soup for extra flavor, or try different cheeses like mozzarella or Swiss for the sandwiches.


Nutrition Facts:

  • Grilled Cheese: Approx. 350 calories per sandwich
  • Tomato Soup: Approx. 200 calories per cup
Quick Tomato Soup With Grilled Cheese

Sheet Pan Lemon Garlic Salmon

Sheet Pan Lemon Garlic Salmon

Quick and Flavorful Sheet Pan Salmon with Lemon and Garlic

Transform your weeknight dinners with this effortless Sheet Pan Lemon Garlic Salmon recipe. Perfect for busy days or special occasions, this dish features succulent salmon fillets baked with a tangy lemon-garlic marinade, paired with your choice of roasted vegetables. It’s a wholesome, one-pan meal that’s both healthy and delicious, offering a burst of flavor with minimal cleanup. Ideal for anyone looking for a fast, flavorful, and nutritious meal, this recipe brings together simplicity and taste in every bite.

Perfect for a quick weeknight dinner or a special occasion where you want a meal that’s both impressive and easy to prepare.

How to Make From Scratch Sheet Pan Lemon Garlic Salmon:

Making this dish from scratch is straightforward and requires minimal preparation.

When to Flip Sheet Pan Lemon Garlic Salmon:

There is no need to flip the salmon during baking. The fish will cook evenly on one side.

How to Reheat Sheet Pan Lemon Garlic Salmon:

Reheat leftovers gently in the microwave or the oven at 300°F (150°C) until warmed through to avoid drying out the salmon.

Can You Save Batter Sheet Pan Lemon Garlic Salmon?

This recipe does not use batter.

Can You Freeze Sheet Pan Lemon Garlic Salmon?

You can freeze the cooked salmon. Place it in an airtight container or wrap it tightly in foil or plastic wrap before freezing. It can be stored for up to 2 months. For best results, thaw it in the refrigerator before reheating.

Ingredients:

  • 4 salmon fillets
  • 2 tablespoons olive oil
  • 2 lemons (1 sliced, 1 juiced)
  • 4 cloves garlic, minced
  • 1 teaspoon dried oregano
  • 1 teaspoon dried thyme
  • 1 teaspoon dried rosemary
  • Salt and black pepper, to taste
  • 1 cup baby potatoes, halved
  • 1 cup broccoli florets
  • 1 cup cherry tomatoes
Sheet Pan Lemon Garlic Salmon

Directions:

  1. Preheat Oven: Preheat your oven to 400°F (200°C).
  2. Prepare Marinade: In a small bowl, mix olive oil, lemon juice, minced garlic, oregano, thyme, rosemary, salt, and pepper.
  3. Season Salmon: Place the salmon fillets on a large sheet pan. Brush the fillets with the lemon garlic marinade.
  4. Add Vegetables: Arrange baby potatoes, broccoli florets, and cherry tomatoes around the salmon on the sheet pan. Drizzle the remaining marinade over the vegetables and season with salt and pepper.
  5. Bake: Bake in the preheated oven for 15-20 minutes, or until the salmon flakes easily with a fork and the vegetables are tender.
  6. Garnish: Optional – garnish with lemon slices and fresh herbs before serving.

Editor’s Note:

This Sheet Pan Lemon Garlic Salmon is a quick and easy recipe that’s perfect for busy weeknights or when you want a healthy, flavorful meal with minimal cleanup. The lemon and garlic add a bright, aromatic flavor to the tender salmon, while the roasted vegetables complement the dish perfectly.

Nutrition Facts (per serving):

  • Calories: 320
  • Protein: 30g
  • Carbohydrates: 20g
  • Fat: 15g
  • Fiber: 5g
Sheet Pan Lemon Garlic Salmon

Pasta with Creamy Kale Sauce A Nutritious Twist on a Classic in 30-Minute

Mini Caprese Skewers: A Bite-Sized Italian Classic

Mini Caprese Skewers

Fresh and Flavorful Mini Caprese Skewers

These Mini Caprese Skewers are a simple yet elegant appetizer, perfect for any occasion. Made with juicy cherry tomatoes, creamy mozzarella, and fragrant basil, they’re drizzled with olive oil and balsamic glaze for a burst of fresh, Italian flavor. Quick to assemble and visually appealing, these bite-sized delights will impress guests at any gathering, from casual picnics to formal parties.

Perfect for festive occasions like cocktail parties, summer picnics, or holiday gatherings

Mini Caprese Skewers

How to Make From Scratch Mini Caprese Skewers:

Creating these fresh, colorful Mini Caprese Skewers is quick and easy. Simply assemble cherry tomatoes, fresh mozzarella, and basil on small skewers, then drizzle with olive oil and balsamic glaze for a flavor-packed bite.

When to Flip Mini Caprese Skewers:

Since this is a cold dish, there’s no flipping needed! Just make sure the ingredients are evenly distributed on each skewer.

How to Reheat Mini Caprese Skewers:

Mini Caprese Skewers are best enjoyed fresh and do not require reheating.

Can You Save Batter Mini Caprese Skewers?

No batter is used in this recipe.

Can You Freeze Mini Caprese Skewers?

This dish doesn’t freeze well, as the fresh mozzarella and basil may lose texture after freezing.


Ingredients:

  • 1 pint cherry tomatoes
  • 8 oz fresh mozzarella balls
  • Fresh basil leaves
  • Olive oil (for drizzling)
  • Balsamic glaze (for drizzling)
  • Salt and pepper to taste
  • Small skewers or toothpicks

Directions:

  1. Assemble: On each skewer, layer a cherry tomato, a basil leaf, and a mozzarella ball. Repeat if the skewers are long enough.
  2. Season: Drizzle the skewers with olive oil and balsamic glaze, then sprinkle with salt and pepper.
  3. Serve: Arrange on a platter and serve immediately or refrigerate until ready to eat.

Editor’s Note:

For extra flavor, you can marinate the mozzarella balls in olive oil, garlic, and Italian herbs for an hour before assembling.


Nutrition Facts (Per Serving):

  • Calories: 90
  • Fat: 7g
  • Carbohydrates: 2g
  • Protein: 4g
Mini Caprese Skewers

Bruschetta