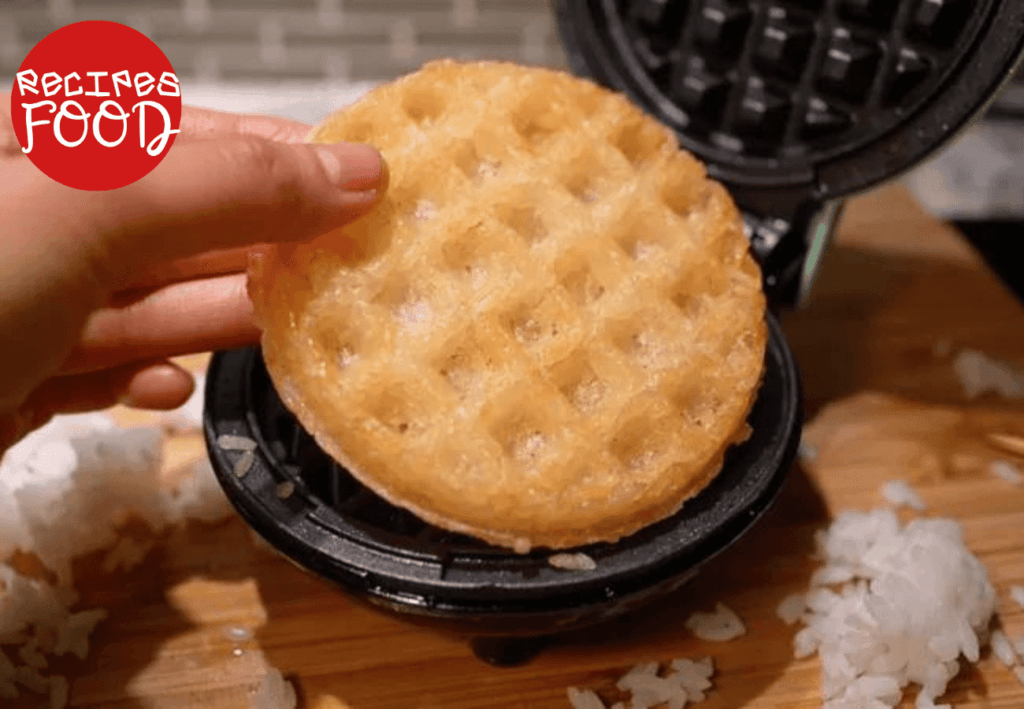
Crispy Sushi Waffles brings together the best of two worlds—crispy, savory rice waffles topped with fresh sushi ingredients. This fun and innovative dish is perfect for adventurous eaters looking to put a twist on traditional sushi. The crispy waffle base adds a delightful crunch that complements the fresh toppings like salmon, avocado, and nori. Ideal for casual gatherings, sushi-themed parties, or whenever you want to try something new, this recipe is as visually stunning as it is delicious!
This unique dish is perfect for a fun twist on traditional sushi, ideal for festive occasions like sushi-themed parties, casual dinner nights, or even summer barbecues where you want to impress guests with something innovative and delicious.
How to Make From Scratch Crispy Sushi Waffle:
To make Crispy Sushi Waffles, you’ll need sushi rice, nori (seaweed), fresh seafood (like salmon or tuna), vegetables, and a waffle iron. The base is made from crispy rice waffles that act as a crunchy, savory foundation for sushi toppings.
When to Flip Crispy Sushi Waffle:
When cooking the sushi rice in the waffle iron, you’ll want to flip or check after about 5-6 minutes to ensure both sides are golden and crispy without burning.
How to Reheat Crispy Sushi Waffle:
Reheat your sushi waffles by placing them in a hot oven or air fryer for 5-7 minutes to regain their crispness without making the toppings too hot.
Can You Save Batter Crispy Sushi Waffle?
Since sushi rice isn’t a traditional batter, you can store the leftover rice in the refrigerator for up to 2 days and reshape it for more waffles when needed.
Can You Freeze Crispy Sushi Waffles?
Yes, you can freeze the crispy rice waffles without the toppings. Wrap them tightly in plastic wrap and store them in an airtight container for up to a month. When ready to serve, reheat in the oven or air fryer.
Ingredients:
2 cups sushi rice (cooked)
1 tbsp rice vinegar
1 tsp sugar
1/2 tsp salt
1 sheet nori, cut into strips
100g fresh salmon or tuna, thinly sliced
1 avocado, thinly sliced
Soy sauce for dipping
Wasabi and pickled ginger for serving
Sesame seeds for garnish
Directions:
Cook sushi rice according to package instructions. Mix in rice vinegar, sugar, and salt, and let cool.
Preheat the waffle iron and spray with non-stick cooking spray.
Scoop a layer of rice into the waffle iron, pressing it down firmly to spread evenly.
Cook the rice for 5-7 minutes or until golden and crispy on both sides.
Carefully remove the rice waffle and top with slices of salmon or tuna, avocado, and nori strips.
Garnish with sesame seeds and serve with soy sauce, wasabi, and pickled ginger.
Crispy Sushi WaffleCrispy Sushi Waffle
Editor’s Note:
For added crunch, try using panko breadcrumbs mixed with the rice before placing it in the waffle iron. You can also customize your toppings with other sushi favorites like cucumber, crab, or spicy mayo.
A Deliciously Cheesy Twist on Classic Lasagna Cheesy Spinach Lasagna is the ultimate comfort food that combines the richness of multiple slices of cheese with the freshness of sautéed spinach,
Crispy Shrimp Tempura: A Crunchy Delight for Any Occasion Crispy Shrimp Tempura is a mouthwatering Japanese-inspired dish, perfect for appetizers or as a crispy side to your meal. Light, golden,
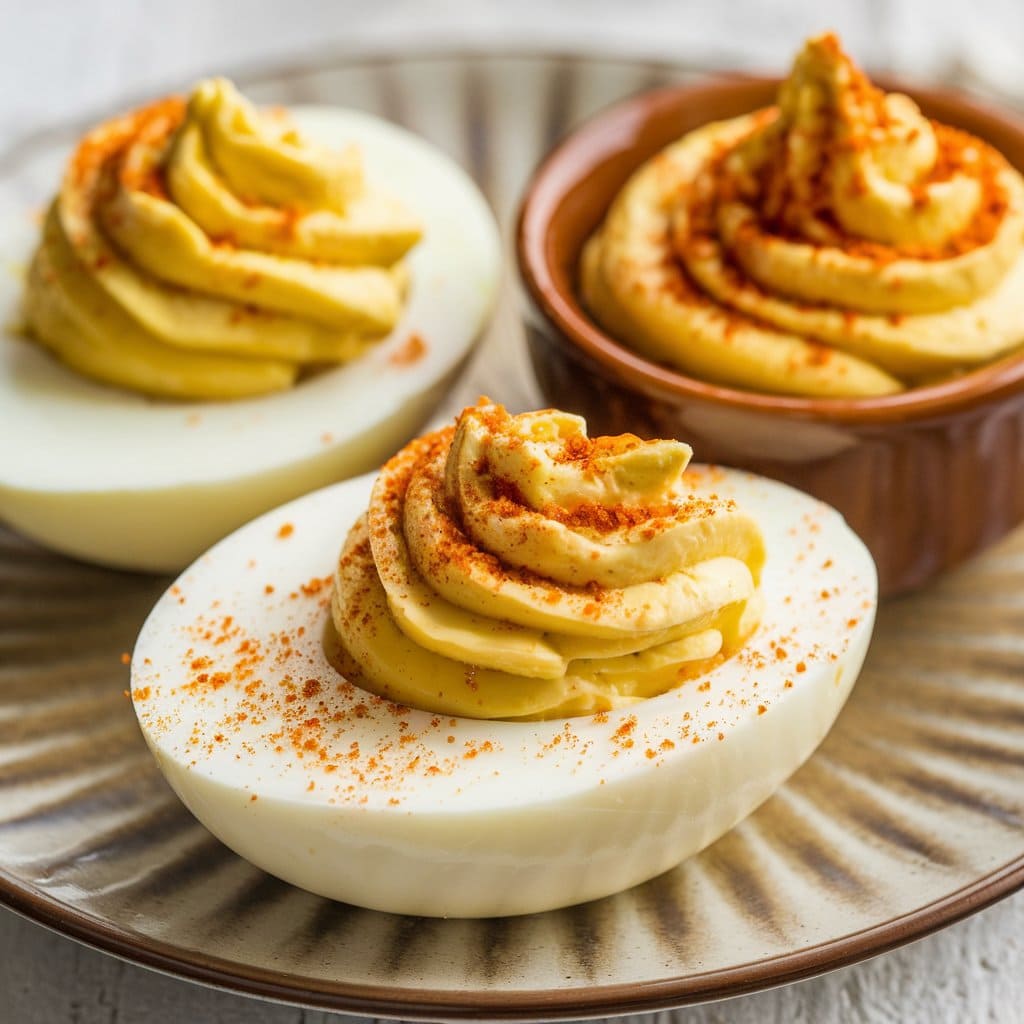
Deviled eggs are a timeless appetizer that never goes out of style. Whether hosting a party, preparing a holiday spread, or craving a delicious snack, this deviled eggs recipe is your go-to guide. In this article, we’ll walk you through everything you need to know to make the classic deviled eggs creamy, flavorful, and irresistible. Plus, we’ll share tips, variations, and answers to all your burning questions. Let’s get cracking!
Deviled Eggs Recipe
Table of Contents
Why You’ll Love This Deviled Eggs Recipe
Perfect for Any Occasion
Deviled eggs are a crowd-pleaser, whether at a family gathering, a potluck, or a fancy dinner party. They’re bite-sized, easy to serve, and always disappear fast!
Simple and Affordable Ingredients
With just a handful of pantry staples, such as eggs, mayonnaise, and mustard, this easy-deviled egg recipe is budget-friendly and requires no fancy equipment.
Endlessly Customizable
Deviled eggs can be spicy, tangy, or keto-friendly, so they can be tailored to suit your taste buds or dietary preferences. They’re the ultimate versatile dish!
Essential Ingredients for the Recipe
Ingredients:
6 large eggs
3 tablespoons mayonnaise
1 teaspoon Dijon mustard (or yellow mustard)
Salt and pepper to taste
Paprika for garnish
Optional: Fresh chives, hot sauce, or bacon bits for variation
Eggs
Eggs are the star of the show. Use fresh, large eggs for the best results. If you’re concerned about peeling, older eggs (about 7-10 days old) tend to peel more easily.
Mayonnaise
Mayonnaise adds creaminess to the filling. Use your favorite brand, or try a homemade version for an extra touch of flavor.
Mustard
Dijon or yellow mustard works perfectly. Mustard adds a tangy kick that balances the richness of the mayo.
Paprika
A sprinkle of paprika adds a smoky flavor and gives your deviled eggs that classic finishing touch.
Ingredient Preparation
Boiling the Eggs
Cover your eggs in a single layer in a pot with cold water. Bring the water to a boil, cover the pot, and remove it from the heat. Let the eggs sit for 10-12 minutes before transferring them to an ice bath to cool.
Peeling the Eggs
Gently tap the eggs on a hard surface and roll them to crack the shell. Peel under cool running water to make the process easier.
Cutting and Scooping
Slice the eggs in half lengthwise and carefully remove the yolks. Place the yolks in a bowl and set the whites aside.
Step-by-Step Cooking Instructions
Step 1 – Preparing the Filling
Mash the egg yolks with a fork until they’re crumbly. Add mayonnaise, mustard, salt, and pepper, then mix until smooth and creamy.
Step 2 – Filling the Egg Whites
Spoon the yolk mixture back into the egg white halves. For a fancier presentation, use a piping bag or zip-top bag with the corner snipped off.
Step 3 – Adding the Finishing Touches
Sprinkle each deviled egg with paprika for a pop of color and flavor. For extra flair, add fresh herbs like chives or dill.
Tips for an Even Tastier Version
Add Extra Ingredients
Mix in finely chopped pickles, bacon bits, or hot sauce for a unique twist.
Enhance the Flavor
A splash of vinegar or a pinch of garlic powder can elevate the flavor profile of your deviled eggs.
Adjust for Preferences
For a healthier version, use Greek yogurt instead of mayonnaise. For a spicy kick, add a pinch of cayenne pepper.
Recipe Variations and Adaptations
Vegetarian Option
Deviled eggs are naturally vegetarian, but you can add more veggies like diced bell peppers or avocado for extra texture.
Keto-Friendly Option
This recipe is already low-carb, making it perfect for keto diets. Just ensure your mayonnaise and mustard are sugar-free.
Seasonal Variations
Add a touch of pumpkin spice in the fall for a unique twist. Fresh herbs like basil or cilantro can brighten the flavor in the summer.
Serving Suggestions
Pair with a Salad
Serve your deviled eggs with a light green salad or a tangy coleslaw for a refreshing contrast.
Hearty Sides
Pair them with roasted vegetables or a charcuterie board for a more substantial meal.
Drink Recommendations
A crisp white wine, iced tea, or a citrusy mocktail perfectly complements the creamy richness of deviled eggs.
Deviled Eggs Recipe
Storage and Reheating Tips
Storing Leftovers
Deviled eggs can be stored in an airtight container in the fridge for up to 2 days. They should be chilled until ready to serve.
Reheating Tips
Deviled eggs are best served cold, so reheating them is unnecessary.
Portioning for Meal Prep
If you’re making the filling and egg whites beforehand, prepare them separately. Assemble just before serving to keep them fresh.
Nutritional Information and Benefits
Nutrition Information:
Serving Size: 1 deviled egg half
Cholesterol: 95mg
Calories: 70
Sugar: 0.2g
Sodium: 70mg
Fat: 6g
Saturated Fat: 1.5g
Unsaturated Fat: 4g
Trans Fat: 0g
Carbohydrates: 0.5g
Fiber: 0g
Protein: 3g
Health Benefits
Eggs are a great source of protein and essential nutrients like vitamin B12 and selenium.
Recommended Portions
Serving 2-3 deviled egg halves is perfect as appetizers.
Common Mistakes to Avoid
Overcooking the Eggs
Overcooked eggs can lead to a rubbery texture and a greenish yolk. Follow the boiling instructions carefully.
Overfilling the Egg Whites
Be careful not to overfill the egg whites, as the filling can spill out and make them messy.
Skipping the Ice Bath
The ice bath is crucial for easy peeling and preventing overcooking. Don’t skip this step!
Inspiring Conclusion
Deviled eggs are more than just a recipe—they’re a tradition. Whether you stick to the classic deviled eggs or experiment with your variations, this dish will impress. So, grab your eggs, get creative, and enjoy the process of making these delicious bites. Don’t forget to share your creations with friends and family!
FAQ (Frequently Asked Questions)
Can I make deviled eggs ahead of time?
Yes! Prepare the filling and egg whites separately and assemble them just before serving.
What can I use instead of mayonnaise?
Greek yogurt or avocado make great substitutes for mayonnaise.
How do I prevent my deviled eggs from sliding on the plate?
Use a small piece of lettuce or a sprinkle of salt on the plate to keep them in place.
Can I freeze deviled eggs?
It’s not recommended, as the texture of the eggs will change.
How long do deviled eggs last in the fridge?
They can last up to 2 days when stored properly.
What’s the best way to pipe the filling?
Use a piping or zip-top bag with the corner snipped off for a neat presentation.
Can I add cheese to the filling?
Absolutely! Grated cheddar or cream cheese can add a delicious twist.
How do I make spicy deviled eggs?
Add a dash of hot sauce or cayenne pepper to the filling.
Are deviled eggs keto-friendly?
They’re naturally low in carbs and perfect for a keto diet.
What’s the secret to perfectly boiled eggs?
Start with cold water, boil, then let them sit off the heat for 10-12 minutes before cooling in an ice bath.
A timeless and easy-to-make appetizer, these classic deviled eggs are creamy, tangy, and perfect for any occasion. Made with simple ingredients like eggs, mayonnaise, and mustard, they’re a crowd-pleasing favorite.
Optional: Fresh chives, hot sauce, or bacon bits for variation
Instructions
Boil the Eggs: Place eggs in a pot, cover with cold water, and bring to a boil. Once boiling, cover and remove from heat. Let sit for 10-12 minutes, then transfer to an ice bath to cool.Peel the Eggs: Gently crack and peel the eggs under cool running water.Prepare the Filling: Slice eggs in half lengthwise, remove yolks, and mash them in a bowl. Add mayonnaise, mustard, salt, and pepper, then mix until smooth.Fill the Egg Whites: Spoon or pipe the yolk mixture back into the egg white halves.Garnish: Sprinkle with paprika and optional toppings like chives or bacon bits.Serve: Chill until ready to serve.
Notes
For easier peeling, use eggs that are 7-10 days old.
Add a splash of vinegar or hot sauce for extra flavor.
Store leftovers in an airtight container in the fridge for up to 2 days.
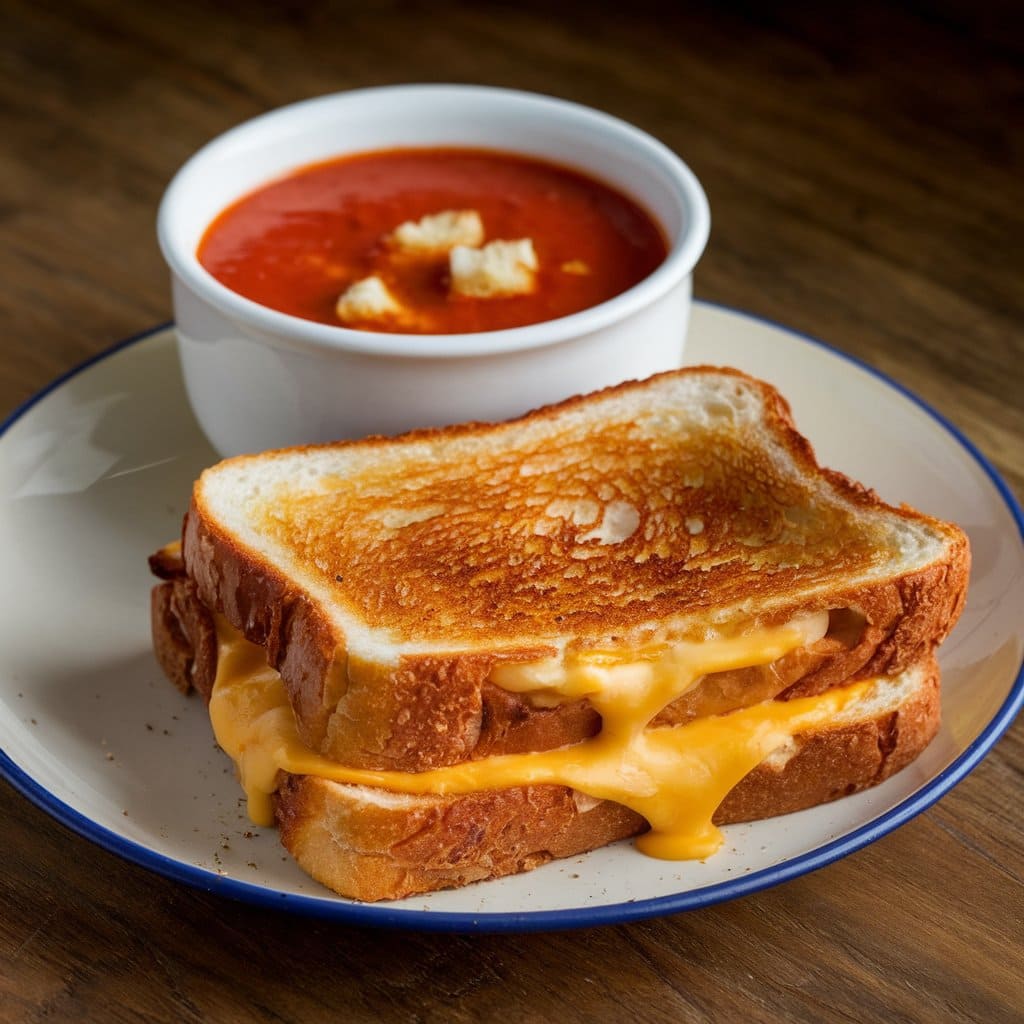
Golden, Gooey Grilled Cheese with Savory Tomato Soup – A Match Made in Comfort Food Heaven
Grilled Cheese and Tomato Soup is the ultimate comfort food pairing, perfect for cozy evenings at home or a nostalgic lunch. The combination of buttery, crispy grilled cheese sandwiches filled with melted cheese and a rich, creamy tomato soup is irresistible. This classic duo is easy to make, satisfying for all ages, and brings warmth to any occasion, from rainy days to family dinners.
This dish is great for rainy days, casual family dinners, or even comfort-food-themed parties.
How to Make From Scratch:
Grilled Cheese: Start with fresh, thick slices of bread, spread butter on both sides, and place slices of your favorite cheese in between. Grill in a pan on medium heat until golden brown and crispy.
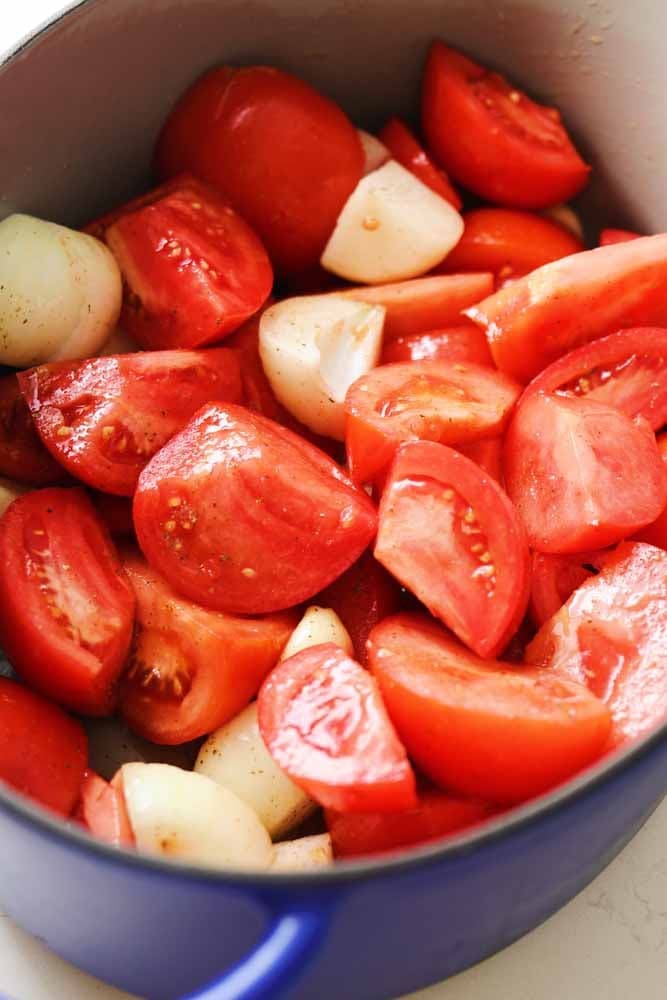
Tomato Soup: For homemade soup, sauté onions and garlic, add canned or fresh tomatoes, and simmer with chicken or vegetable broth. Blend until smooth and add cream for richness.
When to Flip:
Flip the grilled cheese once the bottom side is golden brown, usually after 3-4 minutes.
How to Reheat:
To reheat grilled cheese, place it in a preheated oven at 350°F for 5-7 minutes to restore its crispiness. For soup, warm it on the stove on low heat while stirring.
Can You Save Batter?
For grilled cheese, there is no batter, but you can prepare extra sandwiches and keep them in the fridge for a day or two before cooking.
Can You Freeze?
Tomato soup freezes well for up to 3 months. Store it in an airtight container. Grilled cheese does not freeze well after cooking but can be assembled and frozen before grilling.
Ingredients:
Grilled Cheese:
8 slices of bread
4 tablespoons butter
8 slices of cheddar or your favorite cheese
Tomato Soup:
1 tablespoon olive oil
1 small onion, chopped
2 garlic cloves, minced
1 can (28 ounces) crushed tomatoes
2 cups vegetable or chicken broth
1/2 cup cream
Salt and pepper to taste
Directions:
Grilled Cheese:
Heat a skillet over medium heat.
Spread butter on both sides of each bread slice.
Place cheese between two slices of bread and grill until golden, about 3-4 minutes per side.
Tomato Soup:
Heat oil in a pot over medium heat. Sauté onions until soft, then add garlic and cook for 1 minute.
Add crushed tomatoes and broth, then simmer for 15 minutes.
Blend until smooth, then stir in cream. Season with salt and pepper.
Quick Tomato Soup With Grilled Cheese
Editor’s Note: Feel free to add herbs like basil to the soup for extra flavor, or try different cheeses like mozzarella or Swiss for the sandwiches.
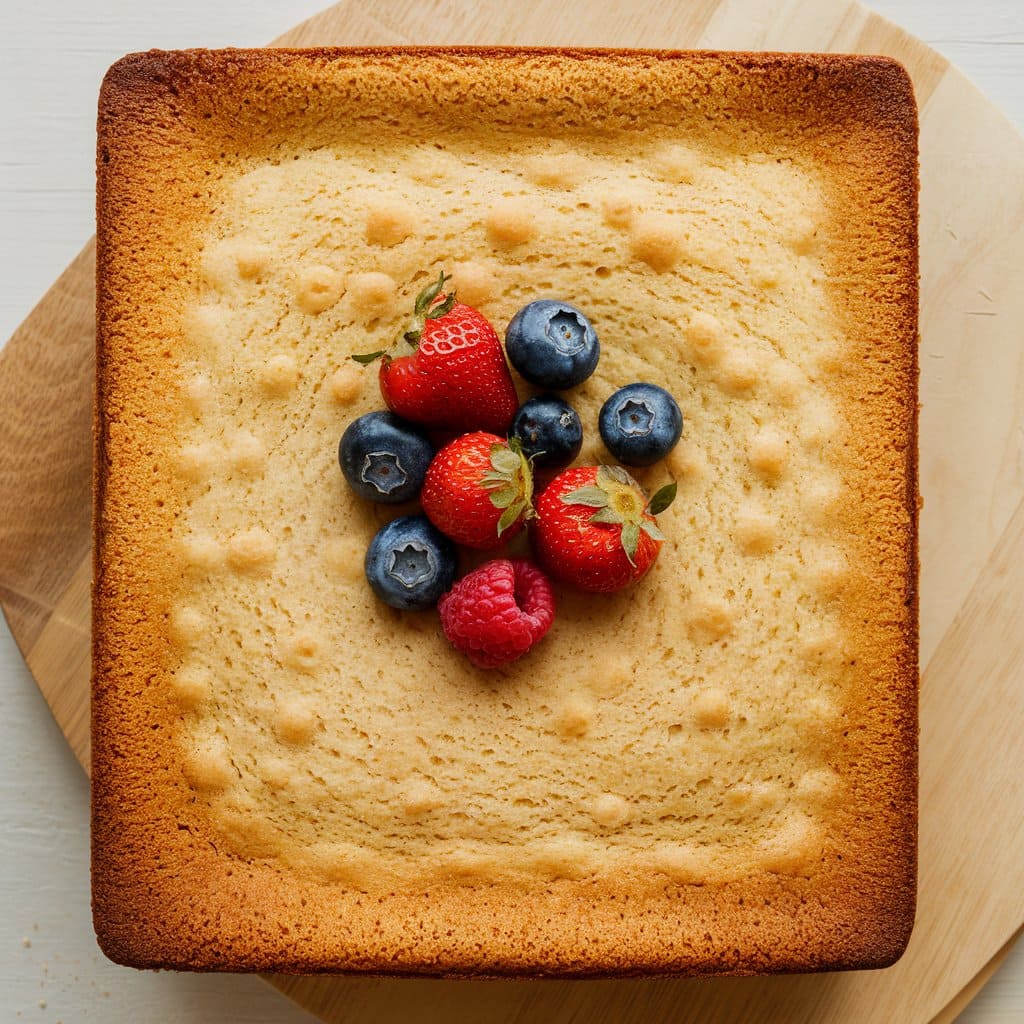
Basic Sheet Pan Cake: Easy & Versatile Dessert This Basic Sheet Pan Cake is perfect for any celebration – from birthdays, and family gatherings, to casual get-togethers. Its simple yet
Deliciously Sweet and Savory Bacon-Wrapped Dates: A Perfect Party Appetizer Indulge in the irresistible combination of sweet Medjool dates and crispy bacon with this simple yet elegant recipe for bacon-wrapped
Deliciously Crispy and Fluffy Waffles for a Perfect Breakfast Discover the ultimate recipe for classic waffles that are crispy on the outside and fluffy on the inside. Perfect for a
Hearty and Sweet: A Classic Baked Beans Delight Perfect for family gatherings, summer barbecues, or holiday dinners, this Classic Baked Beans Recipe brings a rich, sweet, and smoky flavor to
Creamy Chicken Alfredo: A Classic Italian Comfort Dish Dive into the creamy goodness of this Chicken Alfredo recipe, a perfect blend of tender chicken, rich Alfredo sauce, and fettuccine pasta.