Table of Contents
Welcome to our comprehensive guide on making delectable Zebra Cakes! In this article, you’ll discover everything you need to know about creating the perfect dessert—from a simple and eye-catching Easy Zebra Cakes Recipe to mastering the art of making Homemade Zebra Cakes that will dazzle your family and friends. Whether you’re curious about the best Zebra Cake Recipe or wondering How to Make Zebra Cakes that are as delicious as they are beautiful, you’re in the right place. Our detailed guide covers every aspect of the process, ensuring your experience is as rewarding as the final product.
Why You’ll Love Zebra Cakes
Zebra Cakes are more than just a treat—they’re a delightful fusion of flavor, texture, and visual appeal. Here’s why these striped beauties will win you over from the very first bite.
Perfect for Families and Celebrations
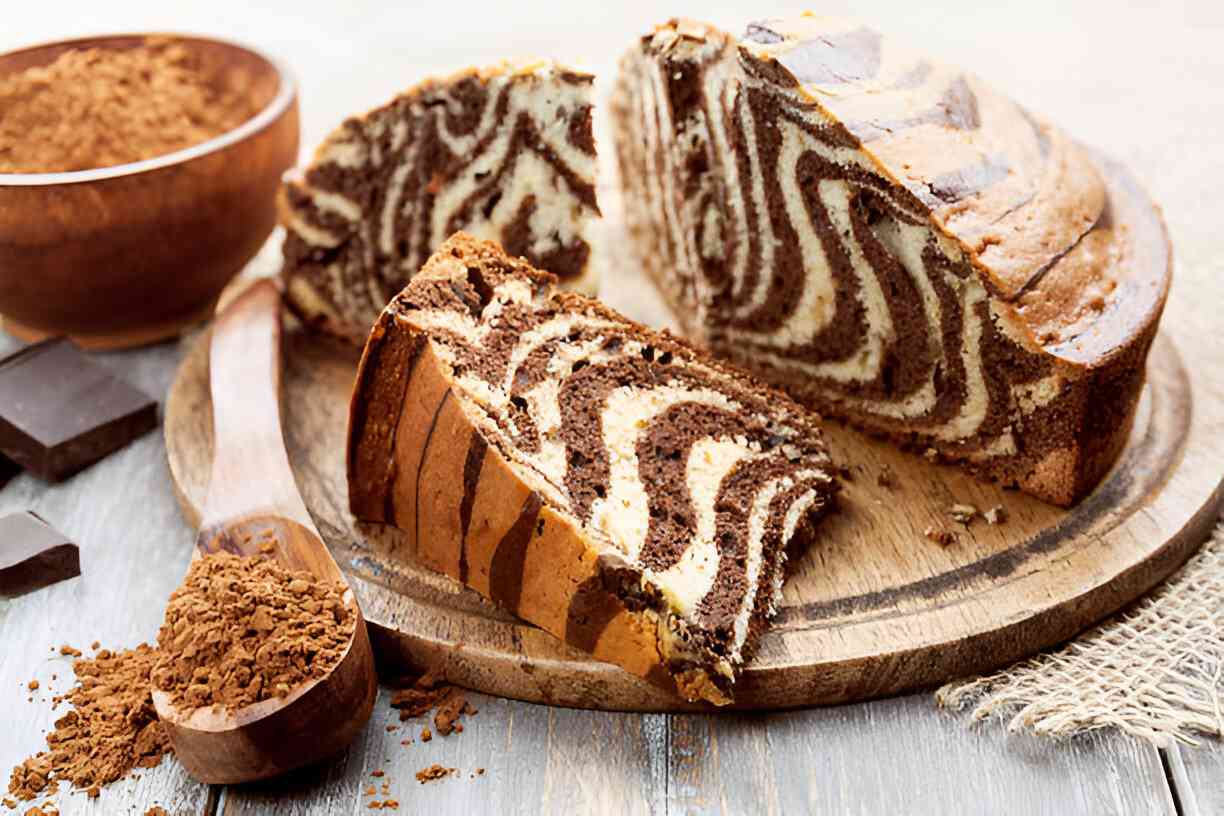
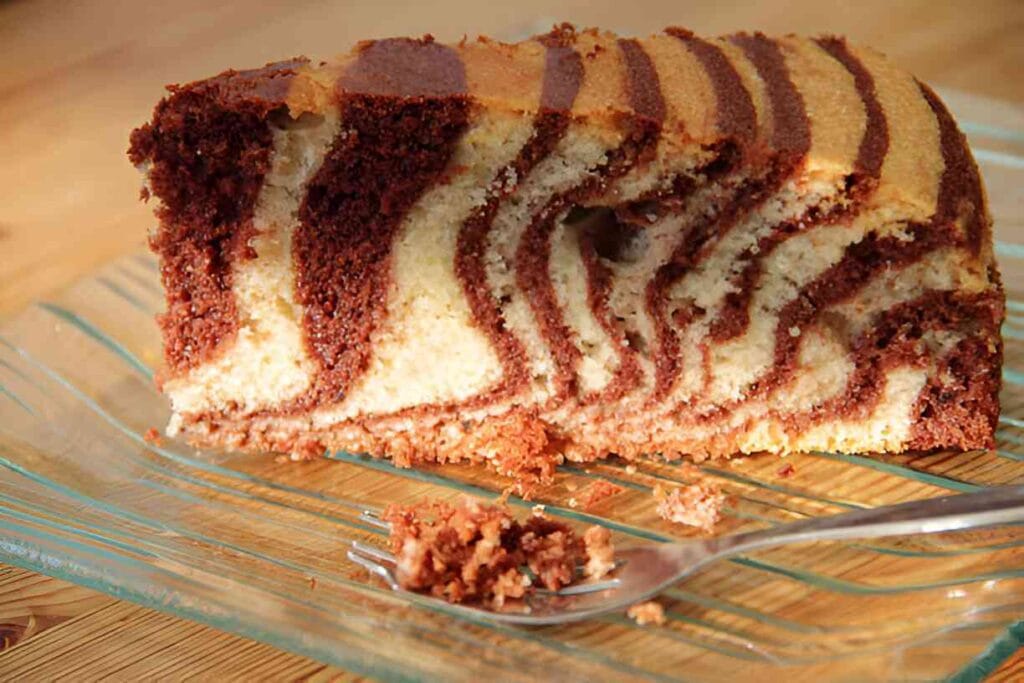
Imagine gathering around the table with loved ones, sharing a dessert that tastes amazing and captivates with its unique striped pattern. Zebra Cakes are an absolute hit at family gatherings, birthday parties, and casual get-togethers. The striking black-and-white swirl is fun for kids and adults alike, and the ease of preparation makes it a go-to option for busy families. With our Easy Zebra Cakes Recipe, you can whip up a crowd-pleaser in no time, ensuring that every celebration is as memorable as it is delicious.
Nutritional Benefits and Simple, Quality Ingredients
While Zebra Cakes are undeniably indulgent, they also emphasize quality ingredients that provide subtle nutritional benefits. Our recipe calls for fresh eggs, quality flour, and real butter, ensuring that every bite is carefully crafted. The simplicity of the ingredients means you know exactly what’s in your cake, which is perfect for those who value transparency in their cooking. This focus on quality and clarity makes our Homemade Zebra Cakes a smart choice for health-conscious bakers who don’t want to sacrifice flavor for nutrition.
Versatility and Budget-Friendliness
One of the most appealing aspects of our Zebra Cakes is their adaptability. Whether on a tight budget or looking to impress at your next party, this dessert is flexible and cost-effective. You can easily modify the recipe to cater to dietary restrictions (like opting for a gluten-free version) without compromising taste or texture. The versatility inherent in our Zebra Cake Recipe ensures you can create something extraordinary with ingredients you likely already have in your pantry. Knowing How to Make Zebra Cakes opens up a world of creative variations that can be tailored to any occasion.
Essential Ingredients for the Recipe
Every great recipe begins with the right ingredients. Here, we’ll break down the essential components that make our Zebra Cakes irresistible and practical tips on choosing and substituting them if needed.
Ingredients
- 2 cups (250g) all-purpose flour
- 1 ½ cups (300g) granulated sugar
- 1 cup (240ml) milk
- ½ cup (120ml) vegetable oil
- 3 large eggs
- 1 teaspoon vanilla extract
- 2 teaspoons baking powder
- ½ teaspoon salt
- 3 tablespoons unsweetened cocoa powder
- ¼ cup (60ml) hot water

All-Purpose Flour
Flour is the foundation of our Zebra Cakes. It provides structure and texture, ensuring your cake has a light yet firm crumb. Choose a high-quality, all-purpose flour that is finely milled for the best results. If you’re seeking alternatives, consider using a gluten-free flour blend that is designed for baking; just be sure to add a binding agent like xanthan gum if your mix doesn’t already include it.
Fresh Eggs and Butter
Fresh eggs are indispensable in baking. They act as a binding agent that holds the ingredients together while contributing to the cake’s rich flavor. Similarly, butter adds moisture and an unmistakable creamy taste, elevating the dessert experience. If you need a dairy-free version, you can replace butter with a plant-based alternative and use flaxseed or chia egg substitutes to mimic the binding properties of eggs.
Cocoa Powder and Sugar for the Stripes
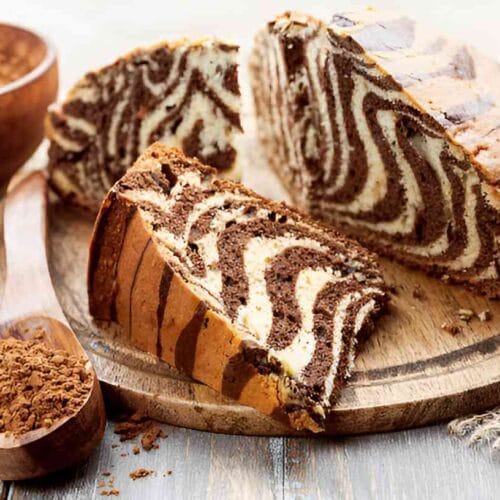
The iconic zebra pattern in your cake comes from the contrast between the plain batter and the cocoa-infused mixture. Cocoa powder not only creates the bold stripes but also enriches the flavor with a hint of chocolate bitterness that perfectly balances the sweetness of the cake. High-quality cocoa powder is a must; opt for unsweetened and natural. Granulated sugar sweetens the batter and helps achieve that perfect texture, so be sure to use fresh, fine-grade sugar for the best results.
Ingredient Preparation
Preparation is the key to a smooth and successful baking process. Follow these simple yet precise steps to ensure that your ingredients are ready for the magic of transforming into a beautiful Zebra Cake.
Step 1 – Sift and Measure Dry Ingredients
Begin by sifting together your all-purpose flour, a portion of your cocoa powder, and baking powder. Sifting removes any lumps and ensures that the dry ingredients are evenly distributed throughout the batter. Accurate measurement is crucial; use measuring cups or a digital kitchen scale to get the quantities right. This step is essential for achieving a uniform texture and structure in your Homemade Zebra Cakes.
Step 2 – Prepare the Wet Ingredients
Whisk together the fresh eggs, melted butter, and sugar in a separate bowl until the mixture becomes light and fluffy. This process helps incorporate air into the batter, vital for a tender crumb. If you’re pressed for time, using an electric mixer in a medium setting expedites the process. Ensure your eggs are at room temperature for proper emulsification and a smooth batter.
Step 3 – Mix the Cocoa Batter
In another bowl, combine a measured amount of cocoa powder with a small portion of the wet ingredients from Step 2. Stir until you achieve a smooth, lump-free cocoa mixture. This chocolatey blend will later be layered with the plain batter to create the striking zebra effect. By preparing this step separately, you ensure that the cocoa is evenly distributed, which is critical for achieving a balanced pattern in your final product.
Step-by-Step Cooking Instructions
Now that your ingredients are prepped, it’s time to begin the baking process. Follow these step-by-step instructions to create stunning Zebra Cakes that are as delightful to look at as they are to eat.
Step 1 – Initial Preparation
Preheat your oven to 350°F (175°C) to ensure it reaches the proper temperature when your batter is ready. Grease your cake pans with butter or non-stick spray and lightly dust them with flour to prevent sticking. For an extra layer of assurance, you might also line the bottom of the pans with parchment paper. This step ensures that your Easy Zebra Cakes Recipe always comes out perfectly.
Step 2 – Assembling the Batter
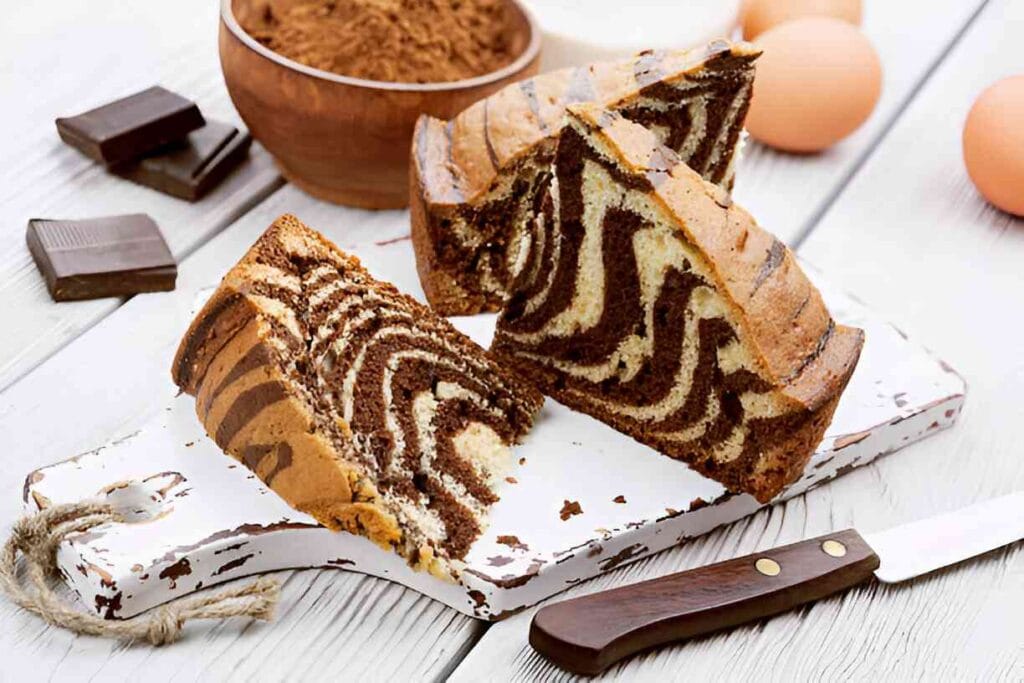
Divide your prepared plain batter equally between two bowls. Gently fold the cocoa mixture you prepared earlier in one bowl, creating a rich, chocolate-infused batter. Now, alternate spoonfuls of the plain and chocolate batters into your prepared pans. Use a skewer or a knife to swirl them together lightly, being careful not to overmix. The goal is to create a distinct zebra stripe pattern that is visually appealing and deliciously layered.
Step 3 – Baking and Final Touches
Place your pans in the preheated oven and bake for 25-30 minutes, or until a toothpick inserted into the center comes out clean with just a few moist crumbs clinging to it. Keep an eye on the cakes as they bake; the edges should start pulling away from the pan’s sides, and the top should be springy. Once baked, remove the cakes from the oven and allow them to cool in the pans for about 10 minutes before transferring them to a wire rack to cool completely. This cooling process is critical for setting the structure and moisture of your Zebra Cake Recipe.
Tips for an Even Tastier Version
While our standard Zebra Cake Recipe is fantastic, several ways exist to elevate your creation. Here are some expert tips to help you make your Zebra Cakes even more irresistible.
Adding Extra Ingredients
For those looking to experiment, consider adding extra ingredients to the batter. A handful of mini chocolate chips, a sprinkle of cinnamon, or even a few drops of vanilla extract can introduce an exciting twist to your Zebra Cakes. Consider incorporating a touch of instant coffee dissolved in hot water to intensify the chocolate flavor. These small additions can significantly affect the overall taste and texture.
Techniques to Enhance Flavor
Advanced bakers might enjoy exploring techniques such as letting the batter rest for 10-15 minutes before baking. This rest period allows the flavors to meld together and can result in a richer, more harmonious taste. Additionally, consider using browned butter instead of regular melted butter to add a nutty, deep flavor that pairs wonderfully with the cocoa. These techniques are perfect for those who want to take their Homemade Zebra Cakes to the next level.
Adjustments for Personal Preferences
Remember, recipes are meant to be flexible. If you prefer a less sweet dessert, try reducing the sugar slightly in the wet ingredients. Alternatively, consider increasing the cocoa batter’s cocoa ratio if you aim for a richer, more decadent cake. These adjustments allow you to tailor the Easy Zebra Cakes Recipe to suit your taste and dietary needs without compromising on the overall integrity of the dish.
Recipe Variations and Adaptations
Baking is all about creativity, and once you’ve mastered the basic Zebra Cake Recipe, you can experiment with various adaptations to suit different occasions, dietary restrictions, or flavor preferences.
Vegetarian and Vegan Options
While our traditional Zebra Cake Recipe is naturally vegetarian, you can also easily create a vegan version. Replace eggs with flaxseed or chia eggs (mix 1 tablespoon of ground flaxseed or chia seeds with 3 tablespoons of water for each egg) and use a plant-based butter substitute with non-dairy milk. These swaps ensure that your Homemade Zebra Cakes remain just as delicious while catering to a vegan lifestyle.
Gluten-Free or Low-Carb Adaptations
For those who need a gluten-free option, try substituting all-purpose flour with a high-quality gluten-free baking blend. Ensure your blend contains a binding agent, or add one if necessary to maintain the cake’s structure. Similarly, if you’re aiming for a low-carb dessert, consider using almond flour or coconut flour and a natural sweetener like stevia or erythritol. These modifications can help you achieve a Zebra Cake Recipe that is friendly to various dietary requirements without sacrificing taste.
Other Flavor Adaptations for Special Occasions
Feel free to get creative by altering the flavor profile of your Zebra Cakes. For a refreshing twist, incorporate seasonal spices like nutmeg or cardamom during winter or a citrus zest during summer. You can even layer in fruit purees or swap out the cocoa with matcha for a green tea variation. These variations can turn your Zebra Cakes into a unique treat for any season or celebration.
Serving Suggestions
Presentation and pairing are just as important as the baking process. Here are some creative serving suggestions to ensure your Homemade Zebra Cakes not only taste divine but also look stunning on your table.
Light Salads or Fresh Fruit
While Zebra Cakes are typically enjoyed as a dessert, pairing them with a light salad or fresh fruit can create a well-rounded meal experience. Consider serving a side of mixed greens tossed with a tangy vinaigrette or a vibrant fruit salad featuring berries, kiwi, and citrus slices. These combinations can provide a refreshing contrast to the rich flavors of the cake.
Hearty Sides for a Complete Meal
If you’re serving Zebra Cakes as part of a brunch or a special gathering, complement them with hearty sides. Homemade bread, a warm soup, or a delicate quiche can round your menu beautifully. The key is to balance the cakes’ sweetness with savory or tangy accompaniments that satisfy all palates.
Drink Recommendations for Pairing
Pair your Zebra Cakes with beverages that enhance their flavor profile. A robust cup of coffee or a well-brewed tea can complement the chocolatey stripes, while a glass of milk (dairy or plant-based) makes for a classic, satisfying pairing. For those looking for something more festive, a sparkling wine or a refreshing mocktail can add a celebratory touch to your dessert experience.
Storage and Reheating Tips
Proper storage and reheating are essential for enjoying your Zebra Cakes long after they’ve been baked. Here’s how to keep your creation fresh and ready to serve whenever the craving strikes.
How to Store Leftovers
After your Zebra Cakes have completely cooled, store them in an airtight container. Keeping them at room temperature is fine if you plan to enjoy them within a few days. However, place the container in the refrigerator if you need to preserve them longer. The key is ensuring the cakes remain moist and free from drying out.
Reheating Techniques
When it’s time to savor a slice of your Easy Zebra Cakes Recipe again, reheating is easy. Use a microwave on a low power setting for 10-15 seconds per slice, or warm them in an oven preheated to 300°F (150°C) for about 5-7 minutes. This gentle reheating will restore the softness and flavor without overcooking the cake.
Portioning Tips for Meal Prep
For those who love to plan, cutting your Zebra Cakes into individual portions and storing them in separate containers is an innovative approach. This makes them perfect for meal prep, ensuring you have a ready-to-eat treat at any time. Portioning also helps maintain consistent serving sizes so you always enjoy the ideal amount of your delicious dessert.
Nutritional Information and Benefits
While Zebra Cakes are a delightful indulgence, understanding their nutritional profile can help you enjoy them responsibly. Here’s a closer look at what you’re treating yourself to with every bite of these scrumptious cakes.
Nutrition Information
Serving Size: 1 slice (1/12 of the cake)
Calories: 320
Sugar: 20g
Sodium: 150mg
Fat: 12g
Saturated Fat: 2g
Unsaturated Fat: 8g
Trans Fat: 0g
Carbohydrates: 50g
Fiber: 1g
Protein: 5g
Cholesterol: 50mg
Nutritional Values per Serving
A typical serving of Zebra Cakes is estimated to provide roughly 250–350 calories, depending on the size and specific ingredients used. Each serving contains a balanced mix of carbohydrates, proteins, and fats. The natural sugars and butter provide quick energy, while the eggs contribute to protein content. Remember, the exact values can vary based on substitutions and portion sizes.
Ingredient Benefits
Beyond calories, each ingredient in our Homemade Zebra Cakes carries its own set of benefits. For instance, eggs are an excellent source of high-quality protein and essential vitamins. At the same time, butter contributes fat-soluble vitamins like A and D. Cocoa powder enhances flavor and is rich in antioxidants. By choosing quality ingredients, you can enjoy a dessert that, while indulgent, also offers small nutritional perks.
Recommended Portions for a Balanced Diet
Indulging in a slice of Zebra Cake is a wonderful treat, but moderation is key. We recommend enjoying one slice as a dessert or snack, ideally balanced with a side of fruit or a light beverage. This ensures you enjoy the rich flavors without overindulging, keeping your overall dietary balance in check.
Common Mistakes to Avoid
Even the best recipes can sometimes go awry if common pitfalls are not avoided. Here are some typical mistakes in making Zebra Cakes and expert tips on sidestepping them for a flawless dessert every time.
Issue 1 – Overmixing the Batter
One of the most frequent errors in baking is overmixing the batter, which can lead to a dense and overly burdensome texture. When combining the wet and dry ingredients, mix just until everything is incorporated. Overworking the batter activates gluten development, which is not ideal for achieving the light, tender crumb that defines our Zebra Cake Recipe.
Issue 2 – Uneven Layering of Batters
Creating the iconic zebra stripe pattern requires care when layering the plain and cocoa batters. If the layers aren’t alternated correctly, you may have a muddled design instead of distinct stripes. To avoid this, use a spoon or spatula to gently alternate dollops of each batter, and consider using a skewer to swirl them together lightly. This technique ensures that every slice of your cake looks as impressive as it tastes.
Issue 3 – Inaccurate Measurements
Baking is a science, and precision is key. Inaccurate measurements of ingredients—especially leavening agents like baking powder—can result in either too dense or crumbly cakes. Always use measuring cups or a digital scale to get the quantities right. Level off dry ingredients to ensure consistency, and follow the recipe steps diligently to achieve the perfect balance of flavors and textures.
Inspiring Conclusion
In summary, our Zebra Cakes guide is designed to inspire you to create a visually stunning and irresistibly delicious dessert. With our Easy Zebra Cakes Recipe and detailed step-by-step instructions on How to Make Zebra Cakes, you now have all the tools necessary to bring this creative treat to life in your kitchen.
Not only do these cakes captivate with their unique striped pattern, but they also bring families together over the shared joy of baking and eating something special. Each step in this process—from selecting the best ingredients to mastering the art of layering batters—adds a personal touch that transforms ordinary baking into an extraordinary culinary experience. We encourage you to experiment with variations, try new flavor enhancements, and, most importantly, share your creations with friends and family. The beauty of these Homemade Zebra Cakes is that they are as adaptable as delectable, making them perfect for any occasion.
Remember, every mistake is a stepping stone to mastery, and every attempt is a chance to improve. We hope this guide has provided you with a reliable recipe and sparked your creativity in the kitchen. Happy baking, and may your journey with Zebra Cakes be as delightful and inspiring as the final treat you create!
FAQ (Frequently Asked Questions)
Here are answers to some of our readers’ most common questions about making Zebra Cakes. We’ve compiled these FAQs to help you troubleshoot any issues and gain further insight into the process.
- Can I prepare the Zebra Cake batter in advance?
- Absolutely! You can mix your batter ahead of time and store it in the refrigerator for up to 24 hours. Let it come to room temperature before baking, as this helps the leavening agents work correctly and ensures even rising.
- What are some common substitutes if I don’t have all the ingredients?
- You can use flax or chia eggs (1 tablespoon of ground flaxseed or chia seeds mixed with three tablespoons of water for each egg). A high-quality vegetable oil or a dairy-free butter substitute works well if you’re out of butter. For flour, you can opt for a gluten-free blend if needed; just ensure it includes a binding agent.
- How do I get the perfect zebra pattern in my cake?
- The key is in the layering and swirling of the plain and cocoa batters. Alternate spoonfuls of each into your baking pan, then use a skewer or knife to gently swirl them together without thoroughly blending the two batters. This technique creates distinct, appealing stripes.
- What is the best method to prevent my cake from drying out?
- Ensure that you do not overbake your cake. Use a toothpick test about 5 minutes before the recommended baking time is up. Proper storage—keeping your cake in an airtight container—will help maintain its moisture. As described in our guide, reheating gently can also help restore moisture.
- Can I modify this recipe to create a vegan version?
- Yes, you can! Replace eggs with flax or chia egg substitutes, use a plant-based butter alternative, and opt for non-dairy milk (almond or soy). These modifications will allow you to create a delicious batch of Homemade Zebra Cakes that are entirely vegan without sacrificing taste.
- How long do Zebra Cakes typically stay fresh?
- Zebra Cakes can stay fresh for up to two days when stored correctly in an airtight container at room temperature. For more extended storage, refrigerate them and bring them to room temperature before serving, or reheat them gently.
- Can I freeze Zebra Cakes?
- Yes, Zebra Cakes freeze very well. Once completely cooled, wrap individual slices tightly in plastic wrap and place them in a freezer-safe bag or container. When ready to enjoy, thaw in the refrigerator overnight and then allow them to come to room temperature or gently reheat them.
- Can mini Zebra Cakes be made for individual servings?
- Absolutely! You can use a muffin tin to create mini Zebra Cakes. Follow the same layering and swirling process, but adjust the baking time—typically 15-20 minutes—until a toothpick inserted into the center comes out clean.
- What’s the difference between this Zebra Cake Recipe and traditional cake recipes?
- The main difference lies in the layering of two distinct batters—one plain and one with cocoa—which creates the signature zebra stripe effect. This unique presentation, combined with the balanced flavors, sets it apart from more conventional cakes.
- Can I use a boxed mix to make Zebra Cakes?
- While a boxed mix might provide convenience, making Homemade Zebra Cakes from scratch gives you complete control over the ingredients’ quality and the stripes’ final appearance. Our detailed guide ensures you get the best texture and flavor with every batch.
Easy Purple Velvet Cake Recipe: A Delicious Journey to the Best Purple Velvet Cake Experience
Zebra Cakes
Ingredients
- 2 cups (250g) all-purpose flour
- 1½ cups (300g) granulated sugar
- 1 cup (240ml) milk
- ½ cup (120ml) vegetable oil
- 3 large eggs
- 1 tsp vanilla extract
- 2 tbsp baking powder
- ½ tsp salt
- 3 tbsp unsweetened cocoa powder
- ¼ cup (60ml) hot water
Instructions
- Preheat the oven to 350°F (175°C). Grease and flour a 9-inch round cake pan.In a large bowl, whisk together the flour, sugar, baking powder, and salt.Add the milk, vegetable oil, eggs, and vanilla extract. Mix until smooth.Divide the batter evenly into two bowls.In one bowl, mix the cocoa powder and hot water until smooth, then combine with half of the batter.Alternately spoon the vanilla and chocolate batters into the prepared pan, creating concentric circles.Use a knife to gently swirl the batters for a marbled effect.Bake for 35-40 minutes, or until a toothpick inserted into the center comes out clean.Let the cake cool in the pan for 10 minutes before transferring it to a wire rack to cool completely.
Notes
- For a more defined zebra pattern, avoid over-swirling the batters.
- Store leftovers in an airtight container at room temperature for up to 2 days or in the fridge for up to 5 days.
- Freeze the cake for up to 3 months by wrapping it tightly in plastic wrap and foil.
Ask the Community
🥗 Free Custom Keto Meal Plan?
Do you want to lose weight while still enjoying delicious Asian & Thai Fusion meals? Take this quick quiz to get your personalized Keto plan based on your favorite foods!
- ✅ No more guessing what to eat
- ✅ Delicious & easy-to-make recipes
- ✅ Tailored to your body type
Get My Custom Plan Now! →
*Over 100,000+ people have transformed their lives with this quiz.