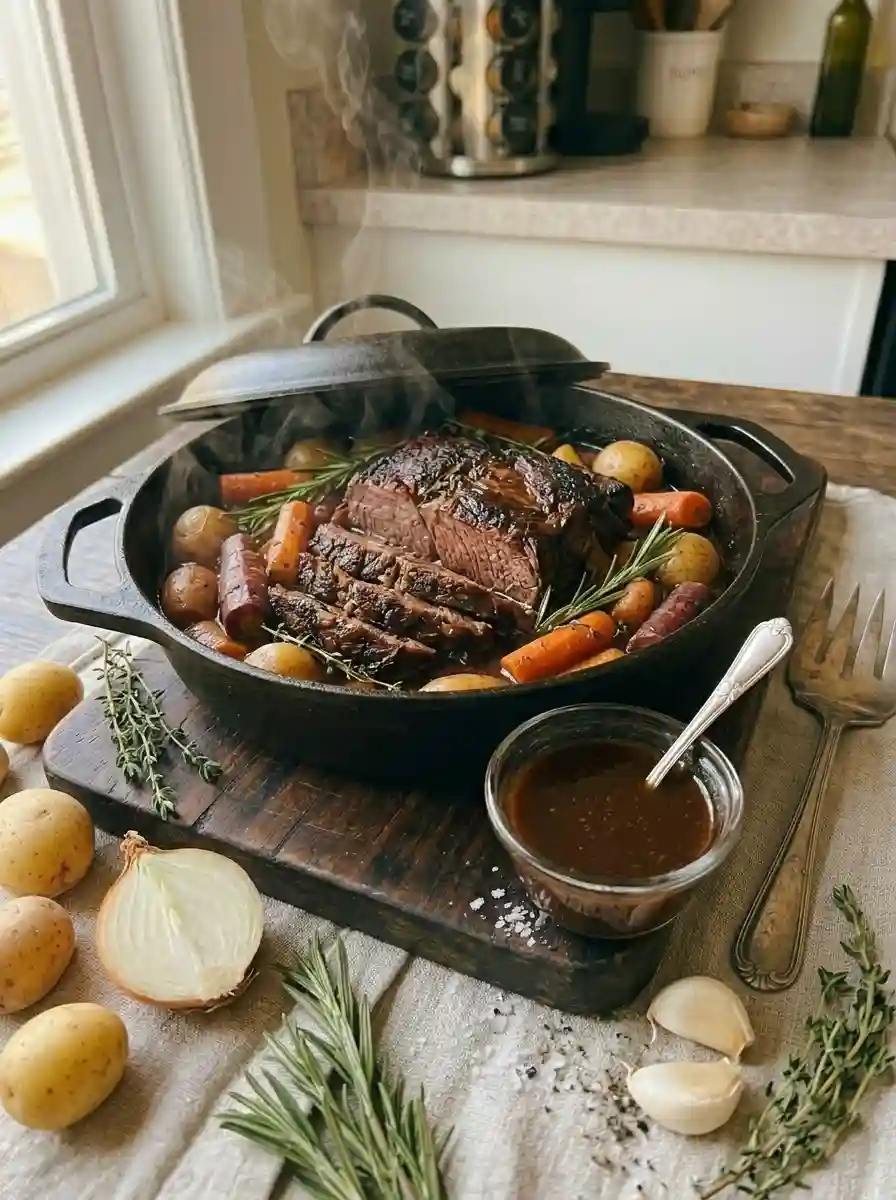
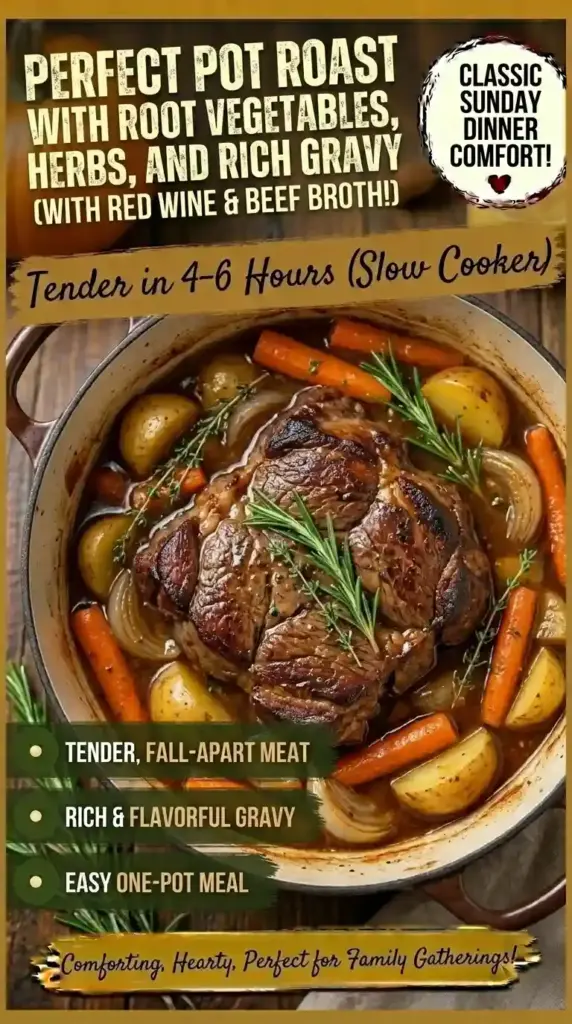
Few meals are as comforting as a pot roast simmering slowly, filling your home with the rich, savory aroma of tender beef, aromatic vegetables, and fragrant herbs. This Perfect Pot Roast is the ultimate Sunday dinner: melt-in-your-mouth tender meat, hearty vegetables, and a rich, flavorful gravy that comes together with minimal effort. Whether you’re recreating a nostalgic family meal or impressing guests with a hearty dish, this recipe delivers restaurant-quality results with simple, accessible ingredients.
Note: Active prep time is just 20 minutes. Let your oven or slow cooker do the rest!
Dietary Badges
- Gluten-Free (Naturally! Check broth labels)
- Dairy-Free Option (Omit butter/parmesan)
- Keto-Low Carb Adaptable (Skip potatoes, add low-carb veggies)
- One-Pot Wonder (Minimal cleanup)
- Meal-Prep Friendly (Tastes even better the next day)
The 3 Biggest Mistakes People Make with Pot Roast
Even simple braised dishes can turn into a tough, bland, or watery disappointment if you fall into these common traps. Avoid these to guarantee tender, flavorful, perfectly cooked pot roast every time:
- Skipping the Sear (The Flavor Killer): If you toss raw beef straight into the pot, you miss out on the Maillard reaction—the chemical process that creates deep, savory, complex flavors. The Fix: Take 10-15 minutes to brown the roast on all sides in a hot Dutch oven or skillet before braising. It’s worth every minute!
- Overcrowding the Pot (The Steam Trap): If you pack the roast and veggies too tightly, they steam instead of braise, resulting in pale, soggy vegetables and less flavorful meat. The Fix: Use a large Dutch oven (6-8 quart) or slow cooker, and arrange ingredients in a single layer when possible.
- Cutting the Meat Too Soon (The Juice Loss): Slicing pot roast immediately after cooking releases precious juices, leaving the meat dry. The Fix: Let the roast rest for 10-15 minutes before shredding or slicing. This allows the juices to redistribute, ensuring every bite is moist and tender.
Why This Works: The Science of Perfect Pot Roast
- Chuck Roast = Collagen Gold: Chuck roast is rich in collagen, a protein that breaks down into gelatin during long, slow cooking. This transformation is what gives pot roast its luxurious, mouth-coating texture and makes the beef incredibly tender.
- Searing = Flavor Foundation: Browning the meat creates the Maillard reaction, developing hundreds of new flavor compounds that raw beef simply can’t provide. This step builds the savory depth that defines a great pot roast.
- Acid Deglazing = Balanced Richness: A splash of red wine vinegar (or red wine) dissolves the flavorful browned bits (fond) from the bottom of the pot, integrating them into the braising liquid. The acid also balances the richness of the beef, creating a more complex, satisfying sauce.
- Low & Slow = Tender, Not Tough: Cooking at a low temperature (325°F / 165°C oven or LOW slow cooker) for several hours gently breaks down connective tissue without tightening muscle fibers. Result: fork-tender meat that shreds effortlessly.
Ingredients
Measurements are provided in both US Customary and Metric for precision. Your exact ingredients are kept intact.
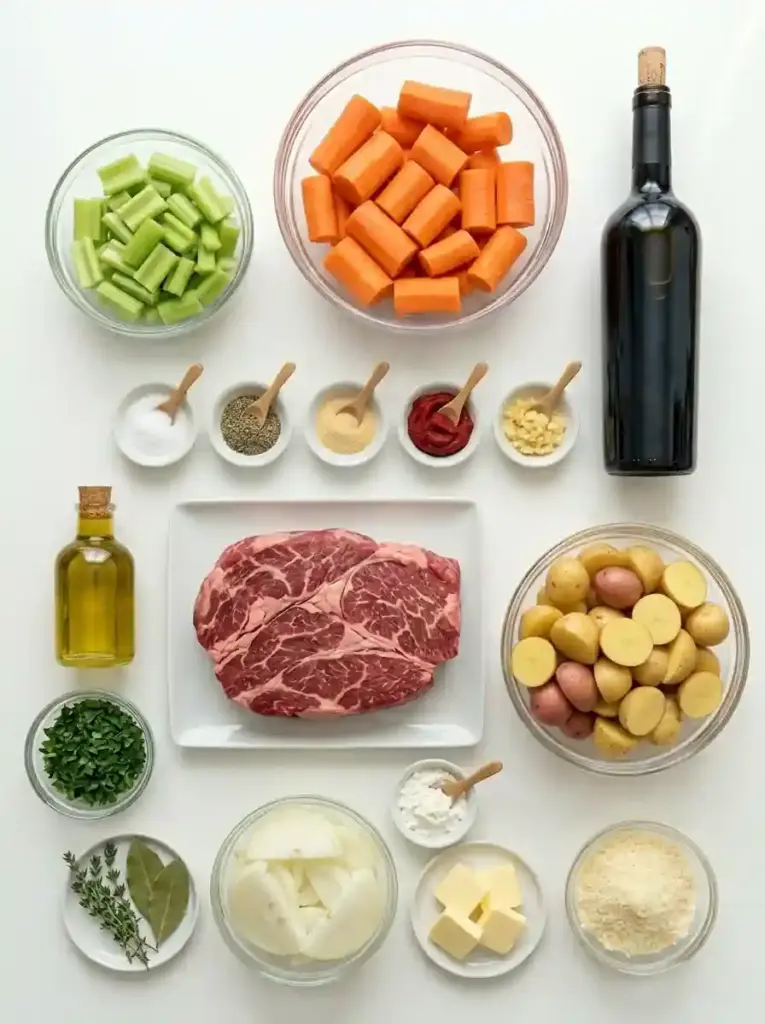
For the Pot Roast:
- 3-4 lb (1.4-1.8 kg) chuck roast, trimmed of excess fat (look for good marbling)
- 2 tablespoons (30ml) olive oil, for searing
- 1 teaspoon (6g) kosher salt, plus more to taste
- ½ teaspoon (1g) freshly ground black pepper, plus more to taste
- 1 teaspoon (2g) garlic powder (optional, for extra depth)
- 1 large yellow onion (about 300g), sliced
- 4 medium carrots (about 200g), peeled and cut into 2-inch chunks
- 3 celery stalks, chopped
- 4 cloves garlic, minced
For the Braising Liquid & Gravy:
- 2 cups (480ml) beef broth, low-sodium preferred
- ½ cup (120ml) red wine (optional, or substitute extra broth + 1 tbsp red wine vinegar)
- 2 tablespoons (30g) tomato paste
- 2 sprigs fresh thyme (or 1 tsp dried)
- 2 bay leaves
- 1 tablespoon (8g) cornstarch (optional, for thickening gravy)
- 2 tablespoons (30g) cold butter (optional, for finishing)
Optional Add-Ins:
- 1.5 lb (680g) baby potatoes or Yukon Gold, halved (add in last 1-1.5 hours of cooking)
- Fresh parsley, chopped (for garnish)
- Grated Parmesan cheese (for serving)
Step-by-Step Instructions (Optimized for Perfect Results)
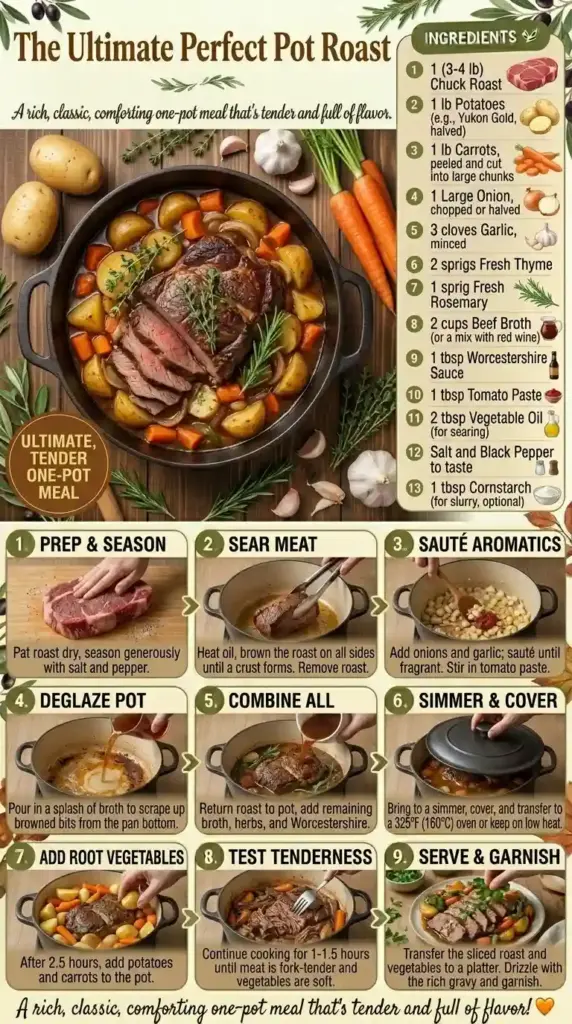
1. Prep & Sear the Roast (Flavor Foundation)
Pat the chuck roast thoroughly dry with paper towels. Season generously on all sides with salt, pepper, and garlic powder. Heat olive oil in a large Dutch oven or heavy-bottomed pot over medium-high heat until shimmering. Carefully add the roast and sear for 3-4 minutes per side, until deeply browned on all surfaces. Work in batches if needed to avoid overcrowding. Transfer seared roast to a plate.
2. Build the Flavor Base (Deglazing Magic)
Reduce heat to medium. Add sliced onion and celery to the same pot. Sauté for 4-5 minutes until softened. Add minced garlic and cook for 30 seconds until fragrant. Pour in red wine (or broth + vinegar) and use a wooden spoon to scrape up all the browned bits (fond) from the bottom of the pot. Let simmer for 1-2 minutes to reduce slightly and cook off the alcohol smell. Stir in tomato paste until well combined.
3. Braise Low & Slow (Tenderness Transformation)
Return the seared roast (and any accumulated juices) to the pot. Add beef broth, thyme, and bay leaves. The liquid should come about ⅓ to ½ way up the sides of the roast—do not submerge completely. Oven Method: Cover and cook in a preheated 325°F (165°C) oven for 2.5-3.5 hours, until fork-tender. Slow Cooker Method: Transfer everything to a slow cooker. Cook on LOW for 8-9 hours or HIGH for 4-5 hours, until fork-tender. Pro-Tip: Add potatoes (if using) during the last 1-1.5 hours of cooking to prevent overcooking.
4. Rest, Shred & Thicken (Perfect Finish)
Once the roast is fork-tender (shreds easily with gentle pressure), carefully transfer it to a cutting board. Let rest for 10-15 minutes before shredding or slicing against the grain. Optional Gravy: Remove bay leaves and thyme sprigs. If you prefer a thicker gravy, mix cornstarch with 2 tablespoons cold water to make a slurry. Stir into the simmering braising liquid and cook for 2-3 minutes until thickened. For extra richness, whisk in cold butter off the heat (monter au beurre technique). Taste and adjust seasoning with additional salt and pepper as needed.
5. Serve & Enjoy
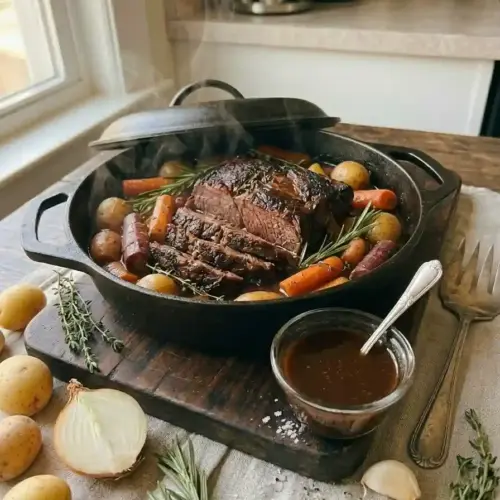
Return shredded beef to the pot with vegetables and gravy, or arrange on a platter. Garnish with fresh parsley and serve warm with crusty bread, mashed potatoes, or egg noodles to soak up the incredible sauce.
Cut Selection & Cooking Method Guide
| Cut of Beef | Best For | Cooking Time (Oven 325°F) | Notes |
|---|---|---|---|
| Chuck Roast | Ideal choice | 2.5-3.5 hours | Rich marbling = tender, flavorful results |
| Brisket | Alternative | 3-4 hours | Leaner; may need extra liquid, slice against grain |
| Bottom Round | Lean option | 2.5-3 hours | Less marbling; ensure not to overcook |
| Short Ribs | Rich, decadent | 2.5-3 hours | More fat; render well, skim excess fat from sauce |
| Cooking Method | Temperature/Setting | Time | Best For |
|---|---|---|---|
| Oven (Dutch Oven) | 325°F (165°C) | 2.5-3.5 hours | Best flavor development, caramelization |
| Slow Cooker | LOW | 8-9 hours | Ultimate convenience, set-and-forget |
| Slow Cooker | HIGH | 4-5 hours | Faster option, still tender results |
| Instant Pot | High Pressure | 60-75 min + natural release | Fastest method, good for weeknights |
Pro-Tips for Next-Level Pot Roast
- Dry the Meat Well: Patting the roast thoroughly dry before searing ensures proper browning (water = steam = no Maillard reaction).
- Don’t Peek!: Resist lifting the lid during braising. Each peek releases heat and steam, adding 15-20 minutes to cooking time.
- Acid Balance: If your sauce tastes too rich or heavy, a splash of red wine vinegar or lemon juice at the end brightens all the flavors.
- Make-Ahead Magic: Pot roast tastes even better the next day as flavors meld. Cook a day ahead, cool, and reheat gently for effortless entertaining.
- Freezer-Friendly: Cool completely, portion into airtight containers, and freeze for up to 3 months. Thaw overnight in fridge before reheating.
- Vegetable Timing: Add delicate veggies (peas, green beans) in the last 15-20 minutes of cooking to preserve color and texture.
Troubleshooting Table
| Problem | Cause & Solution |
|---|---|
| Meat is tough after cooking | Cause: Not cooked long enough, or cut too lean. Solution: Continue cooking in 30-min increments until fork-tender. Use chuck roast with good marbling next time. |
| Sauce is too thin/watery | Cause: Too much liquid, or lid lifted too often. Solution: Simmer uncovered to reduce, or use cornstarch slurry (1 tbsp cornstarch + 2 tbsp cold water) to thicken. |
| Sauce is too thick/salty | Cause: Over-reduction, or salty broth. Solution: Thin with a splash of water or unsalted broth. Balance saltiness with a squeeze of lemon juice. |
| Vegetables are mushy | Cause: Added too early or cut too small. Solution: Add potatoes/carrots in last 1-1.5 hours of cooking. Cut veggies into large, uniform chunks. |
| Meat is dry | Cause: Overcooked, or sliced too soon. Solution: Cook just until fork-tender, not falling apart. Rest meat 10-15 min before slicing to retain juices. |
| Flavor is bland | Cause: Not enough seasoning, or skipped searing. Solution: Season roast generously before searing. Taste and adjust salt/pepper at end. Add umami boosters (Worcestershire, tomato paste). |
Storage & Reheating
- Refrigerator: Store leftovers in an airtight container for up to 4 days. Flavors often improve overnight!
- Reheating: Gently reheat on stovetop over low heat, or in a 300°F (150°C) oven covered with foil, until warmed through. Add a splash of broth if sauce has thickened too much.
- Freezer: Cool completely, portion into freezer-safe containers, and freeze for up to 3 months. Thaw overnight in refrigerator before reheating.
- Meal Prep: Shred meat and portion with vegetables and gravy into individual containers for easy grab-and-go meals.
Nutrition Information (Per Serving)
Based on 6 servings (using standard ingredients, without optional potatoes). This is an estimate and may vary based on specific brands and portion sizes.
- Calories: ~450 kcal
- Total Fat: 25g (Saturated Fat: 10g)
- Carbohydrates: 10g
- Sugars: 5g
- Protein: 35g
- Sodium: 900mg (can be reduced with low-sodium broth)
- Dietary Fiber: 3g
- Cholesterol: 90mg
Disclaimer: This recipe is naturally Gluten-Free. For Dairy-Free, omit butter and parmesan garnish. For Keto/Low-Carb, skip potatoes and serve with low-carb vegetables.
Perfect Pairings (Elevate Your Meal)
- Wine: A bold, structured red like Cabernet Sauvignon or Syrah stands up to the rich beef. For a lighter option, try a Pinot Noir with earthy notes.
- Non-Alcoholic: Sparkling cranberry juice with a splash of lime, or a rich mushroom broth, complements the savory depth.
- Beer: A malty brown ale or robust porter pairs beautifully with the caramelized flavors of the roast.
Frequently Asked Questions
What’s the best cut of meat for pot roast?
Chuck roast is the ideal choice because it’s rich in collagen and marbling. During slow cooking, collagen breaks down into gelatin, creating that signature melt-in-your-mouth texture. Brisket and bottom round work too, but may need extra cooking time or liquid.
Why is my pot roast tough after cooking?
Tough pot roast usually means it wasn’t cooked long enough. Collagen needs time to break down into gelatin. Solution: Continue cooking in 30-minute increments until the meat shreds easily with a fork. Also ensure you’re using a well-marbled cut like chuck roast and cooking at low temperature (325°F oven or LOW slow cooker).
Can I make pot roast in a slow cooker or Instant Pot?
Yes! For slow cooker: sear meat first, then cook on LOW 8-9 hours or HIGH 4-5 hours. For Instant Pot: sear using Sauté function, then pressure cook on HIGH for 60-75 minutes with natural release. Oven method (325°F for 2.5-3.5 hours) gives the deepest flavor, but all methods yield tender results.
Should I sear the roast before braising?
Yes, absolutely! Searing creates the Maillard reaction, developing hundreds of complex, savory flavors that raw meat can’t provide. It also creates a flavorful fond (browned bits) that enriches your gravy. Take 10-15 minutes to brown all sides—it makes a dramatic difference in the final dish.
How do I know when pot roast is done?
Pot roast is done when it’s fork-tender—meaning a fork slides into the meat with little resistance and the meat shreds easily. Internal temperature should reach 190-200°F (88-93°C) for optimal tenderness. Don’t rely on time alone; ovens and roasts vary. Start checking at the minimum time and continue cooking until tender.
Why add vinegar or wine to the braising liquid?
Acid serves two purposes: 1) It deglazes the pan, dissolving flavorful browned bits (fond) into the sauce. 2) It helps tenderize the meat and balances the richness of the beef. The alcohol cooks off, leaving complexity without a strong vinegar taste. If avoiding alcohol, use beef broth + 1 tbsp red wine vinegar.
Can I make pot roast ahead of time?
Yes! Pot roast is an excellent make-ahead meal. Cook completely, cool, and store in an airtight container in the fridge for up to 4 days. Flavors actually deepen and improve overnight. Reheat gently on the stovetop or in a 300°F oven with a splash of broth to maintain moisture.
How do I thicken the gravy?
For a thicker gravy: 1) Remove the roast and veggies, then simmer the braising liquid uncovered to reduce. 2) Make a slurry by mixing 1 tbsp cornstarch with 2 tbsp cold water, then whisk into the simmering liquid. Cook 2-3 minutes until thickened. For extra richness, whisk in 1-2 tbsp cold butter off the heat (monter au beurre technique).
Can I freeze leftover pot roast?
Yes! Cool completely, portion into freezer-safe containers with some gravy to prevent drying, and freeze for up to 3 months. Thaw overnight in the refrigerator before reheating gently on the stovetop or in a 300°F oven. Add a splash of broth if the sauce has thickened too much during storage.
What vegetables work best in pot roast?
Classic choices: carrots, onions, celery, and potatoes. Add hearty root vegetables (parsnips, turnips) at the start. Add delicate veggies (peas, green beans) in the last 15-20 minutes. Cut vegetables into large, uniform chunks (2-inch) so they hold their shape during long cooking. Don’t overcrowd the pot—vegetables should be in a single layer when possible.
Perfect Pot Roast Recipe
Ingredients
For the Pot Roast
- 3-4 lb (1.4-1.8 kg) chuck roast, trimmed of excess fat (look for good marbling)
- 2 tbsp (30ml) olive oil, for searing
- 1 tsp (6g) kosher salt, plus more to taste
- ½ tsp (1g) freshly ground black pepper, plus more to taste
- 1 tsp (2g) garlic powder (optional, for extra depth)
- 1 large yellow onion (about 300g), sliced
- 3 celery stalks, chopped
- 3 cloves garlic, minced
- 4 medium carrots (about 200g), peeled and cut into 2-inch chunks
For the Gravy
- 2 cups (480ml) beef broth, low-sodium preferred
- ½ cup (120ml) red wine (optional, or substitute extra broth + 1 tbsp red wine vinegar)
- 2 tbsp (30g) tomato paste
- 2 sprigs fresh thyme (or 1 tsp dried)
- 2 bay leaves
- 1 tbsp (8g) cornstarch (optional, for thickening gravy)
- 1 tbsp (30g) cold butter (optional, for finishing)
Optional Add-Ins:
- 1.5 lb (680g) baby potatoes or Yukon Gold, halved (add in last 1-1.5 hours of cooking)
- Fresh parsley, chopped (for garnish)
- Grated Parmesan cheese (for serving)
Instructions
1. Prep & Sear the Roast (Flavor Foundation)
Pat the chuck roast thoroughly dry with paper towels. Season generously on all sides with salt, pepper, and garlic powder.Heat olive oil in a large Dutch oven or heavy-bottomed pot over medium-high heat until shimmering. Carefully add the roast and sear for 3-4 minutes per side, until deeply browned on all surfaces. Work in batches if needed to avoid overcrowding. Transfer seared roast to a plate.2. Build the Flavor Base (Deglazing Magic)
Reduce heat to medium. Add sliced onion and celery to the same pot. Sauté for 4-5 minutes until softened. Add minced garlic and cook for 30 seconds until fragrant.Pour in red wine (or broth + vinegar) and use a wooden spoon to scrape up all the browned bits (fond) from the bottom of the pot. Let simmer for 1-2 minutes to reduce slightly and cook off the alcohol smell.Stir in tomato paste until well combined.3. Braise Low & Slow (Tenderness Transformation)
Return the seared roast (and any accumulated juices) to the pot. Add beef broth, thyme, and bay leaves. The liquid should come about ⅓ to ½ way up the sides of the roast—do not submerge completely.Oven Method: Cover and cook in a preheated 325°F (165°C) oven for 2.5-3.5 hours, until fork-tender.Slow Cooker Method: Transfer everything to a slow cooker. Cook on LOW for 8-9 hours or HIGH for 4-5 hours, until fork-tender.Pro-Tip: Add potatoes (if using) during the last 1-1.5 hours of cooking to prevent overcooking.4. Rest, Shred & Thicken (Perfect Finish)
Once the roast is fork-tender (shreds easily with gentle pressure), carefully transfer it to a cutting board. Let rest for 10-15 minutes before shredding or slicing against the grain.Optional Gravy: Remove bay leaves and thyme sprigs. If you prefer a thicker gravy, mix cornstarch with 2 tablespoons cold water to make a slurry. Stir into the simmering braising liquid and cook for 2-3 minutes until thickened. For extra richness, whisk in cold butter off the heat (monter au beurre technique).Taste and adjust seasoning with additional salt and pepper as needed.5. Serve & Enjoy
Return shredded beef to the pot with vegetables and gravy, or arrange on a platter. Garnish with fresh parsley and serve warm with crusty bread, mashed potatoes, or egg noodles to soak up the incredible sauce.
Notes
- Substitute red wine with additional beef broth if preferred.
- For a stovetop method, simmer the pot roast on low heat for 3-4 hours instead of using the oven.
Table of Contents
🥗 Free Custom Keto Meal Plan?
Do you want to lose weight while still enjoying delicious Asian & Thai Fusion meals? Take this quick quiz to get your personalized Keto plan based on your favorite foods!
- ✅ No more guessing what to eat
- ✅ Delicious & easy-to-make recipes
- ✅ Tailored to your body type
Get My Custom Plan Now! →
*Over 100,000+ people have transformed their lives with this quiz.